How to Save Tesla Dashcam Footage
Contents
- 1 Key Takeaways
- 2 📑 Table of Contents
- 3 Understanding Your Tesla Dashcam System
- 4 Preparing Your USB Drive: The Foundation of Success
- 5 How to Save Footage Manually: The Essential Skill
- 6 Automatic Saving with Sentry Mode
- 7 Accessing and Managing Your Saved Footage
- 8 Troubleshooting Common Dashcam & Saving Issues
- 9 Best Practices for Reliable Dashcam Operation
- 10 Conclusion: Your Digital Witness is Only as Good as Your Workflow
- 11 Frequently Asked Questions
Saving Tesla dashcam footage is a simple but crucial process that requires a properly formatted USB drive and knowing when to press the Save button. The dashcam continuously records, but you must manually save the last 10 minutes of footage when an event occurs. For automatic captures, enable Sentry Mode, which saves clips when it detects a threat. Always use a high-quality, high-endurance USB drive formatted to exFAT with the correct TeslaCam folder structure to avoid issues. Regularly transfer saved files to your computer to free up space and ensure critical moments are preserved.
So, you’ve just experienced a close call on the road, or perhaps you’re reviewing a scenic drive through your Tesla’s sleek interface. You know the dashcam has captured it all, but how do you actually pull that footage off your car and onto a device where you can save, share, or submit it to insurance? This is the moment many Tesla owners face: the system records seamlessly, but saving those crucial minutes feels like a hidden secret. Don’t worry; it’s simpler than you think once you understand the process. Think of your Tesla’s dashcam system as a vigilant, always-on witness. It’s constantly writing video to a loop, but it’s up to you to hit the brakes on that loop and say, “Save this part.” This guide will walk you through every single step, from preparing the right USB drive to accessing your saved clips on a computer, ensuring you never lose a vital record.
Key Takeaways
- Use a Proper USB Drive: A high-quality, high-endurance USB drive (or SSD) formatted to exFAT is mandatory. Tesla recommends at least 32GB, but 64GB+ is better for longer trips and Sentry Mode.
- Manual Save is Key: The dashcam records in a continuous loop, overwriting old footage. You must physically press the “Save” button on the touchscreen or steering wheel scroll wheel to preserve the last 10 minutes.
- Sentry Mode Saves Automatically: When enabled, Sentry Mode creates its own “SentryClips” folder for events it detects. These are saved automatically but still require manual transfer off the USB.
- Correct Folder Structure is Non-Negotiable: The USB root must contain a folder named “TeslaCam.” Inside, you need “RecentClips,” “SavedClips,” and “SentryClips” folders. Tesla will not recognize the drive without this exact structure.
- Transfer Files Regularly: Saved footage remains on the USB until you delete it. Get in the habit of transferring files to your computer weekly to prevent the drive from filling and stopping new recordings.
- View Footage with Tesla’s Software: Use the built-in Tesla Viewer on the car’s screen for a synchronized, multi-camera playback. For detailed analysis, transfer files to a computer and use the Tesla Viewer app (Windows/macOS).
- Troubleshooting Starts with Formatting: Most issues (drive not recognized, no recordings) stem from incorrect formatting, a failing USB drive, or a loose connection. Reformatting to exFAT and recreating folders often fixes problems.
📑 Table of Contents
- Understanding Your Tesla Dashcam System
- Preparing Your USB Drive: The Foundation of Success
- How to Save Footage Manually: The Essential Skill
- Automatic Saving with Sentry Mode
- Accessing and Managing Your Saved Footage
- Troubleshooting Common Dashcam & Saving Issues
- Best Practices for Reliable Dashcam Operation
- Conclusion: Your Digital Witness is Only as Good as Your Workflow
Understanding Your Tesla Dashcam System
Before we talk about saving, let’s quickly demystify what you’re working with. All Teslas manufactured after approximately August 2017 come with built-in dashcam functionality, utilizing the car’s own cameras—the front, rear, and side repeater cameras (on models equipped with them). This system operates independently of the main infotainment computer for recording, which is why it needs its own storage.
How the Continuous Loop Recording Works
The dashcam is always on when your car is powered on (or in “Awake” mode with Sentry). It records video in one-minute segments, continuously writing them to your USB drive. Think of it like a conveyor belt. As new one-minute clips are created, the oldest clips are automatically deleted to make space. This is fantastic for not running out of space, but it means any footage you want to keep must be manually saved before it gets overwritten, typically within about an hour of driving depending on your drive time and USB capacity.
Sentry Mode: The Automatic Protector
Sentry Mode is an intelligent layer on top of the dashcam. When enabled (Settings > Safety & Security > Sentry Mode), it uses the same cameras to monitor the surroundings when the car is parked and locked. If it detects a potential threat—like someone leaning against the car, a door being opened, or a proximity alert—it switches to a “Alert” state, saves the preceding 10 minutes of footage, and begins a new recording. These clips are saved to a separate SentryClips folder on your USB. While automatic, you still need to physically remove the USB to access these files; they aren’t uploaded to the cloud.
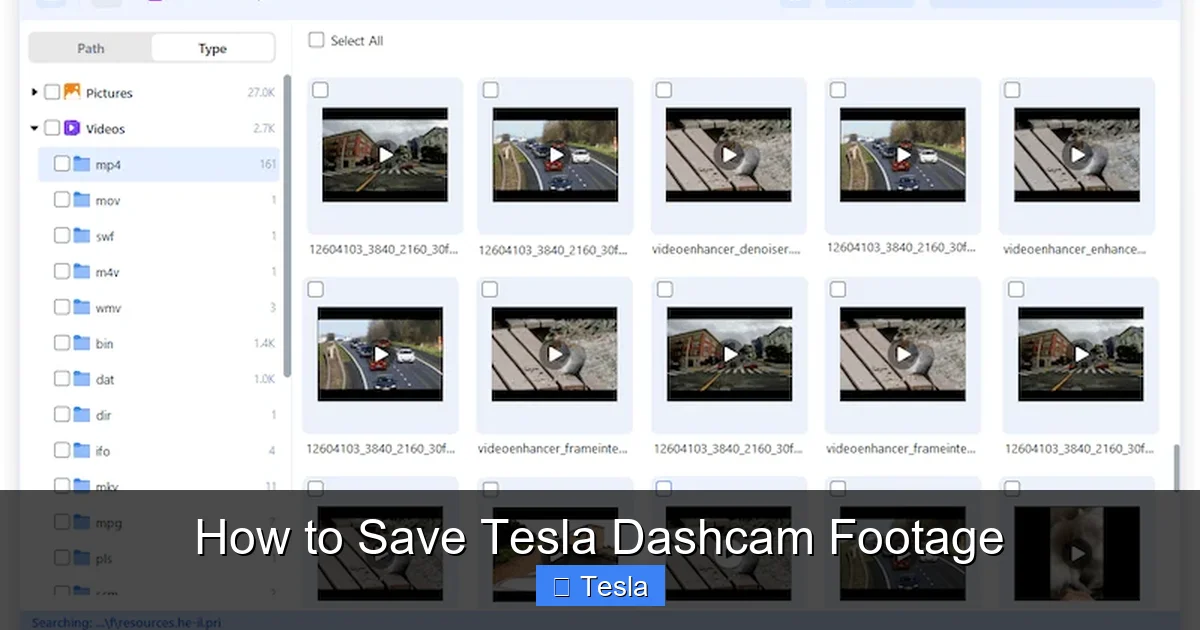
Preparing Your USB Drive: The Foundation of Success
This is the most critical step. A poorly prepared USB drive is the #1 reason people think their dashcam is broken. Tesla’s system is picky, and for good reason—it needs a reliable, fast drive to handle constant high-bitrate video writing from multiple cameras.
Visual guide about How to Save Tesla Dashcam Footage
Image source: cisdem.com
Choosing the Right USB Drive
Not all USB drives are created equal. You need a drive that can handle constant, heavy writes without failing.
- Type: Use a USB 3.0 (or higher) flash drive or, even better, a portable SSD (Solid State Drive). SSDs are more durable, faster, and have a longer lifespan under continuous write conditions, which is perfect for dashcam use.
- Capacity: Minimum 32GB. For heavy Sentry Mode users or those who take long trips, 64GB, 128GB, or even 256GB is recommended. More space means longer retention of the continuous loop and more room for saved clips before you need to offload them.
- Endurance: Look for drives labeled “high-endurance” or “video surveillance.” These are built for constant write cycles, similar to security camera systems.
Formatting and Folder Structure: The Sacred Ritual
This step cannot be skipped. The Tesla’s media controller will only recognize a drive that meets these exact specifications.
- Format the Drive: On your computer (Windows or Mac), format the USB drive to exFAT. Do not use NTFS (Windows) or HFS+ (Mac). exFAT is the file system Tesla requires for cross-platform compatibility and support for large video files. Ensure the allocation unit size is set to default.
- Create the Root Folder: After formatting, create a new folder on the root (top level) of the USB drive and name it exactly: TeslaCam. The capitalization doesn’t usually matter, but the spelling does. Do not put it inside another folder.
- Create Subfolders: Inside the TeslaCam folder, you must create three empty folders with these exact names:
- RecentClips (where the live loop is stored)
- SavedClips (where your manually saved footage goes)
- SentryClips (where Sentry Mode events are saved)
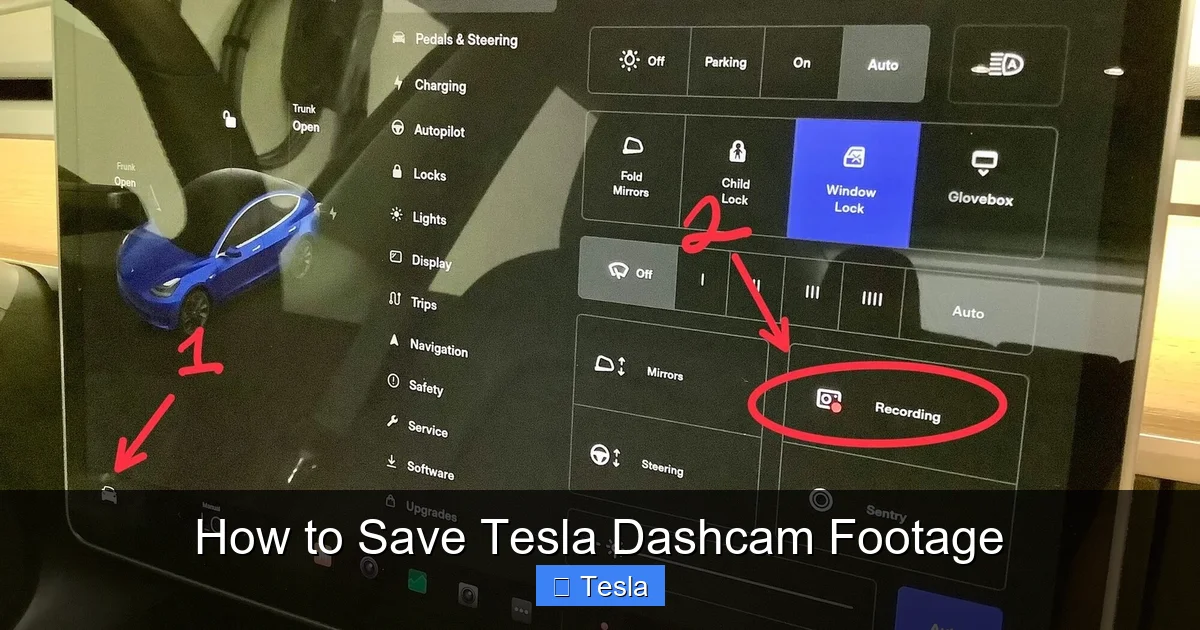
Once these folders exist, safely eject the drive and plug it into one of your Tesla’s front USB ports (usually in the center console or dashboard). The car will take a few moments to initialize. You should see a small camera icon appear in the top status bar of your screen, often with a red dot when recording. If you don’t see this after a minute, unplug and re-plug the drive, or double-check your folder names.
Pro Tip: Some users report better reliability with USB-A ports over USB-C, or by using a powered USB hub if they have many devices. Always use the ports directly connected to the car’s media system, not the ports in the rear console (which are often for charging only).
How to Save Footage Manually: The Essential Skill
This is the action you’ll take in the moment. The dashcam is always recording the last hour or so into the RecentClips folder. To capture an event, you must intervene within about 1-5 minutes of it happening.
Visual guide about How to Save Tesla Dashcam Footage
Image source: yeslak.com
The “Save” Button: Your Lifeline
There are two ways to initiate a manual save:
- Touchscreen Icon: While the car is on and the dashcam is active, a small camera icon with a “Save” label appears in the top app launcher bar (the row of icons at the top of the screen). Tap it. The icon will flash or change to indicate saving is in progress. It takes about 10-30 seconds to copy the last 10 minutes of footage from the RecentClips folder to the SavedClips folder.
- Steering Wheel Scroll Wheel: On most models, you can press and hold the left (or right) scroll wheel on the steering wheel for about 2-3 seconds. A chime will sound, and the screen will show a saving notification. This is the fastest method while driving, as you don’t need to take your eyes off the road.
Important: The system saves the last 10 minutes from the current moment. It does not save a clip starting from the moment you pressed save. So if an incident just passed, press save immediately. The saved clip will include the incident and the 10 minutes leading up to it.
What Gets Saved and Where to Find It
When you save manually, the system creates a new folder inside SavedClips with a timestamp (e.g., “2024-01-15_14-30-00”). Inside, you’ll find four video files:
- front.mp4 (front camera)
- back.mp4 (rear camera)
- front_left.mp4 (left repeater camera, if available)
- front_right.mp4 (right repeater camera, if available)
You can play these individually, but the magic is in the Tesla’s built-in viewer, which syncs all four angles. To view saved clips, go to the “Dashcam” app on your touchscreen (or the “Safety” section in newer UI versions). You can scrub through the timeline and toggle between camera views. For editing or sharing, you’ll need to transfer the files to a computer.
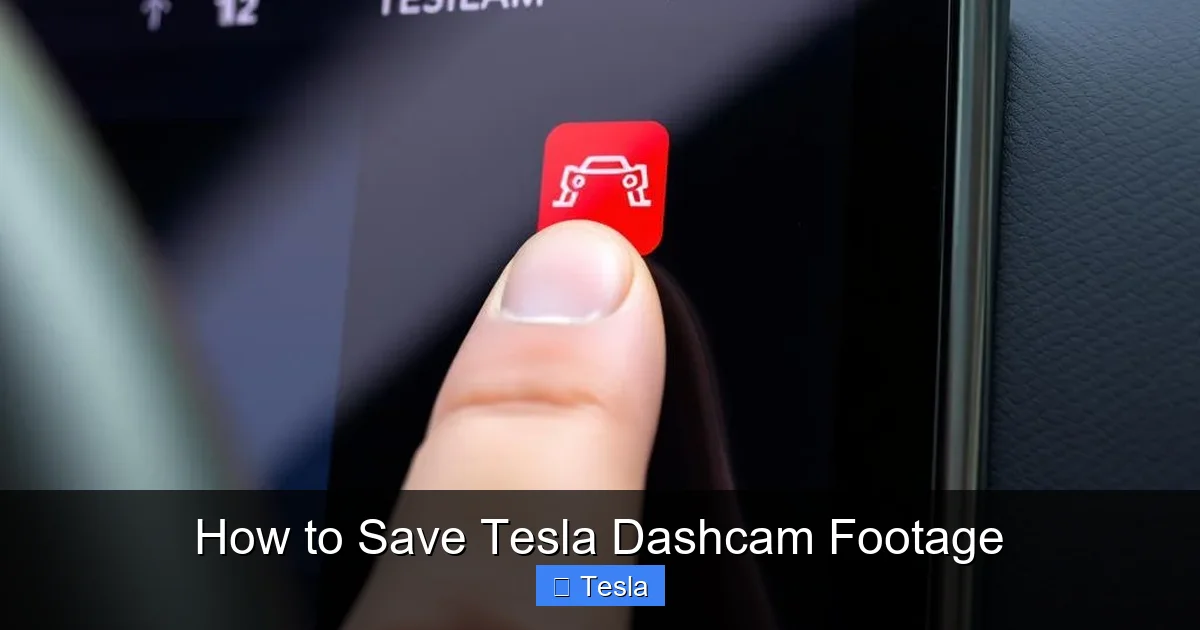
Automatic Saving with Sentry Mode
Sentry Mode is your automated guardian when the car is parked. Understanding how it saves is key to using it effectively.
Visual guide about How to Save Tesla Dashcam Footage
Image source: automotivesimple.com
Enabling and Configuring Sentry Mode
Go to Controls > Safety & Security > Sentry Mode and toggle it on. You can set it to “On” or “On at Home/Work” if you have a trusted location. Be aware: Sentry Mode consumes significant battery power (about 1-2 miles of range per hour). It’s best used when you anticipate parking in a questionable area for a short period.
How Sentry Clips are Saved
When Sentry Mode detects a threat, it triggers an alert on the screen and saves the preceding 10 minutes of footage to the SentryClips folder on your USB. It also creates a new subfolder within SentryClips with a timestamp and a note like “Alert.” These clips are saved automatically—you don’t need to press anything. However, they will remain on the USB until you manually delete them or format the drive.
Note: Sentry Mode can generate many clips from false positives (like a pedestrian walking nearby). Periodically review and clear out the SentryClips folder to free space.
Accessing and Managing Your Saved Footage
Getting the video off the USB and into a usable format is the final step.
Using the Tesla On-Screen Viewer
The simplest method is to keep the USB plugged in and use the car’s Dashcam app. You can navigate to SavedClips or SentryClips and play them directly on the car’s screen. You can even trim clips within the app (in some software versions) and share them via Wi-Fi to your phone using the Tesla app. This is great for quick reviews but not ideal for long-term storage or detailed analysis.
Transferring to a Computer
For permanent storage, editing, or sending to authorities/insurance, you need the files on a computer.
- Safely Eject: On the Tesla screen, go to the USB drive icon in the status bar and select “Eject.” Wait for the confirmation, then physically remove the drive.
- Connect to Computer: Plug the USB drive into your computer.
- Navigate Folders: Open the drive and go into the TeslaCam folder. You’ll see SavedClips and SentryClips. Inside each timestamped folder are the four video files.
- Copy Files: Copy the entire folder (or individual .mp4 files) to a folder on your computer, like “Tesla Dashcam Footage.” Organize by date for easy retrieval.
Using the Tesla Viewer Desktop App
Tesla provides a free desktop application for Windows and macOS called “Tesla Viewer” (formerly “TeslaDashCam”). Download it from Tesla’s official website or GitHub. This app is a game-changer:
- It synchronizes all four camera angles into one seamless video.
- You can easily trim the start and end points.
- It can combine front and rear footage into a single picture-in-picture view.
- You can export a single, merged video file that’s much easier to share and watch.
Simply point the app to the folder on your computer where you saved the raw clips, and it will do the rest. This is the professional way to handle your footage.
Troubleshooting Common Dashcam & Saving Issues
Even with perfect setup, things can go wrong. Here’s how to fix the most common problems.
“USB Drive Not Recognized” or No Camera Icon
This is almost always a formatting or folder issue.
- Re-format to exFAT: Go back to your computer, fully reformat the drive (not just quick format) to exFAT.
- Recreate Folders: Delete all folders on the drive. Create a new TeslaCam folder, and inside it, create the three subfolders: RecentClips, SavedClips, SentryClips. Ensure they are spelled correctly and are directly inside TeslaCam, not nested further.
- Try a Different Port/Drive: Use a different USB port in the car. If possible, test with a different, known-good USB drive. Some cheaper drives have compatibility issues.
Save Button Does Nothing / No New Folder in SavedClips
The drive might be full, or the write process is failing.
- Check Storage: Plug the USB into a computer. Is the drive completely full? If so, delete old Sentry clips or manually saved clips you no longer need.
- Check for Errors: On Windows, run a disk check on the USB drive. On Mac, use Disk Utility’s First Aid. A failing drive will cause save failures.
- Firmware Update: Occasionally, a Tesla software update can change dashcam requirements. Ensure your car is updated to the latest version.
Saved Clips Are Corrupted or Won’t Play
This usually indicates the USB drive was removed while the car was still writing to it, or the drive is failing.
- Never Eject While Saving: Always wait for the “Saving…” notification to disappear before removing the USB. The car’s screen will show when it’s safe.
- Test the Files: Transfer the problematic .mp4 files to your computer. Try playing them with VLC media player, which handles many codecs. If they don’t play, the files are likely corrupted during the save process due to a slow or faulty drive.
- Replace the Drive: If corruption is frequent, the USB drive itself is likely the culprit. Invest in a higher-quality, high-endurance model. Protecting your vehicle’s electronics and storage media is as important as protecting its exterior—many owners invest in a paint protection film or wrap to guard against road debris, but they often overlook the need for robust storage for their dashcam.
No Audio in Playback
The Tesla dashcam system does not record audio from inside the vehicle due to privacy regulations in many regions. The video files will only have the sound from the external environment captured by the microphones near the cameras (mainly wind/road noise). Don’t expect cabin conversations to be recorded.
Best Practices for Reliable Dashcam Operation
To make this system a seamless part of your Tesla ownership, adopt these habits.
- Format Monthly: Even with a good drive, formatting it in the car (Controls > Safety & Security > Format USB Drive) every month or two can clear up minor file system errors and keep performance snappy.
- Have a Dedicated Drive: Use one USB drive solely for the dashcam. Don’t use it for music or other storage, as mixing file types can sometimes cause confusion.
- Offload Weekly: Get into a routine. Every Sunday, take the USB inside, transfer all new saved and sentry clips to your computer, and then delete them from the USB to free space. This ensures you never run out of room during the week.
- Label Your USB: Put a sticker on the drive that says “Tesla Dashcam ONLY” and lists the folder structure. This helps if you have multiple drives or if someone else needs to use it.
- Consider a Dual-Drive Setup: Some owners use a small, fast drive for the dashcam and a larger, slower one for music. This keeps the dashcam drive optimized and less prone to errors from other data writes.
Just as you would meticulously research the cost and process of tinting your Tesla’s windows to reduce glare and heat, you should be equally diligent in maintaining your dashcam’s storage. Both are investments in your driving experience and vehicle preservation.
Conclusion: Your Digital Witness is Only as Good as Your Workflow
Mastering how to save Tesla dashcam footage transforms a cool feature into a powerful tool for peace of mind, evidence, and memory-keeping. The core process is beautifully simple: a correctly formatted USB drive, a quick press of the Save button when it matters, and a regular habit of transferring files to your computer. Sentry Mode adds an automated layer of security for parked moments, but it still relies on that same foundational USB setup.
Don’t let the technology intimidate you. Spend 20 minutes now to format a drive correctly, and you’ve solved 90% of potential problems. The remaining 10% is just routine maintenance—like checking tire pressure or knowing the cost to replace a cracked window should an incident occur. Your dashcam footage is a digital record of your journeys and a critical asset in uncertain situations. By following this guide, you ensure that when you need it most, that asset is ready and waiting, safely stored on your computer, not overwritten on a loop. Now, go enjoy your Tesla, and drive with the confidence that your travels are being captured and preserved.
Frequently Asked Questions
What is the best USB drive for a Tesla dashcam?
Use a high-quality USB 3.0 flash drive or, preferably, a portable SSD with at least 32GB of storage and high-endurance ratings for continuous writing. Brands like Samsung, SanDisk, and Sabrent offer reliable models. Always format it to exFAT and create the required TeslaCam folder structure.
Can I save dashcam footage directly to my phone?
Not directly. The Tesla does not support saving dashcam clips over Bluetooth or Wi-Fi to your phone. You must physically remove the USB drive, plug it into a computer to transfer files, and then you can send them to your phone from there. The Tesla app can share short clips via Wi-Fi only if they are already saved and the USB is plugged into the car.
How long does the Tesla dashcam store footage automatically?
The dashcam continuously records in a loop, typically storing about 1-2 hours of footage on a 64GB drive, depending on video quality settings. Older clips are automatically deleted as new ones are written. Only clips you manually save (or Sentry Mode events) are preserved until you delete them.
Why is my Tesla not saving dashcam footage when I press the button?
The most common reasons are: 1) The USB drive is not properly formatted to exFAT or lacks the correct TeslaCam folder structure. 2) The drive is full. 3) The drive is faulty or too slow. Reformat the drive, ensure the three folders exist, and try a different, known-good USB drive.
Do I need to be parked to save dashcam footage?
No. You can and should save footage while driving. The system records continuously when the car is on, so pressing the Save button immediately after an incident (even while moving) will capture the preceding 10 minutes. Just ensure you can do so safely.
Where are Tesla dashcam videos stored on the USB?
On the USB drive, there is a root folder named “TeslaCam.” Inside, manually saved clips go into the “SavedClips” folder, organized by timestamped subfolders. Sentry Mode events go into the “SentryClips” folder. The live loop is in “RecentClips,” but these files are temporary and get overwritten.