
How to Defrost Tesla
Defrosting your Tesla is simple once you know the built-in tools and best practices. The primary method is using the powerful automatic defrost setting in the climate control system, which directs heated air to the windshield and rear window. For severe ice, combining this with pre-treatment and manual clearing is key. Always avoid using sharp objects or excessive force to prevent damage to sensors and glass.
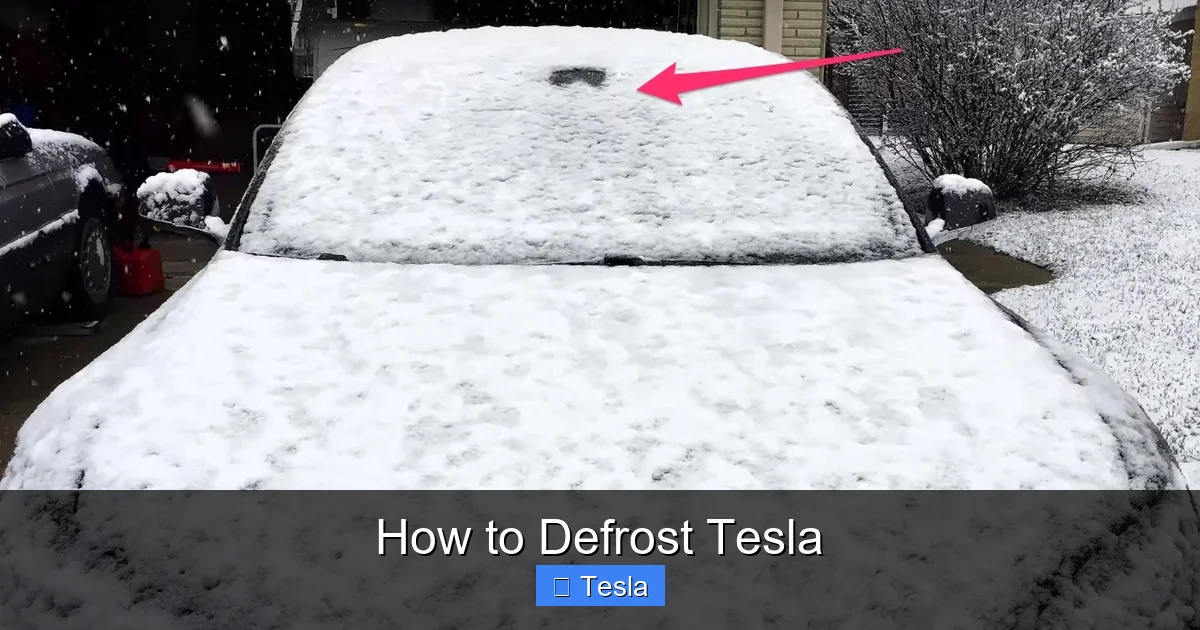
Waking up to a frozen Tesla on a cold winter morning can feel like a daunting start to your day. That thick layer of ice on the windshield and frosted rear glass isn’t just an inconvenience—it’s a safety hazard. But here’s the good news: your Tesla is equipped with one of the most sophisticated and effective defrost systems in any modern car. Mastering how to defrost your Tesla isn’t about brute force; it’s about using smart technology and the right techniques. This guide will walk you through every method, from the perfect one-touch solution to pro-level tips for the iciest conditions, ensuring you get on the road clearly and quickly.
Key Takeaways
- Use the “Defrost” Mode: Your Tesla’s touchscreen has a dedicated defrost button that activates maximum HVAC heat directed at the front and rear glass, the fastest built-in method.
- Pre-Treatment is Crucial: Applying a de-icer spray or a vinegar-water solution beforehand can dramatically reduce ice accumulation and scraping time.
- Never Use Sharp Objects: Metal ice scrapers or sharp tools can scratch glass and damage the integrated camera and sensor housings behind the front grille.
- Model 3/Y Have Unique Features: The minimalist interior means no traditional vent directs air solely at the windshield; the system uses the entire dash vents intelligently.
- Schedule Preconditioning: Use the Tesla app’s “Schedule” or “Climate Start” feature to have the car warm up and melt ice/snow while still plugged in, before you even go outside.
- Check for Software Updates: Tesla regularly improves climate control algorithms and defrost efficiency through over-the-air updates, so keep your car connected.
📑 Table of Contents
Understanding Your Tesla’s Defrost System
Before we dive into the “how,” it helps to understand the “why.” Tesla’s defrost system is a carefully engineered part of its climate control. Unlike many cars with a simple vent pointed at the windshield, Tesla uses a network of vents and a powerful heat pump (on newer models) or PTC heater (on older ones) to manage cabin and glass temperature efficiently.
The Magic Button: The Defrost Icon
On your Tesla’s touchscreen, look for the iconic symbol that looks like a windshield with wavy lines—that’s your defrost button. Tapping it does several things at once. It sets the climate system to maximum heat. It closes the normal cabin vents and redirects all airflow to the front windshield and, crucially, the rear window. It also automatically turns on the rear window defroster (the grid of thin lines on the glass). On models with heated wipers, it activates those too. This single action is your primary and fastest tool for melting frost and light ice.
Heat Pump vs. Traditional Heater
If you have a Model 3 or Model Y built after roughly 2020, you likely have a heat pump. It’s more efficient at moving heat around, meaning it can warm the cabin and glass faster while using less battery power—a big deal in cold weather. Older Model S and X, and early Model 3/Y, use a resistive heater (PTC), which is simple but uses more energy. The user experience is similar for defrosting: both deliver hot air. The difference is in energy efficiency and how quickly the system can respond, especially when the battery is very cold. The heat pump’s efficiency means you can run defrost longer with less impact on range.
The Step-by-Step Defrosting Process
Let’s get practical. Here is the optimal sequence for most winter mornings, from a light frost to a thick ice scenario.
Visual guide about How to Defrost Tesla
Image source: teslarati.com
Step 1: The Immediate Action (Before You Scrape)
As soon as you approach your car, do not immediately start scraping. First, get inside (if safe) or use the Tesla app. Turn on the climate control to “Defrost” mode using the app’s “Climate Start” feature. This begins heating the glass from the inside while you’re still putting on your coat. If you’re already outside, unlock the car, get in, and immediately press the defrost button on the screen. Set the temperature to its highest setting (usually 75-80°F or 24-27°C). Crank the fan speed to maximum. This combination is the most powerful setting your car has.
Step 2: Patience and Observation
Now, wait. Give the system 5-10 minutes. Watch as the ice on the windshield begins to melt from the edges and the rear window clears from the grid lines outward. You’ll see water pooling at the bottom. This is the system working. For a light frost, this may be all you need. Just use your wipers to clear the melted water once the ice is gone. For thicker ice, proceed to step 3.
Step 3: Safe Manual Clearing
Once the ice has softened and started to melt, it’s time for manual intervention. Use a plastic ice scraper with a soft edge. Never use metal. Start from the top and work down, allowing the melted water to lubricate your path. For the rear window, the defroster grid will be active and warm, so you’re often just clearing the softened top layer. For the front, be extremely careful around the camera housing (the bump behind the grille on Model 3/Y) and the radar (if equipped). Do not scrape directly against these components. If ice is caked on them, use a gentle prying motion with the plastic scraper’s corner.
Advanced Techniques and Pre-Treatments
For those who deal with extreme cold, lake-effect snow, or overnight ice storms, basic defrosting might not be enough. These pro tips will save you time and effort.

Visual guide about How to Defrost Tesla
Image source: notateslaapp.com
The Pre-Treatment Advantage
The best defrost is the one you prevent. The night before a forecasted freeze, spray your windshield and rear glass with a commercial de-icer or a homemade solution (2 parts isopropyl alcohol to 1 part water, with a drop of dish soap). This creates a film that inhibits ice bond. Some people swear by a vinegar-water mix (3:1 vinegar to water), but be cautious as vinegar can be harsh on paint if oversprayed. Covering your windshield with a fitted car cover or even a large piece of cardboard held down by wipers is the ultimate prevention, but often impractical for daily drivers.
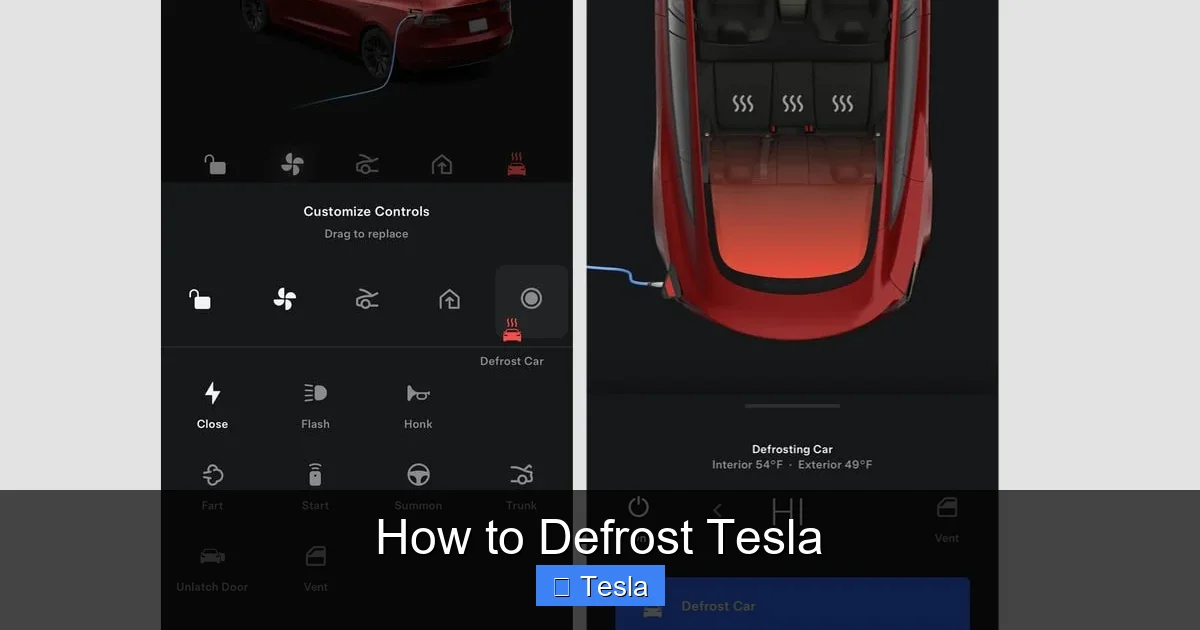
Using the Tesla App’s “Climate Start” Remotely
This is your secret weapon. When your car is plugged in (at home or a Supercharger), you can activate climate control from anywhere via the Tesla app. Tap “Climate Start” and set it to defrost. The car will begin heating the cabin and glass using shore power instead of its battery. By the time you walk out 10-15 minutes later, most or all of the ice will be gone. You can also schedule this for your daily commute. Go to the app’s “Schedule” tab, set a time, and choose “Climate On.” The car will automatically start preconditioning at that time. This is also fantastic for cooling the cabin in summer.
Dealing with Snow Load
Snow is different from ice. It insulates and can be heavy. The defrost system will eventually melt it from the bottom up, but that takes time and energy. For a snowy car, your first step is physical removal. Use a soft-bristled snow brush to clear the roof, hood, and trunk first. Never clear only the windshield. Snow sliding off the roof while driving is a major hazard. Clear all lights, side mirrors, and camera lenses. Then, use the defrost system to melt any remaining slush or packed snow on the glass. The heated wipers (if your model has them) will be a huge help here.
Model-Specific Considerations
While the core principle is the same, your specific Tesla model has some nuances.
Visual guide about How to Defrost Tesla
Image source: notateslaapp.com
Model 3 and Model Y: The Minimalist Interior
These cars have no traditional center dashboard vents. All air comes from slender vents across the dash. In defrost mode, the system automatically closes the main dash outlets and redirects a powerful stream of air upward toward the windshield through these same vents. It’s very effective, but the airflow pattern is different from a car with a dedicated defrost vent. Ensure nothing is blocking the entire dash surface (like a large mat or object). Also, the front camera housing is very exposed. Be extra gentle when clearing ice from the central area of the front glass.
Model S and Model X: The Classic Approach
These models often have more traditional vent layouts, and the defrost function is similarly powerful. The Model X’s falcon-wing doors present a unique challenge: they have their own small defrost elements in the glass seams. If they are frozen shut, do not force them. Use the main defrost system to warm the entire cabin for a while; the heat will eventually reach the door seals and hinges. Gently wiggle the door handle after a few minutes. For the front, the sensor array is more integrated into the front bumper, so scraping near the grille area still requires caution.
The Importance of Glass Coatings
Many Tesla owners apply hydrophobic coatings (like Rain-X) or ceramic coatings to their glass. These repel water, causing it to bead and roll off. This can be a double-edged sword for defrosting. While it helps melted ice run off faster, it can also create a layer where ice bonds slightly differently. A good coating should still allow the defrost system to work effectively. If you notice poor performance, it might be time to reapply the coating. For those considering window tint, it’s worth noting that high-quality ceramic tints can actually improve insulation and may slightly assist in maintaining glass temperature, but they do not replace the defrost system. You can learn more about the costs and benefits of tinting your Tesla in our comprehensive guide.
Common Mistakes to Avoid
Even with the best system, it’s easy to make errors that can cause damage or waste time.
Using Hot Water
A classic bad idea. Pouring hot or boiling water on a frozen windshield can crack the glass due to thermal shock. The sudden temperature change is dangerous. It also just refreezes quickly, making the problem worse. Stick to the car’s own heat.
Forcing Frozen Components
This is the #1 cause of damage. Do not force a frozen wiper arm away from the glass. Do not pry a frozen door handle or charge port door. Do not yank on a frozen side mirror fold mechanism. The defrost system is designed to thaw these components. Give it time. For the wipers, once the ice at the blade’s contact point melts, they will often pop free on their own. You can gently lift the wiper blade itself once it’s loose to prevent it from sticking again.
Neglecting the Rear and Side Windows
Focusing only on the front windshield is a mistake. Your rear window defroster is essential for visibility. Also, check your side mirrors. Many Tesla models have heated mirrors, but they are separate from the main defrost cycle. You may need to manually turn them on via the touchscreen (Controls > Mirrors > Heat) or they may activate with the defrost button—check your owner’s manual. Clear ice from all mirrors and side windows for full, legal visibility.
High Defrost Settings in Extreme Cold
Running the defrost on maximum heat and fan for 20 minutes in -20°F weather will drain your battery significantly if you’re not plugged in. While necessary for safety, be mindful if your charge is low. If possible, plug in and use scheduled preconditioning to use grid power. Also, understand that in extreme cold, the heat pump’s efficiency drops, and the car will rely more on the battery heater and cabin heater, increasing energy use.
Maximizing Efficiency and Battery Range
Defrosting uses energy. In a Tesla, we care about that. Here’s how to be effective without sacrificing too much range.
Plug In Whenever Possible
This is the golden rule. If you have a home charger or access to a destination charger, always plug in overnight and in the morning. The car will use shore power for climate control, preserving your battery’s state of charge. Scheduled preconditioning while plugged in is the ultimate efficient setup. You get a clear car and a fully charged battery ready to go.
Use Preconditioning Smartly
Don’t start defrosting an hour before you leave if you’re not plugged in. The battery will drain the whole time. Instead, start it 10-15 minutes before departure. The system will work hard for a shorter period. If you have a set schedule (e.g., leave for work at 8 AM), use the in-car or app scheduling feature. The car will calculate the optimal start time based on outside temperature to reach your desired cabin temperature by departure time, minimizing energy waste.
Combine with Other Energy-Saving Tips
When defrosting, you’re heating the cabin air. If you don’t need a warm cabin, just warm the glass. Set the climate to “Defrost” but turn the cabin temperature down to a moderate level (like 65-68°F or 18-20°C). The system will still prioritize glass heating but won’t overheat the cabin, saving a bit of energy. Also, ensure all doors and windows are fully closed before starting. A slight gap will let all that precious heat escape.
Conclusion
Defrosting your Tesla is a perfect blend of leveraging its advanced technology and applying common-sense winter car care. The one-touch defrost mode is a marvel of convenience, but understanding when and how to use it—combined with pre-treatment, remote scheduling, and gentle manual clearing—makes the process seamless. Remember, the goal is clear visibility and safe operation, not a race. A few minutes of patience with the climate system is always faster and safer than a frantic battle with an ice scraper. By integrating these practices into your winter routine, you’ll protect your Tesla’s sensors and glass, preserve battery range, and start every journey with a clear view. Your Tesla is built for all seasons; with these tips, you’re ready to command it in any weather.
Frequently Asked Questions
How long does it take to defrost a Tesla?
For a light frost, the automatic defrost system can clear the windshield in 5-10 minutes. For a thick layer of ice (1/4 inch or more), it may take 15-20 minutes of combined defrosting and manual scraping. Using a pre-treatment spray the night before can cut this time in half.
Can I use the Tesla app to start defrosting while the car is locked?
Yes, absolutely. The Tesla app’s “Climate Start” feature works whether the car is locked or unlocked. You can activate it from inside your home to begin warming the car before you go outside. The car must be within cellular range and have sufficient battery charge (usually above 20%).
Will using defrost mode drain my Tesla’s battery significantly?
Yes, running the climate control uses a notable amount of energy, especially in very cold weather. In extreme cold, defrosting can use 5-10% of your battery’s charge over 15-20 minutes if not plugged in. To minimize impact, always plug in when possible and use scheduled preconditioning to use grid power instead of the battery.
What should I do if my Tesla’s charge port door is frozen shut?
Do not force it. Activate the climate control to defrost mode and let the car warm up for 10-15 minutes. The heat from the cabin will eventually thaw the seal. You can also gently tap around the edge of the door with the palm of your hand to help break the ice bond. Once it moves slightly, you can open it manually.
Is it safe to use de-icer spray on my Tesla’s glass and sensors?
Yes, commercial windshield de-icer sprays are generally safe for automotive glass and the plastic housings around sensors. Avoid spraying directly into the front camera lens or radar sensor with high pressure. A light mist on the glass is fine. Always test on a small area first and rinse off any residue with water after the ice is cleared, as some chemicals can be harsh on paint or trim if left on.
Do Tesla windows have special coatings that affect defrosting?
All Tesla glass has a slight acoustic laminate layer for sound deadening and UV protection. This does not significantly impede defrosting. However, aftermarket hydrophobic or ceramic coatings applied to the exterior glass can improve water beading but should not hinder the defrost system’s ability to melt ice. Poorly applied or old coatings might need reapplication for optimal performance.


