
How to Park a Tesla
Parking a Tesla combines traditional driving skills with advanced technology. This guide covers everything from using the automated Autopark system to perfecting manual maneuvers in tight spots. You’ll learn step-by-step procedures, safety tips, and how to integrate parking with your home charging setup. Whether you’re a new owner or looking to refine your skills, understanding your Tesla’s unique parking capabilities is essential for confidence and safety on every trip.
So, you’ve traded in your gas guzzler for the sleek, silent thrill of a Tesla. You’ve mastered the one-pedal driving and the instant torque. But then you pull into your driveway or a crowded supermarket lot, and a new question pops up: How do I park this thing? It’s a valid question. While the fundamental act of turning a wheel and pressing a brake is universal, parking a Tesla involves a fascinating blend of old-school technique and futuristic automation. This guide will walk you through every method, from letting the car do the heavy lifting to perfecting that parallel park like a pro. Think of it as your complete owner’s manual for one of the most common—and sometimes most stressful—driving tasks.
We’ll start by demystifying the suite of technologies Tesla calls “Autopark.” Then, we’ll get hands-on with manual parking, ensuring you’re comfortable with the car’s size and braking characteristics. Next, we’ll explore the boundary-pushing Smart Summon feature. We’ll tackle tricky situations like tight spots, hills, and bad weather. Finally, we’ll connect it all to charging, because where and how you park is intrinsically linked to keeping your Tesla powered up. By the end, you won’t just know how to park a Tesla; you’ll understand why each method works and when to use it for maximum safety and convenience.
Key Takeaways
- Tesla’s Autopark is a driver-assistance feature, not a full self-driving system. You must remain alert and ready to take control at any moment.
- Manual parking in a Tesla is similar to any modern car but requires familiarity with the steering feel and regenerative braking settings.
- Smart Summon and Call allow your Tesla to move without a driver inside within your line of sight, useful for exiting tight spots but requiring extreme caution.
- Sensor and camera calibration is critical for all automated parking features to work correctly; this is usually automatic but can be manually initiated.
- Parking for charging requires planning to ensure your Tesla is positioned correctly for the charger connector, whether at home or a public station.
- Environmental factors like snow, heavy rain, or extreme angles can significantly impact the performance of Tesla’s parking sensors and cameras.
📑 Table of Contents
- Understanding Tesla’s Parking Arsenal: Autopark, Summon, and Sensors
- Step-by-Step: How to Use Tesla Autopark
- Manual Parking Mastery: The Essential Skill
- Smart Summon and Call: The Remote Control Feature
- Conquering Challenging Parking Situations
- Parking and Charging: The Inextricable Link
- Conclusion: Confidence Through Practice and Patience
Understanding Tesla’s Parking Arsenal: Autopark, Summon, and Sensors
Before we dive into the “how,” let’s clarify the “what.” Tesla didn’t just put a new body on an old platform. Its parking systems are deeply integrated with its sensor suite and software. The primary tools in your parking toolkit are:
Autopark: The Automated Parallel and Perpendicular Pro
This is the feature most people think of. Autopark uses the car’s四面 cameras (front, side, rear) and ultrasonic sensors to detect painted lines and surrounding vehicles. When activated, it will steer the car into a detected parallel or perpendicular parking space while you control the accelerator and brake. It’s a driver-assistance feature, meaning you are still responsible for the vehicle’s speed and must monitor the environment. It’s incredibly useful for reducing the cognitive load of a tricky maneuver but requires your active participation.
Smart Summon & Call: Your Remote Key Fob
Taking automation a step further, Smart Summon (available with Full Self-Driving capability or as a subscription) allows you to “call” your Tesla from up to 200 feet away using the Tesla app. The car will drive itself to you, navigating around obstacles and parking spaces. “Call” is the simpler counterpart that moves the car forward or backward a short distance in a straight line. These features are designed for use in private parking lots or your driveway, never on public roads with traffic. They are perfect for extracting yourself from a tight squeeze between two other cars.
The Sensor Suite: The Eyes and Ears
All this automation relies on a clear view. Your Tesla has:
- 8 Cameras: Providing 360-degree visibility.
- 12 Ultrasonic Sensors: Detecting nearby objects at short range (traditionally used for parking).
- Forward-Facing Radar (in older models): For longer-range object detection.
Note: Tesla has been transitioning to a vision-only system (Tesla Vision) for newer models, removing the ultrasonic sensors. This means parking automation relies solely on the cameras. While still capable, some owners report the transition has made tight-space detection slightly less refined. It’s important to know which system your car has, as it affects performance.
Step-by-Step: How to Use Tesla Autopark
Using Autopark is straightforward, but the steps must be followed precisely. Here is the universal process for both parallel and perpendicular parking.
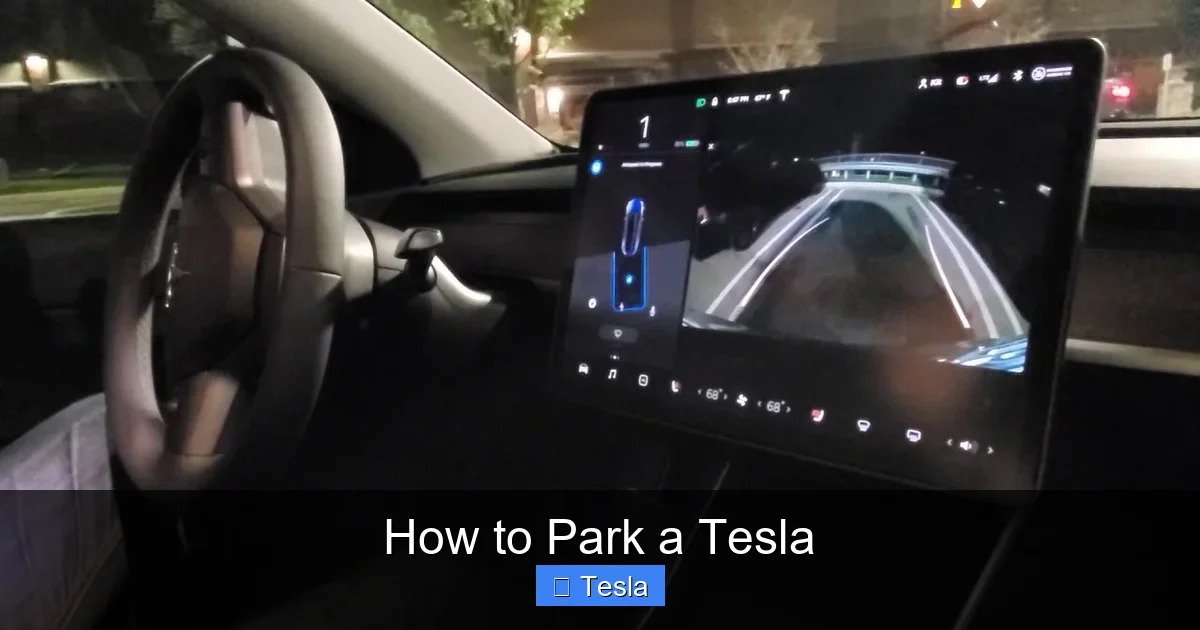
Visual guide about How to Park a Tesla
Image source: i.ytimg.com
1. Identify and Approach the Spot
Drive slowly (under 25 mph/40 km/h) past the parking space. The car needs to recognize the lines. You’ll see a gray “P” icon appear on your touchscreen, usually in the status bar at the top. A message will also appear: “Autopark ready to park.” For parallel parking, you typically need to drive past the spot and then reverse. For perpendicular, you can often drive straight in.
2. Activate the System
Once the “P” icon is solid, you have two options:
- Double-press the drive selector stalk (the stalk on the left side of the steering column used for drive/reverse) downwards.
- Touch the “P” icon on the touchscreen.
The screen will change, showing the car’s path into the space. You’ll hear a chime.
3. Control Speed, Car Handles Steering
This is the most critical step. The car will now control the steering wheel. Your job is to control the speed using the brake pedal. Follow the on-screen instructions: it will tell you when to stop and shift into drive/neutral/reverse. Typically:
- For perpendicular: You’ll stop, shift to reverse, then the car will back in. You may need to press the accelerator slightly to get it moving, but the brake controls the speed.
- For parallel: You’ll stop, shift to reverse, and the car will back into the spot, often requiring a two-stage maneuver (back, then forward).
Pro Tip: Keep your foot hovering over the brake. The car’s speed will be very slow, almost a crawl. Use light brake pressure to control it. Watch the screen and your mirrors!
4. Completion and Verification
The system will chime and display “Parking complete” when finished. It will automatically shift into “Park” (P). Do a final visual check in your mirrors and backup camera to ensure the car is centered and clear of curbs. Never assume it’s perfect. You are the final authority.
Common Autopark Troubleshooting
If Autopark doesn’t activate:
- Drive slower. The system needs to clearly see the lines.
- Ensure lines are clear and well-painted. Faded lines, heavy snow, or debris can confuse it.
- Check for software updates. Tesla constantly improves Autopark via over-the-air updates.
- Clean your cameras and sensors. Dirt, mud, or snow can obscure them. A quick rinse with a hose (avoid high pressure directly on sensors) can help.
Manual Parking Mastery: The Essential Skill
Relying solely on Autopark is a crutch. True driving confidence comes from knowing you can park manually in any situation—when the system fails, in a spot too tight for sensors, or simply when you prefer to be in full control. Parking a Tesla manually feels familiar but has a few quirks.
Visual guide about How to Park a Tesla
Image source: tesery.com
Steering and Handling
The steering in a Tesla is generally well-weighted and responsive. The turning circle is quite tight for its size, especially on Models 3 and Y. Get a feel for it in an empty lot. Remember: the car is heavier than a comparable gas car due to the battery pack. This gives it stability at speed but means it has more momentum when moving slowly. You’ll need to be a bit more decisive with your steering inputs to overcome that weight, especially on a slope.
The Brake: Regenerative vs. Friction
This is the biggest adjustment. When you lift off the accelerator, regenerative braking (regen) slows the car dramatically, often to a near-stop without touching the brake pedal. This is fantastic for controlling your speed while maneuvering. However, for a smooth, controlled stop in a parking spot, you usually want to use the friction brake pedal. Here’s the technique:
- As you approach your final stopping point, press the brake pedal firmly to override regen and come to a smooth, precise halt.
- Practice modulating the brake pedal pressure. The Tesla’s brake pedal is very responsive; a little goes a long way.
- Be aware that on steep hills, regen might not hold the car stationary. Always use the brake pedal to hold, and when ready to move, press the accelerator to disengage “creep” mode (if you have it off) or simply press the brake, then the accelerator.
Visibility and Camera Use
Make full use of the excellent backup camera and surround-view display (if equipped). The camera is high-resolution and has good dynamic range. However, do not rely on it exclusively. Use your mirrors and turn your head to check blind spots. The camera’s wide-angle lens can distort distances, making objects appear farther away than they are. Use it as a guide, not a perfect measurement tool.
Practice Drills
Find an empty section of a large parking lot. Set up cones or use empty spaces. Practice:
- 90-degree turns into a spot.
- Three-point turns.
- Parking on a slope.
- Backing into a space from an angle.
Get a passenger to give you feedback on your distance from the curb or other cars. Muscle memory is key.
Smart Summon and Call: The Remote Control Feature
This is where parking feels like science fiction. Smart Summon is not for everyday use but is a powerful tool for specific scenarios. It is imperative you understand its limitations and safety requirements.
Visual guide about How to Park a Tesla
Image source: teslathunder.com
Prerequisites and Safety First
Before you even think about using Smart Summon:
- You must have Full Self-Driving (FSD) capability purchased or subscribed to.
- Your car must be within 200 feet of you and have a clear GPS signal (open sky).
- The destination must be within your line of sight. You must be able to see the car at all times.
- The area must be a low-speed, private parking lot or driveway. Never use it on public roads, near pedestrians, or in crowded areas.
- Always be prepared to hit the “Stop” button in the Tesla app instantly.
How to Activate Smart Summon
- Open the Tesla app on your phone.
- Ensure your phone is connected to the car via Bluetooth and has a good signal.
- Tap “Summon” in the app.
- You’ll see a map of your car’s location. Press and hold the “Come to Me” button (or “Call” for straight-line movement). The car will start moving.
- You can steer the car slightly by dragging your finger on the screen, but the primary control is the destination point.
Real-World Use Cases
- Extracting from a tight space: If you’re blocked in by another car, you can summon your Tesla forward or backward a few feet to give you room to get in.
- Moving the car in your driveway to make room for another vehicle or to get it closer to the charger.
- Pulling into a covered parking spot during light rain so you don’t have to run back and forth.
Remember: The car is not aware of everything. It might miss a low curb, a pothole, or a small child’s toy. Your eyes are the primary safety system. Use this feature sparingly and with immense caution.
Conquering Challenging Parking Situations
Not all parking is created equal. Let’s tackle the scenarios that make even experienced drivers sweat.
Tight Spots and Narrow Streets
This is where manual skill shines. In a very tight parallel park:
- Use your mirrors aggressively. Get a clear view of the curb and the car behind you.
- Pull ahead and back up slowly. It’s better to take two, three, or even four movements to get perfectly positioned than to rush and hit the curb.
- Don’t be afraid to abandon and re-start. If it’s not going well, pull out and try a different angle.
- Consider folding in your mirrors (if your Tesla has manual folding mirrors) to gain an extra inch or two of clearance.
Parking on Hills
This involves both technique and the correct use of the parking brake.
- Facing Uphill (with a curb): Turn your wheels away from the curb (to the left). Let the car roll back slightly until the tire gently touches the curb. This acts as a block.
- Facing Uphill (no curb): Turn your wheels toward the side of the road (to the right). If the car rolls, it will roll off the road, not into traffic.
- Facing Downhill: Always turn your wheels toward the curb.
- Always engage the parking brake (the “P” button on the drive selector stalk) after coming to a complete stop. On a steep hill, you may need to hold the brake pedal, then press the “P” button while holding the brake to prevent rollback.
Weather and Sensor Interference
Snow, ice, heavy rain, and mud are the enemies of parking sensors and cameras.
- Clear all snow and ice from the bumper sensors and camera housings (the black rectangles on the front, rear, and sides). A brush or hand works best.
- Be aware that slush and dirty water can create a film on sensors, reducing their range. You may need to clean them mid-winter with a wet cloth.
- Heavy rain can cause camera lens occlusion. Wipers may not clear it fast enough. In these conditions, rely on manual parking.
- Cold temperatures can temporarily reduce sensor sensitivity. Give the car a few minutes to warm up after starting.
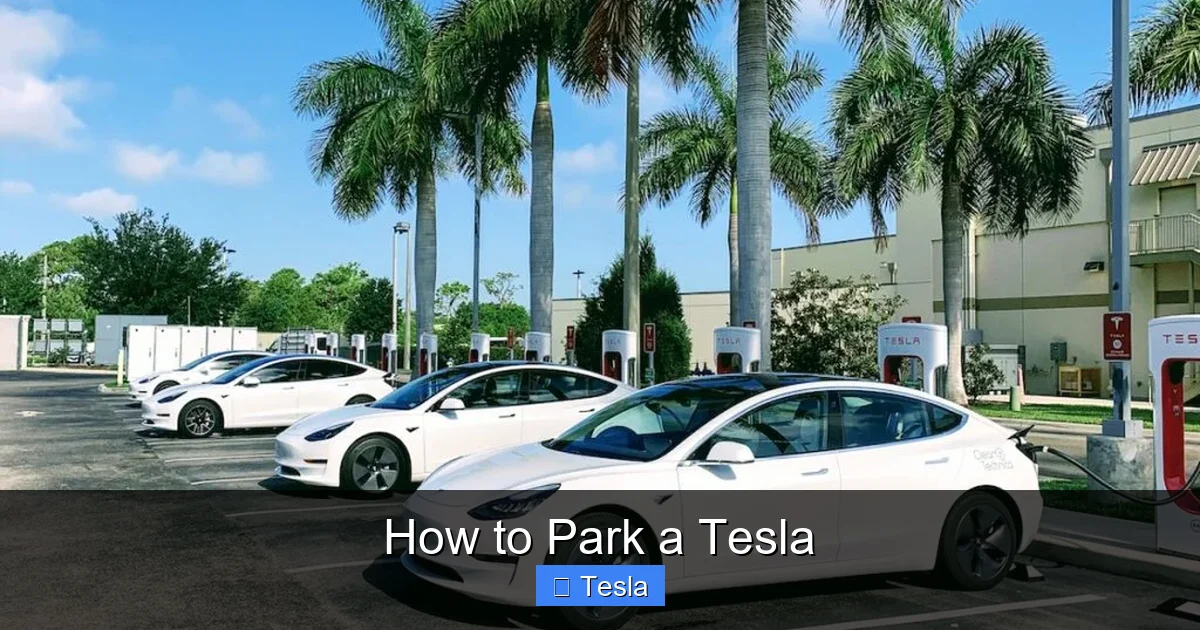
Parking and Charging: The Inextricable Link
For an EV, parking is never just about finding a spot. It’s about finding a powered spot. How you park directly impacts your ability to charge efficiently and safely.
Home Charging Setup: The Golden Standard
The best-case scenario for any Tesla owner is a dedicated parking spot at home with a charger. This requires planning:
- Garage: Ensure your Tesla’s charge port location (left rear fender on all models) lines up with your wall connector’s cable length. You may need to park slightly off-center. Practice the approach.
- Driveway: Consider a pedestal or wall-mounted connector. You’ll need to park in the exact same spot every night. Use a tire stop or paint a line to ensure perfect alignment.
- Installation is key. A properly installed 240V outlet or Tesla Wall Connector is essential for faster charging. The process involves electrical work that must be done by a qualified professional. Understanding the costs and requirements for a home charger installation is a crucial first step for every new owner. For a detailed breakdown of what’s involved and what you can expect to pay, check out our comprehensive guide on how much it costs to install a Tesla charger.
Public Charging Station Etiquette and Positioning
At a public Supercharger or destination charger:
- Park squarely within the lines. Don’t take up two spots. The charger cables have limited reach.
- Pull forward as much as possible. The charge port is at the rear. You want the cable to reach without straining or dragging on the ground.
- Be mindful of other users. Don’t park in a charging spot if you’re not charging. Limit your charging time to 80-90% unless you truly need 100% for a long trip.
- Check for stalls marked “Tesla only” versus universal J1772. Your adapter needs will dictate which you can use.
The “Park to Charge” Mindset
Make it a habit to always consider the charger when parking at home. Is the cable long enough? Will the connector reach cleanly? A little forethought prevents a frustrating 10-minute shuffle every morning. This mindset also applies to road trips; when you arrive at a hotel, ask about EV charging and park in the designated spot if available.
Conclusion: Confidence Through Practice and Patience
Parking a Tesla, at its core, is about blending respect for a powerful machine with an appreciation for its helpful technology. Start by mastering the manual fundamentals—steering, braking, and spatial awareness. Then, gradually incorporate Autopark as a valuable co-pilot for those standard parallel and perpendicular spots. Keep Smart Summon in your back pocket for those rare, frustrating moments of being boxed in, but always treat it with the caution of a powerful remote-controlled device. Finally, never forget the charging context. Your parking spot is your energy portal. Get it right, and your Tesla ownership experience is seamless. Get it wrong, and you’re left with a dead battery and a tow truck call.
The best advice? Practice. Find an empty lot on a Sunday morning. Try every technique. Get a feel for the car’s dimensions. Let Autopark do its thing and then critique its path. The more you engage with these systems, the more intuitive they become. Soon, parking your Tesla won’t be a question mark; it’ll be another effortless, enjoyable part of the drive. Remember, the technology is there to assist you, not replace you. Stay alert, stay practiced, and enjoy the park.
Frequently Asked Questions
Why isn’t Autopark activating for my Tesla?
Autopark may fail to activate if the parking lines are faded, obscured by snow/dirt, or if you’re driving too fast (over 25 mph). Ensure your cameras and sensors are clean and that you’re in a well-defined space. A software restart or update may also resolve glitches.
Can I use Smart Summon on public roads or in crowded parking lots?
Absolutely not. Smart Summon is designed for private, low-speed areas like your driveway or a mostly empty parking lot. Using it on public roads or in areas with pedestrians and heavy traffic is dangerous and violates Tesla’s terms of use. You are always responsible for the car’s operation.
How do I manually calibrate my Tesla’s parking sensors or cameras?
Calibration is usually automatic and occurs during normal driving. If you suspect a sensor issue, park the car, ensure all camera lenses are clean, and drive on a straight road with clear lane markings at various speeds for 20-30 minutes. For persistent errors, a service appointment may be needed to reset the calibration.
What’s the best way to park on a steep hill in a Tesla?
Always use the parking brake (“P” button). For uphill with a curb, turn wheels away from curb and let tire touch it. For uphill without a curb, turn wheels toward the road side. For downhill, always turn wheels toward the curb. Hold the brake pedal while pressing “P” on steep inclines to prevent rolling.
Does wrapping my Tesla affect parking sensor performance?
A proper vinyl wrap should not interfere with sensor or camera operation if installed correctly by a professional. They will ensure openings are left for all sensors and cameras. However, a poor installation that covers or misaligns these components can cause parking system failures. Always choose an experienced installer familiar with Teslas.
How close should I park to a curb when parallel parking manually?
Aim to be within 6-12 inches (15-30 cm) of the curb. Use your side mirror or backup camera to judge. Getting too close risks scraping the wheel rim; too far and you block traffic. Practice to find the sweet spot for your specific Tesla model’s wheel size.


