
How to Jack Up a Tesla Model 3
Contents
- 1 Key Takeaways
- 2 📑 Table of Contents
- 3 Why Jacking a Tesla Model 3 is Different
- 4 Essential Tools and Safety Gear
- 5 Step-by-Step: Locating and Engaging the Jack Points
- 6 The Lifting Sequence and Using Jack Stands
- 7 Performing the Tire Change or Inspection
- 8 Common Mistakes and How to Avoid Them
- 9 When to Call a Professional: Lift Points for Major Service
- 10 Conclusion: Safety First, Always
- 11 Frequently Asked Questions

Reflective Stickers

Jack Stands

Car Paint Touch Up Pen

Diesel Fuel Additive
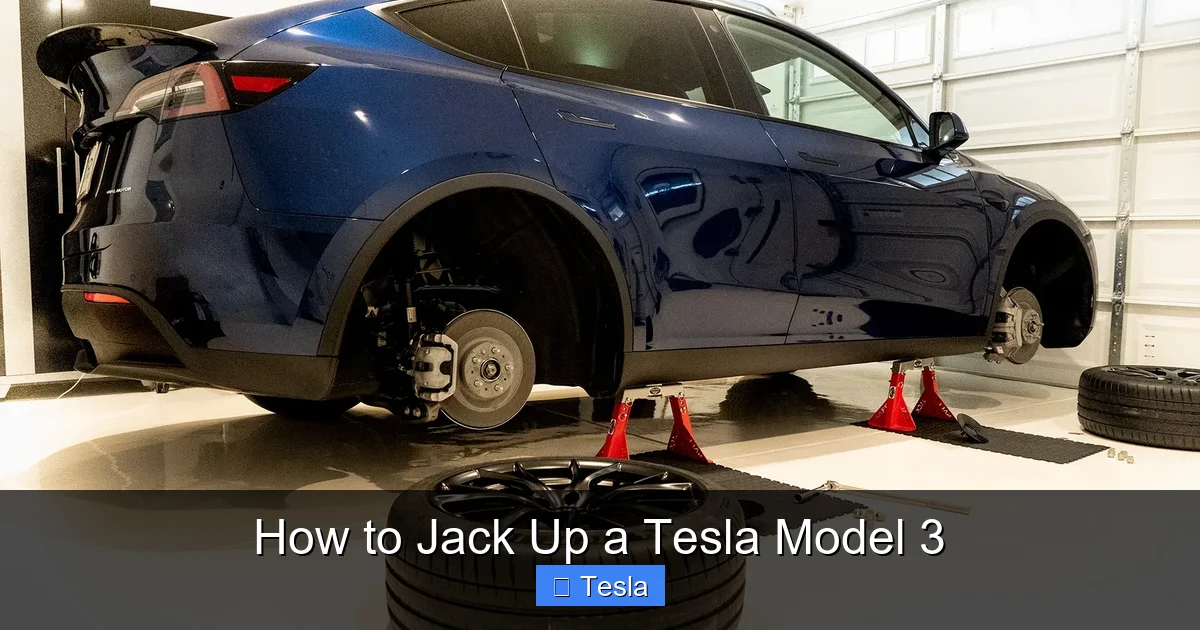
Jacking up a Tesla Model 3 requires specific knowledge of its unique design and factory-approved lift points to avoid costly damage to the battery pack, suspension, or body panels. Unlike traditional cars, you must use the reinforced jacking rails and never place a jack under the battery, frame rails, or any plastic components. This guide provides the precise, safe method for lifting your Model 3 for tire rotations, inspections, or replacements, emphasizing the use of the supplied Tesla jack and proper wheel chocking.
So, you need to get your Tesla Model 3 up in the air. Maybe it’s time for a tire rotation, you have a slow leak, or you just want to inspect the undercarriage. But here’s the thing: jacking up a Tesla isn’t like jacking up your old gas-guzzler. The Model 3’s design is sleek, minimalist, and packed with sensitive, expensive components in places you might not expect. One wrong move with a jack, and you could be looking at a repair bill that makes your monthly payment look like pocket change. The most critical danger? Puncturing the massive, flat battery pack that forms the car’s floor. That’s not just a repair; that’s a catastrophic event. But don’t worry. If you follow the precise steps outlined here, you can safely and confidently lift your Model 3 for basic maintenance. It’s all about knowing where to put the jack and using the right tools.
Key Takeaways
- Locate the designated jacking rails: The Tesla Model 3 has four specific, reinforced steel jacking points on the front and rear subframes. These are the ONLY safe places to apply a jack.
- Use the correct jack: Always use the Tesla-supplied scissor jack (or a compatible floor jack with a padded saddle) that fits the unique shape of the jacking rail. Never use a generic bottle jack or one with a pointed saddle.
- Wheel chocks are non-negotiable: Before lifting, securely chock the wheels on the opposite axle to prevent any vehicle movement. Use proper rubber or plastic chocks, not wooden blocks.
- Never lift at the battery or pinch points: The large, flat battery pack forms the floor. Lifting anywhere on the flat undercarriage will puncture the pack. Also, avoid the rocker panel pinch welds.
- Engage Park and apply the parking brake: Ensure the vehicle is in ‘Park’ (P) and the parking brake is activated. For dual-motor models, consider placing the car in ‘Service Mode’ to disable the one-pedal driving regen brake.
- Use jack stands for any work under the car: The Tesla scissor jack is for lifting only. Once the tire is off the ground, immediately support the vehicle with certified jack stands placed on the designated lift points for that specific task.
- Lower slowly and carefully: When lowering, ensure all tools and body parts are clear. Lower the jack slowly until the full weight is on the jack stands, then carefully remove the jack before beginning work.
📑 Table of Contents
- Why Jacking a Tesla Model 3 is Different
- Essential Tools and Safety Gear
- Step-by-Step: Locating and Engaging the Jack Points
- The Lifting Sequence and Using Jack Stands
- Performing the Tire Change or Inspection
- Common Mistakes and How to Avoid Them
- When to Call a Professional: Lift Points for Major Service
- Conclusion: Safety First, Always
Why Jacking a Tesla Model 3 is Different
To understand the “why,” you have to look at what’s under a Model 3. There’s no traditional engine, no exhaust system, and no bulky transmission tunnel. Instead, you have a large, sealed lithium-ion battery pack that stretches nearly the entire length and width of the car’s underside. This pack is armored, but it’s not invincible. It’s protected by a thick aluminum shell, but a sharp point from a misplaced jack can breach it. That’s the primary fear. Beyond the battery, the suspension components are also positioned differently, and the body’s rocker panels are thin metal that can be easily crushed if used as a lift point.
The Critical Role of the Jacking Rails
Tesla engineers anticipated the need for tire service. They integrated specific, reinforced steel jacking rails into the front and rear subframe structures. These are not the plastic splash guards you see. They are solid metal strips, clearly marked with a small triangular or rectangular pad, often with a raised dimple or hole. Think of them as the car’s official “lift handles.” They are designed to take the entire weight of the vehicle without flexing. Your entire lifting strategy must revolve around finding and using these four points—two at the front, two at the rear. They are your only friends in this situation.
The Perils of the Wrong Jack Point
Let’s talk about what happens if you guess wrong. Placing a jack under the flat battery enclosure is the number one mistake. The jack’s saddle, even if padded, can concentrate force onto a small area of the aluminum battery case. A puncture here risks thermal runaway—a battery fire—which is extremely dangerous and requires specialized fire suppression. Lifting on the rocker panel’s pinch weld (the folded edge) will bend and crinkle that thin metal, ruining the car’s clean side profile and requiring expensive bodywork. Lifting on suspension arms or axles can bend those components, leading to dangerous handling issues. The message is clear: if it’s not one of the four marked steel rails, do not put your jack there.
Essential Tools and Safety Gear
Before you even think about sliding under the car, you need to gather your arsenal. Having the right tools makes the job safe and possible. The wrong tools make it dangerous and likely to cause damage.
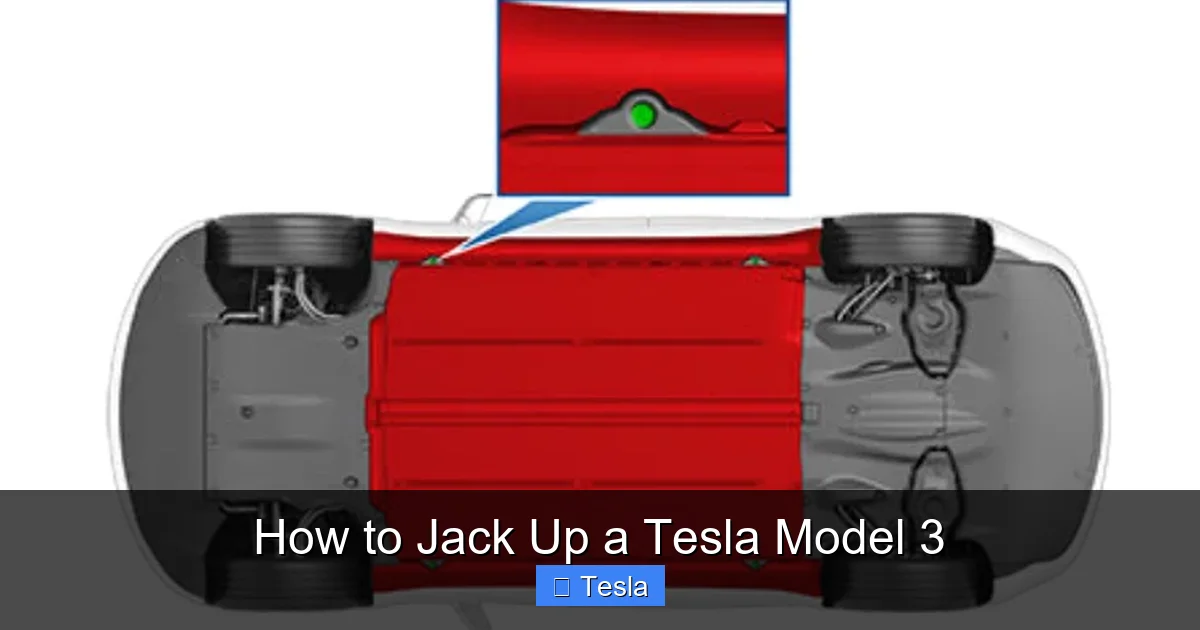
Visual guide about How to Jack Up a Tesla Model 3
Image source: teslatuneup.com
The Tesla Supplied Scissor Jack
Your Model 3 came with a compact scissor jack stored in the trunk, usually under the floor mat. This jack is custom-designed for the job. Its saddle (the top part that touches the car) is wide and flat, perfectly matching the shape of the jacking rail. It also has a long handle for easy pumping. This is the preferred tool for most owners doing a simple tire change. It’s slow but steady and fits perfectly in the tight spaces around the wheel wells. Always inspect it before use for any cracks or mechanical issues.
Alternative: A Quality Floor Jack
If you do a lot of work, a low-profile floor jack is faster and easier. However, you must be meticulous. You need a jack with a wide, padded, and ideally swiveling saddle to ensure full contact with the narrow rail. A jack with a small, pointed saddle is a definite no. Furthermore, the jack must be rated for at least 3 tons (6,000 lbs) to handle the Model 3’s weight safely. Brands like Harley, Arcan, or Pittsburgh make good options. Pair this with a set of universal jack stands.
Non-Negotiable Safety Equipment
This is not the place to save a few bucks. You need:
- Wheel Chocks: Two solid rubber or plastic chocks. Place them snugly against the tires on the opposite axle from where you’re lifting. If lifting the front, chock the rear wheels, and vice versa.
- Jack Stands: A set of at least 2-ton capacity stands with a wide, stable base and a padded or ratcheting top. Never rely on the jack alone to support the car while you work.
- Gloves and Safety Glasses: Protect your hands from sharp metal edges and your eyes from any debris.
- The Tesla Lug Nuts and Socket: The Model 3 uses a specific 21mm socket (often with a plastic cap). It’s usually in the trunk with the jack. Use a proper breaker bar or torque wrench; never use an impact gun to remove or tighten the nuts, as it can over-torque and damage the wheel studs.
Step-by-Step: Locating and Engaging the Jack Points
This is the most important sequence. Rushing this part is how damage happens. Take your time, verify your location, and proceed slowly.
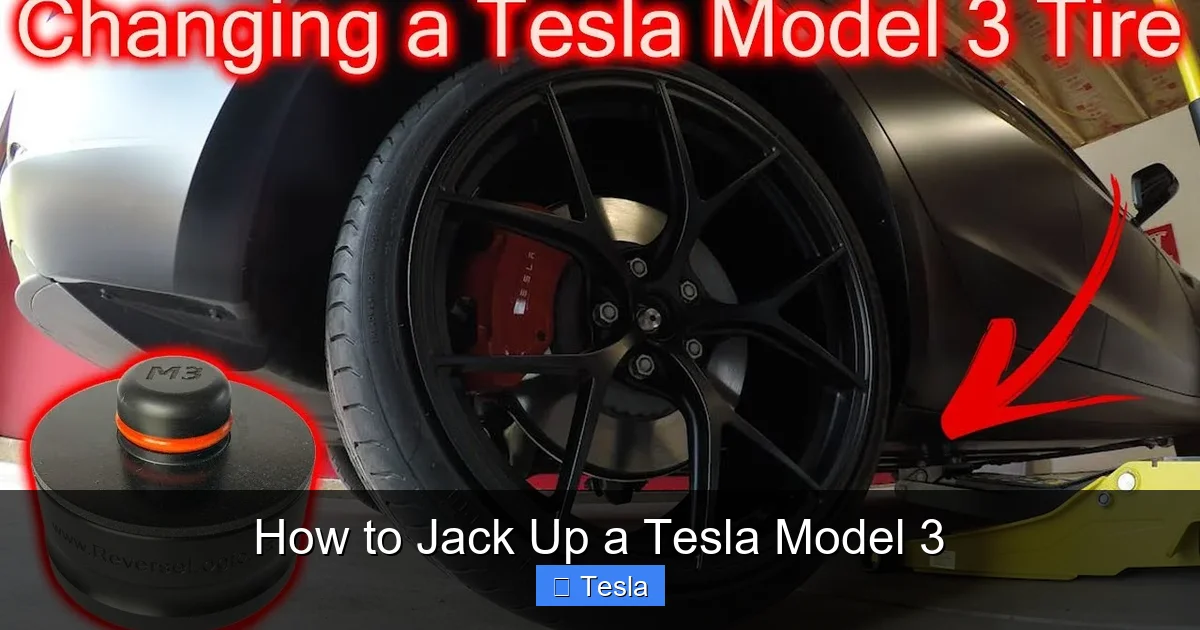
Visual guide about How to Jack Up a Tesla Model 3
Image source: i.ytimg.com
Identifying the Correct Front and Rear Points
First, ensure the car is on a solid, level surface. Concrete is ideal. Never lift on soft asphalt, gravel, or uneven ground. Engage the parking brake firmly and put the car in ‘Park.’ For dual-motor vehicles, it’s a smart safety step to access the service menu on the touchscreen (Controls > Service > Towing) and enable ‘Transport Mode’ or ‘Service Mode.’ This disables the one-pedal driving regen braking, which can cause the car to lurch if the parking brake fails. If you don’t have access to that, just be extra vigilant with the parking brake and chocks.
Now, locate the points. Crawl under the front of the car (use a creeper if you have one). Look just behind the front wheel, at the inner edge of the wheel well. You’ll see a vertical steel rail running front-to-back. On the top of this rail, there is a small, flat, rectangular pad, about the size of a matchbox. It may have a small hole or dimple in the center. This is your front jack point. Repeat the process for the rear, looking just ahead of the rear wheel on the same type of rail. There are four total. Clean any dirt or mud from these pads so your jack saddle has perfect contact.
Positioning the Jack Correctly
Now, position your jack. If using the Tesla scissor jack, unfold it and slide it under the car, aligning the saddle directly over the center of the steel pad. The jack’s handle should point outward, away from the car. Pump the handle a few times to raise the saddle until it makes firm, even contact with the pad. Do not tilt the jack. It must be perfectly vertical. You should feel it seat securely. If it feels wobbly or only touching on one edge, lower it and reposition. For a floor jack, you’ll need to slide it in from the side, which can be trickier due to the low ground clearance. A low-profile jack is almost essential here. Again, ensure 100% saddle-to-pad contact before lifting.
The Lifting Sequence and Using Jack Stands
With the jack positioned and the opposite wheels chocked, you’re ready to lift. But the lifting is only half the job.
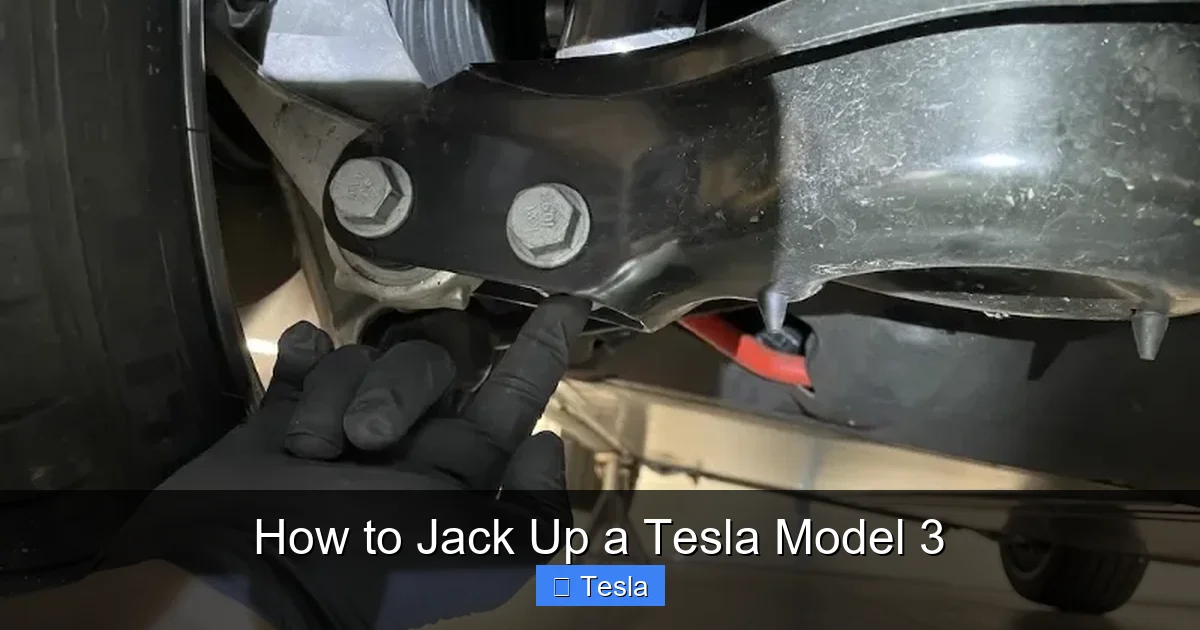
Visual guide about How to Jack Up a Tesla Model 3
Image source: evseekers.com
Lifting the Vehicle
Begin pumping the jack handle slowly and steadily. Watch the wheel. You only need to raise the car enough to remove the tire and have clearance for your jack stands. For a tire change, that’s typically 2-4 inches off the ground. Do not over-lift. As the car rises, keep an eye on the jack’s contact point. It should remain stable and not shift. If you hear any creaking from the body, stop immediately—this indicates you are lifting at the wrong point or the car is flexing unnaturally. Once the tire is clear of the ground, stop lifting.
Installing Jack Stands for Safety
This is the most critical safety step. The jack is for lifting. Jack stands are for holding. Never crawl under a car supported only by a jack. For basic tire work, you can often place jack stands on the designated “pin weld” or reinforced area on the rocker panel. Tesla service manuals specify exact locations, but a common safe spot is the thick metal seam about 12-18 inches behind the front wheel arch or ahead of the rear wheel arch on the solid metal part of the sill. Place the stand so its padded top contacts this solid metal. Adjust the height so it supports the car’s weight, then very slowly lower the jack until the full weight transfers to the stands. Give the car a firm push to test stability. Only then should you remove the jack and begin work. If you’re doing anything more than a tire change (like brake work), you must use the specific, manufacturer-recommended lift points, which often require a different setup.
Performing the Tire Change or Inspection
With the car securely on stands, you can proceed. But remember, Teslas have specific torque requirements.
Removing the Lug Nuts and Wheel
Before loosening lug nuts, ensure the car is still in Park and the parking brake is on. Using the proper 21mm socket and a long breaker bar (the Tesla jack handle can be used in a pinch), break the lug nuts loose while the tire is still on the ground. The weight of the car prevents the wheel from spinning. Turn them counter-clockwise just enough to break their initial torque (often 80-100 lb-ft). Now, raise the car the final inch if needed to clear the ground. Remove all lug nuts and set them in a clean spot. Pull the wheel straight off. Be mindful of the wheel’s weight; Model 3 wheels are not excessively heavy but are awkward.
Reinstallation and Torquing
When putting the new or repaired wheel on, hand-tighten all lug nuts finger-tight in a star pattern (top, bottom, left, right). This ensures the wheel seats evenly on the hub. Then, use your torque wrench to tighten each nut to Tesla’s specified torque, which is 129 lb-ft (175 Nm). Again, use a star pattern. Do not use an impact gun for final tightening—it will almost certainly over-torque and stretch or break the studs. Under-torquing is dangerous; over-torquing makes future removal a nightmare and can damage the hub. After tightening, lower the car from the stands carefully, then torque the lug nuts again once the tire is on the ground for final verification.
Common Mistakes and How to Avoid Them
Even with good intentions, errors happen. Here are the most frequent pitfalls and how to sidestep them.
Using the Wrong Jack or Saddle
That old bottle jack from your truck? Toss it. Its pointed saddle is a battery pack’s worst nightmare. Similarly, a floor jack with a small, hard saddle concentrates too much pressure. Always use a jack with a wide, flat, and preferably rubber-padded saddle that fully covers the steel jacking rail pad. If your jack’s saddle is too small, you can sometimes use a piece of thick wood (like a 2×4) between the jack and the rail to spread the load, but this is a workaround, not a best practice.
Skipping the Wheel Chocks
“It’s level, I’ll be careful.” This is the mantra of someone who hasn’t seen a car roll off jack stands. It happens fast and with devastating force. The parking brake can fail, the transmission ‘Park’ pawl can break, or the car can shift. Always, always chock the tires on the opposite axle. It takes 30 seconds and could save your life and your car.
Lifting Too High or Working Under the Jack Alone
You only need enough lift to remove the tire. Lifting the car 12 inches in the air for a 2-inch tire change is unnecessary and increases instability. More importantly, never get under a car held only by a jack. Jacks can fail—hydraulic seals leak, mechanical locks break. Jack stands are your backup. They are cheap insurance against a fatal accident.
Ignoring the Torque Spec
Everyone thinks they can “feel” tight enough. You can’t. Tesla’s wheel studs are strong but not infinitely so. Over-torquing is a silent killer that will eventually cause a stud to snap, potentially while driving. Invest in a good click-style torque wrench (a 1/2″ drive will cover this) and use it. It’s a $50 tool that protects a $50,000 car.
When to Call a Professional: Lift Points for Major Service
The jacking rails we discussed are for tire service only. If you need to do major undercarriage work—like replacing the battery coolant pump, inspecting the drive units, or doing serious suspension work—you cannot use these points. Tesla has specific, reinforced lift points on the frame rails (the long, flat metal beams running lengthwise under the battery) designed for a professional 4-post lift or a two-post lift with proper arms. Attempting to use the rail jack points to support the entire car for these tasks is dangerous and will likely damage the subframe or battery enclosure. This is a job for a Tesla-certified shop with the correct lift equipment. For peace of mind and to avoid voiding warranties, consult your owner’s manual or a Tesla service center for any service beyond tire rotations and inspections.
Conclusion: Safety First, Always
Jacking up your Tesla Model 3 is a straightforward process if you respect the vehicle’s unique architecture and follow the rules without exception. The core principles are simple: find the four steel jacking rails, use the correct padded jack, chock the opposite wheels, and always support the car with jack stands before getting underneath. It’s a ritual of caution that protects you and your investment. Remember, this car’s engineering is brilliant but different. What worked on your old sedan will not work here. By internalizing these steps and treating the battery pack as the fragile, vital component it is, you can confidently handle basic tire maintenance at home. For anything more complex, the path of least resistance and greatest safety is to let the professionals at a Tesla service center handle it with their specialized equipment. Your Model 3 deserves that careful attention, and so do you.
Frequently Asked Questions
Can I use a regular floor jack on a Tesla Model 3?
Yes, but only if it has a wide, padded saddle and you are absolutely certain to place it only on the designated steel jacking rails. A standard jack with a small or pointed saddle will damage the rail or, worse, slip and damage the battery. A low-profile jack is highly recommended due to the Model 3’s low ground clearance.
What happens if I jack up my Tesla in the wrong spot?
Placing a jack under the battery pack’s aluminum casing can puncture it, leading to a catastrophic battery fire that requires specialized emergency response. Jacking on the thin rocker panel will bend and crinkle the metal. Lifting on suspension components can bend them, causing unsafe handling. Damage from incorrect lifting is extremely expensive and often not covered by warranty.
Do I need to put my Tesla Model 3 in a special mode before jacking?
It’s a highly recommended safety step. For dual-motor models, go to Controls > Service and enable ‘Transport Mode’ or ‘Service Mode.’ This disables the regenerative braking system, preventing the car from unexpectedly moving if the parking brake fails. For all models, always ensure the car is in ‘Park’ (P) and the parking brake is firmly applied before lifting.
Where exactly are the jacking points on a Tesla Model 3?
There are four total. Two are located at the front, just behind the front wheels on the inner side of the wheel well, on a vertical steel rail. Two are at the rear, just ahead of the rear wheels on the same type of rail. Each point is a small, flat, rectangular steel pad, often with a dimple or hole. They are the only factory-approved lift points for tire service.
Can I use the Tesla jack to support the car while I work?
No. The Tesla scissor jack (or any jack) is designed only for lifting. It is a single-point, mechanical device that can fail. You must always support the vehicle’s weight with certified jack stands placed on solid metal (like the designated rocker panel lift points) before crawling underneath. Never rely on the jack alone.
After jacking up my Tesla, do I need to do anything special with the tire pressure?
Yes. Tesla recommends checking and adjusting tire pressures when the tires are cold. If you’ve driven on a flat or severely under-inflated tire, it may have been damaged and require replacement, not just inflation. After remounting and torquing the lug nuts, always check the tire pressure and inflate to the PSI listed on the driver’s door jamb sticker (typically 42 PSI for Model 3). For more on tire maintenance, you can read about Tesla window replacement costs to understand the value of proper care for all vehicle components.


