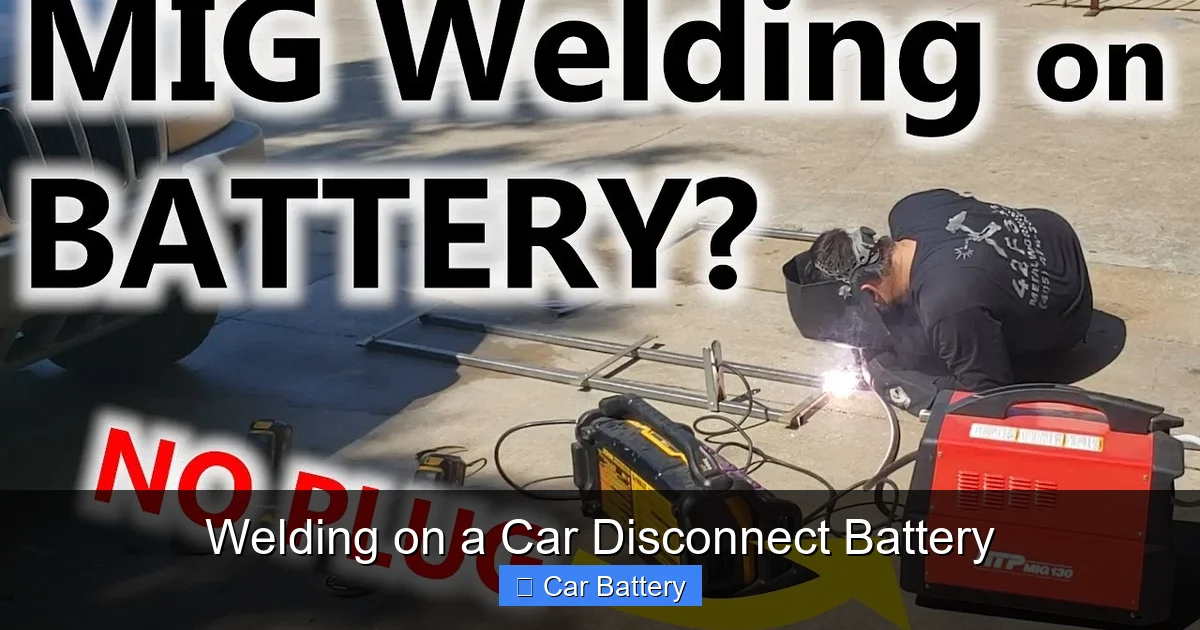
Welding on a Car Disconnect Battery
Contents
- 1 Key Takeaways
- 2 📑 Table of Contents
- 3 Why You Must Disconnect the Battery Before Welding
- 4 How to Safely Disconnect Your Car Battery
- 5 The Risks of Welding Without Disconnecting the Battery
- 6 Best Practices for Welding on a Car
- 7 Reconnecting the Battery After Welding
- 8 Special Considerations for Modern and Electric Vehicles
- 9 Conclusion
- 10 Frequently Asked Questions
Welding on a car without disconnecting the battery can fry sensitive electronics, cause fires, or ruin your vehicle’s computer systems. Always disconnect the battery before welding—especially the negative terminal—to protect your car’s electrical network and ensure a safe, effective repair.
Welding is a powerful and essential skill in automotive repair and restoration. Whether you’re fixing a rusted frame, reinforcing a suspension mount, or building a custom exhaust, welding gets the job done. But here’s the catch: welding on a car isn’t like welding a piece of scrap metal in your backyard. Cars are complex machines packed with sensitive electronics, and one wrong move can turn a simple repair into a costly disaster.
That’s why the golden rule of automotive welding is simple: **always disconnect the battery**. It might seem like an extra step, but it’s one of the most important safety and protection measures you can take. Ignoring this step can lead to blown fuses, fried control modules, corrupted software, or even electrical fires. In modern vehicles, where computers manage everything from fuel injection to airbags, the consequences of skipping this step can be severe.
So, whether you’re a DIY enthusiast working in your garage or a professional mechanic in a busy shop, understanding why and how to properly disconnect your car’s battery before welding is critical. This guide will walk you through the reasons, the risks, the correct procedure, and the best practices to keep your vehicle—and yourself—safe.
Key Takeaways
- Always disconnect the battery before welding: This prevents electrical surges from damaging your car’s ECU, sensors, and wiring.
- Remove the negative terminal first: Disconnecting the ground cable reduces the risk of short circuits and accidental sparks.
- Welding creates high-voltage surges: These can travel through the chassis and fry delicate electronics even if they’re not directly connected.
- Modern cars are especially vulnerable: With advanced infotainment, ADAS, and engine management systems, the risk of damage is higher than ever.
- Use a memory saver if needed: Devices like OBD2 memory keepers preserve radio settings and ECU data during battery disconnection.
- Reconnect the battery carefully after welding: Ensure all tools are removed and connections are tight to avoid arcing or poor grounding.
- Professional shops follow strict protocols: Reputable garages always disconnect batteries before welding to protect customer vehicles.
📑 Table of Contents
Why You Must Disconnect the Battery Before Welding
Welding generates intense electrical currents—often exceeding 100 amps—and these currents need a path to ground. In a car, the chassis acts as a ground plane, meaning the welding current can travel through the vehicle’s metal frame. While this might seem harmless, the real danger lies in how that current interacts with the car’s electrical system.
When you weld without disconnecting the battery, the high-voltage surge can backfeed into the vehicle’s wiring harness. This surge doesn’t need to be directly connected to a component to cause damage. Even nearby wiring can pick up electromagnetic interference or experience voltage spikes that overwhelm delicate circuits. Modern cars are packed with electronic control units (ECUs), sensors, and modules that operate on low-voltage signals. A sudden spike from welding can easily fry these components.
For example, imagine you’re welding a new bracket onto your truck’s frame. The welding machine is grounded to the chassis, and the arc creates a massive current flow. That current travels through the frame—and if the battery is still connected, it can loop back through the vehicle’s electrical system. The alternator, ECU, ABS module, or even the infotainment system might absorb that surge, leading to permanent damage.
The Science Behind the Surge
To understand why this happens, think of your car’s electrical system like a network of tiny rivers. The battery is the source, and the wires are the channels that carry electricity to various destinations. When you weld, you’re essentially creating a massive, uncontrolled river of electricity that floods into the system. Even if the welding ground clamp is placed far from the battery, the current can still find its way back through the chassis and into the wiring.
This phenomenon is known as *inductive coupling* or *ground loop interference*. The welding arc generates a strong electromagnetic field, which can induce voltage in nearby conductors—like the wires running alongside your frame rails. These induced voltages can exceed the tolerance of microprocessors and sensors, causing them to fail.
Real-World Consequences
Let’s look at a real-world example. A mechanic once welded a trailer hitch onto a late-model SUV without disconnecting the battery. The job took less than 30 minutes, but the next day, the customer returned with a dead battery and a check engine light. Diagnosis revealed that the engine control module (ECM) had been damaged by a voltage spike during welding. The repair cost over $1,200—far more than the welding job itself.
In another case, a DIYer welded a custom roll cage into a classic car. He thought disconnecting the battery was unnecessary since the car was older and had fewer electronics. But even older vehicles have voltage regulators, ignition modules, and lighting circuits that can be damaged by welding surges. The result? A fried alternator and a costly replacement.
These stories aren’t rare. They happen all the time—especially as more people take on automotive projects at home. The lesson is clear: no matter how simple the weld or how old the car, disconnecting the battery is non-negotiable.
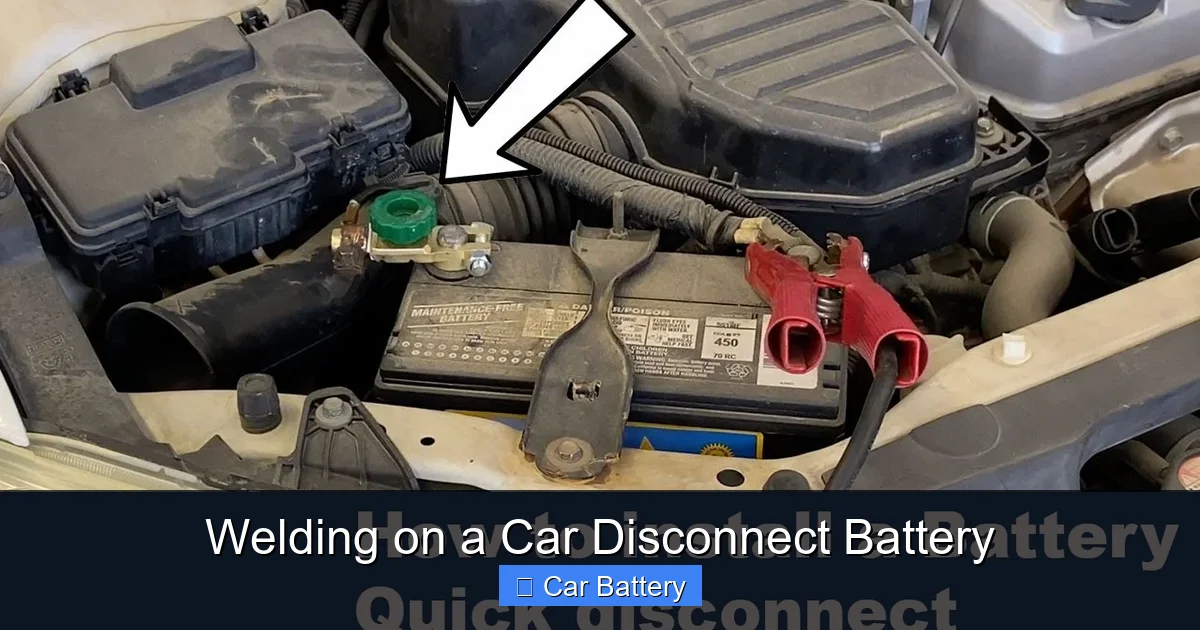
How to Safely Disconnect Your Car Battery
Visual guide about Welding on a Car Disconnect Battery
Image source: i.ytimg.com
Disconnecting a car battery might seem straightforward, but doing it correctly is crucial to avoid sparks, short circuits, or damage to the vehicle’s electronics. Here’s a step-by-step guide to doing it safely and effectively.
Step 1: Park Safely and Turn Off the Engine
First, park your vehicle on a flat, stable surface and engage the parking brake. Make sure the engine is completely off—no accessories running, no lights on. This reduces the risk of electrical load and ensures the system is in a neutral state.
Step 2: Locate the Battery
Most car batteries are under the hood, but some are in the trunk, under the rear seat, or even in the fender well (especially in European models). Consult your owner’s manual if you’re unsure. Once located, remove any covers or panels blocking access.
Step 3: Identify the Terminals
The battery has two terminals: positive (+) and negative (−). The positive terminal is usually red and marked with a “+,” while the negative is black and marked with a “−.” Always disconnect the negative terminal first. This is a critical safety rule because it breaks the ground connection, reducing the risk of short circuits if your tool accidentally touches both terminals or the chassis.
Step 4: Use the Right Tools
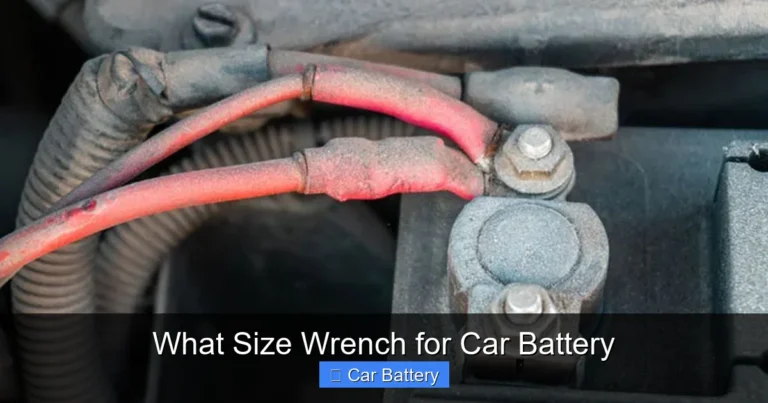
Use a properly sized wrench or socket (usually 10mm or 13mm) to loosen the nut on the negative terminal. Avoid using pliers or adjustable wrenches, as they can slip and cause sparks. A ratcheting wrench is ideal for tight spaces.
Step 5: Remove the Negative Cable
Once the nut is loose, carefully wiggle the cable clamp off the terminal. Do not let the clamp touch any metal part of the car or the positive terminal. Store it away from the battery to prevent accidental contact.
Step 6: Disconnect the Positive Terminal (Optional but Recommended)
While disconnecting only the negative terminal is often sufficient, some professionals recommend disconnecting both terminals for maximum safety—especially during extensive welding. If you do this, follow the same procedure: remove the positive cable after the negative, and store it safely.
Step 7: Secure the Cables
Use zip ties, tape, or a battery terminal cover to keep the cables from swinging back and touching the terminals. This prevents accidental reconnection while you’re working.
Pro Tip: Use a Memory Saver
If you’re worried about losing radio presets, seat settings, or ECU adaptations, consider using a memory saver device. These plug into the OBD2 port and draw power from a 9V or 12V battery to keep the car’s computer alive during disconnection. They’re inexpensive and widely available online or at auto parts stores.
The Risks of Welding Without Disconnecting the Battery
Visual guide about Welding on a Car Disconnect Battery
Image source: i.ytimg.com
Skipping the battery disconnection step might save you five minutes, but the potential risks far outweigh the convenience. Let’s break down the most common dangers.
1. Damage to the Engine Control Unit (ECU)
The ECU is the brain of your car. It manages fuel injection, ignition timing, emissions, and more. It’s designed to operate within a narrow voltage range—typically 12–14 volts. A welding surge can deliver hundreds of volts in a split second, overwhelming the ECU’s protective circuits. Once damaged, the ECU often can’t be repaired—only replaced, at a cost of $500 to $2,000 or more.
2. Fried Sensors and Modules
Modern cars have dozens of sensors: oxygen sensors, mass airflow sensors, throttle position sensors, and more. These are highly sensitive and expensive to replace. A voltage spike from welding can corrupt their signals or destroy their internal circuitry. For example, a single oxygen sensor can cost $100–$300, and replacing multiple sensors adds up quickly.
3. Alternator and Voltage Regulator Failure
The alternator charges the battery and powers the electrical system while the engine runs. It’s connected directly to the battery and is vulnerable to voltage surges. Welding can cause the alternator to overheat or short out, leading to a no-charge condition. Replacing an alternator can cost $300–$800, plus labor.
4. Corrupted Software and Error Codes
Even if no hardware is damaged, welding surges can corrupt the software in your car’s modules. This can trigger persistent error codes, limp mode, or complete system failures. Clearing these codes might require a professional scan tool, and some issues may not be easily reversible.
5. Fire Hazard
In rare cases, a welding surge can cause a short circuit that generates heat and sparks. If flammable materials (like oil, grease, or upholstery) are nearby, this can lead to a fire. Always keep a fire extinguisher nearby when welding, and never weld near fuel lines or tanks.
6. Airbag System Malfunction
The airbag system relies on sensitive accelerometers and control modules. A voltage spike can cause the system to deploy unexpectedly or fail to deploy in a crash. This is not only dangerous but also extremely expensive to repair—airbag modules can cost over $1,000.
Best Practices for Welding on a Car
Visual guide about Welding on a Car Disconnect Battery
Image source: chestofbooks.com
Now that you understand the risks, let’s talk about how to weld safely and effectively while protecting your vehicle.
1. Always Disconnect the Battery
This can’t be stressed enough. Make it a habit—every single time. Even if you’re just tack-welding a small bracket, disconnect the battery. The few minutes it takes could save you thousands in repairs.
2. Ground the Welder Close to the Work Area
Place the welding ground clamp as close as possible to the weld point. This minimizes the path the current takes through the chassis and reduces the chance of it traveling through sensitive wiring. Avoid grounding to painted or coated surfaces—clean the metal to ensure a solid connection.
3. Disconnect Other Sensitive Components (If Possible)
For major welding jobs, consider disconnecting additional components like the alternator, ECU, or fuse box. This adds an extra layer of protection, especially in high-risk areas like the engine bay or frame rails.
4. Use a Surge Protector or Isolation Device
Some advanced welders use isolation transformers or surge suppressors to protect the vehicle’s electronics. These devices block high-voltage spikes from entering the electrical system. While not common in home garages, they’re used in professional shops.
5. Work in a Clean, Dry Environment
Moisture and dirt can increase the risk of electrical shorts. Weld in a dry, well-ventilated area, and keep the battery and wiring clean. Avoid welding in the rain or on wet concrete.
6. Inspect After Welding
Once the job is done and the battery is reconnected, check for any warning lights, unusual noises, or performance issues. If something seems off, have the vehicle scanned for error codes before driving.
Reconnecting the Battery After Welding
After welding is complete and the area is cool and clean, it’s time to reconnect the battery. Do this carefully to avoid sparks or damage.
Step 1: Clean the Terminals
Use a wire brush or terminal cleaner to remove any corrosion or debris from the battery posts and cable clamps. A clean connection ensures proper conductivity and reduces resistance.
Step 2: Reconnect the Positive Terminal First
Contrary to disconnection, you should reconnect the positive terminal first. This minimizes the risk of short circuits. Slide the clamp onto the terminal and tighten the nut securely.
Step 3: Reconnect the Negative Terminal
Attach the negative cable last. Tighten the nut firmly, but don’t over-torque it—this can strip the threads or crack the terminal.
Step 4: Test the System
Turn on the ignition (without starting the engine) and check that all electronics are working: lights, radio, dashboard, etc. Then start the engine and listen for unusual sounds. If everything looks and sounds normal, you’re good to go.
Pro Tip: Reset Adaptations if Needed
Some vehicles may need to relearn throttle positions or idle settings after a battery disconnect. This usually happens automatically within a few minutes of driving, but consult your manual for specific procedures.
Special Considerations for Modern and Electric Vehicles
Modern cars, especially hybrids and electric vehicles (EVs), require extra caution when welding.
High-Voltage Systems in EVs
Electric vehicles have high-voltage battery packs (often 300–800 volts) that are completely separate from the 12V system. However, the 12V battery still powers critical systems like the computer and safety modules. Always disconnect the 12V battery before welding—even on EVs.
Hybrid Vehicles
Hybrids combine internal combustion engines with electric motors and high-voltage batteries. The same rules apply: disconnect the 12V battery. Some hybrids also have a service disconnect for the high-voltage system, which should only be handled by trained technicians.
Advanced Driver Assistance Systems (ADAS)
Cars with ADAS features (like lane departure warning, adaptive cruise control, or automatic emergency braking) rely on cameras, radar, and sensors. These systems are extremely sensitive to electrical noise. Welding without disconnecting the battery can corrupt their calibration, requiring expensive recalibration at a dealership.
Conclusion
Welding on a car is a valuable skill, but it comes with serious responsibilities. The simple act of disconnecting the battery before welding is one of the most effective ways to protect your vehicle’s electronics, prevent costly damage, and ensure your safety. Whether you’re working on a classic muscle car or a modern hybrid, this step should never be skipped.
By following the proper procedure—disconnecting the negative terminal first, using a memory saver if needed, grounding the welder correctly, and reconnecting carefully—you can weld with confidence. Remember, the few minutes you spend protecting your car could save you hundreds or even thousands of dollars in repairs.
So next time you fire up your welder, ask yourself: “Did I disconnect the battery?” If the answer is no, shut it down and do it right. Your car—and your wallet—will thank you.
Frequently Asked Questions
Do I really need to disconnect the battery when welding on a car?
Yes, absolutely. Welding generates high-voltage surges that can travel through the chassis and damage sensitive electronics like the ECU, sensors, and wiring. Disconnecting the battery prevents these surges from entering the electrical system.
Can I just disconnect the negative terminal, or do I need to remove both?
Disconnecting the negative terminal is usually sufficient, as it breaks the ground connection. However, for maximum safety—especially during extensive welding—some professionals recommend disconnecting both terminals.
Will disconnecting the battery erase my radio presets or ECU settings?
It might. To preserve settings, use a memory saver device that plugs into the OBD2 port and powers the system with a small battery. Most memory savers are inexpensive and easy to use.
What happens if I weld without disconnecting the battery?
You risk damaging the ECU, sensors, alternator, or other electronics. This can lead to error codes, poor performance, or complete system failure—often requiring costly repairs or replacements.
Is it safe to weld on a car if the battery is disconnected?
Yes, as long as you follow proper safety procedures: ground the welder close to the work area, avoid flammable materials, and reconnect the battery carefully afterward. Disconnecting the battery greatly reduces the risk of electrical damage.
Do electric or hybrid cars require special precautions when welding?
Yes. Always disconnect the 12V battery before welding, even on EVs and hybrids. Some hybrids also have high-voltage service disconnects that should only be handled by professionals.