
How to Winterise an Rv
Contents


Winterising your RV is essential to prevent costly damage from freezing temperatures. This guide walks you through every step—from draining water systems to storing batteries—so your rig stays safe and ready for spring adventures.
Key Takeaways
- Drain all water systems completely: This includes tanks, lines, and appliances to prevent ice expansion and pipe bursts.
- Use RV antifreeze in plumbing: Non-toxic pink antifreeze protects pipes, pumps, and seals from freezing damage.
- Remove or protect batteries: Cold drains battery life; store them indoors or use a maintainer to keep them charged.
- Seal and insulate vulnerable areas: Windows, vents, and underbelly covers reduce heat loss and deter pests.
- Clean and store appliances properly: Refrigerators, water heaters, and generators need special care to avoid mold and mechanical issues.
- Check seals and exterior for leaks: Prevent moisture intrusion by inspecting roof, windows, and seams before storage.
- Document your winterising process: Keep a checklist to ensure nothing is missed and make spring reactivation easier.
📑 Table of Contents
Why Winterising Your RV Matters
If you’re an RV owner, you know that your home on wheels is more than just a vehicle—it’s your gateway to adventure. But when winter rolls in, that same freedom can turn into a liability if you’re not prepared. Cold temperatures, snow, and ice can wreak havoc on your RV’s systems, leading to cracked pipes, damaged appliances, and expensive repairs. That’s why learning how to winterise an RV isn’t just a good idea—it’s a necessity.
Winterising your RV means preparing it for long-term storage during the colder months. It’s about protecting every component that could be harmed by freezing temperatures, from the plumbing system to the battery and beyond. Think of it like putting your RV into hibernation. When done correctly, winterising ensures that your rig wakes up in the spring ready to roll, without surprises or setbacks.
Many new RV owners underestimate the risks of skipping this process. A single freeze can cause water in the pipes to expand, cracking fittings, tanks, and even the water heater. The cost of replacing a burst pipe or a ruined water pump can easily run into hundreds—or even thousands—of dollars. But with a little time and effort now, you can avoid those headaches entirely. The good news? Winterising isn’t complicated. With the right tools, a clear plan, and this guide, you’ll be able to protect your investment and enjoy peace of mind all winter long.
When to Winterise Your RV
Visual guide about How to Winterise an Rv
Image source: i.ytimg.com
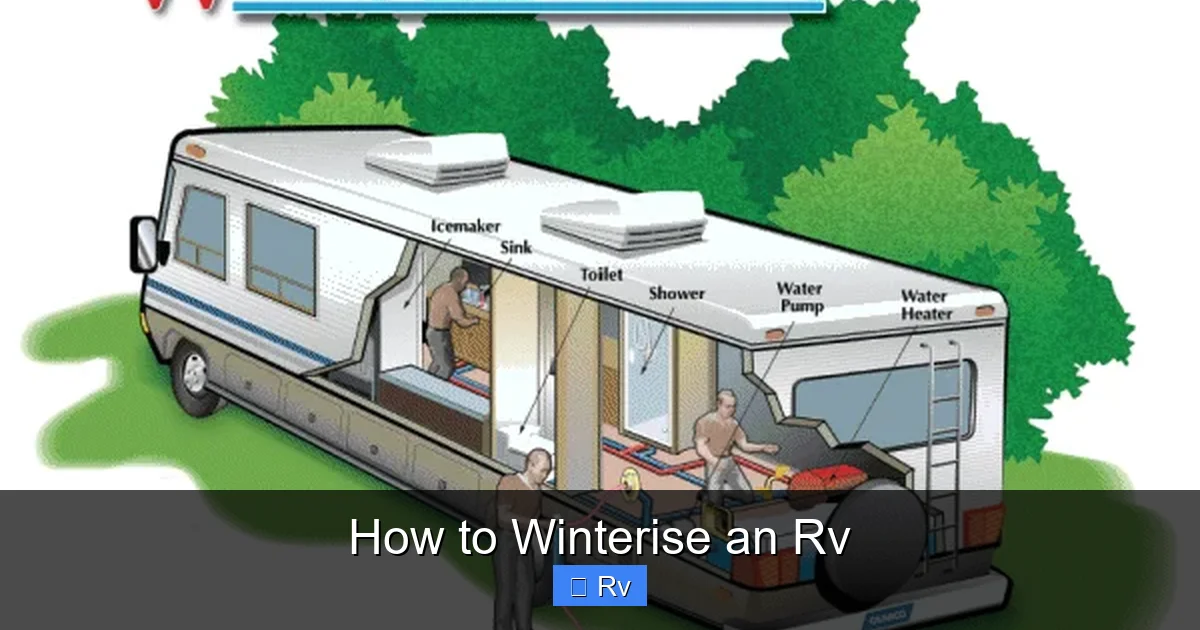
Timing is everything when it comes to winterising your RV. You don’t want to wait until the first frost hits, but you also don’t need to rush at the first sign of cooler weather. The ideal time to winterise is when temperatures are consistently dropping below 40°F (4°C), especially at night. In most regions, this means late fall—typically October or November, depending on your location.
If you live in a mild climate where freezing temps are rare, you might be tempted to skip winterising. But even occasional cold snaps can cause damage. For example, a sudden overnight drop to 28°F (-2°C) can freeze standing water in your pipes, even if it’s just for a few hours. So unless you’re storing your RV in a climate-controlled garage, it’s best to play it safe.
Another factor to consider is how long your RV will be unused. If you’re planning to take it out for a winter trip in December or January, you may not need a full winterisation. Instead, you can use a “partial winterising” method, which involves draining the freshwater system and using antifreeze only in critical areas. But if your RV will sit idle for three months or more, a complete winterisation is strongly recommended.
Keep an eye on your local weather forecast. If a cold front is expected, don’t delay. It’s better to winterise a week early than to rush through the process in freezing conditions. And remember: once you’ve winterised, avoid using any water systems until spring. Even a small amount of fresh water can refill lines and create freeze risks.
Step-by-Step Guide to Winterising Your RV
Visual guide about How to Winterise an Rv
Image source: gocarlife.com
Winterising your RV doesn’t have to be overwhelming. By breaking the process into clear, manageable steps, you can protect your rig efficiently and effectively. Here’s a detailed walkthrough of how to winterise an RV the right way.
1. Drain All Water Tanks and Lines
Start by emptying every water tank in your RV. This includes the freshwater tank, gray water tank, and black water tank. Begin with the black tank—flush it thoroughly using your RV’s built-in flush system or a tank rinser. Then drain the gray water tank. Finally, open the drain valve on the freshwater tank and let it empty completely.
Next, open all faucets—both indoor and outdoor—to release any remaining water in the lines. Don’t forget the shower, toilet, and outdoor shower if your RV has one. Turn on the water pump and let it run for a few seconds to push out trapped water. Then turn off the pump and open the low-point drain valves, usually located under the RV. These valves are designed to drain the lowest points in your plumbing system, where water tends to collect.
2. Blow Out the Water Lines (Optional but Recommended)
For extra protection, consider using an air compressor to blow out the water lines. This method forces any leftover water out of the pipes using compressed air. You’ll need an air compressor with a regulator and a blow-out plug that fits your city water inlet.
Attach the blow-out plug to the inlet, set the compressor to around 30–40 PSI (never exceed 50 PSI), and turn it on. Open each faucet one at a time, starting with the one farthest from the pump. Let the air push out any remaining water, then close the faucet before moving to the next. This step ensures that even tiny amounts of water are removed, reducing the risk of freezing.
3. Add RV Antifreeze to the Plumbing System
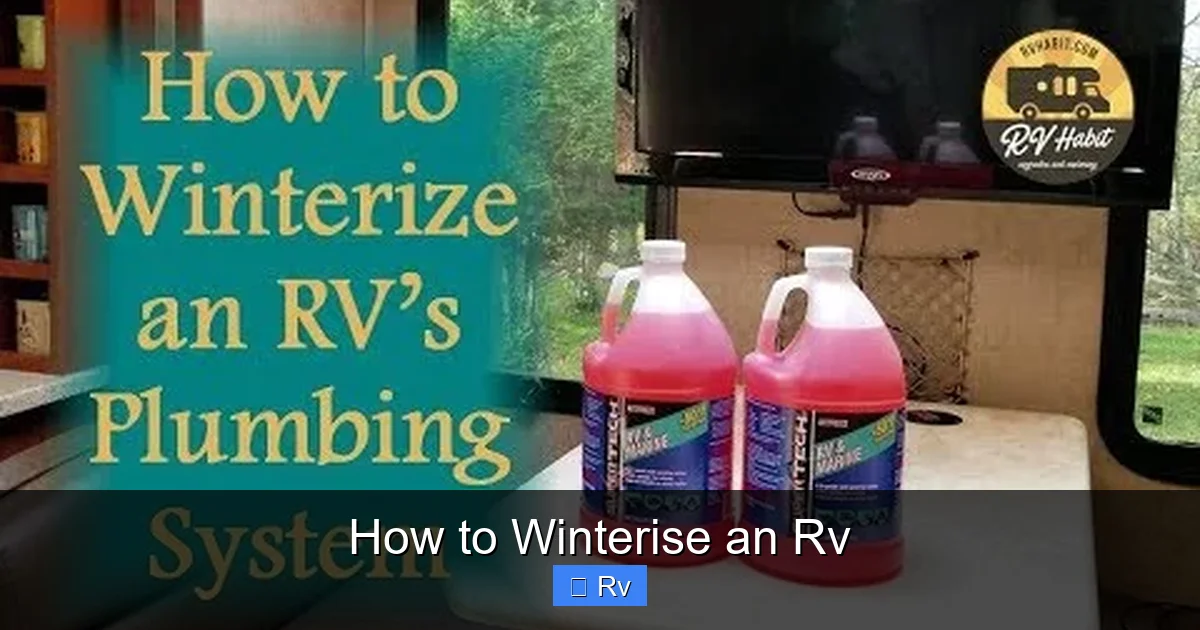
Once the lines are drained (and optionally blown out), it’s time to add non-toxic RV antifreeze. This pink liquid is specifically designed for RVs and won’t harm your plumbing or the environment. Never use automotive antifreeze—it’s toxic and can damage your system.
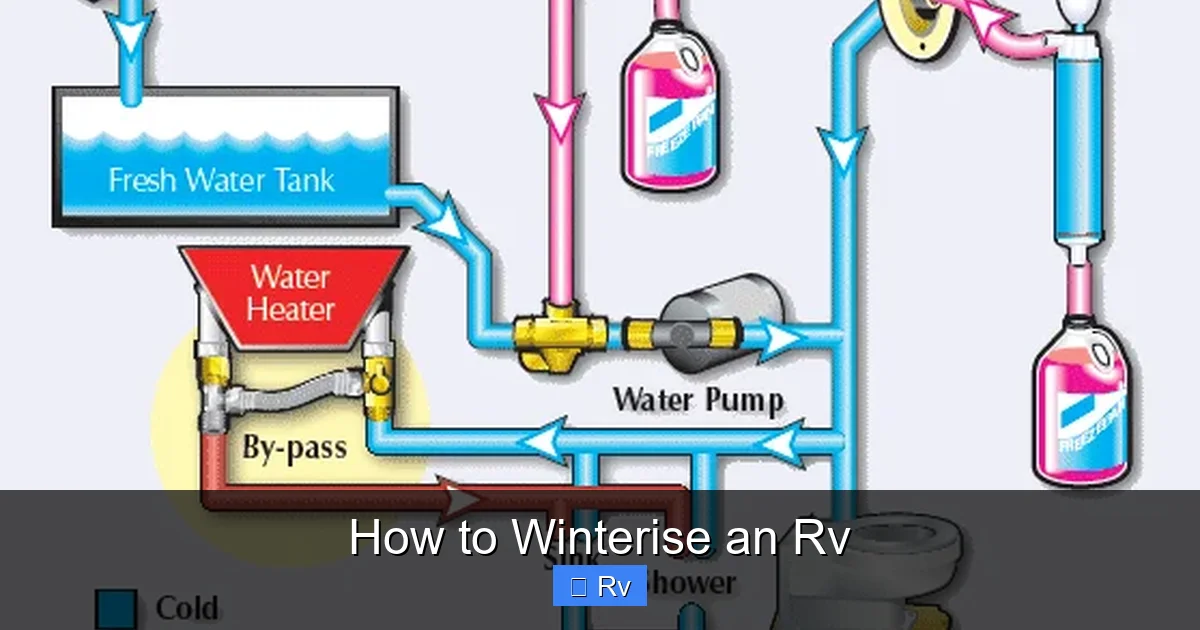
Start by bypassing your water heater. Most RVs have a bypass valve that prevents antifreeze from entering the tank. If yours doesn’t, you’ll need to install one or drain the heater separately. Next, pour about 2–3 gallons of RV antifreeze into the freshwater tank. Turn on the water pump and open each faucet one by one, starting with the one closest to the pump. Let the antifreeze flow until you see pink liquid coming out, then close the faucet. Don’t forget the toilet, shower, and outdoor shower.
Finally, pour a cup of antifreeze directly into each drain trap (sink, shower, etc.) to protect the P-traps from freezing.
4. Winterise the Water Heater
Your water heater is especially vulnerable to freezing. Start by turning off the power—both electric and gas—and letting the unit cool completely. Open the pressure relief valve and the drain plug to empty the tank. Some models also have an anode rod that should be removed and inspected. If it’s corroded, replace it.
If you bypassed the water heater earlier, you’re all set. If not, make sure no antifreeze entered the tank. Either way, leave the drain plug and pressure valve open during storage to prevent pressure buildup.
5. Prepare the Toilet and Holding Tanks
Flush the toilet several times to remove all water from the bowl and valve. Then add a few cups of RV antifreeze to the bowl and flush it through to coat the valve and seal. This prevents freezing and keeps odors at bay.
For the holding tanks, add a holding tank treatment to break down waste and reduce odors. Then close the valves and leave them closed until spring. This prevents any residual moisture from freezing and expanding.
Protecting Your RV’s Exterior and Interior
Visual guide about How to Winterise an Rv
Image source: southernpower.co.za
While the plumbing system gets most of the attention during winterising, your RV’s exterior and interior also need care to stay in top condition.
Clean and Inspect the Exterior
Start by giving your RV a thorough wash. Dirt, grime, and road salt can damage the finish over time, especially in winter. Use a mild soap and rinse thoroughly. Pay special attention to the roof, seals, and seams. Look for cracks, gaps, or worn areas where moisture could enter.
Apply a UV protectant to the roof and sidewalls to prevent sun damage during storage. If you’re storing your RV outdoors, consider using a high-quality RV cover. Make sure it’s breathable to prevent mold and mildew. Avoid plastic tarps—they trap moisture and can cause more harm than good.
Seal Windows, Vents, and Doors
Cold air and pests love to sneak in through gaps. Use weatherstripping or foam tape to seal windows and doors. For roof vents, install vent covers or use vent cushions to insulate and block drafts. Don’t forget the refrigerator vent on the outside—cover it to prevent animals from nesting.
Remove Food and Clean the Interior
Empty all cabinets and refrigerators. Even non-perishable items can attract pests or spoil in extreme temperatures. Clean the fridge thoroughly and leave the door slightly open to prevent mold. Wipe down all surfaces and vacuum the floors.
Consider using moisture absorbers like DampRid in cabinets and storage areas. These help control humidity and prevent musty odors.
Protect the Tires and Chassis
Inflate your tires to the recommended pressure. Cold weather causes air to contract, so check them before storage. If possible, place tire covers to protect against UV damage and cracking. For long-term storage, consider using jack stands to take the weight off the tires.
Battery and Electrical System Care
Your RV’s battery is one of the most vulnerable components in winter. Cold temperatures reduce its capacity and can lead to permanent damage if it’s left discharged.
Remove or Maintain the Battery
If you’re storing your RV for more than a month, remove the battery and store it indoors in a cool, dry place. Keep it on a wooden surface—not concrete—to prevent discharge. Use a battery maintainer or trickle charger to keep it at full charge.
If you can’t remove the battery, disconnect it and use a smart charger to maintain it. Check the charge level monthly.
Check the Generator (If Equipped)
If your RV has a generator, run it for 15–20 minutes before storage to circulate oil and fuel. Add a fuel stabilizer to the tank and run it again to mix it in. Then drain the carburetor if recommended by the manufacturer.
Final Checks and Storage Tips
Before you lock up your RV for the winter, do a final walk-through. Make sure all valves are closed, appliances are off, and nothing is left inside that could cause problems.
Choose the Right Storage Location
If possible, store your RV in a covered, dry location. A garage or carport is ideal. If you must store it outdoors, choose a level, well-drained spot away from trees that could drop branches.
Document Your Winterising Process
Keep a checklist of everything you’ve done. This makes spring reactivation much easier and ensures you don’t forget any steps next year.
Check on Your RV Periodically
Even in storage, it’s a good idea to check on your RV every few weeks. Look for signs of pests, moisture, or damage. A quick inspection can prevent small issues from becoming big problems.
Conclusion
Winterising your RV is one of the most important things you can do to protect your investment. It’s not just about avoiding frozen pipes—it’s about preserving the integrity of your entire system so you can enjoy worry-free adventures when spring arrives. By following this guide on how to winterise an RV, you’ll save money, reduce stress, and keep your home on wheels in peak condition year after year.
Take your time, follow the steps carefully, and don’t skip the details. A little effort now goes a long way. When the snow melts and the roads open up, you’ll be ready to hit the highway with confidence—knowing your RV is as ready for adventure as you are.
Frequently Asked Questions
Can I winterise my RV myself?
Yes, most RV owners can winterise their rigs with basic tools and a little patience. The process involves draining water systems, adding antifreeze, and protecting key components. If you’re unsure, consult your owner’s manual or watch a tutorial.
How much RV antifreeze do I need?
You’ll typically need 2–3 gallons of non-toxic RV antifreeze, depending on your RV’s size and plumbing layout. Pour it into the freshwater tank and run it through all faucets, drains, and the toilet.
Do I need to winterise if I live in a warm climate?
Even in mild areas, occasional cold snaps can occur. If temperatures drop below freezing at night, it’s wise to winterise or at least drain the water system to prevent damage.
Can I use regular antifreeze in my RV?
No. Automotive antifreeze is toxic and can damage your plumbing. Always use non-toxic, RV-specific antifreeze, which is safe for potable water systems.
How do I reactivate my RV after winter?
To de-winterise, flush the antifreeze from the system by running fresh water through all lines. Refill tanks, reconnect the battery, and test all systems before your first trip.
Should I cover my RV during winter storage?
Yes, a breathable RV cover protects against UV rays, dirt, and moisture. Avoid plastic tarps, which can trap condensation and lead to mold or mildew.


