
How to Transfer Ownership of a Tesla
Contents
- 1 Key Takeaways
- 2 📑 Table of Contents
- 3 Introduction: Selling Your Electric Future
- 4 Phase 1: The Pre-Transfer Checklist (Seller’s Preparation)
- 5 Phase 2: The Digital Transfer Process (The Tesla App)
- 6 Phase 3: The Physical Paperwork Dance (DMV/MVA)
- 7 Phase 4: Insurance, Final Steps, and Verification
- 8 Special Scenarios and Troubleshooting
- 9 Conclusion: A Smooth Ride to a New Chapter
- 10 Frequently Asked Questions
Transferring a Tesla is primarily a digital process handled through your Tesla account, unlike traditional cars. You must initiate the transfer in the app, ensure the vehicle’s account is cleared, and handle all state-specific title and registration paperwork separately. Both buyer and seller must update their insurance immediately and verify the transfer is complete in Tesla’s system to avoid future liability.
Key Takeaways
- Initiate Digitally: The Tesla ownership transfer is started by the seller in their Tesla account, not at a DMV or dealership.
- Clear Financials: All pending charges, referrals, and financing/lease obligations must be settled before the transfer can be processed.
- Paperwork is State-Dependent: You must still complete a bill of sale, title assignment, and registration with your local DMV/MVA, as Tesla does not handle this.
- Insurance is Immediate: The buyer must secure new insurance and provide proof to Tesla before the transfer; the seller must cancel or adjust their policy the day after sale.
- Verify Completion: Both parties should confirm the vehicle no longer appears in the seller’s Tesla app and is accessible to the buyer.
[FEATURED_IMAGE_PLACEHOLDER]
📑 Table of Contents
- Introduction: Selling Your Electric Future
- Phase 1: The Pre-Transfer Checklist (Seller’s Preparation)
- Phase 2: The Digital Transfer Process (The Tesla App)
- Phase 3: The Physical Paperwork Dance (DMV/MVA)
- Phase 4: Insurance, Final Steps, and Verification
- Special Scenarios and Troubleshooting
- Conclusion: A Smooth Ride to a New Chapter
Introduction: Selling Your Electric Future
Selling your Tesla is an exciting step, whether you’re upgrading to a new model or passing your electric vehicle on to a new owner. But here’s the thing: transferring ownership of a Tesla isn’t like selling your old Jeep or Honda. There’s no physical key to hand over, and the process is deeply integrated into Tesla’s digital ecosystem. This guide will walk you through every single step, from the first click in your Tesla app to the final paperwork at the DMV, ensuring a clean, secure, and stress-free transition for everyone involved.
Think of it this way: your Tesla’s “identity” lives in two places. First, it’s in the car itself, synced to your personal Tesla account. Second, it’s tied to the physical title and registration issued by your state. A successful transfer requires updating both of these correctly. Miss a step, and you could face billing surprises, registration headaches, or even liability issues. Let’s break it down.
Phase 1: The Pre-Transfer Checklist (Seller’s Preparation)
Before you even list your Tesla or agree on a price, you need to get your digital and physical ducks in a row. Proper preparation is 90% of the battle.

Visual guide about How to Transfer Ownership of a Tesla
Image source: i.ytimg.com
Step 1: Settle All Financial Obligations
Log into your Tesla account online or in the app. This is your command center. First, check for any outstanding balances. This includes:
- Pending Supercharger or Connectivity Fees: Any unpaid charging or subscription bills must be cleared.
- Active Referrals: If you used a referral code to buy the car, any associated benefits or credits should be resolved.
- Financing or Lease Payoff: If the car is financed through Tesla or a third party, you must obtain a formal payoff quote. The lienholder (Tesla Finance, a bank, etc.) will hold the title. You cannot transfer ownership until this lien is satisfied. For a lease, you must follow the specific lease-end or lease-transfer process outlined in your contract, which is separate from a standard ownership transfer.
Pro Tip: Start this process early. Getting a payoff quote from a bank can take days. You cannot proceed with the Tesla app transfer until the lien is released.
Step 2: Remove All Personal Data & Apps
Your Tesla is a rolling computer. Go through the car’s settings and your Tesla app to wipe everything personal:
- Delete your phone key (Phone Key) and any other paired keys/fobs.
- Remove all driver profiles and saved destinations (Home, Work).
- Cancel any scheduled services or app-based commands.
- If you’ve added third-party apps via the Tesla app (like Spotify, Tidal, or even custom apps), ensure any subscriptions are canceled and logins are removed.
This protects your privacy and prevents the new owner from accessing your accounts.
Step 3: Gather Physical Paperwork
While Tesla handles the digital side, your state government handles the legal title and registration. Find these documents:
- Certificate of Title: The physical “pink slip.” If there’s a lien, the lender holds it. You’ll need the lienholder to sign it over to you (or directly to the buyer) upon payoff.
- Current Registration Card: Shows the vehicle is currently registered in your name.
- Bill of Sale Template: While not always required by the DMV, a detailed bill of sale is crucial evidence of the transaction price and date for both tax and liability purposes. You can find state-specific templates online.
- Lien Release Document: If you paid off a loan, get this from the lender. It’s proof the lien is satisfied.
Example: If you’re selling a Model 3 in California, you’ll need the California DMV’s REG 256 form (Notice of Transfer and Release of Liability), which you file online immediately after the sale. Have this ready.
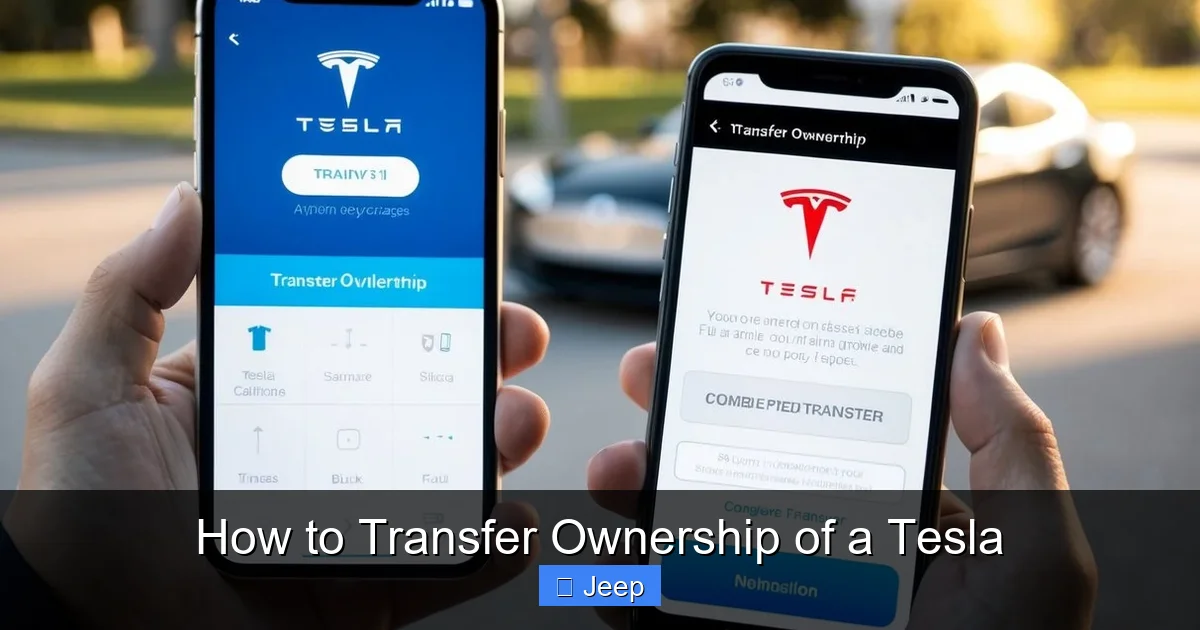
Phase 2: The Digital Transfer Process (The Tesla App)
This is the unique, streamlined part. Once you have a serious buyer (they have financing or cash ready), you initiate the transfer.
Visual guide about How to Transfer Ownership of a Tesla
Image source: automotiveglory.com
How to Start the Transfer in Your Tesla Account
1. Log into your Tesla account on a web browser or the mobile app.
2. Navigate to your vehicle’s details page.
3. Look for the option: “Transfer Ownership” or “Sell Vehicle”.
4. You will be prompted to enter the new owner’s email address and the vehicle’s current odometer reading.
An invitation is sent to the buyer’s email. They must have or create a Tesla account to accept it.
What the Buyer Must Do to Accept
The new owner receives an email with a link. They must:
- Log into or create their Tesla account.
- Review and accept the ownership transfer.
- Add their own payment method (credit card) for charging and any subscriptions.
- Set up their own driver profile and phone key in the car.
Important: The transfer is not instantaneous. Tesla states it can take 1-3 business days to process. During this time, the vehicle’s account is in a pending state. Do not cancel your insurance until you see the vehicle removed from your account.
Handling the “Add Driver” During Transition
Sometimes, a buyer needs a few days to get their own account set up. You can temporarily add them as an “Additional Driver” in your Tesla app (under Security & Drivers). This gives them limited app access and the ability to drive the car, but does not transfer financial responsibility. You must still complete the full ownership transfer as soon as possible. Never leave the car in your account after the sale.
Phase 3: The Physical Paperwork Dance (DMV/MVA)
This is the part that never goes away, no matter how high-tech the car is. The digital transfer with Tesla and the physical title transfer with the state are separate processes.
Visual guide about How to Transfer Ownership of a Tesla
Image source: koala.sh
Completing the Title Assignment
On the back of the Certificate of Title, you’ll find the “Assignment of Title” section. You and the buyer must fill this out accurately:
- Seller’s Name & Address: As it appears on the title.
- Buyer’s Name & Address: Must match their ID at the DMV.
- Odometer Reading: Mandatory for vehicles under 10 years old. Disclose it honestly.
- Sale Price: The actual amount the buyer paid.
- Date of Sale.
- Signatures: Both parties must sign in the designated areas. Some states require notarization.
Critical: Do not sign the title until you are in the presence of the buyer and have confirmed payment (cash, cashier’s check, cleared wire). A signed blank title is a target for fraud.
Filing the Notice of Transfer (Seller’s Protection)
This is your #1 legal protection after handing over the keys. As soon as the sale is final (money and title exchanged), you must file a formal notice with your state’s DMV/MVA that you no longer own the vehicle. This is often called a:
- “Notice of Transfer and Release of Liability” (California)
- “Release of Liability” (many states)
- “Vehicle Transfer Notification”
You can usually do this online in minutes. It provides a timestamped record that you sold the car on a specific date. If the new owner gets a ticket or is in an accident before they register it, this document shields you from liability. Keep a copy of the confirmation for your records.
Buyer’s Responsibility: Registration and Title Application
The buyer is responsible for taking the signed title, the bill of sale, their proof of insurance, and their ID to their local DMV/MVA office. They will:
- Apply for a new title in their name (paying any sales/use tax).
- Submit the signed-over title.
- Register the vehicle and get new license plates or a registration sticker.
Timeline: The buyer should do this as soon as possible, usually within 10-30 days, depending on state law. Driving with expired or out-of-state tags is illegal.
Phase 4: Insurance, Final Steps, and Verification
The paperwork and digital transfer are done, but the process isn’t over until everything is verified and updated.
Insurance: The Non-Negotiable Step
For the Seller: Call your insurance company the day after the sale (or the effective date on your notice of transfer) and inform them the vehicle is no longer in your possession. Request written confirmation (email is fine) that the policy has been canceled or that the vehicle has been removed. This stops premium charges.
For the Buyer: They must have active insurance on the Tesla before they accept the ownership transfer in the Tesla app and before they drive it away. The Tesla app will ask for proof of insurance (an insurance card or binder) during the acceptance process. They should shop around; a new policy for a Tesla can be more expensive than for a gas car. They should also check if their insurer offers a discount for EVs or home charging setups.
Final Verification: Confirm the Transfer is Complete
A week after initiating the transfer:
- Seller: Log into your Tesla account. The vehicle should be gone. You should receive a final invoice for any prorated charges up to the transfer date. If the car still appears, contact Tesla Support immediately.
- Buyer: They should now see the vehicle in their Tesla app. They can summon it, check the state of charge, and access all controls. They should also receive the vehicle’s service history and any remaining warranty information from Tesla.
This verification is the final digital checkpoint. If both parties see the expected result, the online transfer was successful.
Special Scenarios and Troubleshooting
Not every sale is straightforward. Here’s how to handle curveballs.
What If the Car Has a Cracked Window or Damage?
You must disclose any known damage. Minor issues like a chipped windshield or door ding should be repaired before sale for the best price, or the price should be reduced to account for the repair cost. If the buyer agrees to take it “as-is,” this must be clearly stated in the bill of sale. Major damage significantly impacts value and may complicate the title transfer if the car is deemed a total loss by an insurance company.
Transferring a Leased Tesla
This is a different beast. You generally cannot “transfer” a lease like an ownership transfer. You have three options:
- Lease-End: Return the car to Tesla Financial at the end of the term.
- Lease Assumption: Some lessors allow a third party to assume the remaining lease payments. This requires credit approval by the lessor and a formal assumption agreement. Tesla Financial’s policies vary; you must call them directly.
- Buyout and Resell: Pay the residual value (purchase option price) to buy the car outright, get the title, and then sell it as a normal owned vehicle. This requires significant upfront capital.
Never try to use the standard ownership transfer process for a leased vehicle. It will fail, and you’ll be in breach of contract.
The Seller Won’t Respond or Complete the Transfer
If you’ve sold the car and the seller is not responding to your requests to initiate the transfer, you have limited options. First, ensure you have your bill of sale and proof of payment. Then:
- Contact Tesla Support. Explain you are the new owner, provide the VIN, your bill of sale, and proof of payment. They may be able to escalate or provide guidance.
- Send a formal written request (email with read receipt) to the seller demanding they initiate the transfer within a specific timeframe, citing your state’s notice of liability filing you already completed.
- As a last resort, consult with a lawyer about your rights, as the seller remains legally responsible for the vehicle until the transfer is complete.
This is why filing your Notice of Transfer with the DMV immediately is so critical—it starts the legal clock in your favor.
Conclusion: A Smooth Ride to a New Chapter
Transferring ownership of a Tesla is a modern two-step dance: the swift, digital step through the Tesla app, and the traditional, paper-based step through your state’s DMV. By following this guide—settling finances, wiping your data, initiating the app transfer promptly, handling the title correctly, and filing your notice of liability—you avoid the common pitfalls that lead to billing disputes, registration delays, and legal headaches. Remember, clear communication with the buyer, meticulous record-keeping, and acting on each step without delay are your best allies. You’ve enjoyed the silent, instant torque of your Tesla; now you can enjoy the satisfaction of a clean, complete, and professional handoff to its next lucky owner.
Frequently Asked Questions
How long does the Tesla digital ownership transfer take?
Once initiated by the seller and accepted by the buyer, Tesla states the process typically takes 1-3 business days to complete. During this period, the vehicle’s account is in a pending state. The buyer cannot access full vehicle controls via the app until it’s finalized.
Are there any fees to transfer a Tesla through the Tesla app?
No. Tesla does not charge a fee to process the ownership transfer in their system. However, the buyer will pay state-mandated sales/use tax, title fees, and registration fees when they go to their DMV to get the new title and tags in their name.
Can I transfer a Tesla that is still under finance or lease?
For a financed car, you must first pay off the loan in full. The lienholder (e.g., Tesla Finance) will then release the title to you, after which you can proceed with a standard sale. For a leased car, you generally cannot perform a standard ownership transfer. You must explore a lease assumption (if approved by the lessor) or a lease-end buyout. Contact your leasing company for specific, binding procedures.
What happens if I don’t file a Notice of Transfer with my DMV after selling my Tesla?
You remain the legal owner in the eyes of your state until the new buyer registers the car. This means you could be held liable for parking tickets, toll violations, or accidents involving the vehicle before it’s re-registered. Filing the notice (often online) creates an official record of the sale date, protecting you from future liability.
Do I need to physically meet the buyer to transfer ownership?
For the Tesla app transfer, no. The seller initiates online by entering the buyer’s email, and the buyer accepts online. However, for the physical title and payment exchange, meeting in a safe, public place is highly recommended to verify the buyer’s identity, complete the title assignment correctly, and exchange payment (preferably a cashier’s check or bank wire) before handing over the keys and signed title.
What documents are absolutely required for the buyer to register the Tesla?
The buyer must have: 1) The properly signed and completed Certificate of Title from the seller, 2) A signed Bill of Sale, 3) Proof of the buyer’s new insurance for the Tesla, 4) The buyer’s valid driver’s license/ID, and 5) The completed registration application (available at the DMV or online) and payment for all fees and taxes. Requirements can vary slightly by state, so checking the local DMV website is essential.


