
How to Charge an Rv Air Conditioner
Contents
- 1 Key Takeaways
- 2 📑 Table of Contents
- 3 Understanding Your RV Air Conditioner System
- 4 Signs Your RV Air Conditioner Needs a Charge
- 5 Tools and Equipment Needed to Charge an RV Air Conditioner
- 6 Step-by-Step Guide to Charging Your RV Air Conditioner
- 7 Maintaining Your RV Air Conditioner After Charging
- 8 When to Call a Professional
- 9 Conclusion
- 10 Frequently Asked Questions
Charging an RV air conditioner isn’t as simple as topping off your car’s AC—it requires precision, the right tools, and a solid understanding of refrigerant systems. This guide walks you through everything from diagnosing low refrigerant to safely recharging your unit, ensuring your RV stays cool and efficient on the road.
Key Takeaways
- Low refrigerant is a common cause of poor cooling in RV air conditioners. If your unit runs but doesn’t cool well, it may need a recharge.
- Always diagnose the problem first—don’t assume it’s a refrigerant issue. Leaks, dirty coils, or electrical faults can mimic low charge symptoms.
- Use the correct type of refrigerant (usually R-22 or R-410A) for your specific RV AC model. Using the wrong type can damage the system.
- Charging requires specialized tools: a manifold gauge set, vacuum pump, and refrigerant scale. These ensure safe and accurate recharging.
- Never overcharge your RV air conditioner. Too much refrigerant reduces efficiency and can damage the compressor.
- Safety is critical—wear protective gear and work in a well-ventilated area. Refrigerants are hazardous if mishandled.
- Consider professional help if you’re unsure. Improper charging can void warranties or cause costly repairs.
📑 Table of Contents
Understanding Your RV Air Conditioner System
If you’ve ever spent a sweltering summer day in your RV wishing for a cool breeze, you know how vital your air conditioner is. But unlike your home AC or even your car’s climate control, RV air conditioners have unique challenges—limited space, power constraints, and exposure to the elements. Before you even think about charging your RV air conditioner, it’s important to understand how it works.
RV air conditioners are typically rooftop units that use a vapor-compression refrigeration cycle. This means they rely on a refrigerant—a special chemical that absorbs and releases heat—to cool the air inside your rig. The refrigerant travels through a closed loop, changing from gas to liquid and back again as it moves through the compressor, condenser, expansion valve, and evaporator. When everything is working correctly, warm air from inside the RV is pulled over the cold evaporator coils, cooled, and then blown back into the living space.
But here’s the catch: this system is sealed. In theory, refrigerant shouldn’t need to be added unless there’s a leak. So if your RV AC isn’t cooling properly, the first step isn’t to grab a can of refrigerant—it’s to figure out *why* it’s not working. Low refrigerant is just one possible cause. Others include clogged air filters, dirty coils, faulty thermostats, or electrical issues. That’s why diagnosing the problem correctly is the most important step before attempting to charge your RV air conditioner.
Types of RV Air Conditioners
Not all RV air conditioners are created equal. Most fall into one of two categories: ducted or non-ducted (also called ductless). Ducted units distribute cool air through a network of vents, similar to a home HVAC system. Non-ducted models blow cool air directly into the living space and are often used in smaller RVs or as add-on units.
Another key difference is the type of refrigerant they use. Older RV AC units often use R-22 (also known as Freon), which is being phased out due to environmental concerns. Newer models typically use R-410A, a more eco-friendly alternative. Knowing which refrigerant your unit uses is crucial—mixing types or using the wrong one can damage your system and is illegal in many areas.
To find out what refrigerant your RV air conditioner uses, check the manufacturer’s label on the unit itself. It’s usually located on the side or bottom of the rooftop AC. The label will also list the model number, serial number, and sometimes the recommended charge amount (measured in pounds or ounces). Keep this info handy—it’ll save you time and trouble later.
Signs Your RV Air Conditioner Needs a Charge
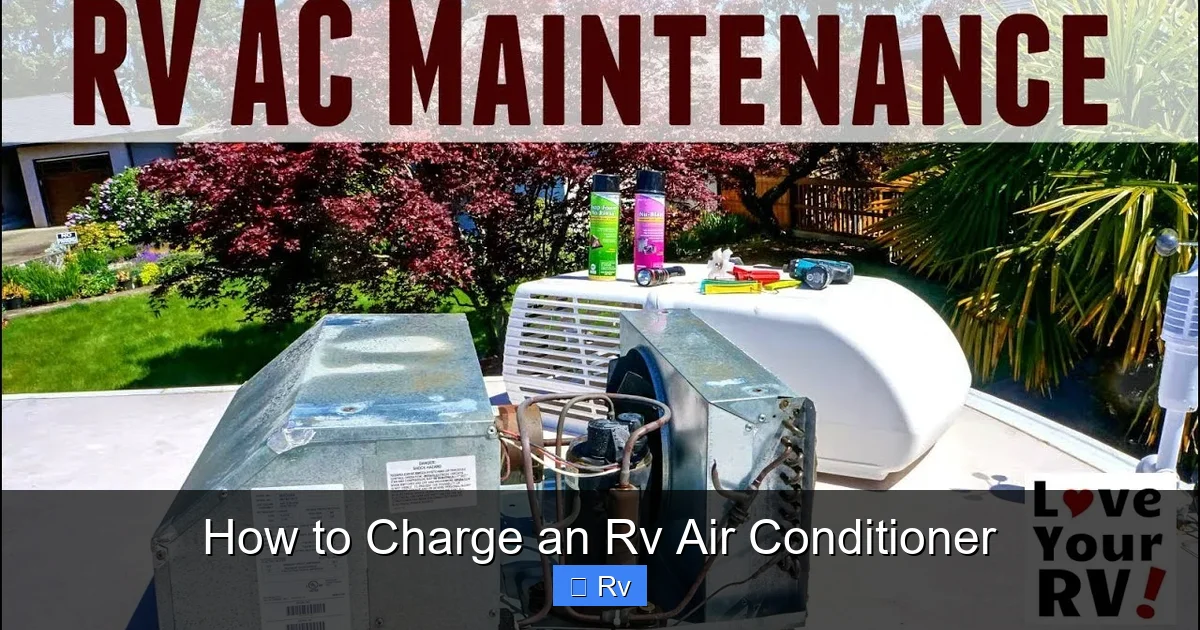
Visual guide about How to Charge an Rv Air Conditioner
Image source: i.ytimg.com
So how do you know if your RV air conditioner actually needs a recharge? It’s easy to assume that weak cooling means low refrigerant, but that’s not always the case. Let’s look at the most common symptoms and what they might really mean.
One of the first signs is reduced cooling performance. If your AC runs but doesn’t seem to be blowing cold air—or if it takes much longer than usual to cool the interior—low refrigerant could be the culprit. You might also notice that the air coming out of the vents is only slightly cooler than room temperature, even after running for an hour.
Another red flag is ice buildup on the evaporator coils. This happens when the refrigerant level is too low, causing the coils to get excessively cold. As moisture in the air condenses on the coils, it freezes. While a small amount of frost is normal during startup, thick ice that doesn’t melt after turning off the AC is a problem. Ice can block airflow and eventually damage the unit.
You might also hear unusual noises, like hissing or bubbling, coming from the AC unit. Hissing could indicate a refrigerant leak, while bubbling might suggest air or moisture in the system—both of which can affect performance. Additionally, if your AC frequently cycles on and off (short cycling), it could be due to low refrigerant pressure.
But again, don’t jump to conclusions. Dirty air filters can restrict airflow and mimic low refrigerant symptoms. A clogged condenser coil can reduce heat exchange, making the AC work harder without cooling effectively. Even a faulty thermostat can cause the unit to behave as if it’s undercharged.
That’s why it’s essential to perform a thorough inspection before deciding to charge your RV air conditioner. Start by checking the air filter—replace it if it’s dirty. Clean the evaporator and condenser coils with a soft brush or coil cleaner. Make sure the vents aren’t blocked and that the thermostat is set correctly. If the problem persists after these steps, then it’s time to consider a refrigerant recharge.
When Not to Charge Your RV Air Conditioner
Here’s a hard truth: not every poorly cooling RV AC needs a recharge. In fact, adding refrigerant without fixing the underlying issue can make things worse. For example, if there’s a leak in the system, simply topping off the refrigerant is a temporary fix. The leak will continue to drain the charge, and you’ll be back to square one—or worse, you might overcharge the system, which can damage the compressor.
Overcharging is a serious risk. Too much refrigerant increases pressure in the system, which can cause the compressor to overheat or fail. It also reduces efficiency, meaning your AC will use more power to do less cooling. In extreme cases, overcharging can lead to a blown seal or ruptured hose.
Another reason not to charge your AC blindly is environmental and legal. Refrigerants like R-22 are regulated because they deplete the ozone layer. Releasing them into the atmosphere is illegal in the U.S. and many other countries. Only certified technicians are allowed to handle certain refrigerants, and improper charging can result in fines.
So when should you avoid charging? If you suspect a major leak, if the unit is very old and inefficient, or if you’re not confident in your ability to do the job safely, it’s better to call a professional. Also, if your AC has never been serviced or hasn’t been used in years, there could be other issues—like seized compressors or dried-out seals—that a simple recharge won’t fix.
Tools and Equipment Needed to Charge an RV Air Conditioner
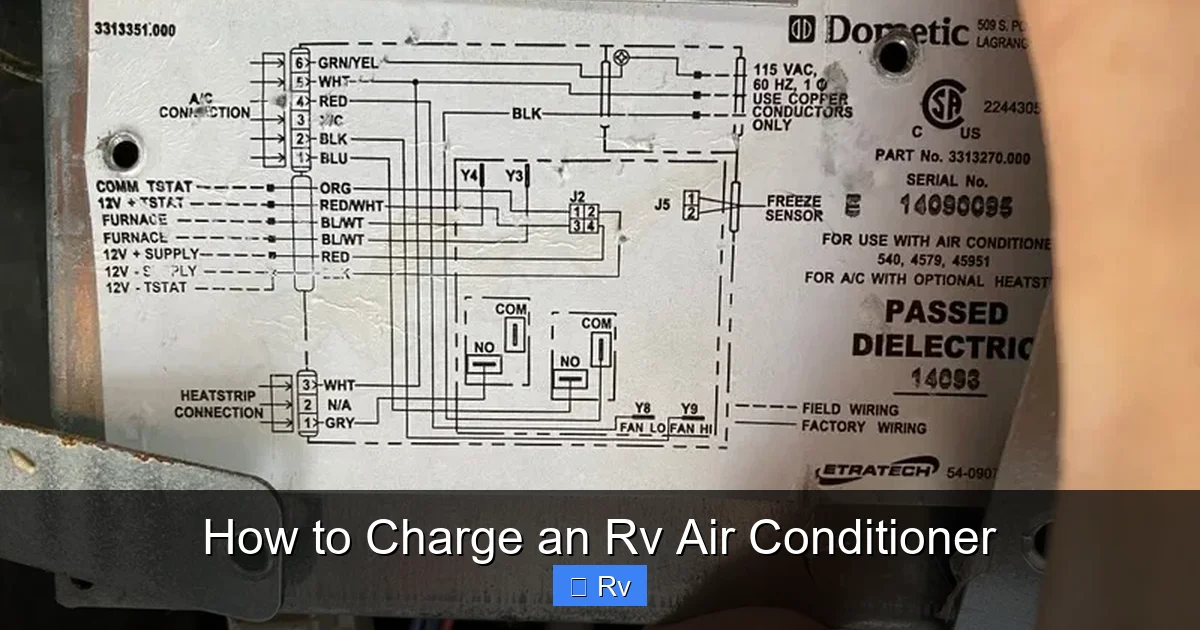
Visual guide about How to Charge an Rv Air Conditioner
Image source: i1.wp.com
Charging an RV air conditioner isn’t a job for the average DIYer with a wrench and a can of Freon. It requires specialized tools and a good understanding of refrigeration systems. Here’s what you’ll need to do the job safely and correctly.
First and foremost, you’ll need a manifold gauge set. This tool connects to the service ports on your AC unit and allows you to monitor pressure levels in both the high- and low-pressure sides of the system. The gauges are color-coded: blue for low pressure, red for high pressure, and yellow for the refrigerant hose. The manifold set also has valves that let you control the flow of refrigerant.
Next, you’ll need a vacuum pump. Before adding refrigerant, you must remove all air and moisture from the system. Air reduces efficiency and can cause corrosion, while moisture can freeze and block the expansion valve. A vacuum pump pulls a deep vacuum (usually below 500 microns) to ensure the system is clean and dry. This step is critical—skipping it can ruin your AC.
You’ll also need a refrigerant scale. Refrigerant must be added by weight, not by pressure or time. The scale ensures you add the exact amount specified by the manufacturer. Overcharging or undercharging can both cause problems, so precision is key.
Of course, you’ll need the refrigerant itself. Make sure you have the correct type—R-22 or R-410A—and that it’s in a sealed, approved cylinder. Never use automotive refrigerant in an RV AC—it’s not compatible and can damage the system.
Other helpful tools include safety goggles, gloves, and a digital thermometer to measure air temperature at the vents. A leak detection kit (with UV dye or electronic detector) can help you find leaks before or after charging. And don’t forget a flashlight and a ladder—you’ll need to access the rooftop unit safely.
Safety Precautions When Handling Refrigerant
Refrigerants are not toys. They can be dangerous if mishandled. Always wear safety goggles and gloves when working with refrigerant. If it contacts your skin or eyes, it can cause frostbite or chemical burns. Work in a well-ventilated area, preferably outdoors, to avoid inhaling fumes.
Never release refrigerant into the atmosphere. It’s illegal and harmful to the environment. If you’re not certified to handle certain refrigerants, don’t attempt to charge the system yourself. In the U.S., EPA Section 608 certification is required for anyone working with refrigerants.
Also, be aware of the pressure in the system. High-pressure refrigerant can cause hoses to burst or fittings to fail. Always open valves slowly and monitor the gauges. If you see pressure spikes or unusual readings, stop immediately and investigate.
Finally, make sure your RV is parked on level ground and the AC unit is turned off before you begin. Working on a hot or running unit increases the risk of injury.
Step-by-Step Guide to Charging Your RV Air Conditioner
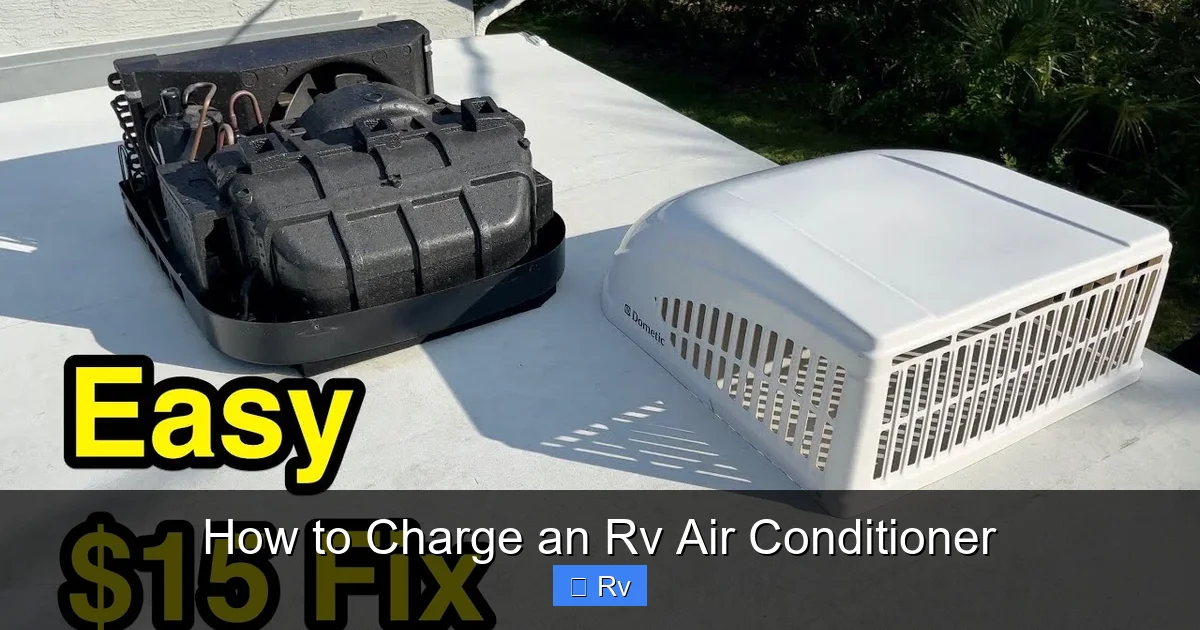
Visual guide about How to Charge an Rv Air Conditioner
Image source: i.ytimg.com
Now that you understand the system, the tools, and the risks, let’s walk through the actual process of charging your RV air conditioner. This is a detailed, step-by-step guide to help you do it right.
Step 1: Turn Off the Power
Before you do anything, turn off the power to your RV air conditioner. This means switching off the breaker in your RV’s electrical panel and, if possible, disconnecting the unit from shore power. Safety first—working on a live electrical system is extremely dangerous.
Step 2: Locate the Service Ports
Climb onto the roof of your RV (use a sturdy ladder and have someone spot you) and locate the service ports on your air conditioner. These are small valves, usually covered by caps, where you’ll connect the manifold gauge set. There are typically two ports: one for the low-pressure side (suction line) and one for the high-pressure side (discharge line). The low-pressure port is usually larger and located near the compressor.
Step 3: Connect the Manifold Gauge Set
Attach the blue hose to the low-pressure service port and the red hose to the high-pressure port. The yellow hose will connect to your refrigerant cylinder. Make sure all connections are tight but don’t overtighten—you could damage the valves.
Step 4: Evacuate the System
Before adding refrigerant, you must remove air and moisture. Connect the vacuum pump to the yellow hose and open the valves on the manifold set. Turn on the pump and let it run until the vacuum reaches below 500 microns (this can take 30 minutes to an hour). This ensures the system is clean and dry.
Step 5: Weigh the Refrigerant
Place your refrigerant cylinder on the scale and zero it out. This allows you to measure exactly how much refrigerant you’re adding. Refer to the manufacturer’s label for the correct charge amount—usually between 1.5 and 3 pounds for most RV units.
Step 6: Add the Refrigerant
With the system under vacuum, slowly open the valve on the refrigerant cylinder. The vacuum will pull the refrigerant into the system. Watch the scale and stop when you’ve added the correct amount. Close the valve and disconnect the hoses.
Step 7: Test the System
Turn the power back on and run the AC. Monitor the gauges and check the temperature of the air coming from the vents. It should be 15–20°F cooler than the ambient air. If it’s not, there may still be an issue—like a leak or airflow restriction.
Step 8: Check for Leaks
After charging, inspect the system for leaks. Use a leak detector or soapy water on fittings and connections. Bubbles indicate a leak that needs to be repaired.
Maintaining Your RV Air Conditioner After Charging
Charging your RV air conditioner is just one part of keeping it running smoothly. Regular maintenance can prevent future problems and extend the life of your unit.
Start by cleaning or replacing the air filter every month during heavy use. A dirty filter restricts airflow and makes the AC work harder. Next, inspect the evaporator and condenser coils annually. Use a soft brush or coil cleaner to remove dirt and debris.
Check the seals around the rooftop unit to ensure they’re intact. Damaged seals can let in moisture and reduce efficiency. Also, make sure the drain pan and drain line are clear—clogged drains can cause water damage.
Finally, have your AC professionally serviced every few years. A technician can check for leaks, test electrical components, and ensure the refrigerant level is correct.
When to Call a Professional
While charging your RV air conditioner is possible for a skilled DIYer, there are times when it’s best to call in a professional. If you’re not comfortable working on rooftops, handling refrigerants, or using specialized tools, don’t risk it. Also, if you suspect a major leak, compressor failure, or electrical issue, a certified technician has the experience and equipment to diagnose and fix the problem safely.
Professional service also ensures compliance with environmental regulations. Many shops recover and recycle refrigerant properly, which protects the environment and keeps you legal.
Conclusion
Charging an RV air conditioner is a complex but manageable task if you have the right knowledge, tools, and precautions. It starts with understanding your system, diagnosing the real issue, and using the correct refrigerant. With careful steps—evacuating the system, weighing the charge, and testing performance—you can restore cooling power to your RV.
But remember: safety and accuracy are paramount. Overcharging, using the wrong refrigerant, or ignoring leaks can lead to costly repairs. When in doubt, consult a professional. With proper care, your RV air conditioner will keep you cool and comfortable on every adventure.
Frequently Asked Questions
Can I charge my RV air conditioner myself?
Yes, if you have the right tools, knowledge, and safety gear. However, handling refrigerants requires caution, and improper charging can damage your system or violate environmental laws.
How often does an RV air conditioner need to be recharged?
Ideally, never—RV AC systems are sealed and shouldn’t lose refrigerant. If it needs frequent recharging, there’s likely a leak that needs repair.
What happens if I overcharge my RV air conditioner?
Overcharging increases system pressure, reduces efficiency, and can damage the compressor. It may also cause the unit to shut down or fail prematurely.
Can I use car AC refrigerant in my RV?
No. RV air conditioners use different refrigerants (like R-22 or R-410A) and operate under different conditions. Using automotive refrigerant can damage the system.
How do I know if my RV AC has a refrigerant leak?
Signs include hissing sounds, ice on the coils, or consistently low cooling. Use a leak detector or soapy water to find the source of the leak.
Is it legal to charge my own RV air conditioner?
In the U.S., only EPA-certified technicians can handle certain refrigerants like R-22. For R-410A, DIY charging is possible but must be done responsibly to avoid environmental harm.


