
How to Adjust Rv Door Hinges
Contents
- 1 Key Takeaways
- 2 📑 Table of Contents
- 3 Why RV Door Hinges Need Adjusting
- 4 Signs Your RV Door Hinges Need Adjustment
- 5 Tools and Materials You’ll Need
- 6 Step-by-Step Guide to Adjusting RV Door Hinges
- 7 Common Mistakes to Avoid
- 8 When to Replace RV Door Hinges
- 9 Maintaining Your RV Door Hinges
- 10 Conclusion
- 11 Frequently Asked Questions


Adjusting RV door hinges may seem tricky, but with the right tools and a little patience, it’s a simple DIY fix. This guide walks you through identifying misalignment, loosening screws, realigning the door, and testing for smooth operation—so you can keep your RV door working perfectly on every trip.
Key Takeaways
- Check for misalignment first: Look for gaps, sticking, or uneven closing to determine if hinge adjustment is needed.
- Use the right tools: A screwdriver, wrench, and level are essential for adjusting RV door hinges safely and effectively.
- Loosen, don’t remove: Slightly loosen hinge screws to allow movement—never fully remove them unless replacing hardware.
- Adjust incrementally: Make small tweaks and test frequently to avoid overcorrecting and causing new alignment issues.
- Test after each adjustment: Open and close the door multiple times to ensure smooth operation and proper sealing.
- Lubricate moving parts: Apply silicone spray or dry lubricant to hinges and latches to reduce wear and improve function.
- Know when to replace: If hinges are bent, cracked, or stripped, replacement is safer and more effective than repeated adjustments.
📑 Table of Contents
Why RV Door Hinges Need Adjusting
RV doors endure a lot—constant opening and closing, temperature changes, road vibrations, and exposure to the elements. Over time, these factors can cause hinges to loosen or shift, leading to misalignment. A misaligned RV door might not close properly, leave gaps that let in drafts or insects, or even stick when you try to open it. Ignoring these issues can lead to bigger problems, like damaged seals, warped frames, or difficulty locking the door securely.
Adjusting RV door hinges is one of the most common maintenance tasks RV owners face. Unlike home doors, RV doors are subject to movement from travel, which can jostle hardware out of place. Even a small shift in the hinge alignment can affect how the door sits in the frame. The good news? Most hinge adjustments are quick, inexpensive, and don’t require professional help. With a few basic tools and some patience, you can restore your door to smooth, reliable operation.
Whether you’re a full-time RVer or take weekend trips, knowing how to adjust your RV door hinges is a valuable skill. It saves you time, money, and frustration on the road. Plus, a well-aligned door improves energy efficiency by maintaining a tight seal, which helps keep your interior comfortable in extreme temperatures. In this guide, we’ll walk you through everything you need to know—from spotting the signs of misalignment to making precise adjustments and maintaining your hinges for long-term performance.
Signs Your RV Door Hinges Need Adjustment
Before diving into adjustments, it’s important to confirm that your hinges are actually the problem. Not all door issues stem from hinge misalignment. Some may be due to warped frames, damaged weatherstripping, or latch problems. However, if you notice any of the following signs, hinge adjustment is likely needed.
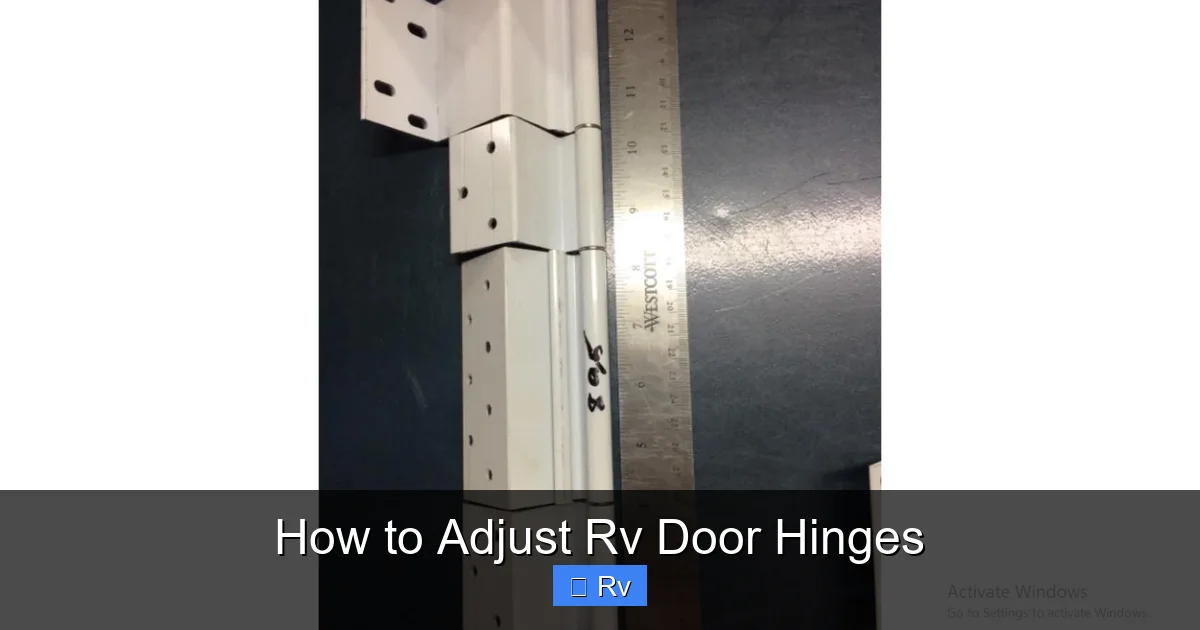
Visual guide about How to Adjust Rv Door Hinges
Image source: i.ytimg.com
Door Sticks or Rubs Against the Frame
One of the most obvious signs is when your door drags or rubs against the frame when opening or closing. You might hear a scraping sound or feel resistance. This usually means the door has shifted downward or sideways, causing it to make contact with the frame. Check both the top and bottom edges—rubbing at the top often indicates the door has sagged, while bottom rubbing suggests it’s shifted forward or backward.
Gaps Between Door and Frame
Look closely at the edges of your door when it’s closed. If you see uneven gaps—especially at the top or sides—it’s a clear sign of misalignment. A properly aligned door should have consistent spacing all around. Gaps not only compromise security but also allow air, moisture, and pests to enter. In colder climates, these gaps can significantly impact heating efficiency.
Difficulty Latching or Locking
If your door doesn’t latch smoothly or the lock doesn’t engage easily, hinge alignment could be the culprit. When hinges shift, the strike plate (the metal piece the latch hooks into) may no longer align with the latch itself. This forces you to jiggle the door or apply extra pressure to close it, which can wear down the lock mechanism over time.
Door Sags or Appears Crooked
A sagging door is a classic symptom of worn or loose hinges. You might notice the top of the door leaning inward or outward, or the bottom edge sticking out. This is often caused by the weight of the door pulling on the hinges, especially if one hinge has loosened more than the others. A quick visual check can confirm this—stand back and look at the door from the front. If it doesn’t appear straight, adjustment is likely needed.
Unusual Noises When Opening or Closing
Squeaking, creaking, or grinding sounds when operating the door can indicate that hinges are misaligned or under stress. While lubrication can help with noise, persistent sounds after lubrication suggest the hinges are no longer positioned correctly. Ignoring these noises can lead to accelerated wear or even hinge failure.
Once you’ve identified these signs, it’s time to gather your tools and get to work. Remember, early intervention prevents more serious issues down the road.
Tools and Materials You’ll Need
Adjusting RV door hinges doesn’t require a full toolbox, but having the right equipment makes the job easier and safer. Most of these items are common household tools, so you likely already have them on hand.
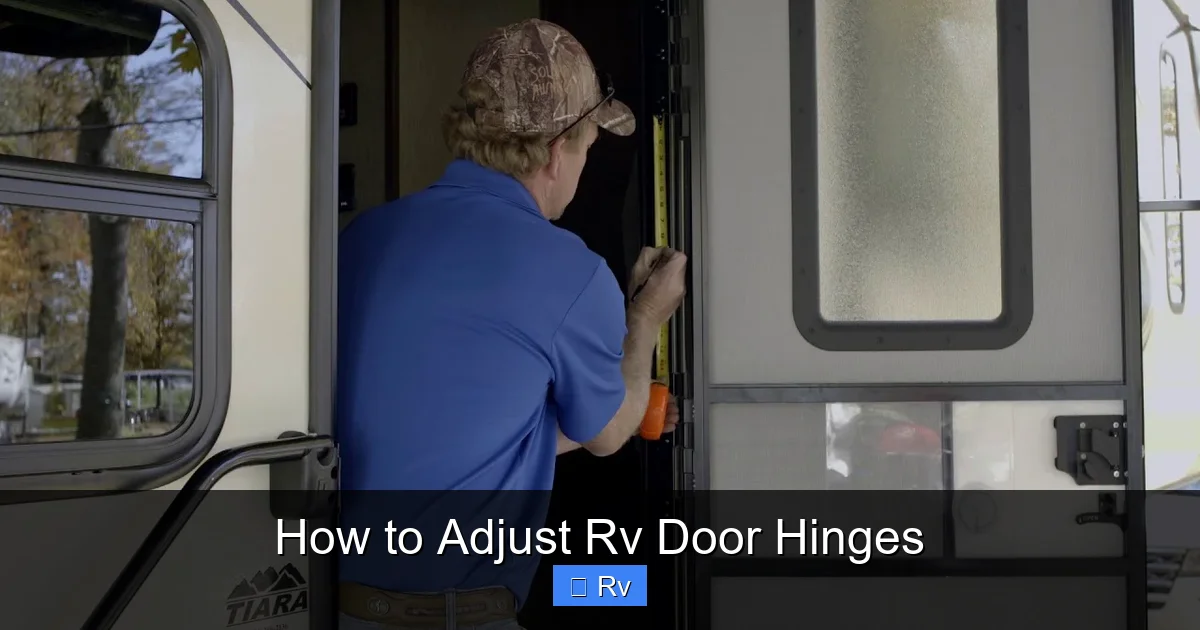
Visual guide about How to Adjust Rv Door Hinges
Image source: fleetwoodrvhinges.com
Basic Hand Tools
Start with a set of screwdrivers—both Phillips and flathead. Most RV hinges use Phillips-head screws, but some older models may have flatheads. A wrench or socket set is also helpful, especially if your hinges use nuts and bolts instead of screws. For precision, consider a torque screwdriver to avoid over-tightening.
Level and Measuring Tape
A small bubble level helps ensure your door is perfectly vertical (plumb) and horizontal (level) after adjustment. Even a slight tilt can affect how the door closes. A measuring tape allows you to check gap consistency around the door frame, ensuring even spacing.
Lubricant
Silicone-based spray or dry lubricant (like graphite powder) is ideal for hinges. Avoid oil-based lubricants, as they attract dirt and can gum up over time. Apply lubricant after adjustment to keep hinges moving smoothly and prevent future squeaking.
Shims or Cardboard (Optional)
If your hinges have significant play or the screw holes are stripped, you may need thin shims (like cardboard or plastic) to fill gaps and stabilize the hinge. This is a temporary fix, but it can buy you time until you can replace the hardware.
Safety Gear
Wear safety glasses to protect your eyes from dust or debris, especially if you’re working overhead. Gloves can also help prevent cuts or pinches, particularly when handling sharp edges or tight spaces.
Having these tools ready before you start will save time and reduce frustration. Keep them in your RV’s maintenance kit so you’re always prepared for on-the-road repairs.
Step-by-Step Guide to Adjusting RV Door Hinges
Now that you’ve identified the problem and gathered your tools, it’s time to adjust those hinges. Follow these steps carefully to ensure a safe and effective repair.
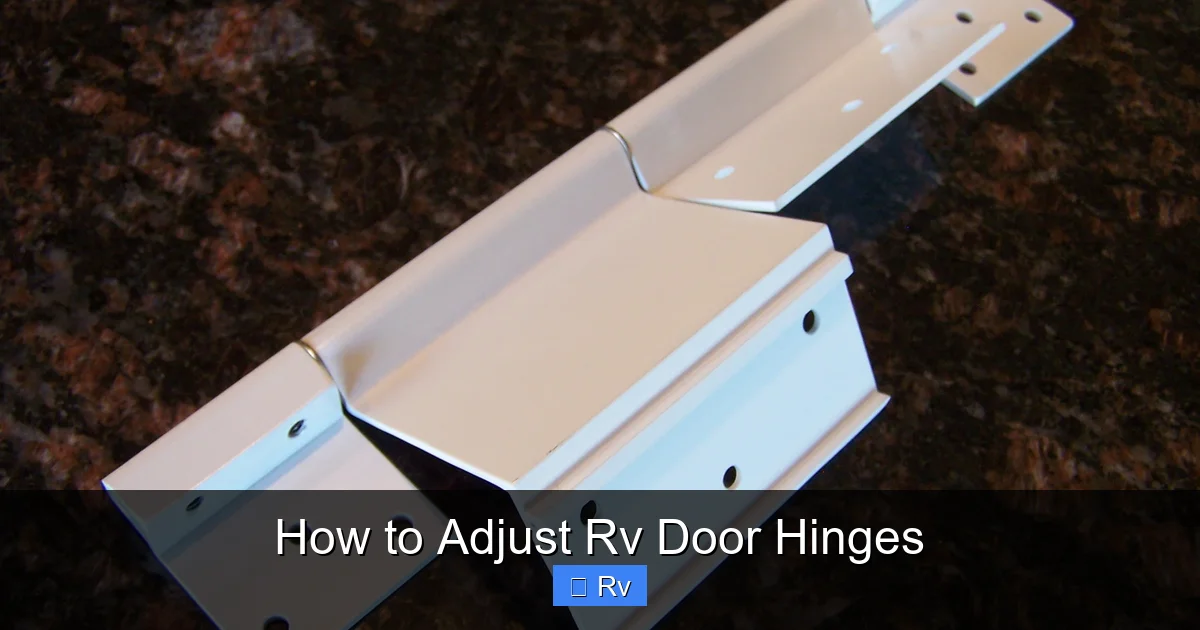
Visual guide about How to Adjust Rv Door Hinges
Image source: fleetwoodrvhinges.com
Step 1: Inspect the Door and Hinges
Start by opening the door fully and examining the hinges. Look for loose screws, rust, cracks, or signs of wear. Check the hinge pins—if they’re loose or wobbly, they may need tapping back into place or replacing. Also, inspect the door frame and strike plate for damage. If the frame is warped or the strike plate is bent, hinge adjustment alone won’t solve the problem.
Step 2: Loosen the Hinge Screws
Using your screwdriver or wrench, slightly loosen the screws on each hinge. Don’t remove them completely—just enough to allow the hinge to move. Loosen all screws on all hinges, even if only one appears misaligned. This ensures even pressure and prevents binding during adjustment.
Step 3: Adjust the Door Position
With the screws loose, gently lift, lower, or shift the door to realign it. For a sagging door, lift the bottom edge slightly to level it. If the door is rubbing on one side, push or pull it to center it in the frame. Use your level to check alignment—the door should be plumb (vertical) and level (horizontal). Make small adjustments and test frequently.
Step 4: Tighten the Screws Gradually
Once the door is properly aligned, begin tightening the screws. Start with the top hinge, then move to the middle and bottom. Tighten each screw a little at a time, alternating between hinges to maintain even pressure. Over-tightening can strip the screws or damage the hinge, so use steady, controlled force.
Step 5: Test the Door Operation
Open and close the door several times to check for smooth movement. Ensure it latches easily and seals tightly without gaps. If it still sticks or doesn’t close properly, repeat the adjustment process with finer tweaks. Sometimes, a millimeter can make all the difference.
Step 6: Lubricate the Hinges
Once everything is aligned, apply a light coat of silicone spray or dry lubricant to the hinge pins and moving parts. Wipe away any excess to prevent buildup. This reduces friction, prevents rust, and keeps your door operating quietly.
Take your time with each step. Rushing can lead to overcorrection or damage. If you’re unsure, make one small change at a time and test before moving on.
Common Mistakes to Avoid
Even experienced RVers can make mistakes when adjusting door hinges. Avoiding these common pitfalls will save you time and prevent further damage.
Over-Tightening Screws
It’s tempting to crank down on screws to make sure they’re secure, but over-tightening can strip the threads or crack the hinge. Use a torque screwdriver if possible, or tighten by hand until snug—then give just a quarter turn more.
Adjusting Only One Hinge
Focusing on a single hinge can throw off the entire alignment. Always adjust all hinges together to maintain balance. If one hinge is severely damaged, consider replacing it, but don’t ignore the others.
Ignoring the Strike Plate
If the latch doesn’t align with the strike plate, adjusting the hinges may not be enough. Check the strike plate’s position and adjust it if necessary. You can file the plate slightly or move it with shims to match the latch.
Using the Wrong Lubricant
Oil-based lubricants like WD-40 may seem convenient, but they attract dirt and degrade over time. Stick to silicone spray or dry lubricants designed for hinges. They last longer and won’t gum up.
Skipping the Test Phase
Don’t assume the door is fixed after tightening the screws. Always test the door multiple times to ensure smooth operation. A quick test can catch issues before they become major problems.
By avoiding these mistakes, you’ll achieve a better result and extend the life of your RV door hardware.
When to Replace RV Door Hinges
Sometimes, adjustment isn’t enough. If your hinges are damaged beyond repair, replacement is the best option.
Signs You Need New Hinges
Look for cracks, bends, or severe rust. If screws won’t tighten because the holes are stripped, or if the hinge pins are loose and won’t stay in place, replacement is necessary. Also, if the door continues to sag or misalign after multiple adjustments, the hinges may be worn out.
Choosing the Right Replacement Hinges
Match the size, style, and material of your existing hinges. Most RV hinges are made of stainless steel or zinc-plated steel for corrosion resistance. Measure the hinge length, width, and screw hole spacing to ensure a proper fit. You can find replacements at RV supply stores or online retailers.
Installing New Hinges
Remove the old hinges completely, then install the new ones using the same screw pattern. Align them carefully and tighten gradually. Test the door after installation to ensure proper function. Replacing hinges is more involved than adjusting, but it’s a worthwhile investment for long-term reliability.
Don’t wait until the door becomes unusable. Proactive replacement prevents emergencies on the road.
Maintaining Your RV Door Hinges
Regular maintenance keeps your hinges in top condition and reduces the need for frequent adjustments.
Monthly Inspections
Check hinges for looseness, rust, or wear during routine RV inspections. Tighten any loose screws and clean off dirt or debris.
Lubrication Schedule
Lubricate hinges every 3–6 months, or more often if you travel in dusty or humid environments. This prevents squeaking and extends hinge life.
Seasonal Adjustments
Temperature changes can cause wood and metal to expand or contract, affecting alignment. Check your door hinges at the start of each camping season and after long trips.
Simple care goes a long way in keeping your RV door functioning smoothly for years.
Conclusion
Adjusting RV door hinges is a straightforward task that every RV owner should know how to do. With the right tools, a bit of patience, and attention to detail, you can fix misalignment, improve sealing, and extend the life of your door hardware. Regular maintenance and timely adjustments prevent small issues from becoming costly repairs.
Remember, a well-aligned door isn’t just about convenience—it’s about safety, comfort, and efficiency. Whether you’re parked in a campground or driving down the highway, your RV door should open and close smoothly every time. By following this guide, you’ll be prepared to handle hinge adjustments with confidence, ensuring your adventures stay hassle-free.
Frequently Asked Questions
How often should I check my RV door hinges?
It’s a good idea to inspect your RV door hinges every 1–2 months, especially before and after long trips. Regular checks help catch loosening or wear early, preventing bigger problems.
Can I adjust RV door hinges without removing the door?
Yes, in most cases you can adjust hinges without removing the door. Loosen the screws, realign the door, and tighten gradually. Only remove the door if hinges are severely damaged or need replacement.
What if my RV door still doesn’t close after adjusting the hinges?
If the door still doesn’t close properly, check the strike plate, weatherstripping, or door frame for damage. The issue might not be the hinges—adjusting the strike plate or replacing seals may be needed.
Are RV door hinges universal?
No, RV door hinges vary by manufacturer and model. Always measure your existing hinges and match the size, screw pattern, and material when replacing them.
Can I use WD-40 on RV door hinges?
WD-40 can provide temporary lubrication, but it’s not ideal for long-term use. It attracts dirt and dries out quickly. Use silicone spray or dry lubricant instead for better performance.
Is it safe to drive with a misaligned RV door?
Driving with a misaligned door is not recommended. It can lead to further damage, poor sealing, or even the door coming open while driving. Adjust or repair the hinges before hitting the road.


