
How to Test an Rv Converter
Contents
- 1 Key Takeaways
- 2 📑 Table of Contents
- 3 What Is an RV Converter and Why It Matters
- 4 Signs Your RV Converter Might Be Failing
- 5 Tools You’ll Need to Test an RV Converter
- 6 Step-by-Step Guide to Testing Your RV Converter
- 7 Interpreting Your Test Results
- 8 When to Repair vs. Replace Your RV Converter
- 9 Preventative Maintenance Tips
- 10 Frequently Asked Questions
Testing your RV converter is essential for reliable power and safety on the road. This guide walks you through simple steps, tools, and signs of failure so you can catch problems early and keep your RV’s electrical system running smoothly.
Key Takeaways
- Understand what an RV converter does: It converts 120V AC power from shore power or a generator into 12V DC power to charge your RV’s battery and run low-voltage systems.
- Know the signs of a failing converter: Flickering lights, dead batteries, burning smells, or no power to 12V appliances are common red flags.
- Use the right tools: A digital multimeter is essential for accurate voltage testing and diagnosing issues.
- Test both input and output voltages: Check shore power input and DC output to confirm the converter is functioning properly.
- Perform regular maintenance: Clean vents, check connections, and inspect for corrosion to extend the life of your converter.
- When to replace vs. repair: If the converter fails key tests or shows physical damage, replacement is often safer and more cost-effective.
- Safety first: Always turn off power at the breaker before inspecting or testing to avoid shocks or damage.
📑 Table of Contents
What Is an RV Converter and Why It Matters
If you’ve ever plugged your RV into a campground outlet and wondered how your lights, fridge, and water pump still work even when the engine is off, you’ve got your RV converter to thank. This small but mighty component is the unsung hero of your RV’s electrical system. It quietly converts 120-volt alternating current (AC) from shore power—like a campground pedestal or home outlet—into 12-volt direct current (DC) that powers your RV’s battery and low-voltage appliances.
Without a working converter, your RV’s battery won’t charge, and your 12V systems (like interior lights, fans, and the water pump) will quickly drain. Over time, this can leave you stranded with a dead battery and no way to run essential systems. That’s why knowing how to test an RV converter isn’t just a nice-to-have skill—it’s a must for any serious RVer.
The converter is usually located in a compartment near the battery or inside a utility panel. It often shares space with the fuse box and sometimes includes a built-in battery charger. Modern converters may also have advanced features like temperature-compensated charging or multi-stage charging to protect your battery and extend its life.
Signs Your RV Converter Might Be Failing

Visual guide about How to Test an Rv Converter
Image source: rvtalk.net
Before diving into testing, it helps to recognize the warning signs that your converter isn’t doing its job. Catching problems early can save you from a frustrating—or even dangerous—situation on the road.
One of the most common symptoms is a battery that won’t hold a charge. If you’re plugged into shore power but your battery still drains overnight, the converter might not be delivering the proper charging voltage. Similarly, if your interior lights flicker or dim when you turn on appliances like the microwave or air conditioner, it could indicate the converter is struggling to keep up with demand.
Another red flag is a burning smell near the converter or utility panel. This could mean internal components are overheating or failing. You might also notice that 12V appliances—like the water pump or ceiling fan—don’t work at all when you’re connected to shore power, even though they function when running off the battery.
Physical signs matter too. Check for burnt or melted wires, corroded terminals, or a converter that feels excessively hot to the touch. Some converters have indicator lights; if the light is off or blinking erratically, it may signal a fault.
Even if everything seems fine, it’s smart to test your converter periodically—especially before long trips or after extended storage. Converters can degrade over time due to heat, vibration, or power surges, and early detection helps prevent bigger issues down the road.
Tools You’ll Need to Test an RV Converter
Visual guide about How to Test an Rv Converter
Image source: i.ytimg.com
Testing your RV converter doesn’t require a garage full of equipment, but you do need a few key tools to get accurate results. The most important is a digital multimeter (DMM). This handheld device measures voltage, current, and resistance, and it’s essential for diagnosing electrical issues.
When choosing a multimeter, look for one with auto-ranging capability and a clear digital display. Models like the Klein Tools MM300 or Fluke 115 are popular among RVers for their reliability and ease of use. Make sure it’s rated for at least 600 volts AC and 20 volts DC to handle the range of voltages you’ll encounter.
You’ll also need basic hand tools: a screwdriver (usually Phillips or flathead) to remove access panels, and possibly needle-nose pliers for handling small wires. Safety gear is non-negotiable—wear insulated gloves and safety glasses, especially when working near live circuits.
A flashlight or headlamp helps you see into tight spaces, and a notepad or phone app can help you record voltage readings for comparison. If your converter has a removable cover, keep track of screws so you don’t lose them.
Optional but helpful tools include a non-contact voltage tester to confirm power is off before you start, and a battery hydrometer if you have a flooded lead-acid battery (to check its state of charge). Some advanced RVers also use a clamp meter to measure current draw, but a standard multimeter is sufficient for most converter tests.
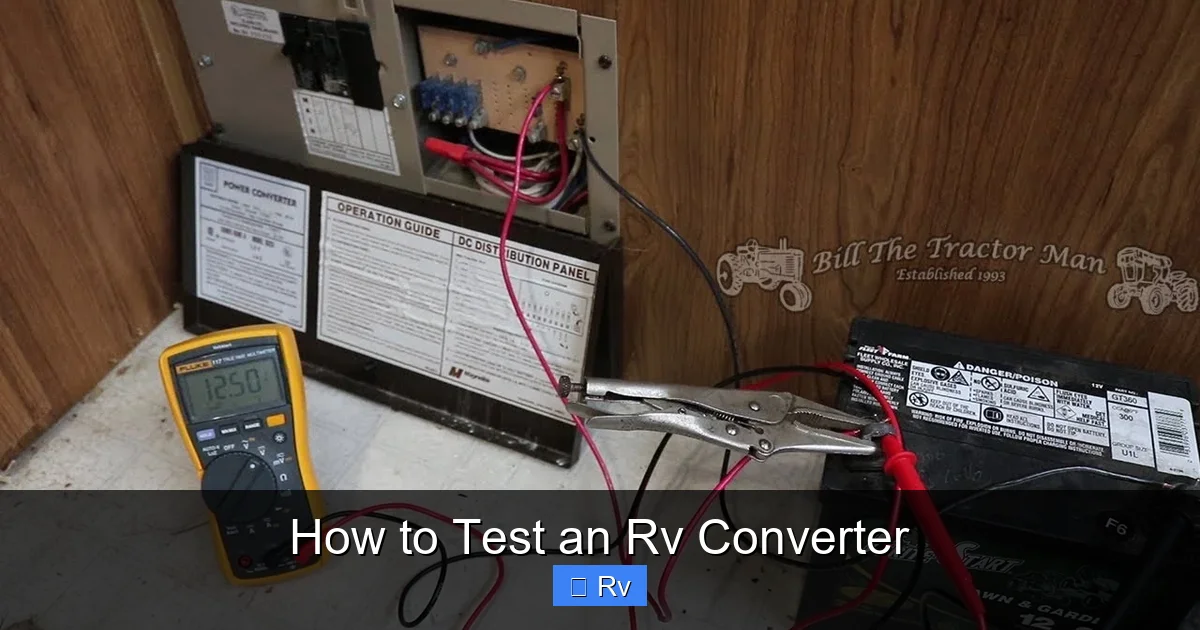
Step-by-Step Guide to Testing Your RV Converter
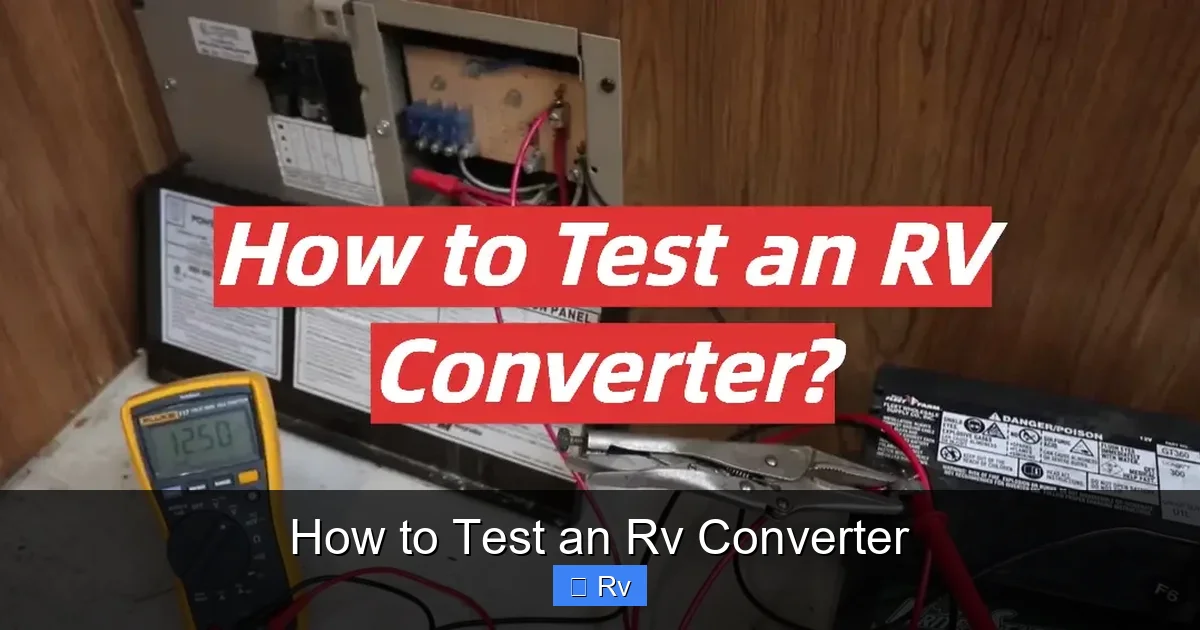
Visual guide about How to Test an Rv Converter
Image source: rvprofy.com
Now that you know what to look for and have your tools ready, let’s walk through how to test an RV converter safely and effectively. Follow these steps in order to get accurate results and avoid damage or injury.
Step 1: Turn Off All Power Sources
Before touching anything, disconnect your RV from shore power. Go to the campground pedestal or your home outlet and unplug the power cord. Then, turn off the main breaker in your RV’s electrical panel. This ensures no live current is flowing while you work.
If your RV has a generator, make sure it’s off and cooled down. Also, disconnect the negative terminal of your RV battery to prevent accidental shorts. Safety is critical—electricity can cause serious injury or damage if mishandled.
Step 2: Locate the Converter
The converter is typically housed in a metal or plastic box near the battery compartment or inside a utility bay. Look for a unit with cooling vents, wires labeled “AC Input” and “DC Output,” and possibly a small fan. Some RVs have the converter built into the power center, which combines the converter, fuse box, and sometimes an inverter.
Refer to your RV’s owner manual if you’re unsure. If you can’t find it, trace the wires from the battery—they usually lead back to the converter. Once located, remove the access panel or cover using your screwdriver.
Step 3: Test Shore Power Input Voltage
With the converter exposed, plug your RV back into shore power—but do not turn on the breaker yet. Set your multimeter to AC voltage (usually marked “V~”). Insert the red probe into the “V” or “Ω” port and the black probe into the “COM” port.
Carefully touch the probes to the AC input terminals on the converter. These are usually labeled “Line” or “Hot” and “Neutral.” You should read between 110 and 120 volts AC. If the reading is significantly lower (below 100V) or zero, the problem may be with the shore power source, not the converter.
If voltage is normal, turn on the main breaker and proceed to the next step.
Step 4: Test DC Output Voltage
Now, set your multimeter to DC voltage (marked “V⎓”). Touch the red probe to the positive (+) DC output terminal and the black probe to the negative (-) terminal. These are often connected to the battery via thick red and black wires.
With the converter running, you should see a voltage reading between 13.2 and 14.4 volts DC. This range indicates the converter is charging the battery properly. If the reading is below 12.6 volts, the converter may not be charging at all. If it’s above 15 volts, it could be overcharging, which damages batteries over time.
Note: Some converters have a “float” mode that reduces voltage to around 13.2V once the battery is fully charged. This is normal. But if the voltage never rises above 12.6V when the battery is low, the converter isn’t working.
Step 5: Check for Voltage Drop Under Load
To simulate real-world conditions, turn on several 12V appliances—like the water pump, interior lights, and fan. Watch the multimeter reading. A healthy converter should maintain voltage within the 13.2–14.4V range even under load.
If the voltage drops sharply (below 12V), the converter may be failing or undersized for your RV’s power needs. This is especially common in older RVs or those with high electrical demands.
Step 6: Inspect for Physical Damage
While the converter is running, feel the unit (carefully—use the back of your hand to avoid burns). It should be warm, but not hot. If it’s too hot to touch, it may be overheating due to a faulty fan, blocked vents, or internal failure.
Look for signs of burning, melted plastic, or corrosion on the terminals. Check that all wires are securely connected and not frayed. If you see any damage, it’s time to replace the converter.
Interpreting Your Test Results
Once you’ve completed the tests, it’s time to make sense of the numbers. Here’s what different readings mean and what to do next.
If your AC input voltage is normal (110–120V) but the DC output is low or zero, the converter is likely faulty. This is the most common failure mode. The internal components—like diodes or transformers—may have burned out, preventing power conversion.
If both AC input and DC output are low, the issue could be with the shore power source. Try plugging into a different outlet or using a different power cord. You can also test the outlet with a receptacle tester to check for wiring problems.
A DC output above 15 volts indicates overcharging, which can boil out battery electrolyte and shorten battery life. This often points to a failed voltage regulator inside the converter.
If the voltage fluctuates wildly or drops under load, the converter may be struggling to meet demand. This could be due to age, overheating, or an undersized unit. Upgrading to a higher-capacity converter or adding a battery maintainer might help.
In some cases, the converter works fine but the battery still won’t charge. This could mean the battery itself is bad—especially if it’s more than 3–5 years old. Test the battery separately with a load tester or hydrometer.
When to Repair vs. Replace Your RV Converter
After testing, you’ll need to decide whether to repair or replace the converter. In most cases, replacement is the better option.
RV converters are not typically designed for easy repair. Internal components are often soldered or sealed, and replacement parts are hard to find. Even if you can fix it, a repaired converter may not be as reliable as a new one.
Replacement converters are widely available online and at RV supply stores. Prices range from $100 to $400, depending on capacity and features. Look for models with built-in protection against overcharging, short circuits, and reverse polarity. Some high-end converters also include a transfer switch or inverter combo.
If you’re not comfortable doing the replacement yourself, hire a qualified RV technician. Improper installation can damage your electrical system or create a fire hazard.
That said, minor issues like loose connections or a clogged cooling fan can often be fixed. Clean the vents with compressed air and tighten any loose terminals. If the fan isn’t spinning, it may just need lubrication or replacement.
Preventative Maintenance Tips
The best way to avoid converter problems is to maintain it regularly. Here are a few simple tips to keep your converter running smoothly:
– Clean the cooling vents every few months to prevent overheating.
– Check wire connections annually for tightness and corrosion.
– Keep the area around the converter dry and free of debris.
– Use a surge protector when plugging into shore power to guard against voltage spikes.
– Test the converter at least once a year, or before long trips.
If you store your RV for extended periods, consider using a battery maintainer or disconnecting the battery to reduce strain on the converter.
Frequently Asked Questions
How often should I test my RV converter?
It’s a good idea to test your RV converter at least once a year, or before any long trip. If you notice signs of failure—like flickering lights or a dead battery—test it immediately.
Can I run my RV without a converter?
Technically yes, but only if you rely solely on battery power or an inverter. Without a converter, your battery won’t charge from shore power, so it will drain quickly and leave you without 12V systems.
What’s the difference between a converter and an inverter?
A converter changes AC power to DC power to charge the battery and run 12V systems. An inverter does the opposite—it converts DC power from the battery into AC power for household appliances.
Why is my converter getting so hot?
Converters generate heat during operation, but excessive heat may indicate blocked vents, a failing fan, or internal damage. Turn off power and inspect the unit—clean vents and ensure proper airflow.
Can a bad converter damage my RV battery?
Yes. A faulty converter can overcharge or undercharge the battery, leading to sulfation, overheating, or reduced lifespan. Always test the converter if your battery isn’t holding a charge.
Do I need a special multimeter to test an RV converter?
No, a standard digital multimeter works fine. Just make sure it can measure both AC and DC voltage and is rated for at least 600V AC and 20V DC for safety and accuracy.


