
How to Mount Solar Panels on Rv Roof
Contents
Mounting solar panels on an RV roof is a smart way to enjoy off-grid adventures with reliable power. With the right tools, planning, and safety precautions, you can install a solar system that keeps your batteries charged and your devices running—no matter where the road takes you.
So, you’ve decided to go solar on your RV—smart move! Whether you’re a weekend warrior or a full-time nomad, adding solar panels to your RV roof gives you freedom, flexibility, and peace of mind. No more scrambling for campground hookups or worrying about dead batteries. With solar, you can boondock in remote locations, enjoy quiet mornings in nature, and still keep your fridge running, lights on, and phone charged.
But let’s be real—mounting solar panels on an RV roof isn’t as simple as slapping them on and calling it a day. It takes planning, the right tools, and a bit of know-how. You’ve got to think about weight, weather resistance, wiring, and, most importantly, avoiding leaks. A poorly installed panel can lead to water damage, electrical issues, or even panel loss on the highway. That’s why it’s crucial to do it right the first time.
In this guide, we’ll walk you through every step of mounting solar panels on your RV roof—from planning your system to sealing the mounts and testing your setup. Whether you’re a DIY enthusiast or a first-time installer, we’ve got practical tips, real-world examples, and safety advice to help you get the job done safely and effectively. Let’s get started on powering your adventures the solar way.
Key Takeaways
- Plan your solar setup first: Calculate your energy needs to determine how many panels and what type of system you’ll need before mounting anything.
- Choose the right mounting method: Use roof-compatible brackets, Z-brackets, or rail systems designed for RVs to avoid leaks and damage.
- Seal all roof penetrations: Properly seal mounting holes with high-quality RV roof sealant to prevent water leaks and costly repairs.
- Prioritize safety during installation: Use harnesses, non-slip shoes, and work with a partner when climbing onto the RV roof.
- Optimize panel angle and placement: Position panels to maximize sun exposure and avoid shading from vents, antennas, or air conditioners.
- Wire correctly and securely: Use appropriately sized cables, fuses, and connectors to ensure efficient power transfer and prevent electrical hazards.
- Test and maintain regularly: After installation, monitor performance and inspect seals, wiring, and panels periodically for wear or damage.
📑 Table of Contents
Why Install Solar Panels on Your RV?
Going solar isn’t just a trend—it’s a game-changer for RV living. Imagine pulling up to a scenic overlook, setting up camp, and having all the power you need without plugging into anything. That’s the magic of solar. It gives you independence from crowded campgrounds and noisy generators. Plus, it’s clean, quiet, and environmentally friendly.
But the benefits go beyond convenience. Solar power can save you money in the long run. While the upfront cost might seem steep, you’ll recoup it over time by avoiding campground fees and reducing reliance on paid electrical hookups. And if you’re someone who loves dry camping or boondocking, solar is practically essential. It keeps your house batteries charged so you can run lights, fans, a refrigerator, and even a small air conditioner or microwave—depending on your system size.
Another big plus? Solar panels require very little maintenance. Once installed, they can last 25 years or more with just occasional cleaning and inspections. And modern RV solar kits are more efficient and affordable than ever. With flexible panels, lightweight designs, and easy-to-use charge controllers, there’s never been a better time to make the switch.
Types of RV Solar Panels
Not all solar panels are created equal—especially when it comes to RVs. You’ve got three main types to choose from: monocrystalline, polycrystalline, and flexible (thin-film) panels. Each has its pros and cons, so let’s break them down.
Monocrystalline panels are the most efficient and durable. They’re made from single-crystal silicon, which allows them to convert more sunlight into electricity—even in low-light conditions. They’re also space-efficient, which is great for RV roofs where every inch counts. The downside? They’re more expensive. But if you’re serious about solar and want maximum output, they’re worth the investment.
Polycrystalline panels are a bit less efficient but more affordable. They’re made from multiple silicon fragments, which gives them a blueish hue. They work well in full sun but don’t perform as well on cloudy days or in partial shade. If you’re on a budget and mostly camp in sunny areas, these can be a solid choice.
Then there are flexible solar panels. These are lightweight, bendable, and perfect for curved RV roofs. They’re easy to install and don’t require drilling holes—many use adhesive backing. However, they’re less efficient and may not last as long as rigid panels. They’re ideal for small setups or as supplemental power, but not recommended for full-time off-grid living.
How Much Solar Do You Really Need?
Before you buy a single panel, you need to figure out how much power you actually use. This is called your “energy audit,” and it’s the foundation of a successful solar setup. Start by listing all the devices you plan to run: lights, fridge, water pump, laptop, phone charger, coffee maker, etc.
Next, check the wattage of each device (usually listed on the label or in the manual). Multiply the wattage by the number of hours you use it per day to get watt-hours. Add them all up to get your total daily energy consumption. For example, if you use a 10-watt LED light for 5 hours, that’s 50 watt-hours. Do this for everything.
A typical RV might use between 1,000 and 3,000 watt-hours per day. Once you know your total, you can size your solar system. A general rule is to have enough solar panels to generate 1.5 times your daily usage to account for cloudy days and inefficiencies. So if you use 2,000 watt-hours, aim for a 300-watt system (since 300W × 5 peak sun hours = 1,500Wh—close enough with battery buffer).
Don’t forget your battery bank! Solar panels charge your batteries, so you’ll need deep-cycle batteries (like lithium or AGM) that can store the energy. Match your battery capacity (in amp-hours) to your daily usage. A 100Ah lithium battery holds about 1,200 watt-hours (100Ah × 12V), so you might need two or three depending on your needs.
Choosing the Right Mounting System
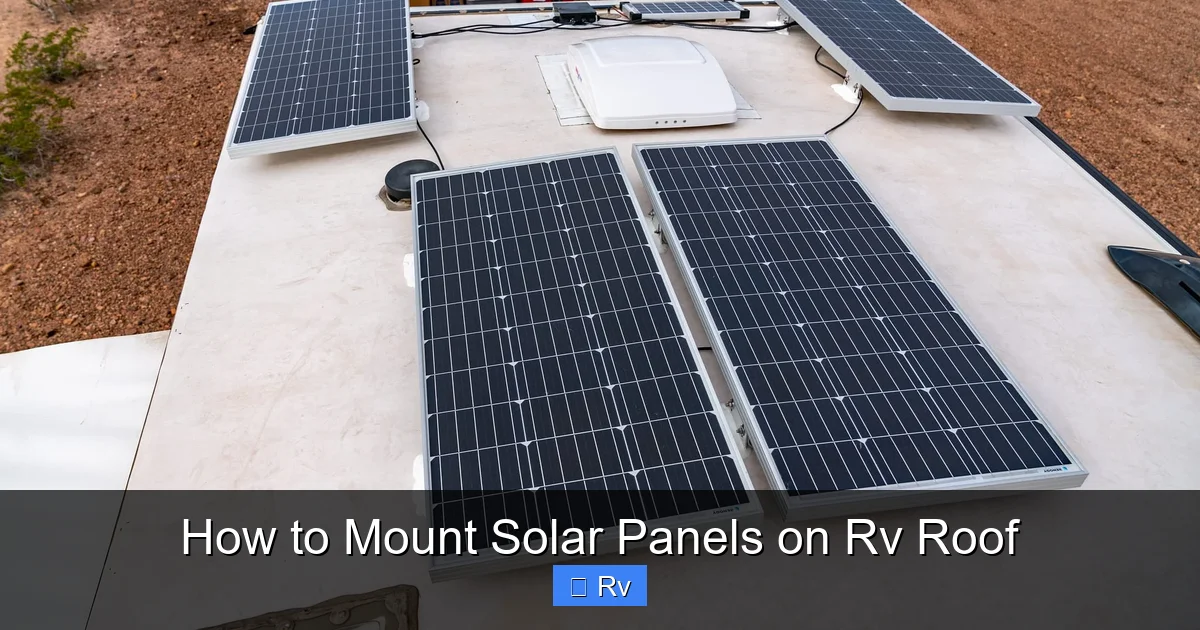
Visual guide about How to Mount Solar Panels on Rv Roof
Image source: adventurousway.com
Now that you know what kind of panels and how much power you need, it’s time to talk about mounting. This is where many DIYers go wrong. You can’t just screw panels directly into your RV roof—that’s a recipe for leaks and damage. Instead, you need a proper mounting system designed for RVs.
There are three main types of mounts: Z-brackets, rail systems, and adhesive mounts. Let’s look at each.
Z-brackets are the most common and affordable option. They’re L-shaped metal brackets that attach to the panel frame and bolt to the roof. They lift the panel slightly off the roof, allowing airflow underneath—which helps keep the panels cool and efficient. Most Z-brackets come with rubber pads to protect the roof and reduce vibration.
Rail systems are more robust and professional-looking. They involve installing aluminum rails along the length of the roof, then attaching the panels to the rails with clamps. This distributes the weight evenly and makes it easier to adjust or remove panels later. Rail systems are great if you plan to expand your system or want a cleaner look.
Adhesive mounts are used primarily with flexible panels. They stick directly to the roof using strong VHB (very high bond) tape. No drilling required! But be cautious—adhesive mounts aren’t suitable for high-wind areas or heavy panels. And if you ever need to remove them, you risk damaging the roof.
Tools and Materials You’ll Need
Before you climb onto the roof, gather your tools. Here’s a checklist:
– Solar panels (rigid or flexible)
– Mounting brackets or rails
– Drill with appropriate bits (usually 1/4” or 5/16”)
– Screws or bolts (stainless steel, corrosion-resistant)
– RV roof sealant (like Dicor self-leveling lap sealant)
– Caulking gun
– Measuring tape
– Level
– Wire strippers and crimpers
– MC4 connectors
– Fuse holder and appropriate fuse
– Cable clips or conduit
– Safety gear (harness, non-slip shoes, gloves)
Don’t forget a helper! Working on an RV roof is tricky, and having someone hand you tools or hold a panel makes a big difference.
Step-by-Step Mounting Process
Now for the fun part—actually mounting the panels. Follow these steps carefully to ensure a secure, leak-free installation.
First, clean the roof area where you’ll mount the panels. Remove dirt, wax, and debris so the sealant adheres properly. Use a mild cleaner and let it dry completely.
Next, position the panels on the roof (without mounting) to plan the layout. Avoid shading from vents, antennas, or air conditioners. Leave at least 2–3 inches of space around the edges for airflow and access. Use a level to make sure everything is straight.
Mark the mounting holes. If using Z-brackets, place them on the panel frame and mark where the screws will go. For rail systems, mark the rail positions first, then the panel clamps.
Drill pilot holes carefully. Use a drill bit slightly smaller than your screws to prevent cracking the roof material. Go slow and steady—RVs often have thin roofs that can be damaged easily.
Apply sealant to each hole before inserting the screw. Use a generous bead of RV-rated sealant around the hole and under the bracket foot. This creates a watertight seal.
Secure the brackets or rails with screws. Tighten them firmly but don’t over-torque—this can strip the roof or crack the panel frame.
Once the mounts are in place, attach the panels. For Z-brackets, bolt the panel to the bracket. For rails, clamp the panel to the rail. Double-check that everything is level and secure.
Finally, apply a second bead of sealant over the screw heads and around the bracket edges. Smooth it with a finger or tool for a clean finish. Let it cure according to the manufacturer’s instructions—usually 24–48 hours.
Wiring Your Solar Panels Safely
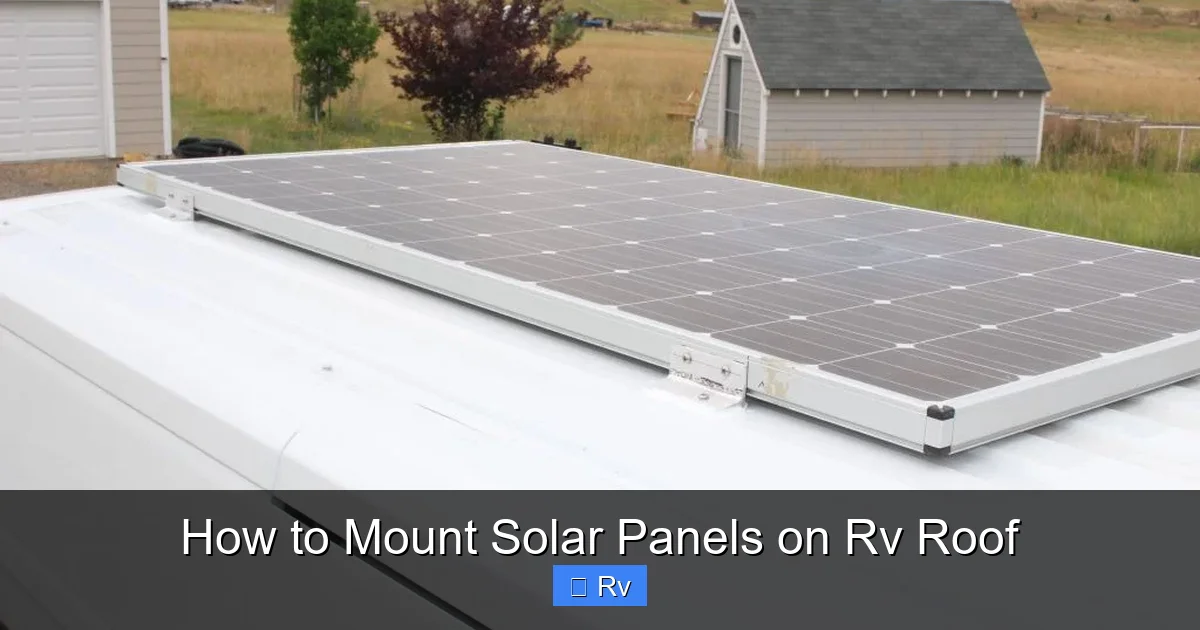
Visual guide about How to Mount Solar Panels on Rv Roof
Image source: buildagreenrv.com
Mounting is only half the battle—now you’ve got to wire everything up. This is where electricity comes into play, so safety is critical. Always disconnect your battery before working on wiring, and use proper fuses and connectors.
Start by running cables from the panels to your charge controller. Use UV-resistant, outdoor-rated solar cable (usually 10 or 12 gauge). Route the cables through existing roof penetrations if possible, or drill a new hole (sealed with sealant) near the edge of the roof.
Connect the panels in series or parallel, depending on your system voltage. Series wiring increases voltage, parallel increases amperage. Most RV systems use 12V or 24V, so check your charge controller specs.
Use MC4 connectors to join panel cables—they’re weatherproof and easy to connect. Never splice wires with electrical tape; always use proper connectors or crimps.
Install a fuse between the panels and the charge controller. This protects against overcurrent and fire. The fuse size should match your wire gauge and panel output.
Connect the charge controller to your battery bank. Follow the manufacturer’s wiring diagram—positive to positive, negative to negative. Some controllers have built-in fuses; others require an external one.
Finally, connect your inverter (if you have one) to the battery. This converts DC power from the batteries to AC power for household appliances.
Common Wiring Mistakes to Avoid
Even experienced RVers make wiring errors. Here are a few to watch out for:
– Using undersized wires: This causes voltage drop and overheating. Always use the correct gauge for your system.
– Skipping fuses: This is a fire hazard. Always fuse the positive wire between panels and controller, and between controller and battery.
– Mixing wire types: Don’t mix copper and aluminum wires—they corrode when connected.
– Poor connections: Loose or corroded connections reduce efficiency and can spark. Use crimp connectors and check them regularly.
Sealing and Weatherproofing
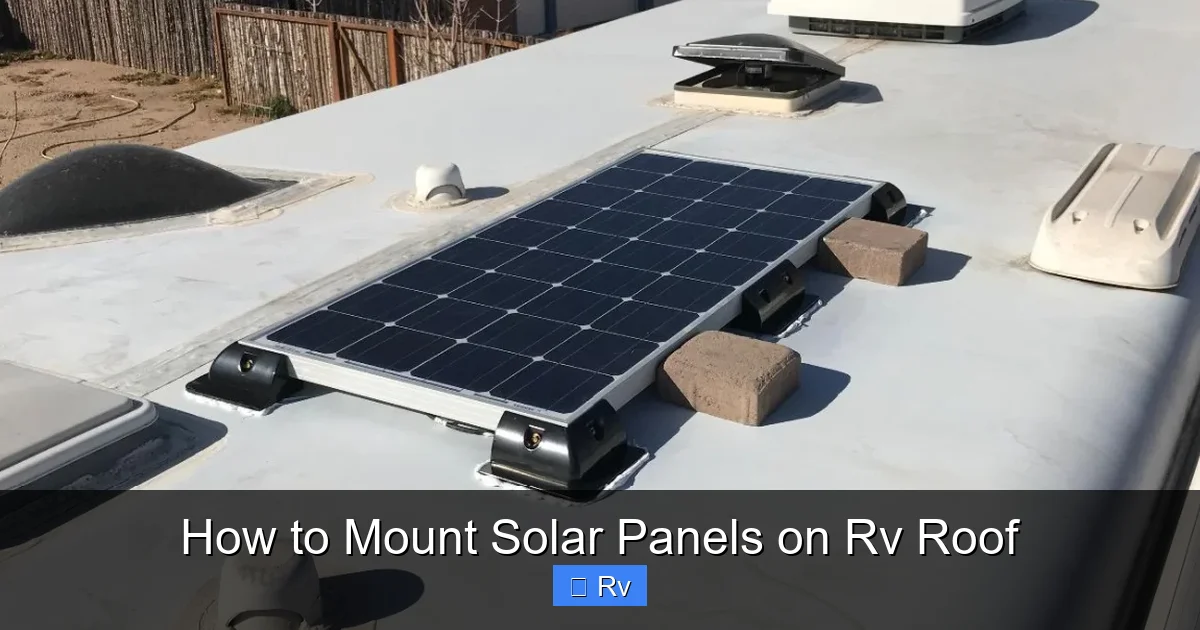
Visual guide about How to Mount Solar Panels on Rv Roof
Image source: mobile-solarpower.com
Water is the enemy of any RV roof. Even a tiny leak can cause mold, rot, and thousands in repairs. That’s why sealing is non-negotiable.
After mounting, inspect every penetration. The screw holes, bracket edges, and cable entry points must be sealed with high-quality RV sealant. Dicor self-leveling lap sealant is the gold standard—it flows into gaps and cures into a flexible, waterproof barrier.
Apply sealant in a continuous bead, covering the entire base of the bracket and the screw heads. Don’t skimp—better to use too much than too little. Smooth it with a gloved finger or putty knife for a clean finish.
For cable entries, use a roof penetration boot or gland. These are rubber or plastic fittings that seal around the cable as it passes through the roof. Apply sealant around the base and over the top for extra protection.
Check your seals regularly—especially after long trips or extreme weather. Reapply sealant if you notice cracks, gaps, or peeling.
Testing and Maintenance
Once everything is installed and sealed, it’s time to test your system. Turn on the charge controller and check the display. You should see voltage and current readings from the panels. On a sunny day, you should see close to the panel’s rated output.
Monitor your battery voltage over a few days. A healthy system should keep your batteries charged above 12.6V (for a 12V system). If they’re dropping quickly, you may have a wiring issue or undersized system.
Clean your panels every few months. Dust, bird droppings, and pollen can reduce efficiency by 10–20%. Use a soft brush or sponge with mild soap and water. Avoid abrasive cleaners or high-pressure washers—they can scratch the glass.
Inspect mounts and seals annually. Look for loose screws, cracked brackets, or damaged sealant. Tighten or replace as needed.
Keep an eye on your wiring. Check for frayed cables, loose connections, or signs of overheating (like melted insulation). Address any issues immediately.
Conclusion
Mounting solar panels on your RV roof is one of the best upgrades you can make for off-grid living. It gives you freedom, saves money, and lets you enjoy the great outdoors without sacrificing comfort. With careful planning, the right tools, and attention to detail, you can install a system that’s safe, efficient, and built to last.
Remember: start with an energy audit, choose the right panels and mounts, seal everything properly, and wire with safety in mind. Don’t rush the process—take your time, follow the steps, and don’t hesitate to ask for help if you’re unsure.
Once your system is up and running, you’ll wonder how you ever traveled without it. So go ahead—embrace the sun, hit the road, and power your adventures the solar way.
Frequently Asked Questions
Can I mount solar panels on a curved RV roof?
Yes, but rigid panels may not fit perfectly. Flexible solar panels are ideal for curved roofs since they can bend to match the contour. Alternatively, use adjustable mounting brackets that allow slight angle adjustments.
Do I need to drill holes in my RV roof?
Most rigid panel mounts require drilling, but you can use adhesive mounts for flexible panels to avoid holes. If drilling, always seal the holes properly with RV-rated sealant to prevent leaks.
How many solar panels can I fit on my RV roof?
It depends on your roof size and panel dimensions. A typical RV roof can fit 2–4 standard 100W rigid panels. Measure your available space and account for vents, air conditioners, and walkways.
Will solar panels damage my RV roof?
Not if installed correctly. Use proper mounts, seal all penetrations, and avoid over-tightening screws. Poor installation can cause leaks or stress cracks, so follow best practices.
Can I install solar panels myself?
Yes, many RVers successfully install their own systems. If you’re comfortable with basic tools, wiring, and roof work, it’s a manageable DIY project. For complex setups, consider professional help.
Do solar panels work on cloudy days?
Yes, but at reduced efficiency. Monocrystalline panels perform best in low light, but output can drop to 10–25% on overcast days. A larger system or battery buffer helps compensate.


