
How to Patch a Torn Car Cover: A Step-by-Step DIY Guide
Quick Answer
To patch a torn car cover, remove it from the vehicle, identify its material, clean and dry the damaged area, and apply a compatible flexible patch over the tear. Reinforce the repair with sufficient overlap onto healthy fabric, allow the adhesive to cure fully, and check the fit before reinstalling the cover. If the material is brittle or several areas are damaged, replacement may be more reliable.
Quick Repair Steps
- Remove the cover: Work on a flat surface away from your vehicle’s paint.
- Check the material: Match the patch and adhesive to the cover’s fabric or coating.
- Prepare the tear: Clean the area, let it dry, and gently align the edges.
- Apply a patch: Reinforce the damaged section with a flexible patch that extends onto sound material.
- Allow curing: Follow the repair product’s instructions before folding or stretching the cover.
- Prevent another tear: Check for loose fit, sharp edges, damaged straps, and wind movement.
One Important Tip
- Don’t use an iron, strong solvent, or ordinary household glue unless the cover and repair-product manufacturers confirm compatibility.
A small tear doesn’t necessarily mean your car cover belongs in the trash. With the right patch and a little preparation, you can often repair localized damage without replacing the entire cover.
When dealing with a ripped car cover, I would focus on two things: restoring the damaged area and finding out why it tore in the first place. This guide explains how to choose repair materials, patch different types of covers, fix vulnerable seams, and decide when replacement makes more sense.
In This Guide
- Can You Patch a Torn Car Cover?
- What Materials and Tools Do You Need?
- How Do You Patch a Torn Car Cover Step by Step?
- Which Repair Method Works Best?
- How Do You Repair Different Materials, Seams, and Straps?
- How Do You Prevent Another Tear?
- Should You Repair or Replace the Cover?
- Frequently Asked Questions
Can You Patch a Torn Car Cover?
Yes, most localized tears and small punctures can be patched if the surrounding material remains strong and flexible. The best repair depends on the cover’s construction, the tear’s location, and how much tension that area experiences.
A car cover patch is a piece of compatible material bonded or stitched over damaged fabric to reinforce the opening and reduce the chance of further tearing. Some patches use pressure-sensitive adhesive, while others require a separate fabric adhesive or sewing.
Which types of damage are worth repairing?
Start by examining the tear and several inches of material around it. A neat opening in otherwise healthy fabric is generally easier to repair than a ragged tear surrounded by weakened fibers.
- Small punctures: Holes caused by twigs or minor snags may need only a compact patch.
- Short tears: A split with intact edges often responds well to an underside reinforcement patch.
- Open seams: A separated stitch line may be repairable when the adjoining fabric remains sound.
- Damaged straps: These need broader reinforcement because the attachment point experiences repeated pulling.
- Brittle or crumbling fabric: Widespread deterioration usually makes patching unreliable.
How do you check whether the cover is still repairable?
Gently flex the fabric near the damaged section without pulling the tear wider. If the material cracks, crumbles, or develops new splits under light handling, the problem may extend beyond the visible opening.
Also inspect the inner lining. A rough, peeling, or hardened surface can potentially scratch the vehicle’s finish when the cover shifts.
For additional guidance, the existing guide to repairing a torn car cover covers related damage and ways to assess the repair before committing to it.
Section Takeaway: Patch isolated damage when the surrounding material is healthy. If the cover keeps splitting in new places, investigate deterioration before spending time on repairs.
What Materials and Tools Do You Need?
You generally need a clean work surface, suitable cleaning supplies, scissors, a compatible patch, and the correct adhesive if the patch isn’t self-adhesive. Choose products for the actual cover material rather than assuming every synthetic fabric accepts the same repair.
Essential supplies for a DIY repair
- Soft cleaning cloth: Removes loose dirt without abrading the cover.
- Compatible cleaner: Use the cleaning method recommended for the material.
- Sharp scissors: Trim loose fibers without cutting into sound fabric.
- Flexible patch material: Choose a compatible fabric, coated-fabric, or vinyl repair patch.
- Suitable adhesive or repair tape: Check the product label for material compatibility and outdoor use.
- Measuring tape: Helps you size the patch with enough overlap.
- Smooth pressing tool: A small roller can help apply even pressure when the patch instructions permit it.
For a small tear, a patch extending roughly one inch beyond the damage on each side is a useful starting point. Larger tears or particular repair systems may require more overlap, so follow the product’s directions.
Why does material compatibility matter?
Car covers can use woven polyester, nylon, nonwoven synthetic layers, coated fabrics, or soft inner linings. A product that bonds to one material may peel away from another or interfere with its coating.
Before applying anything, check the care label or manufacturer instructions. Avoid aggressive solvents, unapproved heat, and ordinary household adhesives that could stiffen, discolor, or damage the cover.
If you plan to sew the tear, remember that each stitch creates needle holes. That may affect water resistance, particularly on waterproof or coated material.
Section Takeaway: The right repair material must bond to the cover without making it brittle or compromising its intended weather protection.
How Do You Patch a Torn Car Cover Step by Step?
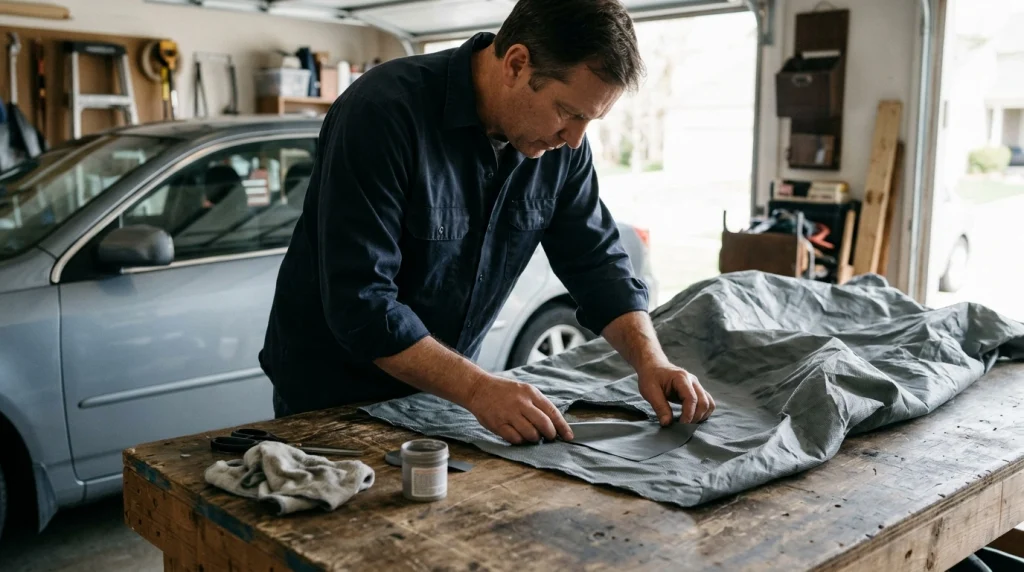
For many small tears, an underside patch is a practical starting point because it reinforces the fabric while keeping the outer surface relatively smooth. Work with the cover removed from the vehicle and follow the patch manufacturer’s instructions throughout the repair.
1. Remove the cover and inspect both sides
Take the cover completely off the vehicle and lay it on a clean, flat surface. Never cut, glue, or sew a cover while it’s stretched over the car.
Examine the surrounding panel for thin spots, loose stitching, additional holes, and signs of weather damage. This helps you avoid patching one tear while overlooking a second problem.
2. Clean and dry the damaged area
Remove dust, grit, and other contamination from both sides using a compatible cleaning method. Dirt trapped under a patch can prevent proper adhesion.
Allow the material to dry completely before proceeding. Don’t use rubbing alcohol or another solvent automatically; confirm that the cover manufacturer permits it.
3. Align the torn edges
Lay the damaged area in its natural shape and gently bring the edges together. Avoid stretching the panel or overlapping the torn edges unnecessarily.
If the fabric is missing rather than simply split, choose a patch large enough to bridge the opening and bond securely to intact material around it.
4. Cut and position the patch
Measure the damaged section and cut a patch that extends beyond the tear on every side. Rounded corners can help reduce the tendency of exposed corners to lift during folding and use.
Position the patch on the underside when the repair system supports that approach. Check that it covers the entire damaged area without bunching the surrounding material.
5. Apply the patch evenly
For a self-adhesive patch, remove the backing and position it carefully before pressing it down. Work from the center toward the edges to help remove trapped air and wrinkles.
For a separate adhesive, use only the amount and application method specified by its manufacturer. Don’t combine products unless their instructions confirm that they’re compatible.
6. Reinforce the outside if necessary
A second patch or narrow repair strip may help in areas exposed to repeated movement. However, double patching isn’t always necessary, and an excessively rigid repair can concentrate stress along its edges.
Choose the least bulky repair that provides adequate support. Make sure no rough adhesive, exposed thread, or hardened edge will rub against the vehicle’s paint.
7. Allow the repair to cure and test it
Keep the cover flat and undisturbed for the period specified by the repair-product manufacturer. Adhesive patches should not be folded, stretched, or exposed to weather before they’re ready.
After curing, gently flex the repaired area by hand. If the patch edges lift or the original tear begins to spread, stop and reassess rather than immediately adding more adhesive.
Before reinstalling the cover, make sure the repair lies flat and doesn’t interfere with the fit. If you need a second reference, the step-by-step car cover patching guide explains additional preparation and application considerations.
Section Takeaway: Careful preparation, proper patch overlap, and adequate curing time are the foundations of a dependable repair. Rushing any of these steps can lead to peeling or renewed tearing.
Which Repair Method Works Best?
The best repair method depends on the cover material, tear location, and expected movement. A flexible adhesive patch often suits a small opening, while a damaged seam may need stitching or professional reinforcement.
Use this comparison to narrow down your options before buying repair supplies.
| Repair Method | Best Use | Main Limitation |
|---|---|---|
| Self-adhesive patch | Small holes and localized tears | Requires a compatible, clean surface |
| Flexible fabric adhesive and patch | Tears in suitable woven fabrics | Incorrect adhesive may stiffen or damage material |
| Specialized vinyl repair kit | Compatible vinyl or coated material | Not suitable for every synthetic cover |
| Sewn patch | Suitable woven fabric and certain seam failures | Stitching can compromise water resistance |
| Professional repair | Complex damage around straps, seams, or hems | May not be worthwhile for an inexpensive, worn cover |
Is repair tape better than a fabric patch?
Repair tape is convenient when the tear is small, the surface is compatible, and the product is designed for outdoor fabric. A separate patch can provide more reinforcement when the damage needs a larger bonded area.
Neither option guarantees a permanent repair. Repeated folding, moisture, temperature changes, and wind movement can weaken the bond over time.
Can you use duct tape or super glue?
Duct tape may provide temporary protection in an emergency, but it isn’t my first choice for a lasting repair. Its adhesive can leave residue, and the tape may peel as the cover flexes or encounters weather.
Super glue is also a poor default because some formulations form rigid bonds that don’t move naturally with flexible fabric. Use a product specifically approved for the cover material instead.
For a related troubleshooting approach, see this guide to fixing a torn car cover.
Section Takeaway: Choose the repair system for the cover’s construction, not just the tear’s appearance. Flexible, compatible materials are generally preferable to improvised rigid repairs.
How Do You Repair Different Materials, Seams, and Straps?
Not every tear should be treated like a hole in ordinary fabric. Coated materials, multilayer covers, seams, and strap attachments may need different repair methods to preserve their function.
How do you patch polyester or nylon covers?
For a woven polyester or nylon cover, look for a flexible patch or adhesive that specifically lists the material as compatible. A patch applied over healthy fabric can reinforce a small split without requiring extensive stitching.
Check whether the cover has a water-resistant coating or soft inner lining. The repair must accommodate those layers without creating a hard surface that could rub against the paint.
How do you patch waterproof or multilayer covers?
A waterproof or multilayer cover needs special care because a visible surface patch may not restore every damaged layer. Use a repair kit approved for the relevant material and follow its instructions for sealing the opening.
Don’t assume that a bonded patch restores the cover’s original waterproof rating. Test the repair cautiously according to the manufacturer’s guidance, and remember that seams may need separate treatment.
How do you fix a torn seam or strap attachment?
If the stitching has separated but the surrounding material remains intact, restitching the seam may be possible. When the fabric itself has torn, the repair must reinforce sound material beyond the damaged stitch line.
Straps, buckles, and elastic hems carry repeated tension, especially when an outdoor cover moves in the wind. A small patch placed directly over a failed attachment may not provide enough support.
- Split seam: Consider suitable restitching with compatible thread and reinforcement.
- Torn strap attachment: Reinforce a larger area or seek professional canvas or upholstery repair.
- Damaged elastic hem: Replace or professionally repair the elastic if it no longer holds the cover securely.
- Separated inner lining: Use a repair system that addresses the affected layer without exposing rough edges.
If the cover is expensive or specially fitted, check the manufacturer’s repair service and warranty before making permanent changes.
Section Takeaway: Repairs around seams and attachment points must restore support, not simply hide the damage. When the repair affects multiple layers or load-bearing sections, professional help may be the safer choice.
How Do You Prevent Another Tear?
The most effective way to prevent repeat damage is to identify what caused the original tear. A good patch won’t solve a persistent fit problem or protect the cover from the same sharp edge that damaged it previously.
Check the fit and vehicle contact points
A cover that’s too tight can place excessive tension around mirrors, bumpers, spoilers, and other contours. A loose cover may flap repeatedly in the wind, causing abrasion and stress at seams.
When reinstalling the cover, center it carefully and use the intended mirror pockets, hems, straps, and fastening points. Don’t force the fabric over a feature it wasn’t designed to accommodate.
Use these habits to extend the cover’s life
- Remove sharp obstructions: Check for protruding accessories, rough edges, and nearby branches that could snag the material.
- Install it gently: Unfold and lift the cover instead of dragging it across the vehicle.
- Secure it correctly: Use the manufacturer’s fastening system to limit unnecessary movement.
- Keep both surfaces clean: Dirt trapped between the cover and paint can contribute to abrasion.
- Store it dry: Follow the care instructions before folding the cover for storage.
- Inspect it regularly: Check seams, corners, and previous repairs for early signs of failure.
Paint protection also depends on keeping the inner surface free from grit and rough patches. If you discover a hard adhesive edge or exposed stitching after repairing the cover, correct it before placing the cover back on the car.
For broader vehicle-care information, consult Kelley Blue Book’s car-care and maintenance advice and the relevant instructions from your cover’s manufacturer.
Section Takeaway: Correct fit, clean contact surfaces, careful handling, and secure fastening help prevent repeat tears and reduce the risk of rubbing damage to your paint.
Should You Repair or Replace the Cover?
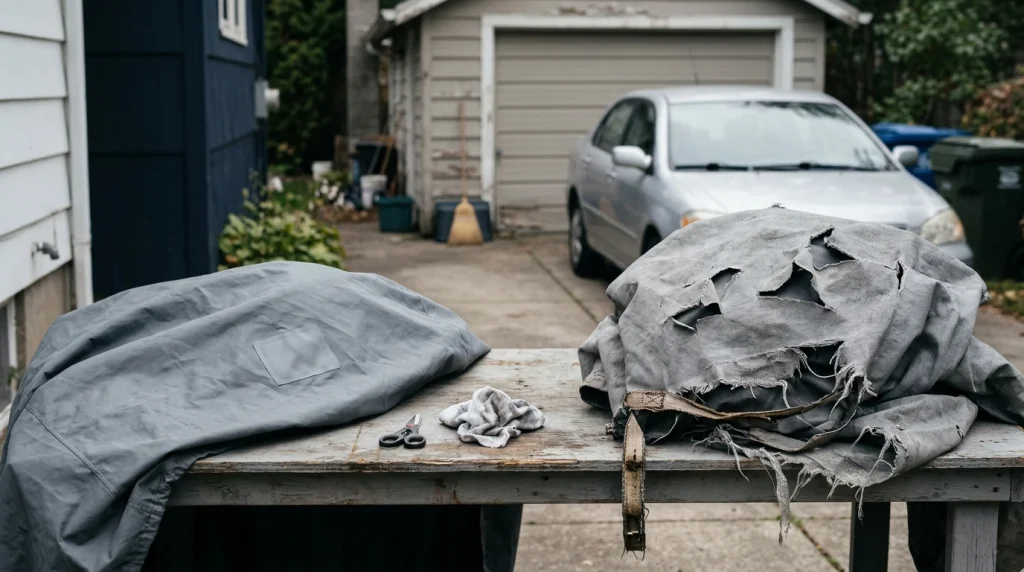
Repair the cover when the damage is limited and the remaining material is still strong enough to support a patch. Replace it when widespread deterioration makes individual repairs unlikely to last.
When repair makes sense
- The tear is isolated and the surrounding fabric remains flexible.
- The inner lining is smooth and free from damage that could affect the paint.
- The seams, straps, and fastening system remain functional.
- A compatible repair product can bond to healthy material around the opening.
When replacement is the better option
- New tears appear in several different areas.
- The fabric cracks or crumbles when gently flexed.
- Multiple seams, straps, or elastic sections have failed.
- The inner surface has become rough or the layers are separating.
- The cover no longer fits securely, even when installed correctly.
- Previous patches repeatedly peel because the underlying material is deteriorating.
Before buying a replacement, check the vehicle’s dimensions, body style, mirror configuration, and intended storage conditions. A cover designed for indoor dust protection may not provide the same weather resistance as one intended for outdoor use.
For more information about choosing a suitable cover, consult Car and Driver’s automotive shopping advice and compare the specifications and care instructions of the covers you’re considering.
Section Takeaway: Don’t keep patching fabric that has lost its strength. When several parts are failing, replacing the cover may offer more dependable protection than repairing one section at a time.
Frequently Asked Questions
What is the best way to patch a torn car cover?
The best general approach is to apply a compatible flexible patch over a clean, dry, and aligned tear. Reinforce the opening with enough overlap onto healthy material, then follow the product’s curing instructions before reinstalling the cover.
Can I use duct tape to repair a car cover?
Duct tape can serve as a temporary fix, but weather exposure and repeated folding may weaken its adhesive. For a more dependable repair, choose a patch or repair tape specifically designed for your cover’s material and intended conditions.
Should I patch a car cover from the inside or outside?
An underside patch often provides a smooth exterior and reinforces the damaged area. However, the best placement depends on the cover’s construction and repair product, so follow the manufacturer’s instructions rather than assuming one side always works best.
How big should a patch be for a torn car cover?
Choose a patch that extends onto healthy material on every side of the tear. Roughly one inch of overlap per side can be a useful starting point for small damage, but larger openings and particular repair systems may require more.
Can I sew a ripped car cover?
Yes, some woven covers can be sewn, especially when a seam has opened and the surrounding fabric remains strong. However, stitching creates needle holes that may affect water resistance, so check the material and consider a compatible bonded patch instead.
Will patching restore a car cover’s waterproof protection?
Not necessarily. A patch may close the opening without restoring the original performance of the fabric, coating, or seams. Use an approved repair system and follow the manufacturer’s instructions if maintaining water resistance is important.
When should I stop repairing a car cover and replace it?
Replace the cover when the material has become brittle, multiple tears appear, attachment points fail, or patches repeatedly detach. A repair is most useful when the surrounding fabric remains strong enough to support it.
For general vehicle safety and maintenance information, the National Highway Traffic Safety Administration is also a useful authoritative resource, although it does not replace your car-cover manufacturer’s repair instructions.
Final Takeaway
Patching a torn car cover is a manageable DIY task when the damage is localized and the material around it remains healthy. Remove the cover, prepare the surface carefully, use a compatible flexible patch, and allow the repair to cure before putting the cover back on.
Just as importantly, correct the reason the tear happened. Check the fit, secure the cover properly, and inspect the repaired area regularly.
If the fabric has become brittle or multiple sections are failing, replacement is usually the more dependable option. The goal isn’t simply to close a hole; it’s to keep the cover protecting your vehicle without introducing new problems.