
Car Cover Leaking? Why It Happens and How to Fix It

Quick Answer
If your car cover is leaking, first confirm whether rain is passing through the fabric or moisture is forming underneath as condensation. Many outdoor covers are designed to be breathable and water-resistant rather than completely waterproof, which is why understanding how breathable outdoor car covers handle moisture matters before replacing yours.
Most likely causes
- Normal seepage: A water-resistant cover may let small amounts of moisture through during prolonged or heavy rain.
- Leaking seams: Stitching holes and worn seam treatments can become entry points for water.
- Dirty fabric: Dirt, pollen, oils, and residue can reduce how well water beads and runs off.
- Poor fit: Wind can push rain beneath loose edges, mirror pockets, and hems.
- Condensation: Humid air can leave moisture on cooler body panels even when rain never passed through the cover.
- Fabric damage: Tears, worn spots, or deteriorated coatings can create genuine leaks.
What I would do first
- Dry the car and cover completely, reinstall the cover, then test one small area with gentle hose water so you can see where moisture starts.
A car cover leaking after rain is frustrating because the cover is supposed to be the thing keeping your vehicle dry. I have learned not to blame the fabric immediately, though.
Water underneath can come from the material, seams, wind, condensation, or even moisture that was already on the car. In this 2026 guide, I will show you how I separate those causes and decide whether to clean, repair, adjust, or replace the cover.
In This Guide
Why Is My Car Cover Leaking?
A car cover usually appears to leak because water is penetrating the material, entering around an opening, or forming underneath the cover. Heavy rain exposes weaknesses that may never show during a short shower.
A leaking car cover is a cover that allows outside water to reach the vehicle through its fabric, seams, openings, or damaged areas. Moisture caused only by condensation is different, even though the result can look almost identical.
The cover may only be water-resistant
One of the first mistakes I made with outdoor covers was assuming “weatherproof” always meant no water could ever get through. It does not necessarily mean that.
Many quality covers favor water resistance plus breathability. That balance lets moisture vapor escape instead of sealing the car inside a plastic-like shell.
- Light rain: Water may bead and roll away easily.
- Long rain: More moisture may eventually reach the inner surface.
- Wind-driven rain: Water can be pushed through weak areas or underneath the hem.
- Standing water: A puddle sitting on the cover puts more pressure on the fabric than moving rain.
The seams may leak before the fabric
Seams deserve close attention. Every stitched seam contains small needle holes, and those areas can become the first place water enters.
I normally inspect the roofline, mirror pockets, antenna openings, and stitched corners first. They often handle more tension than flat sections.
The water-repellent performance may have weakened
A cover that shed rain well when new can behave differently after months or years outside. Dirt and environmental residue can change how water behaves on its surface.
Age matters too. Coatings, laminates, seam treatments, and exposed fibers can wear over time.
| What You Notice | Likely Cause | First Check |
|---|---|---|
| Wet line directly below stitching | Seam seepage | Inspect seams from inside |
| Water near bumpers or rocker panels | Rain entering under loose edges | Check elastic hem and straps |
| Whole car feels damp underneath | Condensation or trapped moisture | Check weather and starting moisture |
| One isolated wet spot | Hole, tear, abrasion, or worn coating | Inspect the matching cover area |
| Cover absorbs water instead of beading it | Dirty or aged fabric | Clean according to manufacturer directions |
Section Takeaway: Find the water pattern before buying anything. Where the car gets wet usually tells you more than the amount of rain.
Is It Really a Leak or Just Condensation?
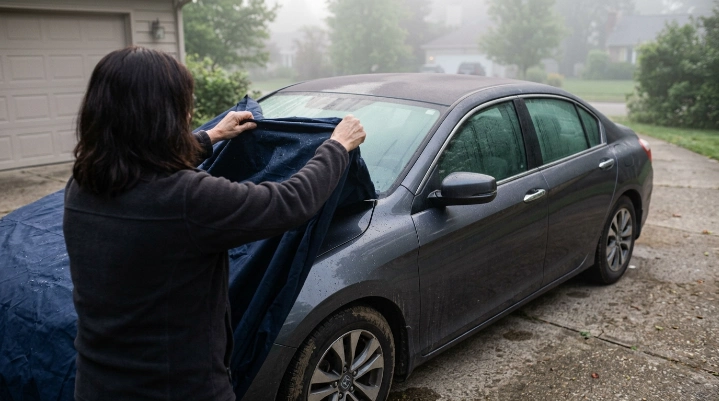
Condensation is one of the easiest things to mistake for a leaking car cover. Moist air can contact a cooler vehicle surface and leave droplets even when no rain penetrated the material.
This is why I never judge a cover by lifting one corner after a humid night. I look at the moisture pattern first.
Signs that suggest condensation
- Moisture appears broadly across the roof, glass, and horizontal panels.
- The underside of the cover feels damp in many areas.
- There is no clear wet path below a seam or damaged spot.
- The car was covered while slightly wet or warm.
- The weather was humid, foggy, or changed temperature quickly.
Breathability helps moisture escape instead of keeping it trapped. Coverking also explains why its outdoor covers use breathable materials to reduce condensation buildup.
You can read its explanation of water resistance, breathability, and condensation under outdoor covers.
Signs that suggest actual rain intrusion
- Water appears below one seam every time it rains.
- A wet patch matches a tear or thin area above it.
- Moisture appears mostly on the windward side.
- The cover develops visible pools before the vehicle gets wet.
- A controlled hose test recreates the same wet spot.
Before testing, I dry both the cover and vehicle. Otherwise, leftover moisture can make the result useless.
Section Takeaway: Condensation usually creates widespread dampness. A true leak more often creates a repeatable path or localized wet spot.
How Do I Find Where a Car Cover Is Leaking?
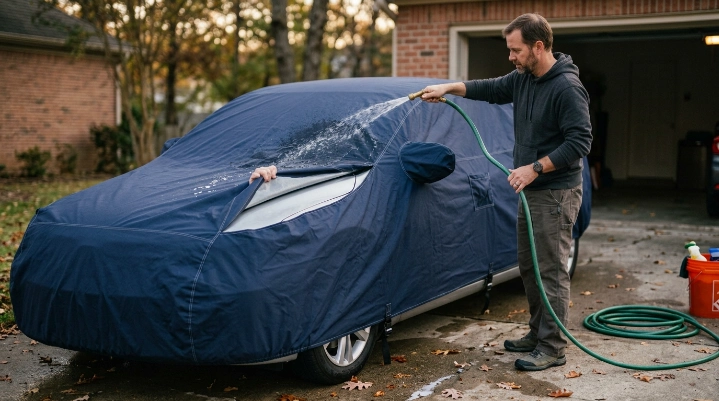
The easiest method is a controlled water test. You want to test one small section at a time instead of soaking the entire cover.
Step 1: Start completely dry
Let the cover dry before testing it. Dry the vehicle as well.
Place the cover on the car exactly as you normally use it. Secure any straps or buckles.
Step 2: Inspect the cover before adding water
- Look for cuts, pinholes, worn corners, and frayed stitching.
- Check mirror pockets and antenna openings.
- Inspect areas that rub against spoilers, mirrors, roof racks, or sharp trim.
- Hold questionable fabric toward daylight to reveal thin spots.
Step 3: Use a gentle hose flow
Apply water to one small roof section for several minutes. Do not use a pressure washer because its force does not represent ordinary rainfall.
Lift the cover and check the matching panel underneath. Repeat with the next area until you locate the problem.
Step 4: Test seams separately
Run water across one seam while keeping nearby sections as dry as possible. Check immediately underneath.
A repeated wet line below the same stitching is much stronger evidence than random moisture elsewhere.
Step 5: Check how the cover fits
A loose cover can let rain blow upward beneath the bottom edge. This can make perfectly good fabric look defective.
- Confirm the front and rear hems sit below the bumpers.
- Use the intended tie-down system.
- Check that mirror pockets are not pulling the cover upward.
- Make sure the cover size matches your vehicle.
I once chased what looked like a lower-door leak before noticing the wind had lifted the cover several inches. Fixing the fit stopped the problem without touching the fabric.
Section Takeaway: Test one area at a time. Controlled testing separates fabric failure from seam problems and wind intrusion.
How Can I Fix a Leaking Car Cover?
The right fix depends on what your test reveals. Cleaning may restore performance, while physical damage usually needs repair or replacement.
Clean the cover correctly
A dirty cover may stop shedding water as effectively as it once did. Start with the manufacturer’s care instructions before applying any aftermarket treatment.
Covercraft’s current car cover cleaning instructions show that washing and drying methods vary by fabric.
- Shake or brush loose debris away first.
- Use only a cleaner approved for your cover material.
- Avoid bleach unless the manufacturer specifically allows it.
- Avoid fabric softener when the manufacturer prohibits it.
- Rinse thoroughly so detergent residue does not remain.
- Dry the cover using the approved method before storage.
Repair small holes only when appropriate
A tiny tear may be repairable with a patch recommended by the cover manufacturer. Generic duct tape is rarely my first choice because adhesive residue can create another problem.
Put any repair on the correct side and keep rough edges away from the vehicle finish.
Do not randomly coat the entire cover
It is tempting to spray a waterproofing chemical over everything. I would not do that unless the cover manufacturer approves the product for that exact fabric.
An incompatible coating can change breathability, stain the material, or affect how the inner surface behaves against paint.
Fix loose fit and wind entry
- Use factory straps and buckles correctly.
- Replace broken elastic or damaged fastening hardware.
- Choose a more accurate size if the cover is oversized.
- Avoid letting large sections flap against painted panels.
If the leak is coming through several seams or large fabric areas, repeated patching usually becomes a losing battle. That is when I start considering replacement.
Section Takeaway: Clean first, repair isolated damage second, and avoid unapproved waterproofing chemicals. Widespread failure usually points toward replacement.
When Should I Replace the Cover Instead?
Replace a car cover when the material can no longer provide dependable protection after proper cleaning and basic repairs. Age alone is less useful than the cover’s condition.
I would replace it if I find these problems
- Multiple tears or thin spots have developed.
- Several seams leak during controlled testing.
- The inner lining is rough, damaged, or contaminated.
- The cover no longer fits securely.
- Elastic hems or attachment points have failed badly.
- Large areas stay saturated during ordinary rain.
- The fabric has become brittle from long-term exposure.
Outdoor use is much harder on a cover than indoor storage. Sun, wind, dirt, rain, snow, and repeated handling all add wear.
Water-resistant vs. waterproof vs. breathable
| Cover Trait | What It Means in Practice | Best Use |
|---|---|---|
| Water-resistant | Designed to shed or resist rain, but may not block unlimited water exposure. | Common outdoor parking conditions |
| Waterproof | Designed to prevent liquid water from penetrating under rated conditions. | Situations where the design also manages trapped moisture properly |
| Breathable | Allows heat or moisture vapor beneath the cover to escape more readily. | Outdoor and longer-term vehicle protection |
I pay more attention to the combination of rain protection, breathability, fit, and construction than to one marketing word on the package.
Section Takeaway: A replacement makes sense when leaking is widespread, structural damage is increasing, or the cover can no longer stay secure.
How Can I Prevent Car Cover Leaks?
Good habits extend the useful life of a cover and make water problems easier to diagnose. The biggest goal is keeping both the vehicle and cover clean, dry, and properly fitted.
Never store the cover wet
A damp cover stuffed into a storage bag stays wet much longer. Let it dry according to its care instructions before folding it away.
Do not cover a dirty vehicle unnecessarily
Dirt trapped between a moving cover and paint can act like an abrasive. Wind makes that risk worse.
I prefer covering a reasonably clean, dry vehicle whenever possible.
Remove the cover periodically
If your car stays covered for long periods, inspect it instead of assuming everything underneath is fine. Covercraft recommends periodic removal, cleaning, and fit checks for extended cover use.
Its guidance on leaving a vehicle covered for extended periods also stresses keeping both the vehicle and cover clean.
Avoid water pooling
Deep puddles place more water against one small area of fabric. They also add weight and stretch the cover.
Check whether roof racks, spoilers, or an oversized fit create low areas where water collects.
Inspect after storms
- Check straps and buckles.
- Look for new tears or abrasion.
- Remove leaves and trapped debris.
- Check the paint for damp areas.
- Let the cover dry if it became saturated.
A five-minute inspection after severe weather can catch a small problem before it becomes a ruined cover.
Section Takeaway: A clean cover, dry vehicle, secure fit, and periodic inspection prevent many of the problems people describe as car cover leaking.
Frequently Asked Questions
Is it normal for a car cover to let some water through?
It can be normal for some water-resistant, breathable covers to allow limited moisture through during prolonged or severe rain. Check the manufacturer’s stated rain protection before deciding the cover is defective.
Why is my car wet under a waterproof cover?
The moisture may be condensation rather than rain entering from outside. Humid air, a warm or damp vehicle, and poor moisture escape can all leave water underneath a cover.
Can I put a car cover on a wet car?
I avoid doing it when possible. Starting with a dry vehicle makes moisture easier to manage and prevents you from confusing existing water with a new leak.
Can I spray waterproofing on my car cover?
Only use a waterproofing or water-repellent treatment if the cover manufacturer approves it for that material. An incompatible product may affect breathability, appearance, or fabric performance.
Why does my car cover leak at the seams?
Stitching creates small holes through the material, and seam treatments can wear with age. If a hose test repeatedly produces water beneath the same seam, the seam is a likely entry point.
Should a car cover touch the ground?
No. It should cover the vehicle securely without dragging on the ground. A cover that is too large can collect dirt, move in the wind, and allow rain to enter around poorly fitted areas.
Will a tighter car cover stop water leaks?
A secure fit can reduce wind-driven rain entering around the edges, but excessive tension can stress seams and corners. The goal is a correctly sized cover, not one stretched as tightly as possible.
If your car cover is leaking, do not rush to replace it after one wet morning. Dry everything, identify the moisture pattern, and run a controlled test first.
Once you know whether the cause is condensation, seams, fit, dirt, damage, or worn material, the next step becomes much clearer. That approach has saved me from throwing away covers that only needed cleaning or adjustment.
“`
SEO METADATA (for WordPress SEO plugin — do not paste into content):
Meta Title: Car Cover Leaking? Causes, Tests & Fixes
Meta Description: Car cover leaking after rain? Learn how to spot condensation, seam leaks, fabric failure, poor fit, and the safest ways to fix the problem.
URL Slug: car-cover-leaking
Focus Keyword: car cover leaking
Secondary Keywords: car cover leaking water, car cover not waterproof, water under car cover, car cover condensation, leaking waterproof car cover
Internal links placed from sitemap:
Internal links skipped — sitemap not fetchable during this session. No aautomotives.com URLs were invented or added.
Links to manually verify before publishing:
None — the outbound links used above were checked during drafting.