
How to Use a Car Cover for Long Term Storage: Complete Guide

Quick Answer
To use a car cover for long term storage, wash and completely dry your vehicle, choose a breathable cover designed for your storage location, and install it without dragging fabric across the paint. Secure the cover, inspect it regularly, and remove trapped moisture or debris promptly. Follow the manufacturer’s extended storage guidance rather than leaving the car covered and unchecked for months.
Essential storage steps
- Clean the vehicle: Remove dirt, road salt, bird droppings, and other paint contaminants.
- Dry every surface: Check mirrors, trim, seals, and other areas that retain water.
- Choose breathable fabric: Use an indoor dust cover or an outdoor-rated weather-resistant cover.
- Install carefully: Position the cover over the roof and secure its fitted edges without scraping the paint.
- Prevent movement: Use approved straps and fasteners to reduce wind-related rubbing.
- Inspect regularly: Check moisture, fit, dirt buildup, and cover damage throughout storage.
Learning how to use a car cover for long term storage involves more than pulling fabric over a parked vehicle. The wrong material or a careless installation can create the paint problems you’re trying to prevent.
My approach to vehicle storage is straightforward: prepare the car first, match the cover to its environment, and keep checking underneath. This guide explains the complete process, including mistakes that can become expensive.
In This Guide
- Why a Car Cover Matters During Long-Term Storage
- How to Choose the Right Car Cover
- How to Prepare Your Car Before Covering It
- How to Install a Car Cover Correctly
- How to Maintain a Covered Car During Storage
- Common Car Cover Storage Mistakes
- How to Remove the Cover and Return Your Car to Service
- Frequently Asked Questions
- Final Takeaway
Why Does a Car Cover Matter During Long-Term Storage?
A car cover protects a parked vehicle from dust, dirt, sunlight, and certain environmental hazards. Its effectiveness depends on the fabric, fit, storage conditions, and routine maintenance.
A storage car cover is a protective fabric enclosure designed to fit over a stationary vehicle. Unlike a simple plastic tarp, an automotive cover should balance protection with appropriate moisture management.
What happens when a car sits uncovered?
Even a parked vehicle continues to face environmental exposure. A garage reduces many risks, but it doesn’t eliminate airborne dust, humidity, or accidental contact.
Outdoor storage introduces additional challenges:
- Ultraviolet exposure: Sunlight can contribute to fading and aging of exterior and interior materials.
- Bird droppings: Contaminants may damage paint if left untreated.
- Airborne debris: Dust, pollen, and grit can settle on painted surfaces.
- Moisture: Persistent dampness increases the risk of corrosion.
- Weather exposure: Rain, snow, and wind place additional demands on exterior materials.
- Minor contact: A suitable cover can provide limited protection against light accidental brushing.
However, a cover isn’t impact protection. It won’t reliably prevent hail dents, falling branch damage, or scratches from heavy objects.
Can a car cover damage paint?
Yes. A dirty, poorly fitted, or moving car cover can scratch or dull a vehicle’s finish.
Picture a dusty car parked outside with a loose cover. Every windy afternoon, fabric moves against particles already sitting on the paint.
That repeated contact is precisely what you want to avoid.
The safest routine starts with a clean surface and a properly fitted cover. Inspecting the material is just as important as checking the vehicle.
What does breathable fabric mean?
Breathable fabric allows some moisture vapor to move through the cover instead of sealing the vehicle inside an impermeable barrier. It doesn’t guarantee that condensation will never form.
Breathability is especially useful where humidity and temperature changes are common. Outdoor covers also need suitable water resistance and weather durability.
A completely waterproof plastic sheet may look protective, but trapped condensation can create problems beneath it. Choose automotive materials made for the actual storage environment.
How Do You Choose the Right Car Cover for Long-Term Storage?
The best car cover depends first on whether your vehicle will remain indoors or outdoors. Fit, breathability, fabric construction, and local weather come next.
Don’t assume thicker fabric always provides better protection. A heavy cover that traps moisture or moves against the paint can be worse than a well-designed lighter material.
Indoor vs. outdoor car covers
Indoor covers prioritize dust control, gentle contact, and easy handling. Outdoor covers need greater resistance to sunlight, precipitation, and wind.
| Feature | Indoor Cover | Outdoor Cover |
|---|---|---|
| Main purpose | Dust and light-contact protection | Weather and environmental protection |
| Water resistance | Usually limited | Important for precipitation exposure |
| Breathability | Important | Important alongside water resistance |
| UV protection | Lower priority in a dark garage | Important in direct sunlight |
| Securement | Fitted hems usually sufficient | Wind-rated fastening recommended |
| Best location | Enclosed garage or storage facility | Driveway or exposed parking space |
Important: An outdoor-rated cover does not automatically make outdoor storage equivalent to a climate-controlled garage.
Custom-fit vs. universal-fit covers
A custom-fit cover follows the vehicle’s approximate body dimensions and accommodates its mirrors or other specified features. A universal cover fits a broader range of vehicles.
Both types can work, but fit affects how much material moves during storage.
- Custom-fit: Usually provides more controlled coverage around mirrors, bumpers, and body contours.
- Universal-fit: Offers flexibility across vehicles but requires careful sizing.
- Oversized cover: May create loose sections that flap outdoors.
- Undersized cover: Can stretch across sharp edges or leave areas exposed.
When choosing between sizes, consult the manufacturer’s fitment chart. Check accessories such as spoilers, roof racks, or aftermarket mirrors.
Which cover material should you look for?
Look for a clean, paint-compatible inner surface, appropriate breathability, and construction intended for your storage location. Outdoor fabric should also resist weathering and provide a secure fit.
Manufacturers such as Covercraft offer both indoor multilayer materials and outdoor weather-resistant fabrics. Always check the individual product specifications rather than relying on the brand name alone.
For classic cars with delicate finishes, prioritize a gentle inner surface and a controlled indoor environment. For driveway storage, weather resistance and secure fastening become more important.
How Should You Prepare Your Car Before Putting on a Cover?
Thorough preparation matters more than applying the cover quickly. Dirt, water, neglected batteries, and pest activity can still harm a vehicle beneath expensive fabric.
Use this checklist before starting a storage period lasting several weeks or months.
Step 1: Wash and completely dry the exterior
Wash the vehicle using automotive shampoo and clean washing equipment. Rinse away road salt, pollen, bird droppings, and accumulated grime.
Dry the body with clean microfiber towels or a suitable automotive drying method. Pay special attention to places where water collects.
- Side mirrors and mirror housings
- Door handles and trim gaps
- Window seals and weatherstripping
- Emblems and body panel seams
- Fuel or charging-port doors
- Areas beneath spoilers and exterior accessories
Don’t cover a freshly washed car while water continues dripping from hidden areas. Give the vehicle enough time to dry thoroughly.
Step 2: Inspect and protect the paint
Inspect the finish under good lighting. Remove bonded contaminants using products appropriate for the vehicle’s paint and follow their directions.
If suitable for your finish, apply a compatible wax or paint sealant. This can add another layer of surface protection during storage.
Allow the product to cure as directed before putting on the cover. Avoid applying fabric over damp polish or uncured coatings.
Step 3: Clean the cabin and remove attractants
Vacuum the interior and remove food, wrappers, and other items that might attract pests. Clean spills and make sure upholstery or carpeting is dry.
Consider a vehicle-safe moisture-control product if your storage environment is humid. These products supplement good ventilation; they don’t replace it.
A dry, secure storage location is preferable to leaving windows open. Open windows can invite pests, moisture, and unauthorized access.
Step 4: Check the tires
Check tire pressure while the tires are cold. Inflate them to the vehicle manufacturer’s recommended pressure, unless your owner’s manual gives different storage-specific instructions.
The correct pressure appears on the driver’s door placard or in the owner’s manual. It isn’t the maximum pressure molded into the tire sidewall.
The NHTSA tire safety guide explains how to locate and use this information.
Long stationary periods can produce temporary tire flat spotting. Keep the tires properly inflated and inspect them during storage.
Michelin’s flat-spotting guidance advises against overinflating tires to prevent this condition.
Step 5: Prepare the battery and fluids
A cover protects the exterior, not the battery or internal mechanical systems. A vehicle left unused for months can develop starting and maintenance problems.
For a conventional gasoline-powered vehicle, review these items:
- Battery: Use an approved smart maintainer when appropriate.
- Engine oil: Follow the manufacturer’s time-based service schedule.
- Fuel: Follow vehicle-specific recommendations for long storage and fuel stabilizers.
- Coolant: Check the correct level and condition.
- Brake fluid: Follow the vehicle’s maintenance schedule.
- Parking brake: Consult the manual for extended-storage instructions, especially in damp conditions.
AAA recommends a battery maintainer for vehicles that remain unused for extended periods. You can review its battery maintenance advice before storing your vehicle.
Electric and hybrid vehicles may require different storage settings and battery charge levels. Follow the specific manufacturer’s recommendations for both high-voltage and 12-volt systems.
Mechanic Alert: If storage preparation requires battery disconnection, electrical modifications, or supporting the vehicle on stands, consult a qualified mechanic when you’re unfamiliar with the procedure.
Step 6: Check for pest entry points
Rodents may enter vehicles during long periods of inactivity. They can damage wiring, insulation, and other components.
Inspect the storage location for food sources, nesting materials, and existing pest activity. Choose traps or deterrents appropriate for the area.
A car cover is not rodent-proof. Don’t rely on fabric alone to keep animals away.
If you install any temporary protective barriers around vehicle openings, use a clearly visible reminder to remove them before starting the engine.
Section Takeaway: Store a clean, dry, mechanically prepared vehicle. The cover is only one part of the overall protection plan.
How Do You Install a Car Cover Correctly for Long-Term Storage?
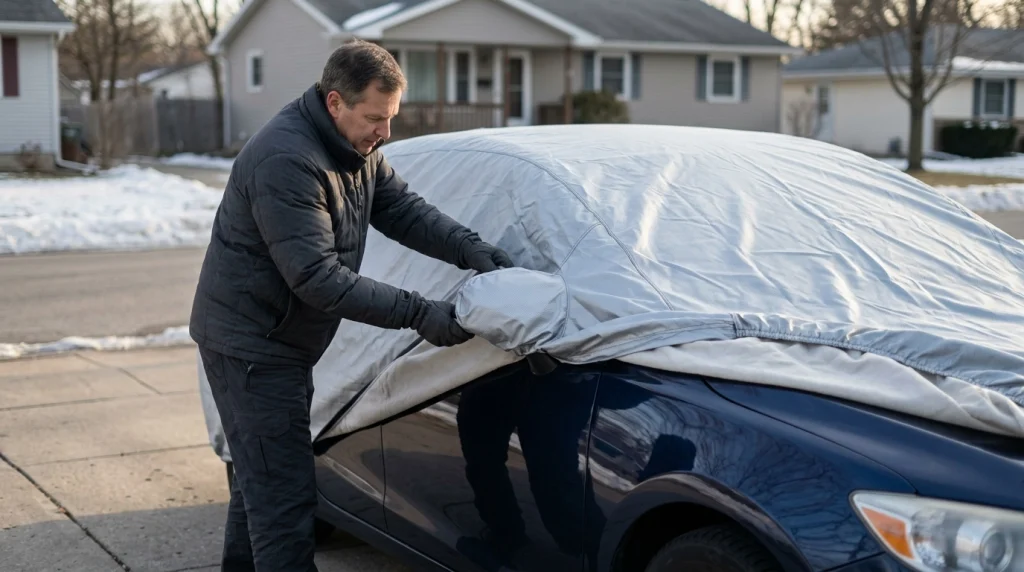
Install the car cover only when the vehicle and the cover are clean and dry. Work carefully to prevent fabric from rubbing against the paint.
A second person can help with larger vehicles, especially outdoors.
Step 1: Check the cover before installation
Unpack the cover on a clean surface and inspect both sides. Look for trapped grit, torn stitching, damaged elastic, or sharp fastening hardware.
Locate the manufacturer’s front and rear identification markings. Follow its installation instructions where they differ from this general process.
Step 2: Position the cover over the roof
Place the folded cover gently over the center of the roof. Keep loose portions off dirty pavement.
Gradually unfold the fabric toward the front and rear. Avoid pulling a dirty or bunched section sideways across the vehicle.
Step 3: Align mirrors and exterior accessories
Position mirror pockets over the corresponding mirrors if the cover includes them. Check that they aren’t twisted or stretched.
Account for antennas, roof accessories, spoilers, and other protrusions. Never force tight fabric over a sharp component.
If your vehicle has a removable antenna, follow the cover manufacturer’s installation recommendations.
Step 4: Fit the front and rear edges
Pull the front section over the front bumper as directed. Then position the rear section around the rear bumper.
Make sure the fabric lies evenly across the roof, hood, doors, and trunk. Correct visible folds or tension points without dragging the entire cover around.
Step 5: Secure the approved fasteners
Use the built-in straps, buckles, or other fastening hardware as specified. Keep them away from painted surfaces wherever possible.
Check the following before leaving the vehicle:
- The cover fits evenly around the vehicle.
- Mirror pockets and fitted contours align correctly.
- Elastic hems sit where intended.
- Straps are secured according to the manufacturer.
- No hard buckle rests against the paint.
- Loose fabric cannot flap excessively.
- Water cannot collect in obvious fabric pockets.
Do not substitute ropes that can scrape the bodywork. Use only fastening methods approved for the cover and vehicle.
Step 6: Perform a final inspection
Walk around the vehicle and inspect all visible edges. Check that the cover doesn’t obstruct required ventilation or contact a connected charging cable.
For electric vehicles, use a cover specifically compatible with the model and charging arrangement. Never assume a charging flap is safe simply because a universal cover fits.
Don’t install a cover over hot exhaust components. Allow the vehicle to cool first.
Section Takeaway: Gentle placement, correct alignment, and secure fastening help prevent unnecessary rubbing during storage.
How Do You Maintain a Car Under a Cover for Several Months?
Long-term storage requires periodic inspections. Even a quality cover can collect moisture, shift in wind, or trap dirt.
A useful starting point is checking the vehicle every one to two weeks, following the cover manufacturer’s instructions. Increase the frequency during wet, windy, or unusually humid conditions.
What should you inspect regularly?
Check the cover before removing it. Look for pooling water, displaced fabric, damaged straps, or debris.
When conditions allow, remove it carefully and inspect the underlying vehicle.
- Paint: Look for fresh dirt, moisture, or contact marks.
- Fabric: Check the underside for grit, mildew, or deterioration.
- Fit: Confirm that straps and fitted sections remain secure.
- Tires: Inspect pressure and visible condition.
- Battery: Confirm that approved maintenance equipment is functioning correctly.
- Pests: Check for nesting material or signs of animal activity.
- Interior: Watch for condensation, damp smells, or mold.
If the cover or vehicle is wet, don’t immediately reinstall damp material. Clean and dry both surfaces before covering the vehicle again.
Should you remove the cover every week?
Weekly removal isn’t universally required, but regular inspection is important. Covercraft recommends removing and checking its vehicle covers every one to two weeks during extended use.
Your actual schedule should account for weather, cover material, and storage conditions. An outdoor vehicle exposed to persistent rain may need closer attention.
What if condensation develops underneath?
Remove the cover and allow the car and fabric to dry. Identify whether the moisture came from rainfall, humidity, trapped wash water, or another source.
Check that you’re using the right fabric for the environment. A nonbreathable tarp can aggravate persistent condensation.
If water repeatedly accumulates, improve the storage environment or change the cover. Don’t simply reinstall damp material and hope it evaporates.
Should you start the engine during storage?
Don’t start the engine briefly just to let it idle for a few minutes. Short operating periods may fail to warm the engine and exhaust system sufficiently.
Follow the manufacturer’s storage procedures instead. If periodic driving is recommended, the vehicle should be roadworthy and driven under appropriate conditions.
Never idle a gasoline-powered car inside an enclosed garage. Carbon monoxide exposure can be fatal.
A practical inspection schedule
| When | Recommended Check |
|---|---|
| Before covering | Wash, dry, inspect, and prepare the vehicle. |
| After severe weather | Check water accumulation, movement, and fastening. |
| Every 1–2 weeks | Inspect the cover and underlying surfaces as conditions permit. |
| Monthly | Check cold tire pressure, pests, battery equipment, and general condition. |
| Before driving again | Complete a vehicle safety and maintenance inspection. |
This is a general inspection routine, not a replacement for vehicle-specific maintenance instructions.
What Are the Most Common Car Cover Storage Mistakes?
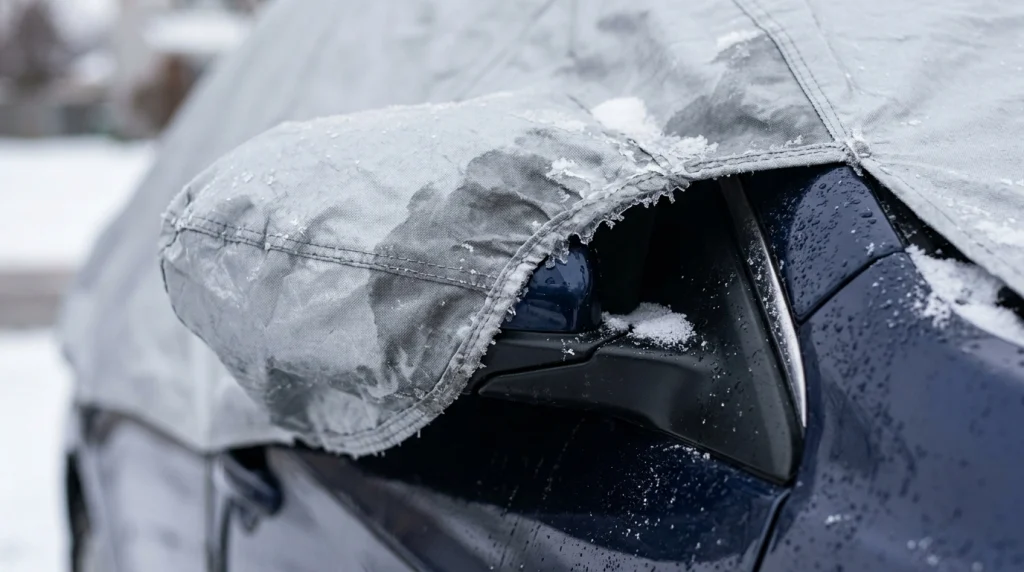
The most damaging mistakes usually involve contamination, moisture, incorrect fit, or neglected inspections. Avoiding these problems can be more important than buying the most expensive cover.
Putting a cover on a dirty vehicle
Dust and grit can become trapped between the fabric and paint. Movement then increases the chance of scratching.
Better approach: Wash and dry the vehicle thoroughly before covering it.
Using a plastic tarp instead of an automotive cover
Ordinary plastic tarps can limit moisture escape and may have unsuitable surfaces or fastening arrangements. Their stiffness and movement may also damage the finish.
Better approach: Choose a breathable automotive cover rated for the storage environment.
Using an indoor cover outdoors
A soft indoor dust cover may not tolerate prolonged rain, UV exposure, or wind. It can become saturated or deteriorate prematurely.
Better approach: Use an outdoor-rated cover for an exposed driveway or parking space.
Leaving loose fabric unsecured
Wind can make loose fabric repeatedly contact painted panels. Straps and buckles may also cause damage if incorrectly positioned.
Better approach: Check the fit and use the manufacturer’s approved fastening system.
Ignoring water or mildew
Moisture beneath a cover deserves immediate attention. Persistent dampness can affect the finish, seals, and underlying metal components.
Better approach: Remove the cover, dry the surfaces, and address the cause before reinstalling it.
Forgetting mechanical storage preparation
A covered vehicle can still develop discharged batteries, flat-spotted tires, fuel issues, or rodent damage. Exterior protection cannot replace routine mechanical care.
Better approach: Create a complete storage checklist based on your vehicle’s owner’s manual.
Assuming a cover can prevent all damage
A car cover isn’t a shield against hail, flooding, falling objects, or vandalism. It also cannot stop corrosion if the storage environment remains damp.
Better approach: Choose sheltered parking when possible and treat the cover as supplementary protection.
How Do You Remove the Car Cover After Long-Term Storage?
Remove the cover slowly and inspect the vehicle before driving. Months of storage can affect systems that have nothing to do with the paint.
Step 1: Check and clean the cover’s exterior
Remove loose leaves and surface debris without pressing grit into the paint. Make sure the cover isn’t frozen to the vehicle.
If it’s wet, allow it to dry when practical. Avoid dragging contaminated fabric across body panels.
Step 2: Release the fasteners
Undo straps and buckles carefully. Keep hard hardware away from the paint as you release tension.
Fold the cover inward progressively, using a method recommended by its manufacturer. Avoid letting the underside touch the ground.
Step 3: Inspect the vehicle
Check the exterior for moisture, staining, or possible abrasion. Look beneath the hood for signs of pests before attempting to start the engine.
Inspect seals, exterior lights, wipers, and visible hoses. Address any concerns before returning the vehicle to use.
Step 4: Check mechanical condition
Perform a basic pre-drive inspection:
- Confirm the tires have the correct cold inflation pressure.
- Inspect tires for cracking, damage, or unusual deformation.
- Check accessible fluid levels according to the owner’s manual.
- Confirm the battery is ready for service.
- Inspect underneath for visible fluid leaks.
- Check the brakes before entering traffic.
- Verify lights, signals, and wipers function correctly.
- Address overdue scheduled maintenance.
If the vehicle has been sitting for many months, arrange a qualified inspection before driving when its condition is uncertain.
Mechanic Alert: If you find leaking fluids, damaged wiring, seized brakes, or persistent tire vibration, have a qualified mechanic inspect the vehicle before driving.
Step 5: Clean and store the cover
Follow the cover’s washing instructions. Mild cleaning products may be suitable, but not all fabrics support machine washing.
Dry the material completely before folding or packing it away. Covercraft’s cover storage instructions also recommend checking for damaged seams and wear.
Store the dry cover in a clean, suitable bag away from sharp objects and contamination. This helps keep it ready for its next use.
Frequently Asked Questions About Long-Term Car Cover Storage
Can you leave a car cover on for six months?
Yes, a suitable car cover can be part of a six-month storage plan, but you shouldn’t leave it completely unattended. Inspect the cover and vehicle regularly, remove trapped moisture, and maintain the battery, tires, and other systems according to the owner’s manual.
Is it better to store a car covered or uncovered in a garage?
A clean, breathable indoor car cover can protect a garaged vehicle from dust and minor accidental contact. However, covering a damp or dirty vehicle may create problems. In a humid garage, ventilation and moisture control can matter more than covering the car.
Should a car cover be waterproof or breathable?
For long-term outdoor storage, look for both suitable water resistance and breathability. Completely impermeable materials may trap condensation. The ideal cover manages rainfall while allowing some moisture vapor to escape and providing enough durability for local weather conditions.
Can you put a car cover on a wet car?
It’s generally best to avoid covering a wet vehicle. Moisture can remain trapped around seams, trim, and painted surfaces. Dry the vehicle first, and make sure the cover itself is clean and dry before installation.
How often should you remove a car cover during storage?
Check the manufacturer’s instructions. Covercraft recommends removing and checking its covers every one to two weeks during extended use. Outdoor conditions may require more frequent inspections, particularly after heavy rain or wind.
Will a car cover prevent rust during winter storage?
A suitable cover can reduce certain environmental exposures, but it cannot guarantee rust prevention. Road salt, existing corrosion, trapped moisture, and a damp storage location can still cause problems. Clean the vehicle thoroughly and maintain a dry storage environment whenever possible.
Should you use a car cover on an electric vehicle?
Yes, provided the cover is compatible with the electric vehicle and its storage conditions. Follow the manufacturer’s instructions for battery charge level, long-term parking, and charging access. Never block required vents or place unsuitable fabric around charging equipment.
Final Takeaway: Protect the Vehicle, Not Just the Paint
Knowing how to use a car cover for long term storage means treating the cover as one part of a larger maintenance routine. Start with a clean, completely dry vehicle and select fabric appropriate for the storage environment.
Install the cover gently, secure it correctly, and inspect it throughout storage. Keep the battery, tires, fluids, and interior in suitable condition as well.
Before your next extended parking period, build a storage checklist around your vehicle’s manual. Good preparation and regular inspections provide more dependable protection than simply leaving the car hidden beneath a cover.
