
Car Cover Swirl Marks: Causes, Prevention, and How to Fix Them

Quick Answer
Yes, a car cover can contribute to swirl marks when dust, sand, or other grit becomes trapped between the cover and your paint. A loose cover that moves in wind can rub those particles across the clear coat, while putting any cover on a dusty car creates similar risk. Following a careful scratch-conscious car washing routine before installing the cover greatly reduces that risk.
Main ways to prevent car cover swirl marks
- Cover clean paint: Never install the cover over visible dust, road film, pollen, or grit.
- Keep it clean: Dirt trapped inside the cover can act like an abrasive whenever the fabric moves.
- Choose a proper fit: Excess fabric can flap against the paint, especially outdoors.
- Use soft material: The inner surface should be smooth, clean, and intended for automotive finishes.
- Install carefully: Roll or unfold the cover across the vehicle instead of dragging it sideways.
If swirls are already visible
- Light clear-coat swirls can often be improved with a suitable polish, but deeper scratches should be inspected professionally.
If you noticed circular scratches after uncovering your car, the cover may seem like the obvious culprit. The full answer is usually a combination of the cover, contamination, fit, and how the cover was handled.
As of 2026, my rule is simple: I treat a car cover like a giant paint-contact towel. If I wouldn’t wipe the paint with it in its current condition, I won’t lay it over the car.
In This Guide
Can a Car Cover Cause Swirl Marks?
Yes, a car cover can contribute to swirl marks. The fabric usually isn’t the only cause, though.
The bigger problem is abrasive contamination trapped between the paint and cover. Movement then drags that contamination across the vehicle’s clear coat.
A swirl mark is a shallow microscopic scratch or group of scratches in the paint’s clear coat. You often notice them as curved lines or spiderweb-like patterns around a bright reflection.
Dark colors usually make these defects easier to see. Bright sunlight, inspection lights, or a flashlight held near the paint can reveal them quickly.
Does the cover itself actually scratch the car?
A clean, soft cover touching clean paint presents much less risk than a dirty or loose cover. Problems usually begin when something abrasive enters that contact area.
- Dust: Fine particles settle on the paint before installation.
- Sand and grit: Hard particles can become trapped inside the fabric.
- Pollen: Heavy deposits can add contamination between the surfaces.
- Road film: A car that looks fairly clean may still carry abrasive grime.
- Dirty cover fabric: The inner surface can collect debris during removal or storage.
The principle is similar to wiping a dusty panel with a dry towel. Once abrasive particles move across the finish, fine scratches become possible.
That is why I don’t judge a car by whether it looks clean from ten feet away. Before covering it, I inspect the horizontal panels closely.
Can an indoor car cover cause swirls too?
Yes. Indoor storage eliminates rain and reduces wind, but dust still accumulates in garages.
A cover installed repeatedly over dusty paint can create the same contact problem. Moving or adjusting the cover can increase that friction.
A clean indoor environment lowers the risk. It doesn’t make paint-contact technique unimportant.
Section Takeaway: A cover usually creates swirl marks through contaminated contact and movement, not simply because fabric touched the paint.
Why Does a Car Cover Scratch Paint?
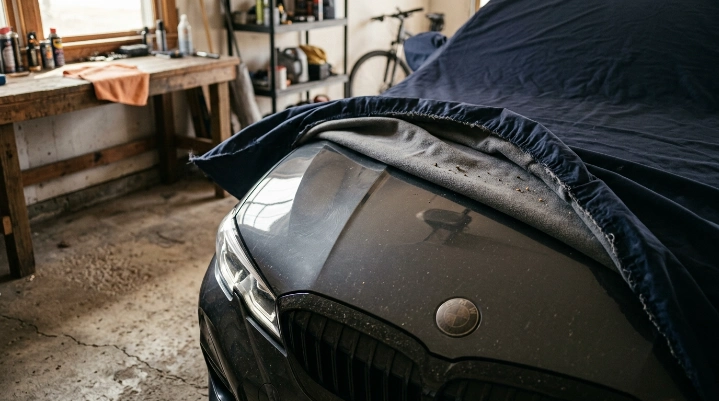
A car cover scratches paint when friction and abrasive particles work together. The most common problems are dirty paint, a contaminated cover, poor fit, and unnecessary movement.
1. The car was dusty before the cover went on
This is the mistake I would check first. A vehicle doesn’t need to look muddy for contamination to become a problem.
Fine dust can be enough to create micro-marring when rubbed against the finish. That is also why proper washing starts by removing loose debris before touching the paint.
Consumer Reports recommends careful washing techniques designed to reduce paint scratching, including avoiding movements that can produce visible swirl marks. You can review its car-washing guidance before developing your cover routine.
2. The inside of the cover is dirty
The paint can be spotless while the cover is contaminated. Dirt often gets transferred to the inner surface during removal, folding, or storage.
A common example is dropping part of the cover onto a garage floor or driveway. That fabric can collect grit before being folded against the clean inner lining.
3. Wind makes a loose cover move
A poorly fitted outdoor cover can shift across panels when wind gets underneath it. That repeated motion matters most when grit is already trapped beneath the fabric.
Mirror areas, fender tops, roof edges, trunk corners, and other raised surfaces may receive repeated contact. Those areas deserve extra attention during inspection.
4. The cover is dragged during installation
Pulling a heavy cover sideways across the hood or roof adds unnecessary paint contact. Any trapped contamination travels with the fabric.
I prefer controlled unfolding. The goal is to place the material rather than wipe the vehicle with it.
| Cover Scenario | What Touches the Paint | Relative Swirl Risk | Best Response |
|---|---|---|---|
| Clean fitted cover on clean paint | Clean fabric | Lower | Install gently and secure it |
| Cover installed over dusty paint | Fabric plus loose particles | Higher | Wash and dry first |
| Loose outdoor cover in wind | Moving fabric and contamination | Higher | Use the correct fit and restraints |
| Dirty inner lining | Embedded dirt against clear coat | Higher | Clean the cover before reuse |
Which Car Covers Are Least Likely to Cause Swirls?
The safest car cover is one that fits correctly, has a paint-friendly inner surface, stays clean, and suits where the vehicle is stored. No material can compensate for putting a cover over gritty paint.
Custom-fit vs. universal car covers
A closer fit can reduce unnecessary fabric movement. A loose universal cover may have more material available to shift across the body.
That doesn’t mean every custom cover is automatically safe. Cleanliness and installation technique remain critical.
- Custom-fit cover: Usually follows the vehicle’s contours more closely and limits excess fabric.
- Semi-custom cover: Can work well when dimensions closely match the vehicle.
- Universal cover: May leave extra material around bumpers, mirrors, and body corners.
Look closely at the inner surface
The material touching the paint should feel clean and smooth. Check for hardened seams, embedded grit, rough areas, or debris before installation.
Don’t assume a cover stays clean because only the outside sees weather. Folding can bring the exterior surface into contact with the inner liner.
Breathability and moisture management matter too
Scratch prevention isn’t the only consideration. Outdoor covers also need to manage changing weather conditions without holding contamination and moisture against the vehicle.
Choose the cover for your actual storage environment. An indoor dust cover and an outdoor weather cover solve different problems.
Section Takeaway: Fit and soft material help, but cleanliness remains the most important part of protecting the paint.
How Do You Use a Car Cover Without Scratching Paint?
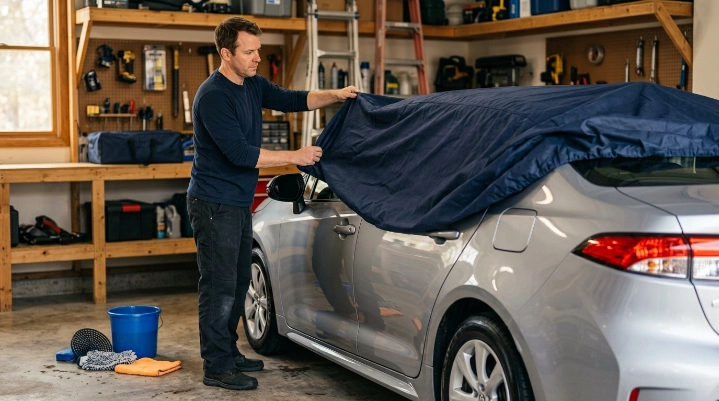
The safest routine starts before the cover touches the vehicle. Keep both contact surfaces clean, then minimize sliding during installation and removal.
Before installing the cover
- Inspect the car: Look for visible dust, pollen, sand, bird residue, and road grime.
- Wash when necessary: Rinse loose contamination away before contact washing.
- Dry the paint: Avoid trapping unnecessary water beneath the cover.
- Inspect the cover: Check the inside for grit, leaves, sand, and rough contamination.
- Check the weather: Make sure an outdoor cover can be secured appropriately for expected wind.
Edmunds recommends rinsing loose dirt before washing because leaving that material on the surface increases scratching risk. That basic idea applies directly to car-cover use.
Install the cover without dragging it
Find the front and rear before you start. This prevents unnecessary repositioning once the material is touching the vehicle.
- Place the folded cover around the center of the roof or another clean recommended starting point.
- Unroll or unfold it toward the front and rear.
- Work the cover over mirrors and corners without pulling fabric aggressively across paint.
- Secure the cover according to its instructions.
- Check that large loose areas cannot repeatedly flap against panels.
Remove it just as carefully
Removal can cause the same damage as installation. Avoid grabbing one end and dragging the entire cover across the roof.
Fold the sides upward first, then roll or fold the clean inner surfaces together. Keep the paint-facing side away from the ground.
Store the cover correctly
A clean cover can become dirty in minutes if it sits on a garage floor. Use its storage bag or another clean, dry container.
If contamination gets onto the inside, clean the cover according to its manufacturer’s instructions before putting it back on the vehicle. Don’t try to solve embedded grit by simply shaking the cover once.
Kelley Blue Book also notes the importance of lubrication and suitable automotive cleaning products when reducing fine scratches during washing. Its guidance on car wash soap versus dish soap is useful when preparing paint before covering it.
Section Takeaway: Wash when needed, keep the cover’s liner clean, minimize sliding, and store the cover so the paint-facing surface never becomes contaminated.
How Can You Tell If the Cover Caused the Swirl Marks?
You usually can’t prove the source of every individual swirl by appearance alone. However, the timing and scratch pattern can provide useful clues.
Inspect the paint under strong light
Clean the car first so dirt doesn’t hide or imitate paint defects. Inspect it in direct sunlight or with a bright detailing light.
Move your viewing angle slowly. Fine swirls become easier to see when a concentrated light source reflects toward you.
Look at where the marks are concentrated
Cover-related rubbing may be more noticeable where fabric experiences repeated contact or movement. Inspect raised edges and exposed body contours carefully.
- Roof edges
- Hood contours
- Fender tops
- Mirror areas
- Trunk or hatch edges
- Bumper corners
Compare the pattern with your washing habits
Swirls can also come from dirty wash mitts, brushes, drying towels, automatic car washes, and dry wiping. Don’t replace an expensive cover until you consider these other contact points.
If new marks appeared immediately after a windy covered-storage period, the cover becomes a stronger suspect. The same is true if the liner contains visible grit.
Try the fingernail check on isolated scratches
A shallow defect that does not catch your fingernail is more likely to be confined near the clear-coat surface. A scratch that clearly catches the nail may be deeper.
This isn’t a perfect paint-depth test. It is only a quick way to decide whether a simple polishing approach is reasonable.
How Do You Remove Car Cover Swirl Marks?
Light car cover swirl marks can often be reduced through careful polishing. Deeper defects require more caution because correcting them means removing or repairing paint material.
Start with a clean surface
Never polish dusty paint. Wash the car thoroughly and dry it with clean paint-safe materials.
Inspect the surface afterward. Water spots, residue, and contamination can sometimes look like paint damage under poor lighting.
Use the least aggressive correction first
A light finishing polish is a sensible starting point for faint clear-coat swirls. Test one small area before working on the whole vehicle.
- Choose a small test section.
- Apply the polish with the recommended applicator.
- Use controlled pressure and follow product directions.
- Wipe residue away with clean microfiber.
- Inspect the section under strong light.
If the test area improves, repeat the process carefully where needed. Stop if you’re uncertain about the paint condition or correction method.
Car and Driver explains that light surface scratches can often be reduced with fine abrasive scratch-removal products, while deeper defects may require more advanced correction. Its overview of how scratch remover kits work helps explain why polishing changes the appearance of shallow defects.
When should you use a machine polisher?
A dual-action machine polisher can correct defects faster than hand polishing. It also introduces more opportunity for mistakes when pad, product, speed, or technique is wrong.
Mechanic Alert: If you’re inexperienced with machine polishing, thin paint, repainted panels, or deeper scratches, have a qualified professional detailer or body technician inspect the finish before aggressive correction.
Will wax or ceramic coating remove swirl marks?
Wax, sealant, and ceramic coatings are primarily protection products, not true scratch-removal methods. Some products can temporarily hide fine defects, but the underlying scratch may remain.
Correct the paint first when appropriate. Then add protection to make maintenance easier and reduce direct contamination contact.
Frequently Asked Questions
Do all car covers cause swirl marks?
No. A clean, well-fitted cover used on clean paint can greatly reduce the conditions that create swirl marks. Problems become more likely when grit is trapped underneath, the cover is dirty, or loose material repeatedly moves across the body.
Should I cover my car every night?
It depends on where the vehicle is stored and whether you can keep both the car and cover clean. Covering a dusty daily driver every night may create more paint contact than leaving it uncovered in a safe garage.
Can I put a car cover on a dusty car?
I wouldn’t recommend it. Dust between the fabric and paint can become abrasive when the cover is installed, adjusted, moved by wind, or removed.
Can a soft car cover still scratch paint?
Yes. Even soft fabric can move hard contamination across the clear coat. The liner’s softness matters, but keeping the vehicle and cover free of grit matters more.
Are car cover scratches permanent?
Many faint swirls are shallow clear-coat defects and can often be reduced with polishing. Scratches that penetrate deeper into the finish may need professional paint correction, touch-up work, or refinishing.
Does waxing before using a car cover prevent swirls?
Wax or another protective layer can make the finish easier to maintain, but it cannot make dirty cover contact harmless. You still need clean paint, clean fabric, proper fit, and careful handling.
Is a tight car cover better than a loose one?
A properly fitted cover is generally preferable to excess fabric that can flap across the body. It should fit securely without forcing the material over sharp accessories or creating excessive tension around mirrors and trim.
The main takeaway is simple: car cover swirl marks are largely a contact-management problem. Keep dirt out of the space between the paint and cover, and eliminate unnecessary fabric movement.
If your current cover repeatedly gets dirty, fits poorly, or moves significantly in wind, fix that issue before polishing the paint again. Otherwise, the same swirl marks can return after you correct them.