
How to Unfreeze a Car Cover Safely Without Damage

Below is the WordPress Gutenberg-ready HTML article for “How to Unfreeze a Car Cover.” It includes a Quick Answer box, jump-link table of contents, safe removal steps, a troubleshooting comparison table, prevention tips, FAQs, and authoritative sources.
The key safety recommendation is supported by car-cover manufacturer guidance: never pull a cover that is frozen to the vehicle; thaw the ice first and stop if you feel resistance.
How to Unfreeze a Car Cover Without Damaging Your Car
Quick Answer
To unfreeze a car cover, never pull it off while ice holds it to the paint. Let the ice melt naturally or gently thaw the frozen areas with lukewarm water if the cover manufacturer allows it. Lift the fabric only when it moves freely. This approach follows car cover thawing guidance from Coverking.
Quick Steps to Remove a Frozen Car Cover
- Check the ice: Find where the cover is frozen to the vehicle.
- Remove loose snow: Use a soft brush without pressing against the paint.
- Thaw the fabric: Wait for warmer conditions or use lukewarm water carefully.
- Test gently: Lift a loose edge without pulling against resistance.
- Remove slowly: Fold the released cover inward, away from exposed paint.
- Dry before reuse: Let the cover and vehicle dry fully.
Important Safety Warning
- Never use boiling water: Rapid temperature changes can damage cold glass, and spilled water may refreeze.
- Never force the cover: Ice and trapped dirt can scratch paint or damage trim.
Finding a car cover frozen to your vehicle is frustrating, especially when you need to leave for work. The good news is that you can often release it safely with patience and the right method.
I prefer a slow thaw over a fast pull. In this guide, I’ll explain how to free the cover, avoid common mistakes, and keep it from freezing again.
In This Guide
Why Does a Car Cover Freeze to a Vehicle?
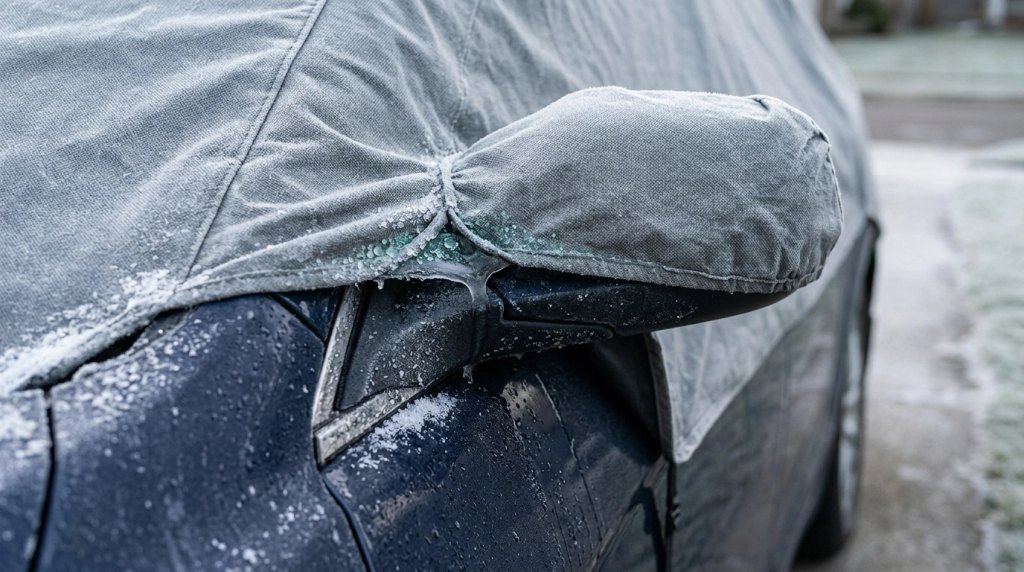
A car cover freezes when moisture between the fabric and vehicle turns into ice. The ice can bond the cover to the paint, glass, mirrors, or exterior trim.
This often happens after rain, melting snow, or overnight frost. Even a weather-resistant cover can trap some moisture beneath it.
What Happens Beneath the Fabric?
A thin layer of water can form between the cover and your car. When temperatures fall below 32°F (0°C), that water may freeze.
Ice can then hold the fabric in place. Pulling on the cover puts stress on both the material and the vehicle’s finish.
Here are the most common conditions that cause trouble:
- Rain followed by freezing weather: Water remains under the fabric before temperatures drop.
- Melting snow: Snow turns into water during the day and freezes overnight.
- Condensation: Moisture forms between the cold body panels and the cover.
- Wet installation: A damp cover is placed on a vehicle before freezing temperatures arrive.
- Poor drainage: Water collects around mirrors, seams, straps, and lower edges.
Why Do Some Areas Freeze More Than Others?
The mirrors and lower edges often collect more water than flat body panels. These spots can form small but stubborn ice bonds.
Fabric may also become trapped around windshield wipers, door handles, and trim. That’s why checking the whole cover matters before removal.
Does a Waterproof Car Cover Prevent Freezing?
Not always. A waterproof or water-resistant outer layer does not guarantee a dry space beneath the cover.
Moisture can still enter through openings or form through condensation. A breathable cover may help moisture escape, but it cannot prevent every freeze.
A cover is useful protection, not a heated garage. Its material, fit, and drying habits all matter.
Section Takeaway: Frozen car covers are usually a moisture problem. Reducing trapped water is the best way to lower the chance of ice bonding.
How Do You Unfreeze a Car Cover Safely?
The safest approach is to melt the ice before moving the fabric. Never try to break the ice bond by pulling harder.
I recommend checking the frozen areas first. A cover stuck at one mirror needs a different approach from one frozen across the roof.
Step 1: Inspect the Cover Before Touching It
Walk around the vehicle and look for visible ice. Check the hood, roof, mirrors, windshield, and lower edges.
Look at the cover’s seams and straps, too. These can remain frozen even after the main fabric begins to loosen.
- Check for ice beneath the lower hem.
- Inspect mirror pockets for frozen fabric.
- Look for ice around door handles and trim.
- Identify areas covered by thick snow.
- Do not lift any section that appears firmly attached.
This first check helps you avoid pulling against a hidden ice bond.
Step 2: Remove Loose Snow Carefully
Use a clean, soft snow brush to remove loose snow from the cover. Sweep lightly without pressing the brush into the vehicle.
Leave frozen chunks alone. Trying to chip them off can push hard ice against the paint.
If the snow is heavy, clear it in small sections. Work from the upper surfaces toward the edges.
Step 3: Let the Ice Thaw Naturally
Natural thawing is my preferred choice when there’s no rush. Sunlight and above-freezing air can gradually loosen the bond.
Wait until you can see water forming around the frozen areas. A soft, flexible cover is a better sign than a rigid one.
Don’t assume the whole cover is free because one edge moves. Ice may still hold another section firmly.
Step 4: Use Lukewarm Water When Necessary
Some manufacturers allow warm water to release frozen covers. Use comfortably lukewarm water rather than hot or boiling water.
Start at the frozen area and apply a small amount slowly. Avoid directing water into electrical parts, open seams, or other sensitive openings.
- Check the cover manufacturer’s thawing instructions.
- Fill a container with lukewarm water.
- Apply water gently over the frozen fabric.
- Give the ice time to loosen.
- Check whether the edge releases without force.
- Repeat only if conditions allow safe thawing.
Water can refreeze quickly when the air is far below freezing. If ice reforms immediately, stop adding water and wait for better conditions.
Be especially careful around cold windshield glass. Do not pour hot water onto frozen windows.
Step 5: Release the Fabric Without Pulling
Once the ice melts, gently lift a loose section. The fabric should separate without tugging, scraping, or stretching.
If you feel resistance, stop. That area needs more thawing.
Never peel a frozen section away like tape. Even a small bonded patch may trap grit against the finish.
Step 6: Remove and Fold the Cover
Once every frozen section is free, release the straps and fasteners. Keep the fabric from dragging across the car.
Fold both sides inward toward the roof. Then roll or fold the material as directed by the cover manufacturer.
This method helps prevent dirty fabric from scraping the paint.
Step 7: Inspect and Dry Everything
Check the vehicle for leftover ice, moisture, and debris. Pay close attention to trim, seals, mirrors, and glass.
Spread the cover out in a suitable dry area. Let it dry completely before storing or reinstalling it.
Do not put a wet cover straight back on the vehicle in freezing weather. That can create the same problem again.
Section Takeaway: Thaw first and lift second. If the fabric resists, stop rather than risk paint damage.
Which Thawing Method Works Best?
Natural thawing is usually the simplest option. Lukewarm water may help when the cover is firmly frozen and the manufacturer permits it.
The best method depends on the weather, the ice thickness, and where the cover is stuck.
Frozen Car Cover Removal Methods Compared
| Method | Best Situation | Main Concern |
|---|---|---|
| Natural thaw | No urgent need to move the car | May take hours |
| Lukewarm water | Localized ice bonds | Water may refreeze |
| Sheltered thaw | Vehicle already in a safe enclosed space | Requires suitable access |
| Vehicle defroster | Appropriate glass areas only | Limited effect on body panels and engine safety concerns |
| Direct pulling | Never recommended while frozen | Paint and fabric damage |
Can You Use Your Car’s Defroster?
A vehicle’s defroster can warm some glass areas, but it won’t reliably thaw a whole car cover. It should not be your main removal method.
Never run an engine in a closed garage. Exhaust contains carbon monoxide, which can be deadly.
If you’re considering the defroster outdoors, first confirm the exhaust outlet is fully clear. Follow the vehicle manual and avoid operating the engine beneath a cover that obstructs ventilation.
The NHTSA winter driving guidance explains important cold-weather vehicle precautions.
Can You Use a Hair Dryer or Heat Gun?
I wouldn’t recommend either tool for routine cover removal. Concentrated heat can harm synthetic fabric, coatings, seals, or nearby trim.
A heat gun is especially risky because its output can become extremely hot. Direct heat also creates uneven warming across the surface.
Choose controlled thawing instead of trying to melt one spot as fast as possible.
What if the Cover Is Frozen Solid?
A completely rigid cover may have ice through multiple fabric layers. In that case, a quick pour of water may not reach every frozen area.
Let the weather warm it gradually whenever possible. If you must move the car urgently, consider professional help rather than tearing the cover loose.
Section Takeaway: Pick a method that releases the ice without force. Faster is not always safer when cold glass and painted surfaces are involved.
What Should You Avoid When Removing a Frozen Cover?
The biggest mistake is forcing fabric away from the vehicle before the ice melts. A second common mistake is using too much heat.
Both can turn a simple winter inconvenience into an expensive repair.
Never Yank or Peel Frozen Fabric
Pulling against ice can stress seams, mirror pockets, and delicate trim. Dirt trapped in the frozen layer may also rub against the clear coat.
A clear coat is the transparent protective layer over the car’s paint. It can show scratches when hard particles drag across it.
Even if a section releases suddenly, the remaining fabric may still be stuck elsewhere.
Never Scrape Ice Through the Cover
Ice scrapers are designed for suitable automotive glass, not for scraping fabric against paint. A rigid scraper can press ice and grit into the finish.
Avoid knives, metal tools, and sharp plastic edges as well.
Avoid Boiling Water and Open Flames
Boiling water creates an unnecessary risk near cold automotive glass. It can also damage some cover materials.
Never use a torch, flame, or high-heat blower. These methods can melt fabric and create a fire hazard.
Don’t Add Salt or Unapproved De-Icers
Road salt is not a good treatment for a frozen car cover. Salt residue can remain on fabric and nearby vehicle surfaces.
Likewise, don’t spray windshield de-icer across the cover without checking product compatibility. Chemicals may affect water-resistant coatings or fabric finishes.
Don’t Drive With the Cover Attached
Remove the entire cover before moving the vehicle. Loose material may obstruct windows, lights, sensors, or the driver’s view.
Clear remaining snow and ice from all required exterior surfaces before driving.
If the paint looks scratched after removal, wash the area gently before inspecting it. Do not rub a gritty surface with a dry towel.
For stubborn paint damage, a qualified automotive detailer can assess the finish.
Section Takeaway: Avoid force, sharp tools, extreme heat, and unapproved chemicals. The goal is to release the fabric without disturbing the paint beneath it.
How Can You Stop a Car Cover From Freezing Again?
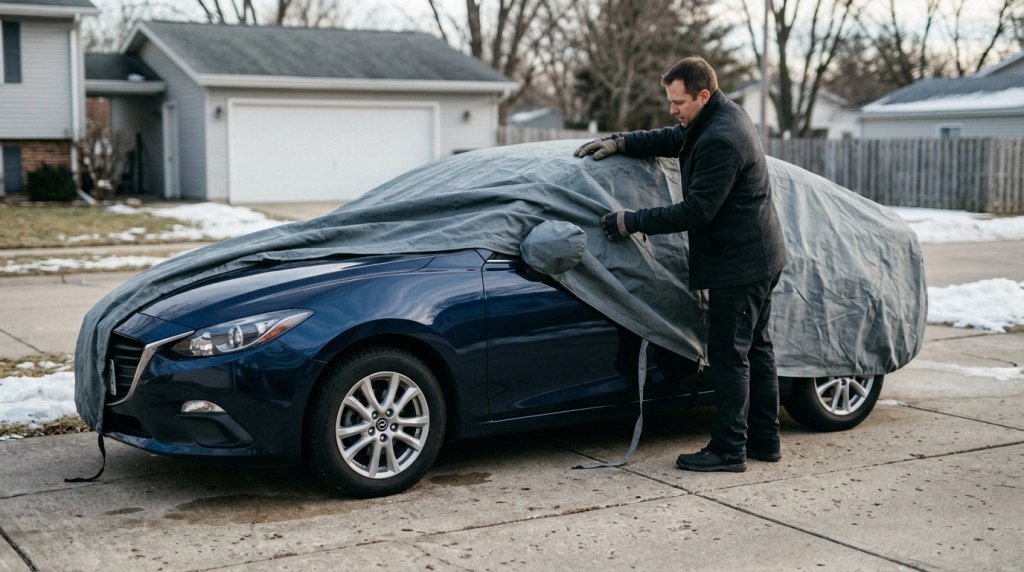
You cannot control winter weather, but you can reduce the moisture that causes freezing. Good cover habits make cold mornings much easier.
For daily drivers parked outdoors, I would focus on dry installation, proper fit, and regular inspections.
Start With a Clean, Dry Vehicle
Before installing the cover, remove dirt and loose debris. Make sure the body panels and glass are dry.
Moisture trapped under the cover can freeze overnight. Small pools around trim and mirror housings deserve extra attention.
If your car has just been washed, allow it to dry before covering it.
Choose a Suitable Winter Car Cover
A good winter cover should fit the vehicle well and offer weather protection. Breathable construction and manufacturer-approved outdoor use are helpful features.
When comparing covers, check these details:
- Correct fit: The cover should match the car’s body shape and dimensions.
- Weather resistance: The fabric should suit rain, snow, and outdoor storage.
- Breathability: Moisture should have a way to escape when conditions permit.
- Secure fasteners: Straps should prevent excess movement in wind.
- Soft contact surface: The inner material should suit the vehicle’s finish.
- Care instructions: The manufacturer should explain cleaning and winter use.
Not every cover marketed as waterproof is ideal for cold-weather storage. Read the care instructions before buying or using one.
Secure the Cover Without Overtightening
A loose cover can move in the wind and trap snow in folds. A cover stretched too tightly can put pressure on mirror pockets and seams.
Follow the manufacturer’s instructions for straps and tie-downs. Check that the hem is secure without pulling sharply on body trim.
Check the Cover After Rain or Snow
Rain followed by a cold night creates a common freeze risk. Look at the forecast before leaving the vehicle covered for days.
The National Weather Service provides weather forecasts and cold-weather alerts that can help you plan.
If the cover becomes wet, remove it while it is still free and safe to handle. Dry it before the next freeze.
Never try to remove it once it has already bonded to the car.
Store Your Cover the Right Way
After removing a wet cover, let it air-dry completely. Follow the maker’s washing instructions to protect the material.
Don’t automatically put every cover in a washing machine. Some manufacturers require hand washing.
For example, Coverking’s cover care guidance explains cleaning and storage practices for its products.
Consider Your Parking Location
A sheltered parking spot can reduce direct snow and rain exposure. A garage also makes it easier to keep a cover dry.
If you use a cover on an outdoor daily driver, check whether you truly need it during mixed rain-and-freeze conditions.
Leaving the cover off before a storm may be safer than risking a frozen cover later, depending on your vehicle and parking environment.
Replace a Cover That No Longer Works Properly
Inspect your cover for torn seams, damaged straps, worn coatings, and rough inner surfaces. A deteriorating cover may provide less reliable protection.
Review your specific manufacturer’s replacement guidance. A cover with damaged contact material may no longer be suitable for painted panels.
Section Takeaway: Dry installation and timely removal do more to prevent freezing than any quick fix. The right cover helps, but regular care still matters.
Frequently Asked Questions
Can a frozen car cover damage the paint?
Yes. Forcing a frozen cover away from the vehicle can drag ice or trapped dirt across the paint. This may cause scratches or damage vulnerable finishes. Allow the ice to melt fully before lifting the fabric, and stop immediately if it resists.
Can I pour warm water on a frozen car cover?
Some car-cover manufacturers recommend warm water for thawing. Use lukewarm water carefully, and never pour boiling water over cold glass. Water can refreeze quickly in severe cold, so stop if the cover isn’t releasing safely.
How long does a frozen car cover take to thaw?
There is no fixed thawing time. A thin ice bond may release relatively soon in above-freezing conditions, while a thick frozen layer may take hours. Air temperature, sunlight, wind, and the amount of ice all affect the process.
Can I use a hair dryer to unfreeze my car cover?
A hair dryer is not my recommended method. Concentrated heat may harm fabric, coatings, or plastic trim. Natural thawing or manufacturer-approved lukewarm water offers a more controlled approach. Never use a heat gun or open flame.
What should I do if my car cover freezes overnight?
Inspect the cover before moving it. If the fabric is bonded to the vehicle, leave it in place until the ice thaws. Once every section is free, remove it carefully and let it dry before reinstalling.
Will a waterproof car cover freeze to my car?
It can. Waterproof or water-resistant fabric may block rain from above, but moisture can still collect underneath through condensation or openings. Keeping the vehicle and cover dry before installation helps lower the risk.
Should I leave a car cover on during winter?
You can use a suitable outdoor cover during winter if the manufacturer approves that use. Keep the vehicle clean and dry, secure the cover properly, and inspect it after storms. If rain is followed by freezing temperatures, watch for trapped moisture.
Final Takeaway
Learning how to unfreeze a car cover comes down to one rule: never fight the ice. Let it thaw naturally or use manufacturer-approved warm water before trying to remove the fabric.
Take extra care around mirrors, trim, and painted panels. Once the cover comes off, dry it fully and address trapped moisture before using it again.
Before the next cold night, check the forecast and make sure your cover is dry. A few minutes of prevention can save you a difficult morning and possible paint damage.
