
How to Fix Ripped Car Cover Seams: A Practical DIY Guide

Quick Answer
To fix ripped car cover seams, remove and dry the cover, inspect whether the fabric is still strong, align the original seam, and stitch it with thread suited to outdoor fabric. Reinforce the repaired area when needed, then apply a compatible flexible seam sealer if the cover must resist rain; proper cover fit also matters because a loose or strained cover can fail again, as explained in Kelley Blue Book’s vehicle storage guidance.
Quick Repair Steps
- Remove the cover: Never sew a seam while the cover is stretched over the vehicle.
- Clean and dry: Dirt and moisture can interfere with stitching, tape, and seam sealers.
- Inspect the fabric: Repair intact material, but replace a cover that is brittle or tearing across large areas.
- Realign the seam: Match the original edges without pulling or stretching them.
- Stitch the damage: Sew beyond both ends of the ripped section so the repair reaches solid stitching.
- Seal if needed: Use only a flexible seam product confirmed compatible with your cover material.
Before You Start
- Check the cover’s care label or manufacturer’s instructions before applying adhesive, heat, solvent, or seam sealer.
A ripped seam doesn’t always mean your car cover is finished. If the surrounding material remains strong, a careful repair can often stop a small split from spreading.
The key is repairing the actual failure instead of simply covering it with tape. This guide shows how I would assess the seam, choose a repair method, reinforce it, and decide when replacement makes more sense.
In This Guide
Why Do Car Cover Seams Rip?
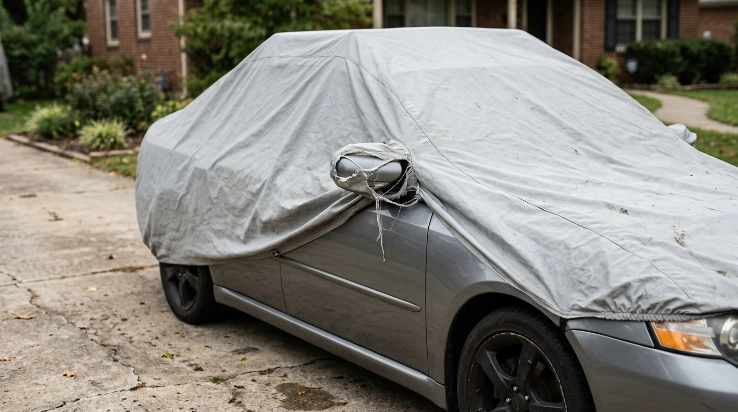
Car cover seams usually rip because the stitching or surrounding fabric receives more stress than it can handle. Wind, poor fit, aging material, sharp vehicle accessories, and repeated pulling can all contribute.
A car cover seam is the joined area where two pieces of cover material are sewn together. That joint may also contain binding, reinforcing material, or a waterproof seam treatment.
Wind can overload weak seams
A loose cover can catch moving air like a small sail. Repeated flapping places thousands of small loads on the stitching instead of one obvious pull.
Car and Driver’s current 2026 car cover testing also emphasizes fit and secure attachment when evaluating covers. A cover that is too loose can move, while one that is too tight can create excessive tension.
The cover may be too tight
A seam shouldn’t look stretched while the cover sits normally on the vehicle. Mirror pockets, bumpers, spoilers, roof racks, antennas, and other accessories can create concentrated stress.
- Mirror areas: A pocket that barely reaches the mirror may constantly pull its seam sideways.
- Bumper corners: Tight elastic can load the seam every time you install the cover.
- Spoilers and racks: Added accessories may change the dimensions the cover was designed around.
- Roof edges: A seam resting under constant tension may gradually open at the stitching holes.
The fabric may be aging
A ripped stitch line is repairable only when the material around it can still hold new stitches. Old fabric may become thin, stiff, frayed, or weak enough to tear beside the repair.
My rule is simple: if the seam failed but the surrounding fabric still feels sound, I consider a repair. If light hand tension makes the material split farther, I replace the cover.
Section Takeaway: Find the reason the seam failed before repairing it. New stitching won’t last if poor fit, wind movement, or deteriorated fabric keeps loading the same area.
Can You Repair a Ripped Car Cover Seam?
Yes, many ripped car cover seams can be repaired at home. The best candidates have localized damage and strong material on both sides of the split.
A seam repair becomes less practical when the fabric itself is failing. Sewing strong thread through weak material can simply move the tear beside the new stitching.
Repair the cover when:
- The thread broke: The fabric remains intact but the original stitching has opened.
- The split is localized: Damage affects one small seam instead of several areas.
- The fabric stays flexible: It bends normally without cracking or crumbling.
- The edges remain usable: There is enough solid material to hold a new stitch line.
- The fit is correct: The repaired seam will not remain under excessive tension.
Consider replacing it when:
- Multiple seams are failing: Several failures often point to overall material or construction wear.
- The fabric tears easily: New stitching cannot strengthen deteriorated material across the entire cover.
- Large areas are delaminating: Separating layers can indicate broader cover failure.
- The cover no longer fits: Repairing one seam won’t correct a cover that is consistently overstretched.
- The inner surface is damaged: Rough or exposed material may no longer be suitable against paint.
Don’t assume thicker stitching automatically creates a better repair. The goal is restoring the seam without creating a stiff ridge that rubs the vehicle.
What Do You Need to Repair a Car Cover Seam?
You don’t need a full upholstery shop for a small seam repair. The exact materials depend on whether you’re repairing stitching, torn fabric, or a leaking seam.
- Clean work surface: Use a table or clean floor where the cover can lie without collecting grit.
- Scissors: Trim only loose thread and badly frayed fibers that interfere with alignment.
- Clips or pins: Hold the original seam position while you work, but avoid unnecessary new holes in coated fabric.
- Needle: Choose one suitable for the thickness of the cover.
- Outdoor-grade thread: Match the original construction as closely as practical.
- Repair patch: Use one when fabric beside the seam has torn or needs reinforcement.
- Flexible seam sealer: Use this only when compatible with the cover’s material and coating.
Material compatibility matters more than the brand name on the tube. Nylon, polyester, vinyl, coated fabrics, and silicone-treated materials can respond differently to adhesives and sealers.
For example, GEAR AID lists its Seam Grip WP as compatible with nylon, polyester, canvas, vinyl, and many other fabrics. The manufacturer specifically warns that this formulation isn’t intended for silicone-treated fabrics or sil-nylon.
Check your car cover label first. When the manufacturer provides care instructions, those instructions should override a generic repair method.
How Do You Fix Ripped Car Cover Seams Step by Step?
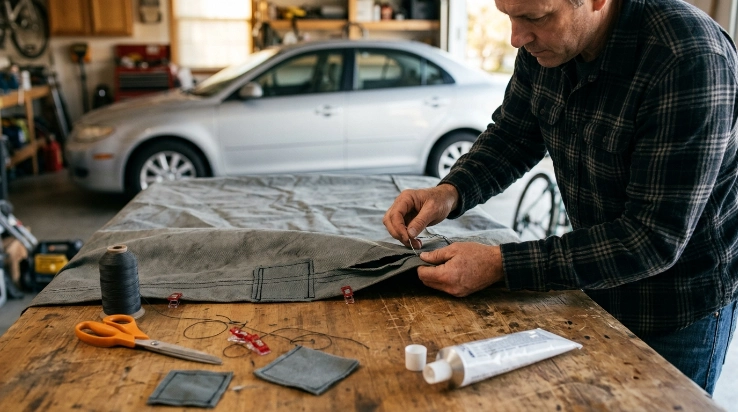
Start by taking the cover off the vehicle completely. Trying to stitch a stretched cover in place makes alignment harder and risks scratching the paint with tools or debris.
1. Clean and completely dry the cover
Shake away loose dirt and inspect both sides of the damaged area. Clean the cover only according to its care instructions.
Let it dry completely before using tape, adhesive, or seam treatment. Covercraft’s current car cover care guidance includes material-specific cleaning information, so don’t assume every cover uses the same washing method.
2. Inspect the entire damaged seam
Don’t stop your inspection where the visible opening ends. Pull the material gently and look for loose stitches extending beyond the obvious split.
- Check whether only the thread has failed.
- Look for fabric torn beside the stitch holes.
- Inspect the same seam several inches in both directions.
- Check for thinning, brittleness, or coating separation.
- Look for a vehicle feature that may have caused the damage.
3. Remove loose thread without enlarging the tear
Trim dangling thread that prevents the seam edges from sitting together. Avoid cutting original stitching that remains secure.
If the fabric has frayed, don’t keep trimming until the edge looks perfect. Removing too much material can make the seam harder to reconstruct.
4. Put the seam back in its original position
Use nearby intact stitching as your pattern. Align the layers so their shape and overlap resemble the undamaged part of the seam.
Don’t stretch the material to force the edges together. That tension will remain after the repair and can start another rip.
5. Stitch into solid material
Begin your new stitching before the failed section and finish beyond it. This connects the repair to original stitching that still has strength.
Keep your stitches consistent rather than pulling every stitch as tight as possible. Excessive thread tension can pucker lightweight material or concentrate stress at each needle hole.
- Small open seam: Restitch the original seam line through solid material.
- Frayed seam edge: Move slightly inward until the needle passes through sound fabric.
- Torn fabric beside seam: Reinforce the area with a compatible patch before expecting the seam alone to carry the load.
- Thick multilayer cover: Use a needle and sewing setup capable of passing cleanly through every layer.
6. Reinforce only where reinforcement is needed
A patch can spread stress beyond a weakened spot. Make it large enough to reach solid material around the damaged area.
Avoid bulky patches on the cover’s paint-facing surface when possible. Hard edges, dried adhesive ridges, and exposed stitching can become contact points against the vehicle.
7. Restore the seam’s weather resistance
If the original seam was designed to resist water, stitching alone may leave needle holes exposed. A compatible flexible seam treatment can help seal those penetrations.
Follow the sealant manufacturer’s cure time instead of reinstalling the cover immediately. For reference, GEAR AID specifies an 8-to-12-hour cure time for Seam Grip WP under its stated application conditions.
8. Test the repair before leaving it outdoors
Install the dry cover on a clean vehicle and look at the repaired seam. It should rest naturally instead of becoming the tightest point on the cover.
- Check that mirror pockets align.
- Seat the front and rear hems normally.
- Inspect straps and buckles.
- Confirm the repaired seam isn’t stretched flat.
- Watch the cover during the next windy period.
If the seam immediately pulls open again, stop using the cover. The problem is likely larger than the original broken thread.
Section Takeaway: A durable repair starts with clean, dry, strong material and proper seam alignment. Stitch past the damaged area, reinforce weakened fabric when necessary, and correct the stress that caused the rip.
Which Car Cover Seam Repair Method Is Best?
The best method depends on what failed. Sewing, patching, and seam sealing solve different problems and shouldn’t automatically replace one another.
| Damage | Best Starting Method | Main Purpose | Important Limitation |
|---|---|---|---|
| Broken stitching, fabric intact | Restitch seam | Restore structural connection | Doesn’t fix weak surrounding fabric |
| Fabric ripped beside seam | Patch plus stitching | Spread load into stronger material | Patch must suit the fabric and coating |
| Small temporary tear | Compatible repair tape | Control damage until permanent repair | Adhesion varies by surface and coating |
| Stitched seam leaks | Compatible seam sealer | Seal stitch holes against moisture | Sealer doesn’t replace structural stitching |
| Brittle or widespread failure | Replace cover | Restore dependable overall protection | Local repairs won’t reverse material aging |
Is tape enough for a ripped seam?
Tape can stabilize a small tear, but I wouldn’t treat ordinary household tape as a structural seam repair. A stitched seam carries tension that surface tape may not handle for long.
Repair tape works better as reinforcement when the manufacturer confirms compatibility. It can also serve as a temporary measure until you can sew the seam properly.
Can seam sealer replace sewing?
No, not when the seam has physically separated. Seam sealer helps with water resistance and some reinforcement, but it shouldn’t replace the structural job of intact stitching.
How Do You Stop the Seam From Ripping Again?
The repaired seam should not become your permanent weak point. Correct the conditions that caused the original damage before putting the cover back into regular service.
Use the correct size and fit
A good cover should sit securely without requiring hard pulling around mirrors or bumpers. Check the manufacturer’s vehicle application whenever your car has spoilers, racks, antennas, or aftermarket body parts.
Secure the cover in wind
Use only the tie-downs, straps, buckles, and fastening points designed for the cover. Don’t improvise by pulling rope tightly across unsupported fabric.
Loose movement matters because repeated flapping can stress seams and can also move dirty material against paint. Proper fit reduces both problems.
Don’t yank the cover during removal
Release straps and hems before pulling the material across the vehicle. Work around mirrors and accessories instead of using the seam as a handle.
Store the cover completely dry
A damp cover should be opened and allowed to dry before being packed away. Moisture trapped in folds can create odors and may shorten the useful life of some materials.
Inspect repaired areas regularly
Look at your repair after strong wind, heavy rain, and several installation cycles. Catching two loose stitches is easier than repairing another long split.
- Check thread: Look for new loops, broken stitches, and enlarging needle holes.
- Check fabric: Watch for tearing immediately beside the repair.
- Check sealer: Look for peeling, cracking, or separation from the fabric.
- Check fit: Make sure the same seam isn’t being stretched again.
As of 2026, car cover construction still varies widely between lightweight indoor covers, multilayer outdoor covers, stretch fabrics, and heavier protective designs. One repair material isn’t automatically suitable for every cover.
Section Takeaway: Preventing another rip is mostly about reducing stress. Correct fit, careful handling, proper fastening, dry storage, and routine inspection give the repaired seam its best chance of lasting.
Frequently Asked Questions
Can I sew a ripped car cover by hand?
Yes. A small seam split can often be hand-sewn if the fabric remains strong and your needle can pass through the layers cleanly. Follow the original seam position, use suitable thread, and extend the repair into intact stitching at both ends.
What thread should I use for a car cover repair?
Use thread intended for durable fabric and outdoor exposure, while matching the original cover construction as closely as possible. Don’t choose thread only because it’s thick; thread that is too aggressive can concentrate stress in lightweight material.
Can I use fabric glue instead of sewing?
Adhesive can help with patches and reinforcement, but a separated load-bearing seam usually needs stitching. Confirm that any adhesive is compatible with your exact fabric, coating, and intended indoor or outdoor use.
How do I waterproof a repaired car cover seam?
After the structural repair is complete, apply a compatible flexible seam sealer according to its instructions. Test compatibility first because polyurethane-coated, vinyl, polyester, nylon, and silicone-treated fabrics may require different products.
Should I repair the seam from the inside or outside?
Whenever possible, restore the seam in the same orientation as its original construction. Keep bulky reinforcement and rough adhesive edges away from the paint-facing surface to reduce potential contact with the vehicle.
Why does my repaired seam keep ripping?
Repeated failure usually points to excessive tension, incorrect fit, weak surrounding material, or wind movement. Stop adding stitches until you identify the cause, because stronger thread alone won’t solve deteriorated fabric or an undersized cover.
When should I replace a ripped car cover instead of repairing it?
Replace it when several seams are opening, the material tears under light tension, large sections are delaminating, or the cover no longer fits correctly. A local repair makes sense only when the surrounding cover remains structurally sound.
The main takeaway: Fixing ripped car cover seams works best when you treat the seam and its cause as two separate problems. Restore the stitching carefully, protect the repaired area from moisture when necessary, and eliminate the fit or handling issue that created the tear.
Before reinstalling the cover, give the repair one final inspection on a clean, dry surface. A few extra minutes now can keep a small seam failure from turning into a much larger tear.