Tire Tread Depth Gauge How to Use
Contents
- 1 Key Takeaways
- 2 📑 Table of Contents
- 3 Why Tire Tread Depth Matters More Than You Think
- 4 What Is a Tire Tread Depth Gauge and Why Use One?
- 5 How to Use a Tire Tread Depth Gauge: Step-by-Step Guide
- 6 Understanding Tread Wear Patterns and What They Mean
- 7 When to Replace Your Tires: Beyond the Numbers
- 8 Tips for Maintaining Healthy Tires
- 9 Conclusion: Stay Safe, Stay Informed
- 10 Frequently Asked Questions
Using a tire tread depth gauge is a quick, easy way to ensure your tires are safe and roadworthy. This guide walks you through choosing the right tool, taking accurate measurements, and understanding what your readings mean—so you can drive with confidence and avoid costly penalties or accidents.
Key Takeaways
- Why tread depth matters: Adequate tread depth ensures proper grip, especially in wet or slippery conditions, reducing the risk of hydroplaning and accidents.
- Legal requirements: Most states require a minimum tread depth of 2/32 of an inch; driving below this can result in fines or failed inspections.
- How to use a gauge: Insert the probe into the tread groove, press down until the base touches the tire, and read the measurement on the scale.
- Where to measure: Check multiple spots across the tire, including the inner, center, and outer grooves, to detect uneven wear.
- When to replace tires: Replace tires when tread depth reaches 4/32” for wet weather safety or 2/32” as a legal minimum.
- Types of gauges: Digital gauges offer precision, while analog (mechanical) models are affordable and reliable for basic checks.
- DIY vs. professional checks: Regular self-checks with a gauge help catch issues early, but professional inspections provide deeper insights into tire health.
📑 Table of Contents
- Why Tire Tread Depth Matters More Than You Think
- What Is a Tire Tread Depth Gauge and Why Use One?
- How to Use a Tire Tread Depth Gauge: Step-by-Step Guide
- Understanding Tread Wear Patterns and What They Mean
- When to Replace Your Tires: Beyond the Numbers
- Tips for Maintaining Healthy Tires
- Conclusion: Stay Safe, Stay Informed
Why Tire Tread Depth Matters More Than You Think
Your tires are the only part of your car that touches the road. That means their condition directly affects your safety, handling, fuel efficiency, and even your wallet. One of the most critical factors in tire performance is tread depth—the measurement of how much rubber is left between your tire and the road surface. Over time, as you drive, the tread wears down. When it gets too low, your tires lose their ability to channel water away, grip the pavement, and respond quickly to steering or braking.
Imagine driving through a rainstorm with bald tires. Water can’t escape fast enough from under the tire, so it starts to float—this is called hydroplaning. Your car essentially loses contact with the road, and you’re no longer in control. That’s not just scary—it’s dangerous. According to the National Highway Traffic Safety Administration (NHTSA), over 200,000 accidents each year in the U.S. are caused by wet weather, and many of those involve underinflated or worn-out tires. Proper tread depth significantly reduces this risk.
But safety isn’t the only reason to care. Worn tires can also hurt your fuel economy. As tread wears down, the tire’s rolling resistance changes, which can make your engine work harder and burn more gas. Plus, many states have strict laws about minimum tread depth. If you’re pulled over and your tires are below the legal limit, you could face a fine or even fail a vehicle inspection. So, checking your tread depth isn’t just smart—it’s essential.
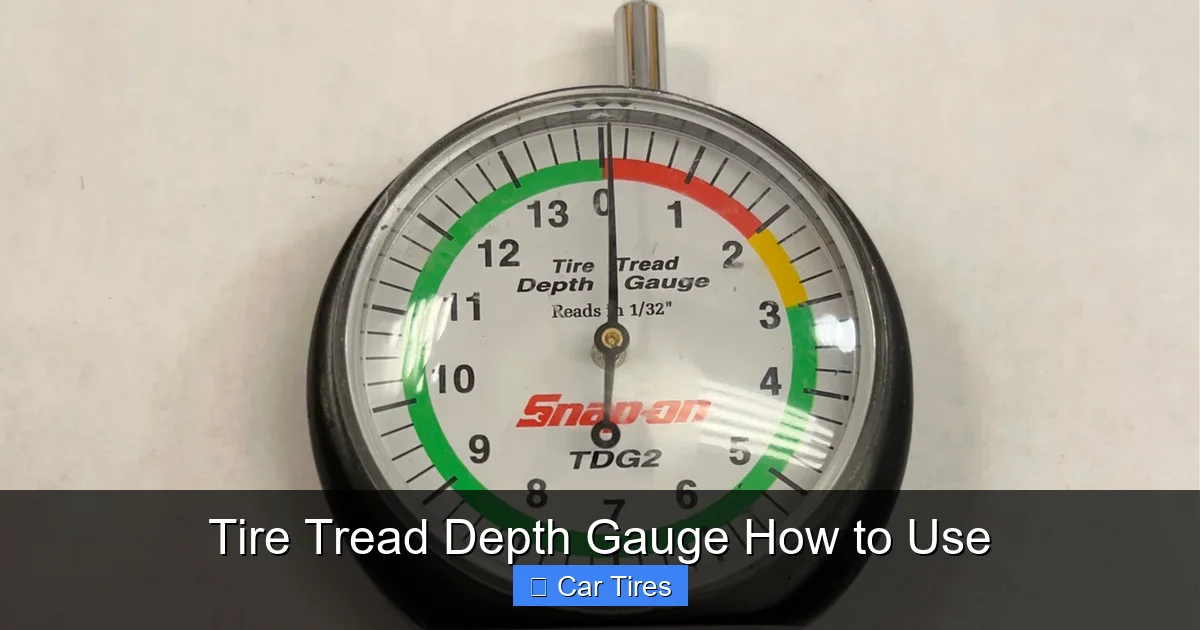
What Is a Tire Tread Depth Gauge and Why Use One?
Visual guide about Tire Tread Depth Gauge How to Use
Image source: images-na.ssl-images-amazon.com
A tire tread depth gauge is a simple, handheld tool designed to measure how much tread is left on your tire. Unlike guessing by looking at the tread or using the “penny test” (which only gives a rough idea), a gauge provides an exact measurement in 32nds of an inch or millimeters. This precision helps you make informed decisions about tire maintenance and replacement.
There are two main types of tread depth gauges: analog (mechanical) and digital. Analog gauges look like a small ruler with a probe that slides into the tread. You push it down until the base rests on the tire shoulder, and the measurement shows up on a scale. These are affordable, durable, and don’t require batteries. Digital gauges, on the other hand, use electronic sensors to display readings on a small screen. They’re often more accurate and easier to read, especially in low light, but they cost more and need batteries.
So why use a gauge instead of just eyeballing it? Because your eyes can be deceiving. Tread wear isn’t always even—some areas may look fine while others are dangerously thin. A gauge removes the guesswork. It gives you a clear, objective number so you know exactly when it’s time to replace your tires. Plus, regular checks help you spot uneven wear patterns early, which could signal alignment issues, underinflation, or suspension problems.
How to Use a Tire Tread Depth Gauge: Step-by-Step Guide
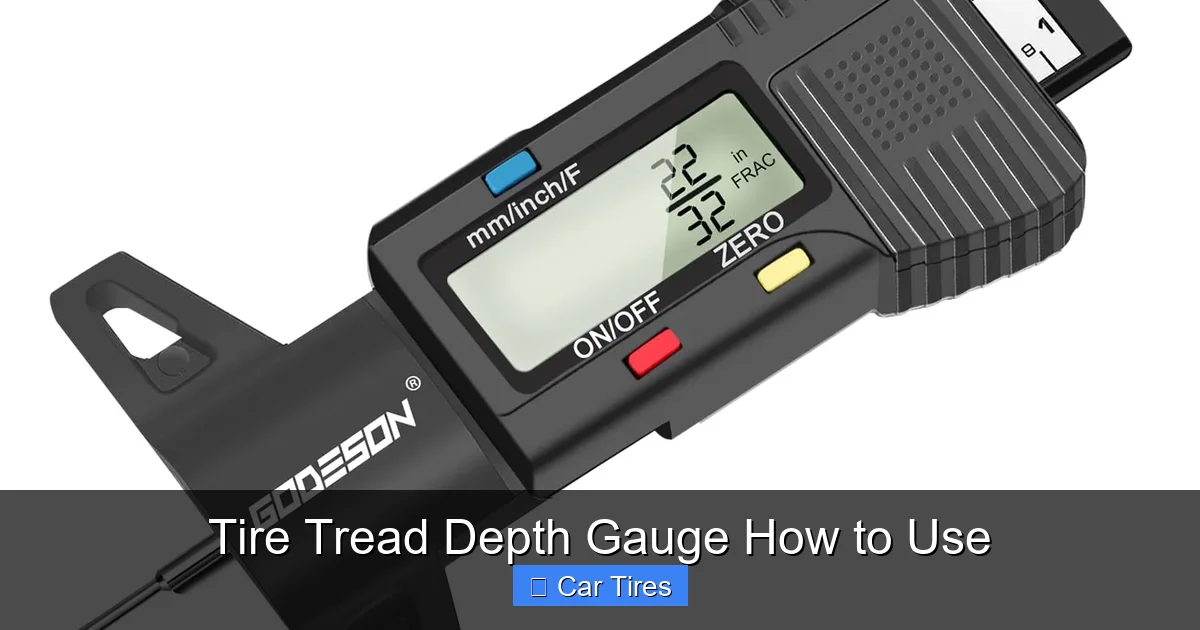
Visual guide about Tire Tread Depth Gauge How to Use
Image source: img.ltwebstatic.com
Using a tire tread depth gauge is easier than you might think. With just a few minutes and the right technique, you can check all four tires and know exactly where you stand. Here’s how to do it properly.
Step 1: Choose the Right Spot to Measure
Start by picking a clean, dry section of the tire. Avoid areas with mud, snow, or debris, as these can throw off your reading. Look for the deepest part of the tread groove—usually near the center of the tire. But don’t stop there. Tread wear isn’t always uniform. To get a complete picture, measure in at least three spots across the tire: the inner edge, the center, and the outer edge. This helps you detect uneven wear caused by improper inflation, misalignment, or suspension issues.
For example, if the inner edge is worn more than the outer, your tires might be underinflated. If one side is significantly thinner, your alignment could be off. Measuring multiple spots gives you clues about what’s going on with your vehicle.
Step 2: Insert the Gauge into the Tread Groove
Hold the gauge perpendicular to the tire surface. Gently insert the probe (the thin metal rod) straight down into the tread groove. Don’t angle it or push it sideways—this can give a false reading. Push it down until it reaches the bottom of the groove. You should feel it stop against the base of the tread.
If you’re using an analog gauge, make sure the base (the flat part that rests on the tire shoulder) is flush against the tire. For digital models, the device will usually have a flat base that automatically aligns when pressed down. Some digital gauges even have a locking mechanism to hold the reading in place.
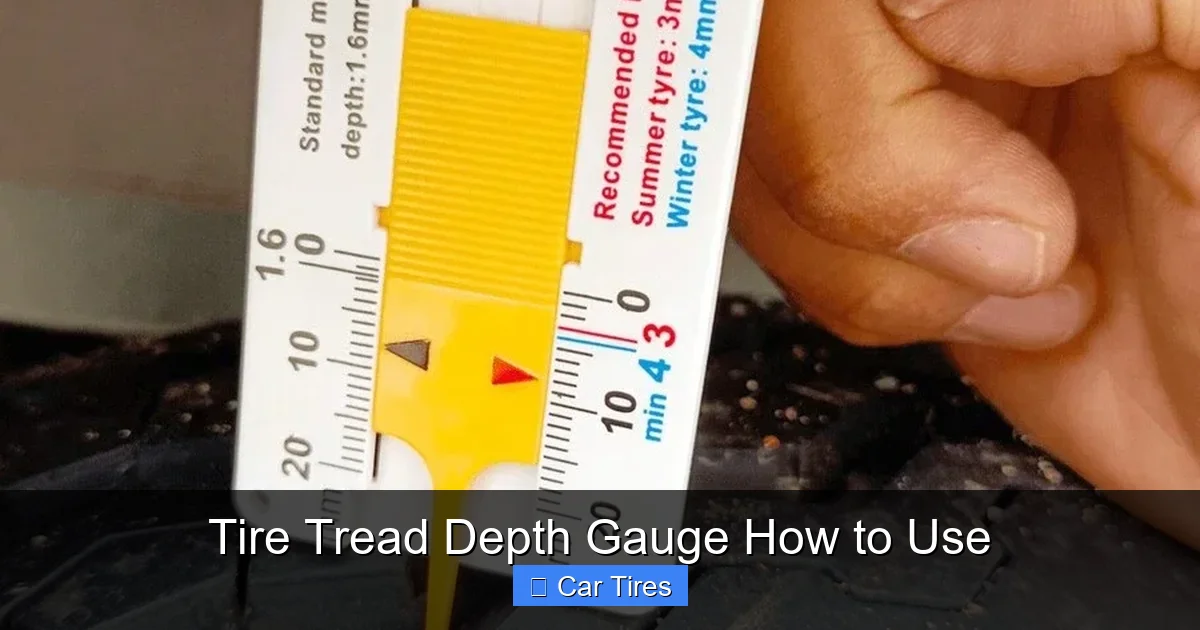
Step 3: Read the Measurement
Once the probe is fully inserted and the base is touching the tire, read the measurement. On an analog gauge, look at where the probe meets the scale—usually marked in 32nds of an inch (like 10/32”, 6/32”, etc.). On a digital gauge, the number will appear on the screen.
Write down the reading for each spot you measured. This helps you track changes over time and spot trends. For instance, if your front tires are wearing faster than the rear, it could indicate a need for rotation or alignment.
Step 4: Repeat for All Tires
Don’t just check one tire and assume the others are fine. Tread wear can vary between tires due to weight distribution, driving habits, or mechanical issues. Measure each tire in multiple spots—front left, front right, rear left, rear right. This gives you a full picture of your vehicle’s tire health.
Step 5: Interpret the Results
Now that you have your numbers, what do they mean?
– **10/32” or higher:** Excellent tread depth. Your tires are in great shape and safe for all conditions.
– **8/32” to 6/32”:** Good tread, but start planning for replacement soon. Consider checking more frequently.
– **4/32”:** This is the threshold for wet weather safety. Tires at this level may struggle in rain or snow. Replace soon.
– **2/32”:** This is the legal minimum in most states. Tires at this level offer minimal grip and should be replaced immediately.
Keep in mind that 2/32” is the absolute minimum—not the ideal. Many safety experts recommend replacing tires at 4/32” for better performance in wet conditions.
Understanding Tread Wear Patterns and What They Mean
Visual guide about Tire Tread Depth Gauge How to Use
Image source: d2j6dbq0eux0bg.cloudfront.net
Tread depth isn’t just about how much rubber is left—it’s also about how evenly it’s wearing. Uneven wear patterns can tell you a lot about your vehicle’s health and driving habits. By using a tread depth gauge regularly, you can catch these patterns early and address the root cause before it leads to bigger problems.
Center Wear
If the center of the tread is worn more than the edges, your tires are likely overinflated. When there’s too much air pressure, the tire bulges in the middle, causing the center to wear faster. Check your owner’s manual or the sticker on the driver’s door jamb for the recommended PSI, and adjust accordingly.
Edge Wear (Inner or Outer)
Wear on the inner or outer edges usually means underinflation. When tires don’t have enough air, the shoulders (edges) make more contact with the road, leading to faster wear on those areas. This also reduces fuel efficiency and can cause overheating.
Cupping or Scalloping
If you see uneven, wave-like dips in the tread (called cupping), it could point to suspension issues like worn shocks or struts. These parts help keep the tire in constant contact with the road. When they fail, the tire bounces, creating uneven wear.
Feathering
Feathering happens when the tread blocks are worn on one side but not the other, giving a “sawtooth” appearance. This is often caused by misalignment, especially toe misalignment (when the tires point slightly inward or outward). A professional alignment can fix this.
One-Side Wear
If one tire is significantly more worn than the others—especially on the same axle—it could indicate a camber issue (when the tire leans too far in or out). This is common in vehicles with modified suspensions or after hitting a curb.
By measuring tread depth in multiple spots, you can identify these patterns and take action. For example, if you notice inner edge wear on both front tires, check your tire pressure and alignment. Catching these issues early can extend tire life, improve safety, and save money.
When to Replace Your Tires: Beyond the Numbers
While tread depth is a key indicator, it’s not the only factor in deciding when to replace tires. Even if your tread is above 2/32”, other signs may mean it’s time for new ones.
Age of the Tire
Tires degrade over time, even if they’re not used much. The rubber compounds break down due to exposure to heat, sunlight, and oxygen. Most manufacturers recommend replacing tires every 6 to 10 years, regardless of tread depth. Check the DOT code on the sidewall—it tells you the week and year the tire was made. For example, “2319” means the tire was made in the 23rd week of 2019.
Cracks or Dry Rot
Look for small cracks in the sidewall or between tread blocks. These are signs of aging and can lead to blowouts. If you see cracking, especially around the edges, it’s time to replace the tire.
Bulges or Blisters
A bulge on the sidewall indicates internal damage—like a broken belt or weakened structure. This is extremely dangerous and can cause a sudden blowout. Replace the tire immediately.
Tread Wear Indicators
Modern tires have built-in wear bars—small rubber bridges that appear across the tread when it reaches 2/32”. If you see these bars, your tires are at the legal limit and should be replaced.
Performance Issues
If your car feels less responsive, takes longer to stop, or slips in wet weather—even with decent tread—it might be time for new tires. Rubber hardens over time, reducing grip.
Using a tread depth gauge helps you stay ahead of these issues. By checking regularly, you can plan replacements before safety becomes a concern.
Tips for Maintaining Healthy Tires
Regular tread depth checks are just one part of tire care. To get the most life and performance from your tires, follow these best practices.
Check Tire Pressure Monthly
Underinflated or overinflated tires wear unevenly and reduce fuel efficiency. Use a quality tire pressure gauge and check when the tires are cold (before driving). Adjust to the recommended PSI.
Rotate Tires Every 5,000 to 7,000 Miles
Rotating front and rear tires helps ensure even wear. Front tires typically wear faster due to steering and braking forces. Follow your vehicle’s recommended rotation pattern.
Get Alignments and Balancing
Misaligned wheels cause uneven wear. Have your alignment checked if you notice pulling to one side or uneven tread. Balancing ensures smooth driving and reduces vibration.
Inspect for Damage
Look for nails, cuts, or embedded objects. Small punctures can often be repaired, but deep cuts or sidewall damage usually require replacement.
Store Tires Properly
If you use seasonal tires (like winter or summer sets), store them in a cool, dry place away from sunlight and chemicals. Use tire bags or racks to prevent flat spots.
Use a Tread Depth Gauge Regularly
Make it a habit—check tread depth every month or before long trips. It takes just a few minutes but can prevent costly repairs or accidents.
Conclusion: Stay Safe, Stay Informed
Using a tire tread depth gauge is one of the simplest and most effective ways to protect yourself, your passengers, and your vehicle. It’s a small investment—most gauges cost under $20—but the benefits are huge. You’ll drive safer, save money on fuel and repairs, and avoid legal trouble.
Remember, tread depth isn’t just a number—it’s a measure of your tire’s ability to grip the road, especially in bad weather. By checking regularly and understanding what your readings mean, you can catch problems early and make smart decisions about maintenance and replacement.
Don’t wait until it’s too late. Grab a tread depth gauge today, check your tires, and drive with confidence. Your safety is worth the few minutes it takes.
Frequently Asked Questions
How often should I check my tire tread depth?
Check your tire tread depth at least once a month and before long trips. Regular checks help you catch wear early and maintain safety.
Can I use a penny instead of a tread depth gauge?
The penny test (inserting a penny into the tread with Lincoln’s head upside down) only tells you if tread is above or below 2/32”. A gauge gives precise measurements, so it’s more accurate and reliable.
What’s the difference between analog and digital tread depth gauges?
Analog gauges use a sliding probe and scale, are battery-free, and cost less. Digital gauges display readings on a screen, are often more precise, but require batteries and cost more.
Is 4/32” tread depth safe for driving in the rain?
While 4/32” is above the legal minimum, it’s the threshold for safe wet weather driving. Experts recommend replacing tires at this point for better traction and reduced hydroplaning risk.
Can I measure tread depth on winter or all-season tires the same way?
Yes, the method is the same. However, winter tires often have deeper tread and different wear patterns, so check them more frequently during cold months.
What should I do if one tire has significantly less tread than the others?
This could indicate alignment, inflation, or suspension issues. Have your vehicle inspected by a professional and consider replacing tires in pairs (on the same axle) for balanced performance.