How to Take Off a Spare Tire
Contents
- 1 Key Takeaways
- 2 📑 Table of Contents
- 3 Why Knowing How to Take Off a Spare Tire Matters
- 4 Essential Tools and Equipment
- 5 Safety Precautions Before You Begin
- 6 Step-by-Step Guide to Removing the Spare Tire
- 7 Common Mistakes to Avoid
- 8 Maintaining Your Spare Tire
- 9 When to Call for Professional Help
- 10 Conclusion
- 11 Frequently Asked Questions
Knowing how to take off a spare tire is a vital skill for any driver. Whether you’re dealing with a flat or performing routine maintenance, this guide walks you through the process safely and confidently.
Key Takeaways
- Safety first: Always park on level ground, engage the parking brake, and use wheel chocks to prevent rolling.
- Gather the right tools: You’ll need a lug wrench, jack, and possibly a wheel brace or breaker bar.
- Loosen lug nuts before lifting: Break the resistance while the tire is still on the ground to avoid spinning.
- Use the jack correctly: Position it on the vehicle’s designated lift point to avoid damage or injury.
- Store the flat tire properly: Secure it in the trunk or wheel well to prevent shifting during driving.
- Check spare tire condition regularly: A flat spare is useless—inspect pressure and tread monthly.
- Practice makes perfect: Try removing your spare tire at home before an emergency happens.
📑 Table of Contents
Why Knowing How to Take Off a Spare Tire Matters
Imagine you’re driving down a quiet country road, miles from the nearest town, when you hear that unmistakable thump-thump-thump. You pull over, step out, and discover a flat tire. Your heart sinks—until you remember you have a spare. But then you realize: do you actually know how to take off a spare tire?
It’s a scenario no one wants to face, but it happens to millions of drivers every year. Whether you’re dealing with a sudden puncture, a blowout, or simply rotating tires for maintenance, knowing how to safely and correctly remove a spare tire can save you time, money, and stress. More importantly, it can keep you safe on the road.
Many people assume that changing a tire is something only mechanics or experienced drivers can do. But the truth is, with the right knowledge and tools, anyone can master this essential skill. The key is preparation, patience, and following the correct steps. This guide will walk you through everything you need to know—from gathering your tools to safely removing and storing your spare tire—so you’re ready when the unexpected happens.
Essential Tools and Equipment
Visual guide about How to Take Off a Spare Tire
Image source: tirescamp.com
Before you even think about jacking up your car, make sure you have the right tools on hand. Most vehicles come with a basic tire-changing kit, but it’s always smart to double-check what’s included and supplement as needed.
Standard Tools That Come with Your Vehicle
Nearly every car, truck, or SUV includes a few essential items in the trunk or under the floor mat. These typically include:
– A **lug wrench** (also called a tire iron): This L-shaped or cross-shaped tool is used to loosen and tighten the lug nuts that hold the wheel in place.
– A **scissor jack** or **hydraulic jack**: This lifts the vehicle off the ground so you can remove the flat tire.
– A **spare tire**: Usually a compact “donut” tire, though some vehicles come with a full-size spare.
These tools are designed to be compact and lightweight, which is great for storage but can sometimes make the job a bit more challenging. For example, scissor jacks can be slow to operate and require careful handling.
Optional but Helpful Tools
While the basics will get the job done, a few extra tools can make the process smoother and safer:
– **Wheel chocks**: These are small wedges placed against the tires to prevent the vehicle from rolling. You can use bricks, wood blocks, or dedicated rubber chocks.
– **Breaker bar or torque wrench**: A breaker bar gives you more leverage when loosening stubborn lug nuts. A torque wrench ensures you tighten them to the correct specification later.
– **Flashlight or headlamp**: If you’re changing a tire at night or in low light, good lighting is essential.
– **Gloves**: Protect your hands from dirt, grease, and sharp edges.
– **Jack pads or wooden boards**: Placing a board under the jack can help distribute weight and prevent it from sinking into soft ground.
Checking Your Spare Tire’s Condition
Before you even start the removal process, take a moment to inspect your spare tire. A flat or damaged spare is worse than no spare at all. Check the following:
– **Tire pressure**: Use a tire pressure gauge to ensure the spare is inflated to the recommended PSI (usually listed on the tire sidewall or in your owner’s manual).
– **Tread depth**: Look for signs of wear, cracks, or dry rot. A spare with worn tread may not provide safe traction.
– **Age**: Even if it looks good, a spare tire older than 6–10 years should be replaced, as rubber degrades over time.
If your spare is in poor condition, consider replacing it or investing in a portable tire inflator and sealant as a temporary fix.
Safety Precautions Before You Begin
Visual guide about How to Take Off a Spare Tire
Image source: tirescamp.com
Changing a tire might seem straightforward, but it involves working with heavy machinery and potential hazards. Taking the right safety precautions can prevent accidents and injuries.
Choose a Safe Location
Never attempt to change a tire on a busy highway, sharp curve, or steep hill. Instead, pull over to a flat, stable, and well-lit area—like a parking lot or wide shoulder. The more level the ground, the better. If you’re on a slope, turning the wheels toward the curb (or away, depending on direction) can help prevent rolling.
Secure the Vehicle
Once you’ve stopped, take these steps to keep your car from moving:
– Turn on your **hazard lights** to alert other drivers.
– Engage the **parking brake** to lock the rear wheels.
– Place **wheel chocks** or heavy objects (like rocks or bricks) in front of and behind the tires that will remain on the ground. For example, if you’re changing a front tire, chock the rear wheels.
Wear Visible Clothing
If you’re changing a tire at night or in low visibility, wear reflective clothing or use a reflective vest. This makes you more visible to passing vehicles.
Keep Passengers Safe
If you have passengers, especially children, have them stay inside the vehicle with the doors locked—or move to a safe location away from traffic. Never allow anyone to stand directly behind or in front of the vehicle while it’s being jacked up.
Be Aware of Your Surroundings
Look out for oncoming traffic, potholes, soft ground, or overhead obstacles like low-hanging branches. If the conditions feel unsafe, consider calling for roadside assistance instead of attempting the change yourself.
Step-by-Step Guide to Removing the Spare Tire

Visual guide about How to Take Off a Spare Tire
Image source: twstatic.net
Now that you’re prepared and safe, it’s time to get to work. Follow these steps carefully to remove your spare tire efficiently and without damage.
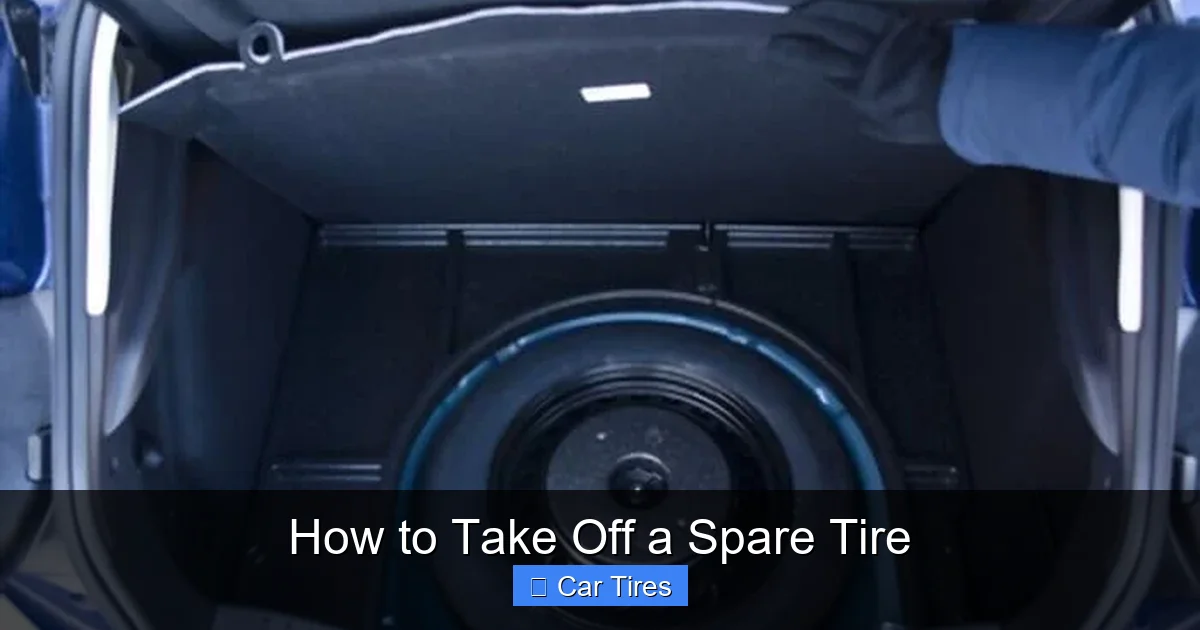
Step 1: Locate the Spare Tire
Spare tires are stored in different places depending on your vehicle:
– **Trunk**: Most sedans and compact cars store the spare under the trunk floor mat. Lift the mat and look for a latch or bolt.
– **Under the vehicle**: Some trucks and SUVs have the spare mounted underneath, near the rear axle. It’s usually held in place by a cable and winch.
– **Rear door**: Certain SUVs and older models have the spare mounted on the tailgate.
Once you’ve found it, check that it’s accessible and not blocked by luggage or debris.
Step 2: Remove the Spare Tire from Its Mount
The method for removing the spare depends on its location:
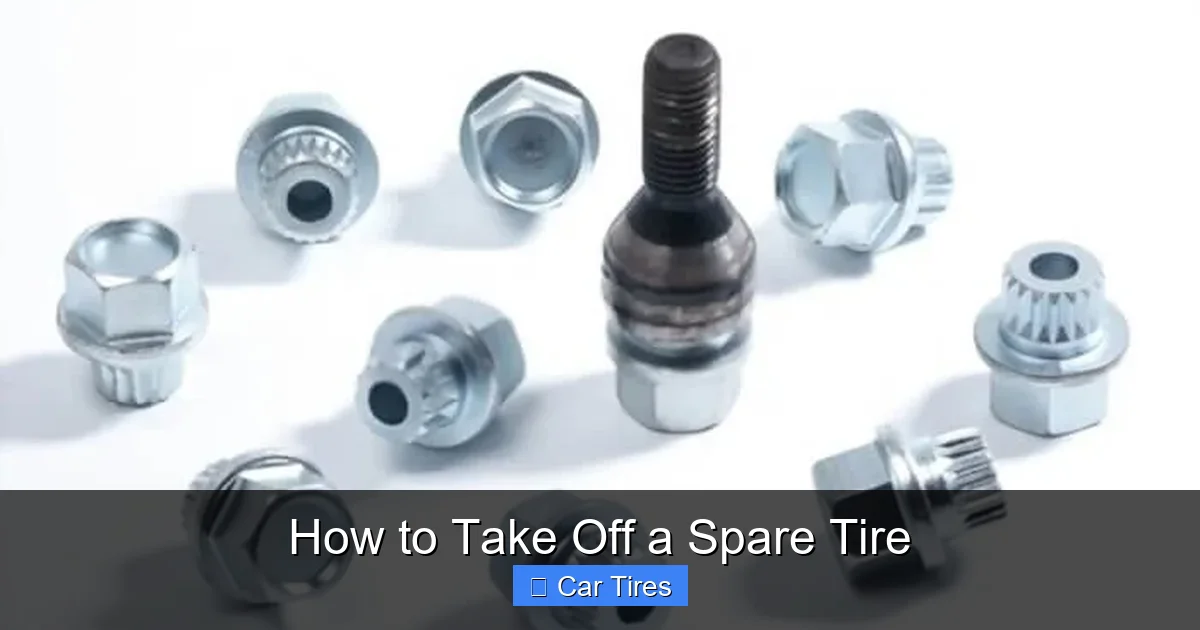
– **Trunk-mounted spares**: Look for a bolt or wing nut in the center of the spare. Use the lug wrench or a socket to turn it counterclockwise. Once loose, lift the tire out.
– **Under-vehicle spares**: Locate the winch mechanism—usually accessed through a hole in the rear bumper or under the truck bed. Insert the lug wrench or a dedicated crank tool and turn it counterclockwise to lower the tire. Once it’s down, pull it out from under the vehicle.
– **Rear door spares**: Simply open the tailgate and unlatch the spare. Some models have a release lever or strap.
Be careful when handling the spare—it’s heavier than it looks, especially if it’s a full-size tire.
Step 3: Prepare the Flat Tire for Removal
Before lifting the car, you’ll need to loosen the lug nuts on the flat tire. This is crucial because once the tire is off the ground, it can spin freely, making it impossible to break the nuts loose.
– Use the lug wrench to turn the nuts **counterclockwise**. You may need to use your foot or body weight to break them loose—especially if they’re tight.
– Loosen each nut about half to one full turn. Do not remove them completely yet.
Pro tip: If the nuts are stuck, spray a little penetrating oil (like WD-40) and let it sit for a few minutes before trying again.
Step 4: Position the Jack
Now it’s time to lift the vehicle. But where do you place the jack?
Never jack the car on the body panels, suspension, or exhaust system. Instead, use the **designated jack points**—these are reinforced areas near the wheels, usually marked by notches, arrows, or metal brackets in the frame.
– For front tires: Jack points are typically behind the front wheels.
– For rear tires: They’re usually in front of the rear wheels.
Place the jack securely under the jack point and ensure it’s centered. If you’re on soft ground, place a flat, sturdy board under the jack to prevent sinking.
Step 5: Lift the Vehicle
Slowly pump or crank the jack until the flat tire is about 6 inches off the ground. Don’t lift it too high—just enough to remove the tire.
Never place any part of your body under the vehicle while it’s jacked up. If the car slips, it could cause serious injury.
Step 6: Remove the Flat Tire
With the vehicle lifted, finish removing the lug nuts by hand. Place them in a secure spot—like a hubcap or your pocket—so you don’t lose them.
Grip the tire firmly on both sides and pull it straight off the wheel studs. It may be stuck due to rust or dirt, so wiggle it gently if needed.
Set the flat tire aside, preferably on its side to prevent it from rolling.
Step 7: Install the Spare Tire
Take your spare tire and align it with the wheel studs. Push it onto the hub until it’s snug.
Hand-tighten the lug nuts in a **star pattern** (also called a crisscross pattern). This ensures even pressure and prevents warping. Tighten them as much as you can by hand.
Step 8: Lower the Vehicle and Tighten the Lug Nuts
Slowly lower the jack until the spare tire touches the ground but doesn’t bear the full weight of the vehicle. At this point, use the lug wrench to fully tighten the lug nuts in the star pattern.
Then, lower the car completely and remove the jack.
Give the lug nuts one final tighten with the wrench. If you have a torque wrench, use it to tighten them to the manufacturer’s recommended specification (usually found in the owner’s manual).
Step 9: Store the Flat Tire and Tools
Place the flat tire back in its storage location. If it’s dirty, wipe it off with a rag. Secure it properly so it doesn’t shift while driving.
Return all tools to the trunk and make sure nothing is left on the road.
Common Mistakes to Avoid
Even experienced drivers can make errors when changing a tire. Here are some common pitfalls and how to avoid them.
Over-tightening or Under-tightening Lug Nuts
Too tight, and you risk stripping the threads or warping the brake rotor. Too loose, and the wheel could come off while driving. Always tighten in a star pattern and use a torque wrench if possible.
Using the Wrong Jack Point
Jacking on the wrong spot can damage your vehicle’s frame or cause the jack to slip. Always consult your owner’s manual for the correct lift points.
Forgetting to Loosen Lug Nuts First
Trying to loosen lug nuts after the tire is off the ground is frustrating and dangerous. Always break them loose while the tire is still on the ground.
Ignoring the Spare Tire’s Limitations
Most spare tires (especially donuts) are not meant for long distances or high speeds. They typically have a speed limit of 50 mph and a range of 50–70 miles. Drive cautiously and get the flat tire repaired or replaced as soon as possible.
Not Practicing Ahead of Time
Don’t wait for an emergency to learn how to take off a spare tire. Practice at home in a safe, dry environment so you’re confident when it matters most.
Maintaining Your Spare Tire
A spare tire is only useful if it’s in good condition. Make it a habit to check your spare tire regularly—ideally once a month or before long trips.
Check Tire Pressure Monthly
Spare tires can lose air over time, even if they’re not being used. Use a tire pressure gauge to ensure it’s inflated to the recommended PSI.
Inspect for Damage
Look for cracks, bulges, or signs of dry rot. If the tire looks worn or damaged, replace it immediately.
Rotate Your Spares (If You Have More Than One)
Some vehicles have multiple spares or full-size spares that can be rotated into regular use. This helps even out wear and extends the life of all your tires.
Keep It Clean and Dry
Store your spare in a clean, dry place. Moisture and dirt can accelerate deterioration.
When to Call for Professional Help
While changing a tire is something most drivers can handle, there are times when it’s better to call for help.
– If you’re in an unsafe location (e.g., busy highway, dark road).
– If you don’t have the right tools or a usable spare.
– If the lug nuts are severely rusted or stripped.
– If you’re injured, elderly, or uncomfortable doing the job yourself.
Roadside assistance services can often change your tire for you, or at least tow you to a safe location.
Conclusion
Knowing how to take off a spare tire is more than just a handy skill—it’s a lifesaver. Whether you’re stranded on the side of the road or simply performing routine maintenance, being prepared can make all the difference.
By following the steps in this guide, you’ll be able to remove and install a spare tire safely and confidently. Remember to prioritize safety, use the right tools, and practice regularly. And don’t forget to check your spare tire’s condition often—because a flat spare is no spare at all.
With a little preparation and know-how, you’ll never have to fear a flat tire again. Stay safe, stay prepared, and keep rolling.
Frequently Asked Questions
How often should I check my spare tire?
Check your spare tire’s pressure and condition at least once a month. Tires can lose air over time, even when not in use, so regular inspections ensure it’s ready when you need it.
Can I drive long distances on a spare tire?
Most spare tires, especially compact “donut” spares, are designed for temporary use only. They typically have a speed limit of 50 mph and a maximum range of 50–70 miles. Replace or repair your flat tire as soon as possible.
What if my lug nuts are stuck?
If lug nuts won’t budge, try spraying them with penetrating oil and let it sit for 10–15 minutes. Use a breaker bar for extra leverage, or gently tap the wrench with a rubber mallet to break the seal.
Where is the spare tire located on my vehicle?
Spare tires are commonly found under the trunk floor, beneath the vehicle near the rear axle, or mounted on the tailgate. Check your owner’s manual for the exact location.
Do I need special tools to remove a spare tire?
Most vehicles come with a lug wrench and jack. However, a breaker bar, torque wrench, and wheel chocks can make the job easier and safer.
What should I do with the flat tire after removing it?
Store the flat tire securely in your trunk or wheel well. Take it to a tire shop as soon as possible for repair or replacement. Never leave it on the side of the road.