
How to Take a Jeep Hard Top Off
Contents
- 1 Key Takeaways
- 2 📑 Table of Contents
- 3 Understanding Your Jeep: Model Year Makes a Difference
- 4 Gathering Your Tools and Preparing the Area
- 5 Step-by-Step: Removing the Hard Top (Manual Systems)
- 6 Step-by-Step: Removing the Power Hard Top (JL/JT)
- 7 Storage Solutions: Protecting Your Investment
- 8 Reinstalling the Hard Top: The Reverse Process
- 9 Common Challenges and Troubleshooting
- 10 Frequently Asked Questions


Removing your Jeep’s hard top is a straightforward process that unlocks the open-air freedom Jeep is famous for. With the right tools, a helper, and knowledge of your specific model year, you can safely take it off in under an hour. Proper storage is crucial to prevent damage, and reinstalling it correctly ensures a perfect, rattle-free fit.
There’s nothing quite like the feeling of the wind in your hair and the sun on your face in a Jeep with the top and doors off. It’s the ultimate expression of fun and freedom that defines the brand. But to get there, you first have to conquer the task of removing that heavy, factory-installed hard top. For many new Jeep owners, the idea of taking off the hard top can seem daunting. It’s a large, awkward piece of fiberglass or composite that seems permanently attached. I’m here to tell you it’s not. With a calm approach, the right tools, and a clear understanding of your specific Jeep’s mechanism, you can master this skill. This guide will walk you through every single step, from gathering your tools to storing your top properly for the season. We’ll cover the key differences between Jeep Wrangler generations so you’re never confused. Think of this as your friend in the garage, talking you through the process. Let’s get that top off and start enjoying the open road.
Key Takeaways
- Know Your Model: The removal process differs significantly between older TJ/JK models and newer JL/JT models with manual or power tops. Identifying yours first is critical.
- Tools Are Essential: You will need specific tools, typically a Torx T40/T50 socket, a flathead screwdriver, and often a specialty hook or trim tool. Never force bolts.
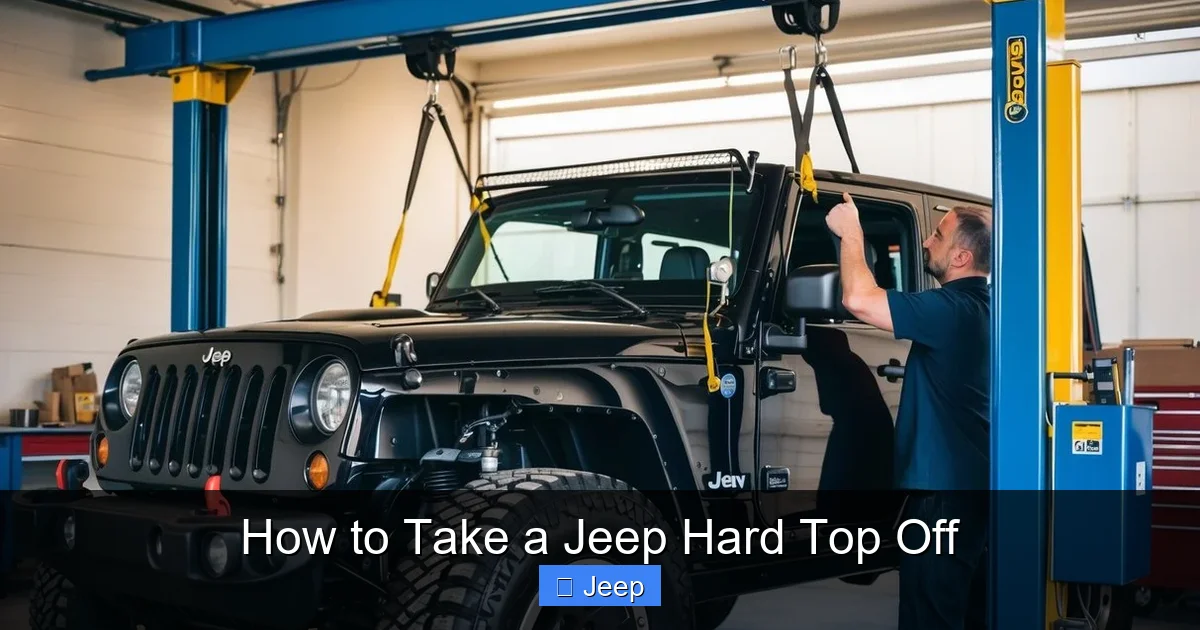
- Two People Are Best: A Jeep hard top is heavy (often 100-200 lbs). A second person is strongly recommended for safety and to guide the top off evenly.
- Storage Matters: Never lay the top flat on the ground. Use proper hard top stands, a wall-mounted rack, or a padded floor stand to avoid stress cracks and scratches.
- Mind the Seals and Wiring: Carefully manage the rear window seal and any wiring for the rear wiper/defroster. Damaging the seal leads to leaks.
- Reinstallation Requires Alignment: Putting it back on is the reverse, but take time to align the front clamps and ensure the rear seal seats perfectly before tightening all bolts.
- Hardware Has a Home: Use labeled bags or a dedicated parts tray for bolts and clips. Missing a single fastener can cause wind noise or leaks.
📑 Table of Contents
- Understanding Your Jeep: Model Year Makes a Difference
- Gathering Your Tools and Preparing the Area
- Step-by-Step: Removing the Hard Top (Manual Systems)
- Step-by-Step: Removing the Power Hard Top (JL/JT)
- Storage Solutions: Protecting Your Investment
- Reinstalling the Hard Top: The Reverse Process
- Common Challenges and Troubleshooting
Understanding Your Jeep: Model Year Makes a Difference
Before you even touch a tool, you must identify your Jeep. The process for a 1997-2006 Jeep Wrangler TJ is completely different from a 2007-2018 JK, and the 2018+ JL and 2020+ JT Gladiator have their own unique systems. The core principles are the same—unbolt, disconnect, lift—but the locations of fasteners and the presence of power-assist systems change the game.
The Classic TJ & JK (1997-2018)
These models use a primarily manual system. The front of the top latches to the windshield frame with a series of metal clamps, usually secured by Torx screws. The rear of the top bolts to the body tub with a perimeter of bolts. There are no motors or complex wiring beyond perhaps a simple rear wiper connection. This is the most straightforward system to learn and is a great starting point for any DIYer. The weight is substantial, but the process is purely mechanical.
The Modern JL & JT (2018-Present)
The newer Wrangler (JL) and Gladiator (JT) introduced a power hard top option. If you have this, your life is much easier. A single switch in the cab operates electric motors that release the front clamps and even lift the rear of the top slightly. You still need to manually remove the final rear bolts and guide it off, but the heavy lifting of breaking the seal and unclamping is done for you. For manual JL/JT tops, the process is similar to JK but with updated clamp designs and more integrated wiring connectors for the rear defroster and wiper. Always check for a wiring harness plug near the rear of the top before trying to lift it.
Pro Tip: Pop the hood and look for a power module for the top on the passenger side firewall. If you see it, you have a power top. If not, it’s manual. This is your first and most important check.
Gathering Your Tools and Preparing the Area
Fumbling for tools halfway through a job is frustrating. A clean, organized start leads to a smooth finish. You’ll need a dedicated workspace with enough clearance on all sides of the Jeep. A garage with high doors is ideal, but a clean, flat driveway or yard works fine. Ensure the Jeep is parked on level ground and set the parking brake.
Visual guide about How to Take a Jeep Hard Top Off
Image source: adventurejeep.com
The Essential Toolkit
You will not be able to do this without the correct tools. Here’s a definitive list:
- Torx Bit Set (T40 & T50): These are the most common sizes for the front clamps on TJ/JK/JL manual tops. A 1/4″ drive set with a ratchet is perfect. Impact-rated bits are a plus if you have an impact driver, but be gentle.
- Flathead Screwdriver or Trim Tool: A 1″ wide flathead is useful for prying the rear window seal gently and for popping out plastic trim clips if needed.
- Socket Set (10mm & 13mm): These are typically for the rear perimeter bolts on all models.
- Helper Gloves: Good grip is crucial. Mechanic gloves or even weightlifting gloves will save your hands and provide traction on the fiberglass.
- Assistant: As mentioned, this is non-negotiable for most people. The top is awkward and heavy. A second set of eyes and hands prevents damage to the Jeep, the top, and, most importantly, you.
Pre-Job Checklist
Before the first bolt is turned, do this:
- Lower all windows completely. This prevents damage if the top shifts.
- Fold and secure the rear seat(s) to create maximum clearance.
- If equipped, remove the rear wiper arm. There’s usually a retaining nut at its base.
- Clear the area around the Jeep of obstacles, tools, and pets.
- If you have a soft top boot or headliner, ensure it’s properly secured or removed as per your manual.
Step-by-Step: Removing the Hard Top (Manual Systems)
Now, let’s get into the heart of the matter. We’ll start with the manual system, which applies to most TJs, JKs, and manual JL/JTs. The process follows a logical sequence: rear first, then front, then lift. This order is designed to keep the top stable as you work.

Visual guide about How to Take a Jeep Hard Top Off
Image source: wallx.net
Phase 1: The Rear Perimeter
Start at the rear of the Jeep. You’ll see a black rubber seal running around the edge of the top where it meets the body. Underneath this seal are the rear mounting bolts. On TJ/JK models, there are typically 10-12 bolts along the sides and top. On JL/JT models, they may be under larger plastic covers. Carefully peel back the rubber seal just enough to access the bolt heads. Using your socket (usually 10mm or 13mm), remove all these bolts. Keep them in a labeled bag—they are not all the same length! As you remove each bolt, note its position or lay them out in order on a clean rag. This makes reinstallation foolproof. Once all rear bolts are out, the rear of the top is free but still connected at the front.
Phase 2: The Front Clamp Release
This is the step that varies most. For TJ and JK models, you’ll find a metal clamp bracket along the top of the windshield frame, usually on both sides and the center. Each bracket is held by two Torx T50 screws. Remove these screws. The bracket will then pivot down, releasing its grip on the front lip of the hard top. On some JK models, there is also a central latch or a second set of screws. For JL/JT manual models, the front clamp is a single, larger mechanism on each side. It often has a Torx T40 screw that, when loosened, allows a lever to be flipped, releasing the clamp. Consult your owner’s manual for the exact location. The key is to fully disengage every front clamp before attempting to lift. You should be able to see and feel a gap between the top’s lip and the windshield frame all the way across.
Critical Safety Check: Before moving to the lift, gently try to rock the top forward and backward by hand. It should feel loose at both ends. If it’s still stuck at the rear, you missed a bolt. If stuck at the front, a clamp is still engaged.
Phase 3: The Lift and Removal
This is where your helper becomes essential. Position yourself and your assistant on opposite sides of the Jeep, at the rear corners of the top. With a firm grip on the reinforced sections near the rear (often there are built-in handles), lift straight up about 2-3 inches. The goal is to clear the front lip from the windshield frame and the rear bolts from their holes. Once clear, you can both pivot the top outward, carrying it away from the Jeep. Keep it as vertical as possible to avoid scraping the body. Have your assistant guide the front end out first, then you both walk it backward away from the vehicle. Place it immediately on your prepared storage stand or rack. Do not set it on the ground.
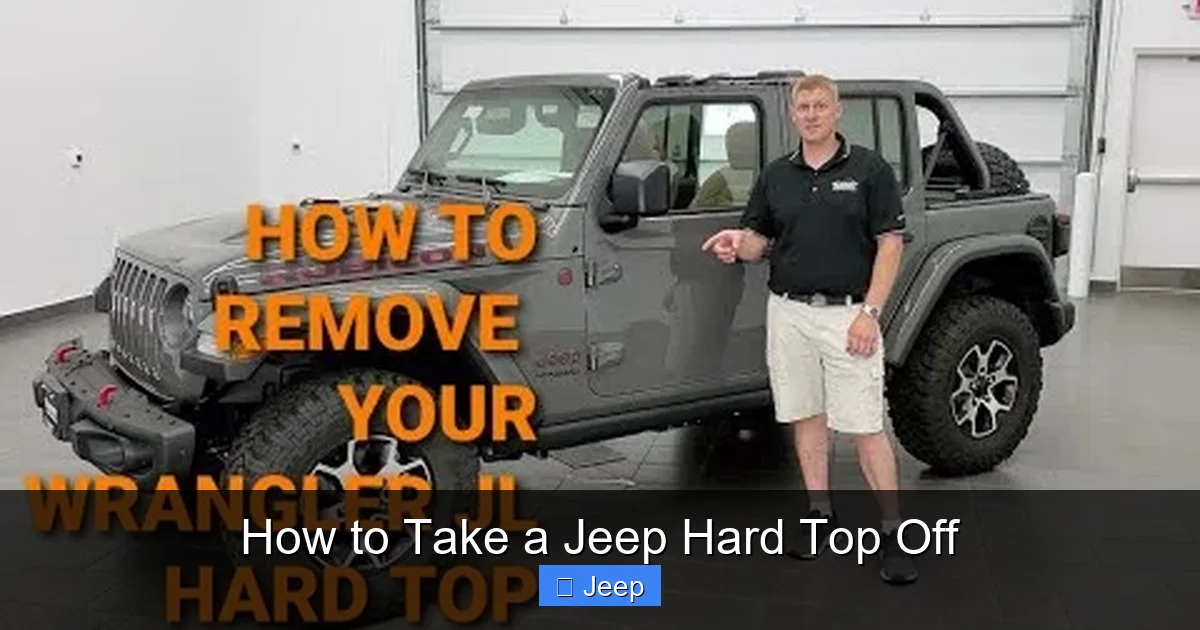
Step-by-Step: Removing the Power Hard Top (JL/JT)
If your JL or JT has the optional power hard top, the process is simplified but has unique steps. The system uses electric actuators to release the front clamps and even give the rear a slight “pop” to break the seal. However, you still have manual work to do.

Visual guide about How to Take a Jeep Hard Top Off
Image source: wallx.net
Engaging the Power Release
With the Jeep running or in the “ON” position (key fob inside), locate the power top switch. It’s usually on the lower dash or center console, marked with a top icon. Press and hold the switch in the “OPEN” direction. You will hear motors whirring. The front clamps will automatically disengage and pivot down. The system may also slightly raise the rear of the top to break the seal. Let the cycle complete. The switch may need to be held for 10-15 seconds. Once the motors stop, the front is completely free.
Final Manual Disconnections
Even with power release, you must still:
- Disconnect the rear wiper/defroster wiring harness: This is crucial. Look for a plastic connector plug near the base of the rear window on the driver’s side. Press the tab and pull it apart. Secure the dangling wire to the body with a zip-tie so it doesn’t dangle.
- Remove the rear perimeter bolts: Just like the manual system, peel back the seal and remove all the rear bolts. The power system may have already broken the seal, making this easier.
- Remove the rear wiper arm: If you haven’t already, take this off now.
Lifting the Power Top
The power top is often heavier due to the motor housing. The lift is identical to the manual process—two people, lift straight up, pivot, and carry. The advantage is that the front clamps are already down and out of the way, so there’s no risk of them catching on the windshield frame. The process is smoother but the weight remains a major factor. Always have a second person.
Storage Solutions: Protecting Your Investment
Your hard top is a significant investment, often costing thousands. Laying it on the garage floor on a couple of sawhorses is a recipe for disaster. The composite material can crack under its own weight if unsupported properly, and the finish is easily scratched. Proper storage is not optional; it’s part of the ownership experience.
Commercial Hard Top Stands & Racks
This is the gold standard. Companies like Prinsu, Bestop, and Smittybilt manufacture dedicated hard top stands. These are A-frame or wall-mounted racks that support the top at its structural points—the sides and the rear hatch area. They keep the top upright, off the ground, and free of stress. A wall-mounted rack saves valuable floor space. Floor stands are more portable. Investing in one of these is the single best thing you can do for your top’s longevity. For specific storage product recommendations and pricing, you might find our article on how much it costs to paint a Jeep helpful, as it discusses surface care which directly applies to storage.
The DIY Approach (If You’re Careful)
If you’re on a budget, you can build a safe storage solution. The key is to never rest the top on its corners or on the front lip. Support must be along the side rails and the rear hatch frame. A common DIY method uses two heavy-duty sawhorses with padded 2x4s laid across them, positioned to support the side rails. You can also build a simple A-frame from lumber. Pad all contact points with foam pipe insulation or moving blankets. Remember, the goal is to distribute the weight evenly and avoid any point loading that could cause a crack. Considering the weight, which you can learn more about in our piece on how much a Jeep top weighs, proper support is non-negotiable.
Reinstalling the Hard Top: The Reverse Process
Taking it off is only half the battle. Putting it back on correctly is essential for a quiet, leak-free ride. The reinstallation is the exact reverse of removal, but patience is key. Rushing this step leads to misalignment, wind noise, and water leaks.
Positioning and Initial Placement
With your helper, lift the top from its storage position. Carry it to the Jeep. The trickiest part is getting the front lip onto the windshield frame correctly. One person should guide the front, making sure it seats evenly along the entire length. Don’t try to slam it into place. It should drop onto the foam seal on the windshield frame with a gentle thud. If it doesn’t seat easily, you’re misaligned. Lift it slightly and try again.
Securing the Front Clamps
Once the front is seated, engage the front clamps. For manual systems, pivot each clamp bracket up and insert the Torx screws. Hand-tighten them all first in a crisscross pattern to ensure even pressure. Then, use your ratchet to snug them down firmly, but do not overtighten and crush the seal. For power tops, the clamps will automatically engage when you press and hold the “CLOSE” switch. Listen for the motors to stop. You should feel and hear a solid “clunk” as each clamp locks.
Final Rear Connection
Now, focus on the rear. Carefully press the rubber seal into its channel on the body tub. Start at the center and work your way out to the sides to avoid trapping air. Insert all the rear bolts, again hand-tightening first in a pattern. Use your socket to snug them down in a crisscross sequence. Do not torque them to extreme specs; a firm, even snug is sufficient. The seal does the work. Finally, reconnect the rear wiper/defroster wiring harness until it clicks. Reattach the wiper arm and tighten its nut.
Final Check: Before driving, sit inside and have your helper gently push down on various points of the top. You should feel no movement. Check that all wiring is tucked away and not pinched. A short test drive on a quiet street at low speed will reveal any rattles.
Common Challenges and Troubleshooting
Even with a perfect guide, you might hit a snag. Here’s how to solve the most common issues.
Stuck or Seized Bolts
This is the #1 frustration, especially on older TJs and JKs. Bolts, particularly the rear ones, can corrode and seize in their holes. Do not use excessive force with a ratchet; you’ll strip the Torx head. Instead: apply penetrating oil (like PB Blaster) and let it soak for 30 minutes. Use a properly fitting, high-quality Torx bit. Tap it lightly with a hammer to seat it. If it still won’t budge, try a manual Torx wrench for more control. In extreme cases, a small amount of heat from a propane torch on the bolt (not the body) can help, but be extremely cautious near the paint and fuel lines. If a bolt head rounds out, you may need an extractor set or a professional’s help.
The Top Won’t Lift Free
If you’ve removed all bolts and clamps but the top still won’t budge, the rear seal is likely stuck. This rubber seal creates a vacuum seal over time. The solution is to break that seal. Have your helper lift slightly on one corner while you insert a flathead screwdriver gently between the top and the body tub. Work your way along the rear edge, carefully prying to let air in. You should hear a hiss as the seal breaks. Be gentle to avoid tearing the seal or chipping the fiberglass.
Wind Noise or Leaks After Reinstall
This almost always means the front seal on the windshield frame is not seated correctly or a bolt is overtightened/undertightened. First, check that all front clamps are fully engaged and their screws are snug. Then, inspect the rear seal. It must be perfectly seated in its channel all the way around. Remove the rear bolts, press the seal firmly into place with your fingers, and reinstall the bolts gradually in a crisscross pattern. Often, simply tightening the bolts in the correct sequence resolves the issue.
Frequently Asked Questions
Can I remove a Jeep hard top by myself?
While it’s physically possible for one very strong person, it is highly discouraged. The top is heavy, awkward, and a fall can cause serious injury or thousands of dollars in damage to your Jeep and the top. Always use at least one helper for safety and to guide the top off evenly.
How long does it take to remove a Jeep hard top?
For an experienced person with a helper, the process takes about 30-45 minutes for a manual top and 20-30 minutes for a power top. For a first-timer, budget 60-90 minutes. The bulk of the time is spent carefully removing the many rear bolts and ensuring all clamps are disengaged.
Do I need to do anything special with the rear window seal?
Yes. When removing, gently peel back the rubber seal just enough to access the bolts. Do not rip it or pull it off completely. When reinstalling, ensure the seal is clean and pressed firmly back into its channel on the body tub before installing the rear bolts. A misaligned seal is the #1 cause of leaks.
Where should I put all the bolts and hardware?
Use small, labeled plastic bags (one for front clamps, one for rear bolts) or a magnetic parts tray. Keep them organized by location. Losing a single bolt or using the wrong length bolt in a hole can lead to noise, leaks, or a top that won’t secure properly.
Can I store my hard top outside?
It is not recommended. UV radiation will fade and weaken the composite material over time. If you must store it outside, invest in a high-quality, UV-protective hard top cover that straps down securely. The best practice is always indoor storage on a proper rack or stand to protect from elements and physical damage.
My power top switch doesn’t work. Can I still remove it?
Yes, but it becomes a manual process. The power system only releases the front clamps. You will need to manually access and disengage the clamps yourself, typically by removing the Torx screws that hold the clamp mechanism. Consult your service manual for the specific manual override procedure for your JL/JT power top. You will still need to remove all rear bolts as usual.


