
How to Reset the Maintenance Light on a Toyota Matrix
Contents
- 1 Key Takeaways
- 2 📑 Table of Contents
- 3 Introduction: That Pesky Wrench Light
- 4 What That Maintenance Light Actually Means
- 5 Essential Preparation: Safety and Knowledge First
- 6 Method 1: The Button Reset (For 2003-2008 Toyota Matrix)
- 7 Method 2: The OBD2 Scanner Reset (For 2009-2013 Toyota Matrix)
- 8 Model Year Deep Dive: Why the Change Happened
- 9 Troubleshooting: What to Do When It Won’t Reset
- 10 Conclusion: Keep Your Matrix Running Smoothly
- 11 Frequently Asked Questions
The maintenance light on your Toyota Matrix is a helpful reminder that scheduled service is due, not an indication of an immediate problem. Resetting it is a simple process you can do at home after completing the required oil change and inspections. For most Matrix models (2003-2008), you use the odometer button; for later models (2009-2013), you typically need an OBD2 scanner. Remember, you should only reset the light after performing the actual maintenance to keep your car running reliably and avoid potential damage.
Key Takeaways
- The light is a service reminder: It illuminates based on mileage/time intervals to remind you of factory-scheduled maintenance like oil changes, tire rotations, and inspections.
- Two primary reset methods exist: Older Matrix models (2003-2008) use a manual button sequence. Newer models (2009-2013) require an OBD2 scan tool to access the maintenance system.
- Never reset without servicing: Resetting the light without performing the actual maintenance is unsafe and can lead to engine wear, void warranties, and mask real problems.
- Model year matters: The exact procedure depends on your Matrix’s year and trim. Always consult your owner’s manual first for the definitive method for your specific vehicle.
- The light is not the “check engine” light: The maintenance required light (usually a wrench icon) is separate from the check engine light (usually an engine icon), which indicates a fault needing diagnosis.
- If the light returns quickly, investigate: A maintenance light that comes back on soon after a reset often means the service wasn’t completed properly or there’s an underlying issue with the sensor or system.
- Professional reset is an option: If you’re uncomfortable or lack the tools (like an OBD2 scanner for newer models), any quick lube shop or dealership can reset it for a small fee after verifying service.
📑 Table of Contents
- Introduction: That Pesky Wrench Light
- What That Maintenance Light Actually Means
- Essential Preparation: Safety and Knowledge First
- Method 1: The Button Reset (For 2003-2008 Toyota Matrix)
- Method 2: The OBD2 Scanner Reset (For 2009-2013 Toyota Matrix)
- Model Year Deep Dive: Why the Change Happened
- Troubleshooting: What to Do When It Won’t Reset
- Conclusion: Keep Your Matrix Running Smoothly
Introduction: That Pesky Wrench Light
You’re driving your trusty Toyota Matrix, and suddenly, a little wrench icon illuminates on your dashboard. It’s not the alarming check engine light, but it’s persistent. This is your car’s way of politely—or sometimes stubbornly—reminding you that it’s time for its scheduled maintenance. For a vehicle known for its practicality and reliability like the Matrix, keeping up with these reminders is key to ensuring it remains a dependable companion for years to come. But what does this light really mean, and more importantly, how do you turn it off after you’ve done the work?
Resetting the maintenance light on a Toyota Matrix is a common DIY task that saves you a trip to the dealer. The process is straightforward, but it varies slightly depending on your model year. This comprehensive guide will walk you through everything you need to know, from understanding what that light signifies to the exact button presses or tool steps for your specific Matrix. We’ll cover the two main procedural eras of the Matrix, highlight common pitfalls, and ensure you reset the light correctly and safely. Think of this as your definitive, friendly manual for handling this simple yet important dashboard alert.
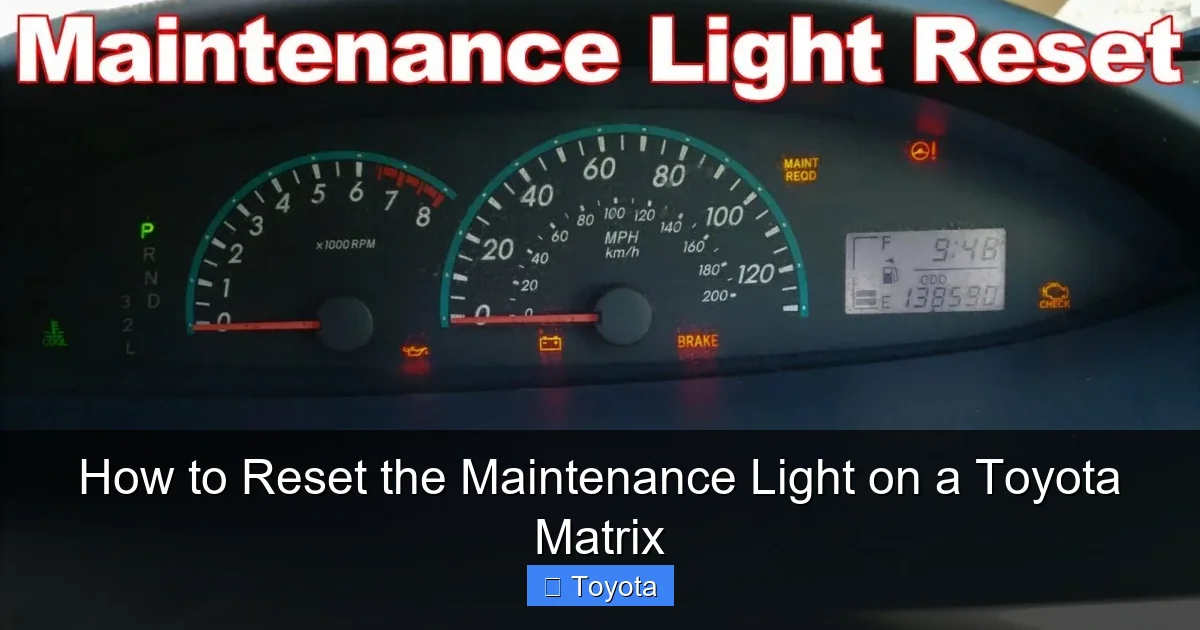
What That Maintenance Light Actually Means
Before we dive into the “how,” let’s clarify the “why.” The maintenance required light (often a wrench symbol) in your Toyota Matrix is part of the vehicle’s integrated maintenance reminder system. It’s not a diagnostic trouble code. It’s a mileage and time-based counter programmed by Toyota. When your Matrix reaches a predetermined interval—typically every 5,000 miles or 6 months, whichever comes first—the system will illuminate the light to remind you that services like an oil change, tire rotation, fluid checks, and a multi-point inspection are due.
Visual guide about How to Reset the Maintenance Light on a Toyota Matrix
Image source: rav4hub.com
It’s a Mileage Counter, Not a Sensor
Many people mistakenly think a sensor triggers this light. In reality, it’s an electronic counter stored in the instrument cluster or the car’s body control module. It’s reset manually after service. This is why the light will come on at the same interval every time if it’s properly reset. The system is designed to be a convenient nudge, helping you stay on top of preventative maintenance that protects your engine, preserves fuel economy, and maintains your vehicle’s value.
Maintenance Light vs. Check Engine Light
It’s crucial to distinguish the maintenance required light (wrench icon) from the check engine light (usually an engine-shaped icon). The check engine light indicates a malfunction detected by the engine computer (ECU) that could affect emissions or performance. It requires diagnostic scanning. The maintenance light is purely informational and should only be addressed by performing the scheduled service and then resetting the timer. Confusing the two can lead to unnecessary worry or, worse, ignoring a real problem.
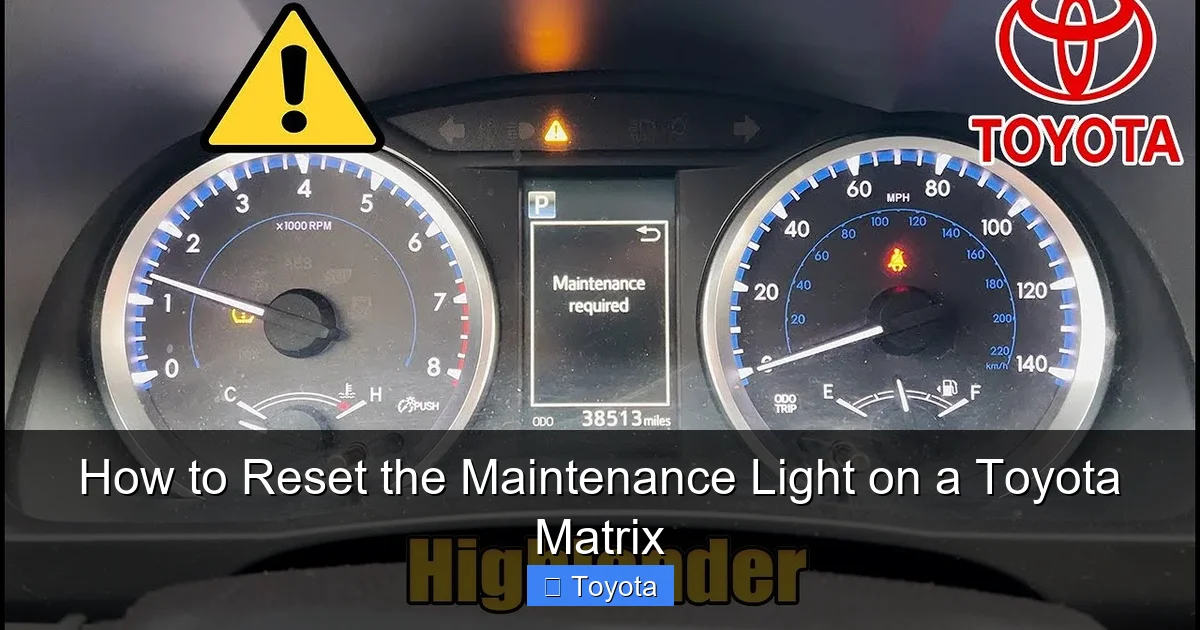
Essential Preparation: Safety and Knowledge First
Resetting the light is the final step in a maintenance cycle. Jumping straight to resetting without performing the actual service is a bad practice that can harm your car and mislead future owners. Here’s what you must do first.
Visual guide about How to Reset the Maintenance Light on a Toyota Matrix
Image source: i.ytimg.com
Step 1: Perform the Required Service
Consult your owner’s manual for the exact service interval requirements for your Matrix’s model year and engine type (1.8L or 2.4L). At a minimum, this will include:
- Oil and Oil Filter Change: The most common trigger. Use the correct oil grade (typically 0W-20 or 5W-30) and a quality filter.
- Tire Rotation: Promotes even tire wear.
- Multi-Point Inspection: Check brakes, fluids, belts, hoses, and suspension components.
- Other Fluids: Top off washer fluid, check coolant, brake fluid, and transmission fluid levels.
If you’re a DIY enthusiast, complete these tasks meticulously. If you take it to a shop, ensure they provide a receipt or checklist confirming all services were performed. Do not reset the light until this work is 100% complete.
Step 2: Identify Your Model Year and Procedure
The reset method changed with the second-generation Matrix redesign. Here’s the quick breakdown:
- 2003-2008 Model Years (First Generation): These use a manual button-press sequence on the instrument cluster. No tools are required.
- 2009-2013 Model Years (Second Generation): These models require an OBD2 scan tool that can access the maintenance system. The button method used in earlier years does not work.
Check your vehicle’s title or a door jamb sticker to confirm your exact model year. If you own a 2009 or later Matrix, you will need an OBD2 scanner with maintenance reset capability. Basic code readers often lack this function, so you may need a more advanced tool or a trip to a professional.
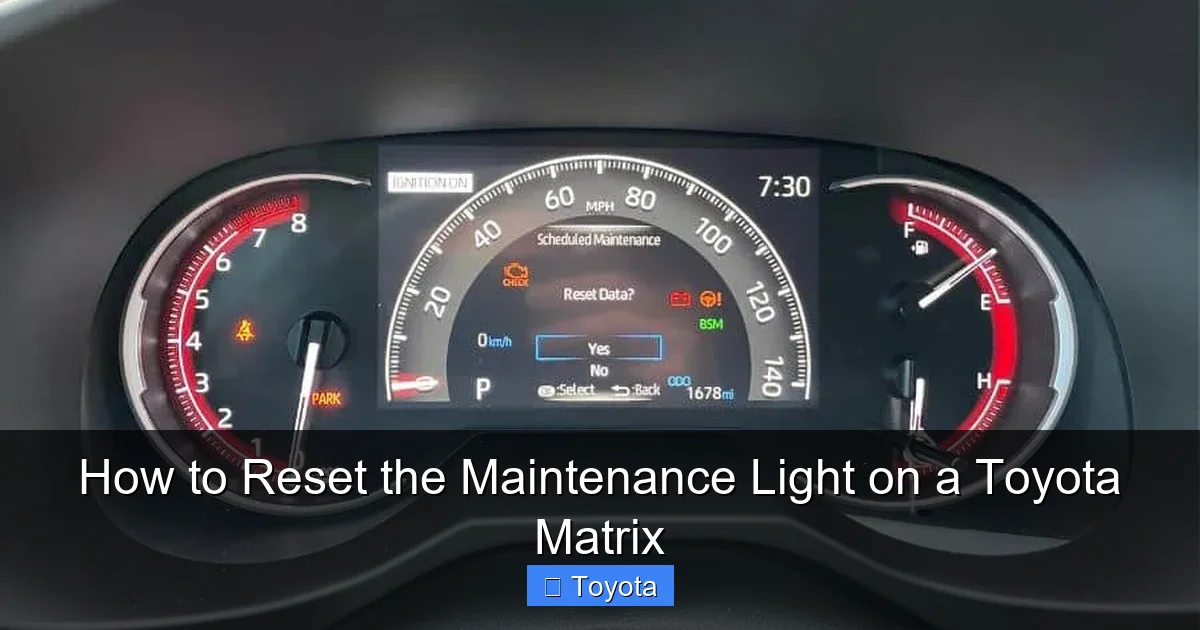
Method 1: The Button Reset (For 2003-2008 Toyota Matrix)
If your Matrix is from the first generation, resetting the maintenance light is a simple, tool-free process that takes less than 30 seconds. The procedure uses the odometer/trip meter button located on the instrument cluster.
Visual guide about How to Reset the Maintenance Light on a Toyota Matrix
Image source: i.ytimg.com
Step-by-Step Button Sequence
Follow these steps precisely. The ignition must be in the “ON” position, but the engine should be OFF.
- Turn the ignition to the “ON” position. This is the position right before you would crank the engine. All dashboard lights should illuminate, including the maintenance wrench.
- Locate the “ODO/TRIP” button. This is the small button you normally press to toggle between the odometer and trip meter readings. It’s typically on the gauge cluster near the speedometer or on the steering column stalk.
- Turn the ignition OFF. Press the power button until the dashboard lights go out.
- Press and hold the “ODO/TRIP” button. Keep it held down firmly.
- While still holding the button, turn the ignition back to the “ON” position. Do not start the engine. Continue holding the button.
- Watch the odometer display. After a few seconds, the display will change. It will show a series of dashes “—–” or a counter counting down (e.g., 5…4…3…2…1).
- Release the button. Once the countdown finishes or the dashes disappear, the maintenance light should blink and then go out. The odometer will return to its normal reading.
- Start the engine. Verify the light is off. It may briefly flash on startup as a system check, but it should remain off.
If the light does not reset, ensure you are holding the button long enough during step 5. Sometimes you need to hold it for 5-10 seconds after turning the key on. Repeat the process carefully.
Pro Tips for Button Reset Success
- Timing is everything: The sequence of turning the key off, holding the button, and turning the key back on must be done without pausing too long between steps.
- Don’t start the engine: Keep the engine off throughout the entire reset procedure.
- Clean the button: If the button is sticky or unresponsive, clean around it with electronic cleaner. A faulty button can prevent the reset sequence from registering.
- Consult the manual: Your owner’s manual will have the exact procedure and diagram for your specific Matrix. It’s the ultimate authority.
Method 2: The OBD2 Scanner Reset (For 2009-2013 Toyota Matrix)
For the second-generation Matrix, Toyota moved the maintenance reset function into the vehicle’s computer network. The old button trick no longer works. You must use an OBD2 (On-Board Diagnostics) scan tool that has the specific software capability to communicate with the maintenance reminder system. This is a common point of confusion, so it’s vital you have the right tool.
Choosing the Right Tool
Not all OBD2 scanners are created equal. A basic $20 code reader will only read and clear check engine light codes. You need a “maintenance reset” or “service light reset” function. Here are your options:
- Advanced DIY Scanners: Tools like the Autel MaxiCOM, Launch X431, or high-end BlueDriver (with paid subscription) often include maintenance reset functions for many makes, including Toyota.
- Toyota-Specific Tools: The official Toyota Techstream software (requires a compatible interface cable) is the most powerful but is dealer-grade.
- Simple Dedicated Reset Tools: Inexpensive tools like the “OBD2 Scanner for Toyota Maintenance Light Reset” (often under $30) are designed for this single purpose and work reliably on supported models.
- Professional Help: If you don’t want to buy a tool, shops like Jiffy Lube, Midas, or your Toyota dealer will reset it for $10-$30 after you’ve done the service.
Step-by-Step OBD2 Reset Procedure
Assuming you have a compatible scanner, here is the general process. Always refer to your specific tool’s manual for exact menu paths.
- Connect the scanner. Plug the OBD2 connector into your Matrix’s port, located under the dashboard, just above the driver’s knees.
- Turn the ignition to the “ON” position. Do not start the engine.
- Power on the scanner. Follow its startup prompts. It may ask for vehicle info (make, model, year, engine). Enter it accurately.
- Navigate to the Maintenance Reset menu. This is usually found under “Service,” “Maintenance,” or “Special Functions.” The exact wording varies by brand. Look for “Oil Maintenance Reset,” “Service Reminder Reset,” or “MAINT RESET.”
- Follow the on-screen instructions. The tool will communicate with the car’s computer. It may ask you to confirm certain conditions (e.g., “Is the parking brake on?”, “Is the ignition in the ON position?”).
- Execute the reset. You will typically press a “Yes” or “Enter” button to confirm you want to reset the maintenance light. The tool will send the command.
- Wait for confirmation. The scanner should display a message like “Reset Successful” or “Service Light Reset Complete.”
- Disconnect and verify. Unplug the scanner. Turn the ignition off and then back on. Start the engine. The maintenance light should be off. If it’s still on, repeat the process or consult your tool’s troubleshooting guide.
For the 2009-2013 Matrix, some users report success using a simplified method with certain scanners: with the ignition ON, navigate to the odometer display (showing total miles), then use the scanner to reset. However, the dedicated menu method is the standard, reliable approach.
Model Year Deep Dive: Why the Change Happened
Understanding why Toyota changed the reset method can clarify your confusion. The shift from a simple button to an OBD2 requirement was driven by the increasing complexity of vehicle computer systems in the late 2000s.
The First Generation (2003-2008): Analog Meets Digital
The early Matrix used a relatively simple electronic gauge cluster. The maintenance reminder was a basic counter stored locally in that cluster. The odometer button provided a direct, physical way to access and reset that counter. It was cheap, reliable, and required no special tools for the owner. This design philosophy was common across many Toyota models of that era, such as the Toyota Yaris and early Camry.
The Second Generation (2009-2013): Centralized Computing
With the 2009 redesign, Toyota introduced more integrated electronics. The maintenance data became part of the Body Control Module (BCM) or a shared network. A simple button on the gauge cluster no longer had direct access to reset this network-level data. The only way to communicate with the BCM is through the standardized OBD2 port, which is why a scan tool became necessary. This change aligns with many other 2009+ Toyotas, including the RAV4 and Highlander of similar years. For a broader look at Toyota systems, you can read about resetting the maintenance required light on a Toyota in general.
Troubleshooting: What to Do When It Won’t Reset
You followed all the steps perfectly, but that wrench is still glaring at you. Don’t panic. There are several common reasons for a failed reset, and most are easy to diagnose.
Scenario 1: You Have the Wrong Model Year Procedure
This is the #1 cause. If you own a 2009 Matrix and you’re trying the button method from a 2007 guide, it will never work. Double-check your model year. The change occurred for the 2009 model year, which was released in late 2008. If your vehicle is a 2009, you must use an OBD2 scanner.
Scenario 2: The Service Wasn’t Actually Completed
The system is designed to be reset only after the maintenance interval is addressed. If, for example, you only changed the oil but did not rotate the tires (a required part of the 5,000-mile service for many models), some systems may still illuminate. Ensure all items on the service checklist for that interval were performed.
Scenario 3: Faulty or Low Battery
A weak battery can sometimes interfere with the electronic reset process, especially the OBD2 communication. Ensure your battery is fully charged. If your battery is over 4-5 years old, consider charging it or jump-starting the car before attempting the reset again.
Scenario 4: OBD2 Scanner Incompatibility or Incorrect Use
Your scanner might not support the maintenance reset function for the Matrix. Check the manufacturer’s compatibility list. Also, ensure you selected the correct year, make, model, and engine during the scanner’s vehicle selection. An incorrect selection can lead to failed commands.
Scenario 5: A Deeper Electrical or Module Issue
This is rare but possible. A blown fuse for the instrument cluster or a failed Body Control Module (BCM) can prevent the reset. If you’ve verified the procedure, the service is done, the battery is good, and the scanner is compatible, it may be time to consult a professional mechanic or a Toyota dealership. They have the advanced diagnostic tools to communicate directly with the vehicle’s modules.
Conclusion: Keep Your Matrix Running Smoothly
Resetting the maintenance light on your Toyota Matrix is the final, satisfying step in completing your vehicle’s scheduled service. It’s a small act of care that reinforces good habits and keeps you connected to your car’s needs. Remember the golden rule: service first, reset second. By performing the actual oil changes, tire rotations, and inspections on time, you’re investing in the longevity and reliability that the Matrix is famous for. The reset procedure itself—whether the simple button dance for 2003-2008 models or the OBD2 scan for 2009-2013—is just a formality to synchronize your car’s reminder clock with your completed work.
Equipped with this guide, you can confidently tackle that dashboard wrench and get back to enjoying the practical, efficient driving experience your Matrix provides. If you ever feel stuck, your owner’s manual is your best friend, and a quick call to a local shop can provide peace of mind. Here’s to many more miles of trouble-free journeys in your Toyota Matrix.
Frequently Asked Questions
Why does the maintenance light come on if I just changed my oil?
The maintenance light is a mileage-based counter, not an oil quality sensor. It illuminates based on a preset interval (e.g., 5,000 miles) from the last reset. If the light was not properly reset after your previous oil change, it will come on again at the next interval, even if you changed the oil recently. You must reset it after each service cycle.
Can I reset the maintenance light without doing the service?
Technically, yes, you can perform the reset steps without doing the work. However, you should never do this. The light is a critical reminder for preventative maintenance that protects your engine and other components. Skipping services and resetting the light can lead to premature engine wear, void your warranty, and create a false sense of security about your car’s health.
What if the maintenance light comes back on right after I reset it?
If the light returns shortly after a proper reset, it usually indicates one of two things: either the required maintenance was not fully completed (e.g., the tire rotation was skipped), or there is a fault in the maintenance reminder system itself (like a blown fuse or a failing instrument cluster). Re-verify all service items were done, then consult a professional if the problem persists.
Is the maintenance light the same as the service engine soon light?
No, they are completely different. The maintenance required light (usually a wrench icon) is a simple mileage timer for scheduled service. The “Service Engine Soon” or check engine light (usually an engine icon) indicates an emissions-related fault detected by the engine computer and requires diagnostic scanning. Do not confuse the two.
Will resetting the maintenance light affect my car’s computer or warranty?
No. Resetting the light after performing the proper maintenance is a standard, manufacturer-approved procedure that does not affect any computer systems or warranties. In fact, failing to perform the scheduled maintenance and keep records can void certain warranty protections. The reset simply tells the car’s reminder system, “The service for this interval has been completed.”
How often should the maintenance light come on in a Toyota Matrix?
For most Toyota Matrix models, the maintenance light is programmed to illuminate every 5,000 miles or 6 months, whichever comes first. This interval is based on Toyota’s recommended severe service schedule. Always confirm the exact interval for your specific model year and driving conditions in your owner’s manual, as some years or engine types may have slightly different recommendations.


