
How to Reset the Maintenance Light on a Toyota Yaris
Contents
- 1 Key Takeaways
- 2 📑 Table of Contents
- 3 Why Does the Maintenance Light Come On?
- 4 Tools and Preparation Needed
- 5 Step-by-Step Reset Instructions by Model Year
- 6 Troubleshooting Common Reset Issues
- 7 Tips to Avoid Future Maintenance Light Confusion
- 8 When to See a Professional
- 9 Conclusion
- 10 Frequently Asked Questions
Resetting the maintenance light on a Toyota Yaris is a simple DIY task that takes just a few minutes. Whether you’ve just changed your oil or completed routine servicing, this guide walks you through the process for every Yaris model year—no special tools required.
Owning a Toyota Yaris means enjoying a reliable, fuel-efficient compact car that’s perfect for city driving and weekend getaways. But like any vehicle, it comes with its own set of maintenance reminders—and one of the most common questions Yaris owners ask is: “How do I reset the maintenance light?”
You’ve just changed your oil, rotated your tires, or completed a scheduled service, and now that little orange wrench or “MAINT REQD” light is still glowing on your dashboard. It’s not dangerous, but it’s annoying—and it can distract you from enjoying your drive. The good news? Resetting the maintenance light on a Toyota Yaris is surprisingly easy, doesn’t require a mechanic, and takes less than five minutes.
In this comprehensive guide, we’ll walk you through the exact steps to reset the maintenance light on every major Toyota Yaris model year—from the early 2000s models to the latest versions. Whether you’re a first-time Yaris owner or a seasoned driver who just forgot how to do it, this article has you covered. We’ll explain why the light comes on, what it means, and how to turn it off safely and correctly—without voiding your warranty or risking damage to your vehicle.
Key Takeaways
- Know your model year: Reset procedures vary slightly between older (2006–2010) and newer (2011–2020+) Toyota Yaris models.
- Use the trip meter button: Most Yaris models rely on the trip odometer button to cycle through reset modes.
- Turn the ignition on (not start): You only need to power up the electrical system—no need to crank the engine.
- Watch for confirmation: The maintenance light will blink or turn off once successfully reset.
- Don’t skip regular maintenance: Resetting the light doesn’t replace actual service—always follow your owner’s manual schedule.
- Try a battery reset if stuck: Disconnecting the battery for 10–15 minutes can clear stubborn warning lights.
- Consult a professional if unsure: If the light persists after reset, there may be an underlying issue requiring diagnosis.
📑 Table of Contents
Why Does the Maintenance Light Come On?
The maintenance light in your Toyota Yaris isn’t just a random reminder—it’s part of the vehicle’s intelligent maintenance monitoring system. This system tracks your driving habits, mileage, and time since the last service to determine when routine maintenance is due. Unlike older cars that rely solely on mileage, the Yaris uses a combination of factors to predict when components like engine oil, filters, and brakes may need attention.
When the system calculates that it’s time for service—typically around every 5,000 to 10,000 miles, depending on your driving conditions—it triggers the maintenance light. This could appear as a wrench icon, the words “MAINT REQD,” or a simple “OIL” indicator, depending on your model year. The light is designed to prompt you to visit a service center or perform basic maintenance yourself.
It’s important to understand that this light is not the same as a check engine light. The maintenance light is a proactive reminder, not a warning of immediate danger. However, ignoring it for too long can lead to reduced engine performance, lower fuel efficiency, or even long-term damage—especially if oil changes are delayed.
For example, if you drive mostly in stop-and-go city traffic or frequently take short trips, your engine oil may degrade faster than usual. The Yaris’s system accounts for this and may trigger the light earlier than the standard 10,000-mile interval. That’s why it’s smart to reset the light only after you’ve actually completed the recommended service.
Tools and Preparation Needed
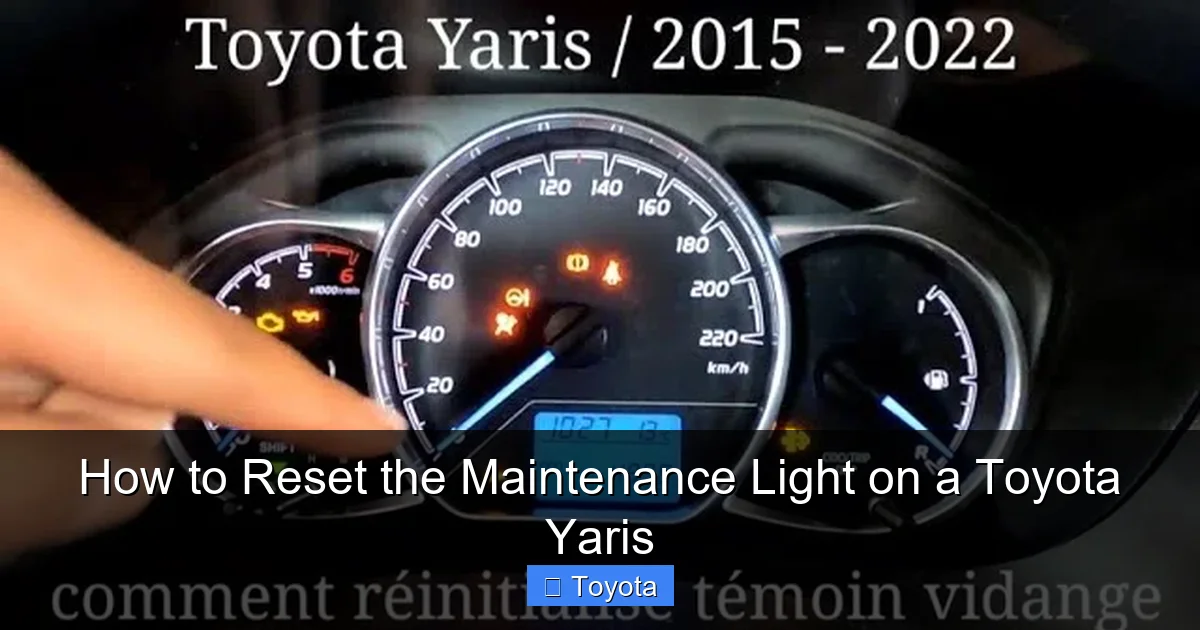
Visual guide about How to Reset the Maintenance Light on a Toyota Yaris
Image source: i.ytimg.com
One of the best things about resetting the maintenance light on a Toyota Yaris is that you don’t need any special tools or equipment. Everything you need is already in your car. However, a little preparation can make the process smoother and help avoid frustration.
First, make sure your vehicle is parked on a flat surface and the engine is off. You’ll be working with the ignition in the “on” position, so it’s safest to keep the car stationary. If you’ve just driven the car, let it cool for a few minutes—especially if you’re planning to check fluids or perform maintenance right before resetting the light.
Next, locate the trip odometer button. This is usually found on the instrument cluster, near the speedometer. It’s labeled “TRIP” or “ODO/TRIP” and is used to switch between trip A, trip B, and total mileage. This button is key to accessing the reset function on most Yaris models.
You’ll also want to have your owner’s manual handy. While this guide covers all major model years, your specific Yaris might have slight variations. The manual will confirm the exact location of buttons and any model-specific instructions.
Finally, ensure your key fob or physical key is within reach. You’ll need to turn the ignition to the “on” position (but not start the engine) during the reset process. If your Yaris has a push-button start, make sure the key is inside the car so the system recognizes it.
Step-by-Step Reset Instructions by Model Year
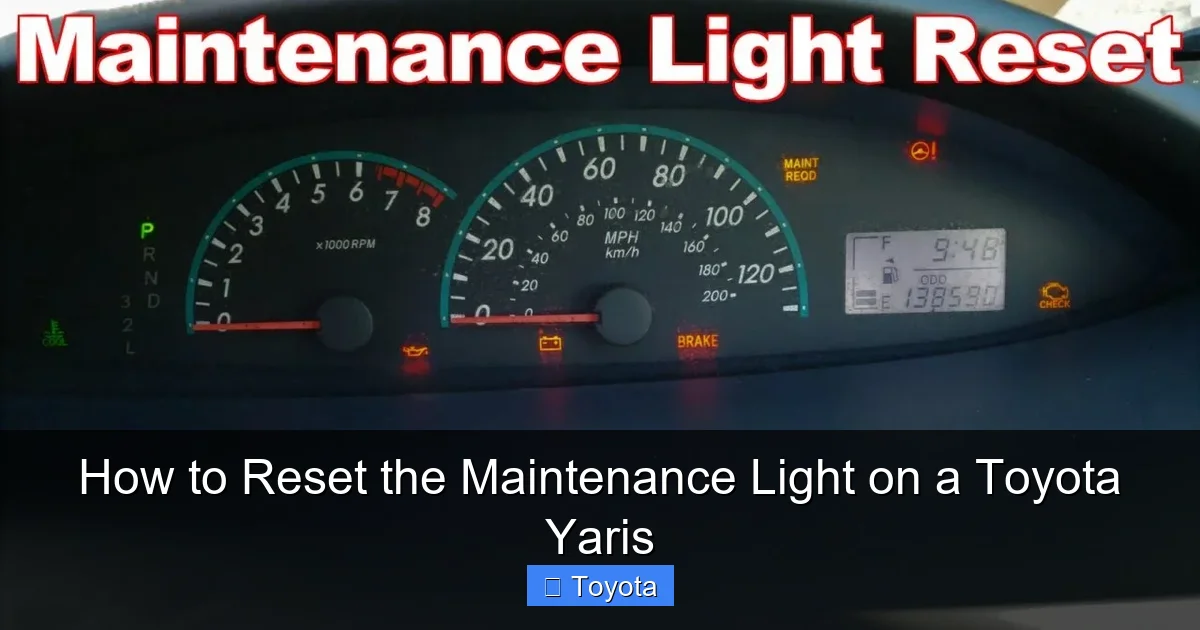
Visual guide about How to Reset the Maintenance Light on a Toyota Yaris
Image source: i.ytimg.com
The process for resetting the maintenance light varies slightly depending on when your Toyota Yaris was manufactured. Below, we’ve broken it down by generation to ensure you get the right steps for your vehicle.
For 2006–2010 Toyota Yaris Models
These older Yaris models use a straightforward button-based reset method. Here’s how to do it:
1. Turn the ignition to the “on” position. This means inserting the key and turning it to the second click—dashboard lights should illuminate, but the engine should not start.
2. Press and hold the trip odometer button (usually labeled “TRIP”).
3. While holding the button, turn the ignition back to the “off” position, then return it to “on” again. Keep holding the trip button the entire time.
4. Continue holding the button until the maintenance light begins to blink or the odometer display shows “000000” or a reset confirmation.
5. Release the button. The maintenance light should now be off.
If the light doesn’t turn off immediately, try repeating the process. Sometimes it takes two or three attempts. Make sure you’re holding the button consistently and not releasing it too early.
For 2011–2014 Toyota Yaris Models
The 2011–2014 Yaris introduced a slightly updated dashboard and reset procedure. Follow these steps:
1. Turn the ignition to the “on” position (do not start the engine).
2. Press the trip odometer button to cycle through the display until you see “TRIP A” or “TRIP B.”
3. Press and hold the trip button until the display starts to flash or shows “000000.”
4. Continue holding the button for about 10–15 seconds. The maintenance light should begin to blink.
5. Release the button. The light should turn off, indicating a successful reset.
Some drivers report that the light turns off immediately, while others see it blink several times before going out. Either way, once it’s off, you’re good to go.
For 2015–2020+ Toyota Yaris Models
Newer Yaris models (including the hatchback and sedan versions) often use a menu-based system accessed through the instrument cluster. Here’s the method:
1. Turn the ignition to the “on” position.
2. Use the trip button to navigate to the “Settings” or “Vehicle Settings” menu (this may appear as a gear icon or text).
3. Scroll through the options until you find “Maintenance” or “Oil Reset.”
4. Select the option and confirm by pressing and holding the trip button.
5. The system will prompt you to confirm the reset. Follow the on-screen instructions.
6. Once confirmed, the maintenance light should turn off.
If your Yaris has a touchscreen infotainment system, you might also be able to reset the light through the vehicle settings menu. Look for “Maintenance” or “Service” under the settings tab.
For Yaris with Push-Button Start
If your Yaris has a push-button ignition (common in 2017 and newer models), the process is similar but requires a few adjustments:
1. Press the “Start” button once (without pressing the brake) to turn the ignition to the “on” position.
2. Use the trip button to access the reset menu as described above.
3. Follow the same steps to reset the maintenance light.
4. Press the “Start” button again to turn the ignition off when finished.
Always ensure the key fob is inside the vehicle during this process, or the system won’t recognize the ignition state.
Troubleshooting Common Reset Issues
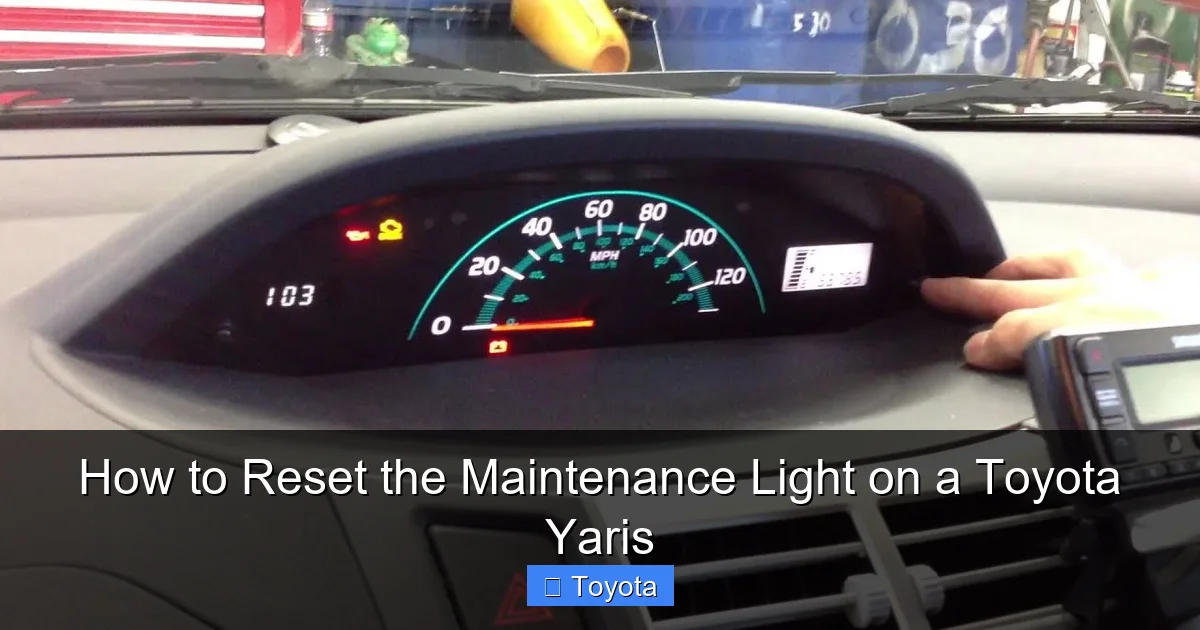
Visual guide about How to Reset the Maintenance Light on a Toyota Yaris
Image source: i.ytimg.com
Even with clear instructions, sometimes the maintenance light refuses to reset. Don’t panic—this happens more often than you’d think. Here are some common issues and how to fix them.
The Light Won’t Turn Off After Reset
If you’ve followed the steps correctly but the light remains on, try repeating the process. Sometimes the system needs a second attempt to register the reset. Make sure you’re holding the trip button long enough—some models require 10–15 seconds of continuous pressure.
Another possibility is that the reset procedure wasn’t completed fully. For example, on newer models, you might need to confirm the reset through a secondary menu. Double-check your owner’s manual to ensure you didn’t miss a step.
The Trip Button Doesn’t Respond
If pressing the trip button does nothing, it could be a sign of a faulty button or electrical issue. Try cleaning around the button with a dry cloth—dirt or moisture can interfere with contact. If the button still doesn’t work, you may need to visit a Toyota service center for inspection.
Battery Disconnect Method
When all else fails, a battery reset can often clear stubborn warning lights. Here’s how:
1. Turn off the ignition and remove the key (or ensure the push-button start is off).
2. Open the hood and locate the negative terminal of the battery (marked with a “-” symbol).
3. Use a wrench to loosen the nut and disconnect the negative cable.
4. Wait 10–15 minutes. This allows the vehicle’s computer to fully reset.
5. Reconnect the cable and tighten the nut securely.
6. Turn the ignition back on and check if the maintenance light is off.
Note: Disconnecting the battery may reset other systems, such as radio presets or clock settings. You may need to reconfigure these after reconnecting.
Persistent Light After Service
If the maintenance light comes back on shortly after a reset—even though you’ve completed the service—it could indicate a deeper issue. For example, the oil level might be low, or the oil filter may not have been installed correctly. Check your oil level using the dipstick and top it off if necessary.
In rare cases, a faulty sensor or wiring issue could cause the light to remain on. If the problem persists, it’s best to have a certified Toyota technician diagnose the vehicle.
Tips to Avoid Future Maintenance Light Confusion
Resetting the maintenance light is easy, but the best way to avoid frustration is to stay on top of your Yaris’s maintenance schedule. Here are some practical tips to keep your car running smoothly and your dashboard clear.
Follow the Owner’s Manual Schedule
Your Toyota Yaris owner’s manual includes a detailed maintenance schedule based on mileage and time. Stick to it—even if the light hasn’t come on yet. For example, Toyota recommends oil changes every 10,000 miles under normal driving conditions, but only 5,000 miles if you frequently drive in severe conditions (like extreme heat, stop-and-go traffic, or dusty roads).
Keep a Maintenance Log
Use a notebook, smartphone app, or digital calendar to track when you last changed your oil, rotated tires, or replaced filters. This helps you stay proactive and ensures you reset the light at the right time.
Use Genuine Toyota Parts
While aftermarket parts are often cheaper, using genuine Toyota oil filters and engine oil ensures optimal performance and longevity. The maintenance system is calibrated for Toyota-recommended products, so using substandard fluids might affect the system’s accuracy.
Don’t Ignore the Light
Even though the maintenance light isn’t an emergency warning, ignoring it can lead to bigger problems. Old oil breaks down over time, losing its ability to lubricate and cool the engine. This can cause increased wear, reduced fuel economy, and even engine damage.
Educate Family Members
If other people drive your Yaris—like a spouse or teen driver—make sure they know how to reset the light or at least recognize when service is due. A simple reminder can prevent missed maintenance and unnecessary stress.
When to See a Professional
While resetting the maintenance light is a DIY-friendly task, there are times when you should seek professional help. If the light comes back on immediately after a reset, or if you notice other warning lights (like the check engine light), it’s time to visit a Toyota service center.
A certified technician can use diagnostic tools to read error codes and determine if there’s an underlying mechanical issue. For example, a faulty oil pressure sensor or a clogged oil filter might trigger the maintenance light even after a proper reset.
Additionally, if you’re uncomfortable performing the reset yourself—or if your Yaris has a complex infotainment system—don’t hesitate to ask for help. Most service centers will reset the light for free during a routine visit.
Conclusion
Resetting the maintenance light on your Toyota Yaris is a quick, simple task that every owner should know how to do. Whether you drive a 2006 model or a 2020 hatchback, the process is straightforward and requires no special tools. By following the steps outlined in this guide, you can keep your dashboard clean and your mind at ease after every service.
Remember, the maintenance light is there to help you—not hassle you. It’s a smart feature designed to keep your Yaris running efficiently for years to come. So the next time that little wrench pops up, don’t stress. Grab your keys, follow the steps, and get back to enjoying the open road.
And if you ever run into trouble? Don’t hesitate to consult your owner’s manual or reach out to a Toyota professional. Your Yaris deserves the best care—and so do you.
Frequently Asked Questions
How often should I reset the maintenance light on my Toyota Yaris?
You should reset the maintenance light only after completing the recommended service, such as an oil change or tire rotation. This is typically every 5,000 to 10,000 miles, depending on your driving conditions and model year.
Can I reset the maintenance light without changing the oil?
Technically, yes—but it’s not recommended. The light is a reminder that service is due. Resetting it without performing maintenance can lead to engine wear and reduced performance over time.
Why won’t my maintenance light turn off after following the steps?
This could be due to an incomplete reset, a faulty sensor, or an actual maintenance issue. Try repeating the process or disconnecting the battery. If the light persists, consult a Toyota technician.
Does resetting the maintenance light affect my warranty?
No, resetting the light yourself does not void your warranty. Toyota encourages owners to perform basic maintenance and resets as part of regular vehicle care.
Can I reset the light using the Toyota app?
Some newer Yaris models with connected services may allow remote maintenance tracking, but the actual reset must still be done manually using the trip button or dashboard menu.
What if my Yaris doesn’t have a trip button?
All Toyota Yaris models come with a trip odometer button. If you can’t find it, check near the speedometer or consult your owner’s manual for the exact location.


