
How to Reset the Check Engine Light After an Oil Change on a Toyota Camry
Seeing the check engine light after an oil change on your Toyota Camry can be frustrating, but it’s often a simple fix. First, confirm it’s not the separate ” Maintenance Required” light. The check engine light typically indicates an electronic sensor issue, like a loose gas cap or oil level sensor, not the oil change itself. Resetting it usually involves a specific button sequence or using an OBD2 scanner, but you must address the underlying cause first to prevent the light from returning.
Key Takeaways
- Verify the Light: Ensure you are resetting the “Check Engine” light (yellow/amber engine icon) and not the “Maintenance Required” light (wrench icon), as they have completely different reset procedures.
- Diagnose First: Never reset the light without first checking for the cause. Common post-oil-change triggers include an improperly seated oil cap, low oil level, or a loose gas cap that happened during the service.
- Method Varies by Year: The reset procedure differs significantly between older Camrys (pre-2012, using the odometer trick) and newer models (2012+, using the steering wheel menu buttons). Identify your model year.
- Scanner is Best Practice: Using an OBD2 scanner to clear codes is the most reliable method. It also lets you read the specific fault code, telling you exactly what problem triggered the light.
- Light Returning Means Trouble: If the check engine light illuminates again shortly after a reset, it indicates an unresolved mechanical or electronic issue that requires professional diagnosis.
- Safety First: If the light is flashing or the car is running poorly, do not drive it. A flashing check engine light signals a severe problem, like a misfire, that can damage the catalytic converter.
- Use Quality Oil & Parts: Prevent future issues by ensuring your oil change uses the correct Toyota-specified oil viscosity and that all caps (oil, coolant, washer fluid) are properly tightened.
📑 Table of Contents
- Why the Check Engine Light Comes On After an Oil Change
- Check Engine Light vs. Maintenance Required Light: Know the Difference
- Preparing to Reset Your Check Engine Light
- Step-by-Step Reset Methods for Toyota Camry
- What to Do If the Check Engine Light Returns
- Preventive Maintenance Tips for Your Toyota Camry
- Conclusion
Why the Check Engine Light Comes On After an Oil Change
You just left the shop, oil changed, everything seems fine. Then, on the drive home, that familiar yellow engine-shaped icon glows on your dashboard. Your heart sinks. “Did they mess something up?” you wonder. Before you panic, take a breath. A check engine light after an oil change on a Toyota Camry is a surprisingly common occurrence, and it’s rarely because the new oil is “bad.” More often, it’s an electronic coincidence or a minor oversight during the service that triggered one of your car’s many sensors.
It’s Usually Not the Oil Itself
Modern engine oil is highly advanced, and using the correct type—like Toyota’s recommended 0W-20 synthetic—won’t cause a check engine light. The light is part of the On-Board Diagnostics (OBD-II) system, a computer network that monitors hundreds of sensors and components. It doesn’t directly “know” about oil quality. Instead, it reacts to signals from sensors that can be affected by the oil change process.
The Usual Suspects: Common Triggers
Let’s play detective. What happened during the oil change? The technician accessed the engine bay. Here are the top reasons a check engine light might appear right after:
- The Oil Cap Wasn’t Seated Properly: This is the #1 culprit. The oil filler cap has a rubber seal. If it’s not twisted until it clicks into place, or if the seal is worn, it can cause a vacuum leak. The engine’s computer detects this as an imbalance in the air-fuel mixture and throws a code (like P0171 or P0172 for “System Too Lean”). It’s an easy fix—just remove and re-seat the cap firmly.
- The Dipstick Wasn’t Fully Inserted: Similar to the cap, a partially seated dipstick breaks the engine’s sealed system. This also causes a lean condition code. Ensure the dipstick is pushed all the way back into its tube until it seats properly.
- Low Oil Level: Did the shop forget to add the full amount of oil? Or is there a slow leak? Low oil pressure can trigger the check engine light, though a low oil *pressure* warning light is more common. Always check the dipstick yourself after an oil change to confirm the level is between the marks.
- A Loose or Damaged Gas Cap: This is a classic, and it can happen coincidentally. If the cap was jostled or not tightened correctly at the gas station before your appointment, the evaporative emission (EVAP) system detects a vapor leak and illuminates the light. The code is often P0455 (large EVAP leak) or P0440 (general EVAP malfunction). Tighten the gas cap until you hear several clicks and drive for a few cycles.
- An Unrelated, Pre-Existing Issue: The timing is just bad luck. A sensor or component that was *already* on the verge of failing chose the moment after your service to finally trip the computer. The oil change is a red herring.
- Disturbed an Electrical Connector: A technician might have accidentally bumped or partially disconnected a sensor wiring harness (like a MAF sensor) while working in the area. Re-seating the connector solves it.
So, before you blame the shop, perform these quick visual and tactile checks. Often, the solution is a 10-second adjustment you can do yourself in the parking lot.
Check Engine Light vs. Maintenance Required Light: Know the Difference
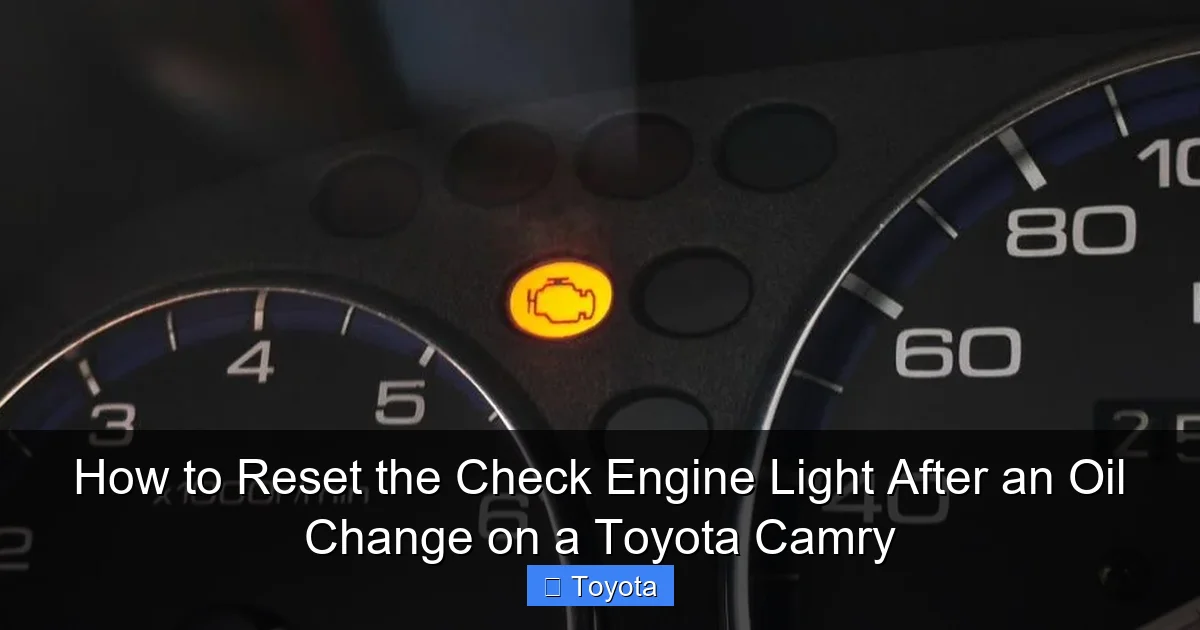
This is a critical distinction that causes endless confusion. On your Toyota Camry’s dashboard, you likely have two separate lights that look similar but mean entirely different things. Understanding which one is on dictates your entire course of action.
Visual guide about How to Reset the Check Engine Light After an Oil Change on a Toyota Camry
Image source: engineoiljournal.com
The “Check Engine” Light (MIL)
This is the one we’re discussing. It’s usually yellow or amber and depicts a side-view of an engine. Its official name is the Malfunction Indicator Lamp (MIL). When it comes on solid, it means the OBD-II system has stored a diagnostic trouble code (DTC) related to emissions, engine performance, or a major sensor. It requires immediate attention to diagnose the cause. If it flashes, it’s a severe emergency (like a cylinder misfire) and you should stop driving immediately.
The “Maintenance Required” Light (Wrench Icon)
This is a simple, mileage-based service reminder. It looks like a little wrench. It illuminates (usually after 5,000 miles) to remind you that it’s time for routine, scheduled maintenance—like an oil change, tire rotation, or inspection. It has nothing to do with a fault code. Resetting it is a manual procedure you perform *after* the maintenance is completed. If you see this light after an oil change, it means the technician simply forgot to reset it. You can do it yourself in under 30 seconds using a button sequence on your steering wheel. For a general guide on resetting this light on many Toyota models, you can refer to resources on how to reset the maintenance required light on a Toyota.
Why This Matters: If you try to use a “maintenance light reset” procedure on a true check engine light, nothing will happen. The lights are controlled by different systems. Always identify your light correctly. If you’re unsure, your owner’s manual has a diagram of all dashboard symbols.
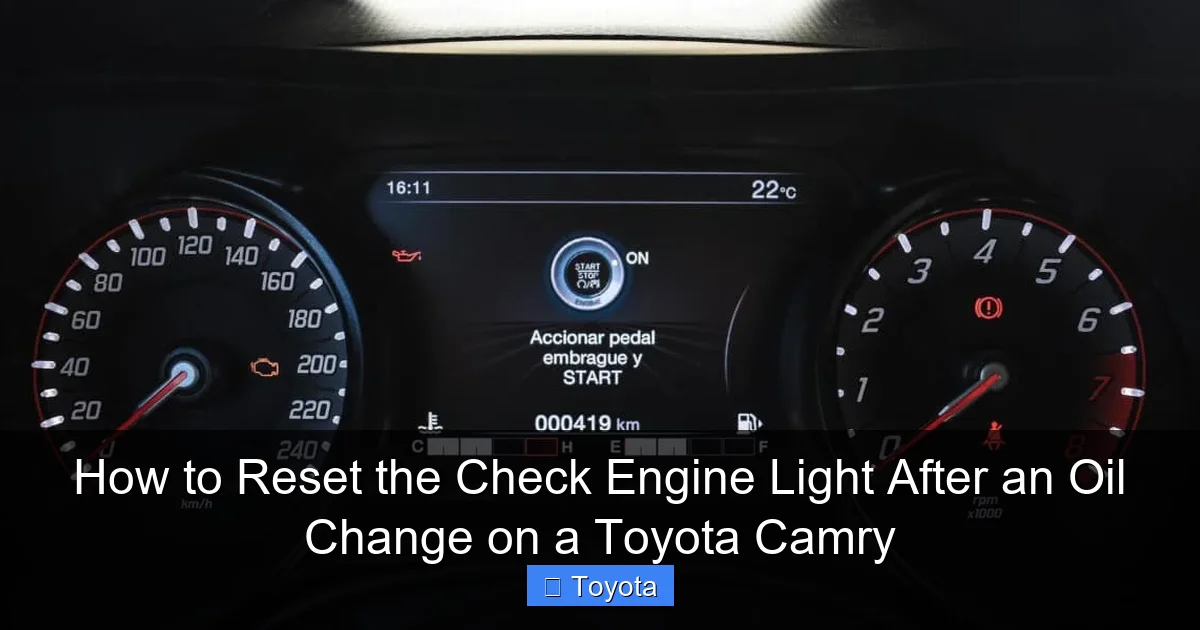
Preparing to Reset Your Check Engine Light
Before you dive into button combinations, you must do your homework. Resetting the light without fixing the underlying problem is like turning off a smoke alarm without putting out the fire. The light will return, and you’ll be back at square one. Here’s your pre-reset checklist.
Visual guide about How to Reset the Check Engine Light After an Oil Change on a Toyota Camry
Image source: mycarmakesnoise.com
Step 1: Perform a Visual Inspection
Pop the hood and do a thorough, safe check with the engine off and cool.
- Oil Cap: Is it twisted on firmly until it clicks? Is the rubber seal intact and clean?
- Dipstick: Is it fully seated in its tube? Check the oil level. Is it within the “Full” and “Add” marks? Is the oil clean (amber) or is it contaminated (milky, gritty)?
- Gas Cap: Is it tightened? Listen for the clicks. Is the cap’s seal damaged?
- Wiring Harnesses: Look around the engine bay, especially near the air filter box and valve cover, for any loose, disconnected, or chafed wiring.
- Fluid Levels: Check coolant and windshield washer fluid. Low coolant can sometimes trigger sensors.
Correct any obvious issues you find. Then, close the hood.
Step 2: Get a Diagnostic Code Read
This is the most important step. You need to know why the light is on. You have three main options:
- Auto Parts Store (Free): Stores like AutoZone, O’Reilly, or Advance Auto will read your codes for free using their OBD2 scanner. A technician will plug it in, get the code(s) (e.g., P0455, P0172), and often give you a brief interpretation. This is the easiest and most cost-effective first step.
- Buy a Basic OBD2 Scanner: For $20-$50, you can own a simple code reader. This is a great investment for any car owner. It plugs into the OBD2 port (under the dash, driver’s side) and reads/clears codes. More advanced scanners show live data.
- Professional Scan: A mechanic will use a high-end scanner that can access all Toyota-specific systems, not just generic OBD2 codes. This is best for complex issues.
Write down the exact code(s) and their definition. A quick internet search for “P0XXX Toyota Camry” will give you detailed explanations and possible causes. This knowledge empowers you.
Step 3: Decide: Fix or Reset?
Now, assess the code:
- Simple, Fixable Cause: If the code points to a loose gas cap (P0455), an oil cap issue (P0171/2), or a minor EVAP leak, fix the problem first. Tighten the cap, re-seat the oil cap. Then, drive the car for a few days to see if the light goes off on its own as the system passes multiple self-tests. If it doesn’t, proceed to reset.
- Complex or Mechanical Issue: Codes for oxygen sensors, catalytic converters, misfires (P0300-P0304), or internal engine problems require professional repair. Do not just reset the light. Have the issue fixed by a qualified mechanic. After the repair, they will reset the light, or you can do it yourself once the problem is resolved.
Only proceed to the reset steps if you have addressed the cause or are certain the light was a phantom, coincidental glitch.
Step-by-Step Reset Methods for Toyota Camry
Okay, you’ve checked the obvious, read the codes, and either fixed the problem or are confident it was a false alarm. Now, let’s clear that light. The method depends entirely on your Camry’s model year generation.
Visual guide about How to Reset the Check Engine Light After an Oil Change on a Toyota Camry
Image source: garagesee.com
For 2012-2017 Camry Models (XV50 Generation) – The Button Method
These models use the steering wheel controls to access the vehicle settings menu. This is the most common modern method.
- Turn the ignition ON. Do not start the engine. Press the “Start/Stop” button twice without touching the brake pedal (if you have a key fob, just turn the key to the “ON” position, all the way before “START”). All dashboard lights should be on.
- Locate the “Menu” or “Display” button. It’s on the right spoke of your steering wheel, often with an icon showing a sheet of paper or a display.
- Press the “Menu” button repeatedly until you see “Settings” appear on the multi-information display (the screen in the gauge cluster).
- Use the “Up/Down” arrow buttons (usually on the left steering wheel spoke) to scroll through the Settings menu. Look for an option like “Vehicle Settings” or “Maintenance”.
- Enter Vehicle Settings. Scroll to find an option called “Check Engine Light” or “Malfunction Indicator Lamp” or sometimes “Engine Warning Light”. The exact wording varies.
- Select it and choose “Reset” or “Clear.” You may need to hold a button for a few seconds.
- A confirmation message will likely appear (e.g., “Reset Check Engine Light?”). Confirm “Yes.”
- The light should blink off on your dashboard. Turn the ignition off, wait a few seconds, and restart the car to ensure it stays off.
Pro Tip: The path is often: Menu -> Settings -> Vehicle Settings -> Check Engine Light -> Reset. If you can’t find it, consult your owner’s manual’s index for “check engine light reset.” The process for resetting other Toyota models is similar; for instance, the steps for a Toyota Corolla’s check engine light follow a nearly identical menu navigation pattern.
For 2007-2011 Camry Models (XV40 Generation) – The Odometer Trick
These older models often use a clever trick with the trip meter/odometer button. There is no direct menu option.
- Turn the ignition ON. Do not start the engine. The dashboard should be lit.
- Press and hold the “Trip/ODO” button on your instrument cluster. It’s the small button you use to toggle between trip A, trip B, and total odometer.
- While holding the button, turn the ignition key to the “OFF” position (if using a key) or press the “Start/Stop” button once to turn the car off (if you have a push-button start).
- Continue holding the button for about 5-10 seconds. You may see the odometer display flicker or show dashes.
- Release the button. Turn the ignition back ON. Start the car.
- Check your dashboard. The check engine light should be off. If it remains on, the procedure wasn’t performed correctly, or the issue is still present and the code hasn’t cleared.
Important Note: This method simply clears the stored codes from the computer’s memory. It does not fix the problem. If the fault is still present when you drive, the light will return within a few drive cycles as the system redetects the issue.
The Universal Method: Using an OBD2 Scanner
This is the most reliable, model-agnostic method and the preferred way for anyone who owns a scanner.
- Locate the OBD2 port. It’s a trapezoidal-shaped 16-pin connector usually under the dashboard, to the left of the steering column. It may have a cover.
- Plug in your OBD2 scanner. Ensure the ignition is in the “ON” position (engine off).
- Turn on the scanner and follow its on-screen prompts. You’ll typically select “Read Codes,” then “Clear Codes” or “Erase Codes.”
- Confirm the clear. The scanner will communicate with the car’s computer and wipe all stored diagnostic trouble codes.
- Unplug the scanner. The check engine light should extinguish immediately. Start the engine. The light should remain off.
Why This Is Best: Not only does it reset the light, but it also tells you what was wrong. You get the code (e.g., P0441 for EVAP purge flow) which is invaluable for diagnosis. It works on any OBD2-compliant vehicle, from a Camry to a Nissan Altima.
What If There’s No “Check Engine Light” Option in the Menu?
Some Camry model years or trims might not have a direct menu option for the MIL. The menu might only have “Maintenance Light” reset. In this case:
- Your primary method is the OBD2 scanner.
- The old-school odometer trick (for pre-2012 models) might still work even without a menu option, as it’s a hidden diagnostic mode.
- Consult your factory owner’s manual. It has the definitive procedure for your specific VIN and model year.
What to Do If the Check Engine Light Returns
You’ve reset the light. It’s off. Success! You drive for a day, maybe a week. Then… it’s back. That’s your car’s way of saying, “Hey, the problem is still here!” This is a critical signal. A recurring check engine light means the fault is persistent and likely not a one-time glitch.
Understanding Drive Cycles
The OBDII system doesn’t just run checks once; it continuously monitors. For many systems (like the EVAP or oxygen sensors), the computer needs to complete a “drive cycle”—a specific set of conditions (engine warm-up, steady cruising, deceleration, etc.)—to fully verify a repair. When you clear the codes, you also reset these monitors to “Not Ready.” If the fault is still present, the monitor will fail during its next test cycle, and the light will return, often within 50-100 miles of normal driving.
Immediate Action Steps
- Re-read the Codes: Use your scanner or go back to the auto parts store. Are the same codes stored again? This confirms the original problem wasn’t fixed. Are there new codes? This suggests your reset may have caused another issue (unlikely) or that multiple problems exist.
- Research the Code Thoroughly: A code like P0171 (System Too Lean) can have dozens of causes: vacuum leak (check oil cap/dipstick!), faulty MAF sensor, clogged fuel filter, weak fuel pump, exhaust leak before the O2 sensor. You need to diagnose the specific cause, not just the code.
- Consider Professional Help: If the code points to something beyond a simple cap or sensor, it’s time to see a mechanic. They have advanced scan tools that can view live sensor data, perform smoke tests for EVAP leaks, and check for software updates. For complex issues, especially those related to emissions, this is not a DIY job.
Example: A customer resets a P0455 (EVAP large leak) after an oil change. The light returns in two days. The cause wasn’t the oil cap; it was a cracked purge valve that happened to fail at the same time. The oil change was a coincidence. Without a proper diagnosis, they would have kept resetting a symptom, not the disease.
Preventive Maintenance Tips for Your Toyota Camry
An ounce of prevention is worth a pound of cure. While you can’t prevent every random sensor failure, you can minimize the chances of a post-service check engine light and ensure your Camry’s reliability.
Choose Your Service Provider Wisely
Not all oil change shops are created equal. A reputable, Toyota-certified technician (or a trusted independent mechanic familiar with Toyotas) will follow procedures:
- They will torque the oil cap and dipstick correctly.
- They will check and reset the maintenance reminder light as part of the service.
- They will ensure all disconnected sensors (like the MAF during air filter changes) are reconnected securely.
- They will use the correct oil and filter.
Ask questions: “Will you reset the maintenance light?” “Do you check all caps and fluid levels before closing the hood?” A good shop will do this automatically.
Adopt a “Walk-Around” Habit
After any service, before you drive off, do a quick 60-second inspection:
- Open the hood. Visually confirm the oil cap is on and the dipstick is seated.
- Check that the washer fluid reservoir cap is on.
- Look for any tools or rags left in the engine bay.
- Check tire pressure (some shops adjust it, some don’t).
Catching a loose cap at the shop saves you a diagnostic fee and a frustrating light later.
Stay On Top of Scheduled Maintenance
A well-maintained engine is a happy engine. Follow the severe or normal maintenance schedule in your owner’s manual. This includes:
- Timely oil and filter changes (every 5,000-10,000 miles depending on oil type and driving conditions).
- Cabin air filter and engine air filter replacements (every 15k-30k miles). A clogged air filter can cause lean conditions.
- Spark plug replacement (typically every 120k miles on modern Camrys).
- Using Toyota-approved fluids and parts.
For other Toyota models, the maintenance light reset process is standardized but button sequences can differ. For example, resetting the maintenance light on a 2021 Toyota RAV4 or a Toyota Yaris involves different menu paths, but the principle of performing the service first and then resetting the reminder is universal.
Address Small Problems Immediately
That minor fuel odor when filling up? That could be a failing gas cap seal. The slight hesitation on acceleration? Could be a dirty MAF sensor. Ignoring small symptoms often leads to a check engine light later. Proactive care prevents the light from ever coming on.
Conclusion
Dealing with a check engine light after an oil change on your Toyota Camry is usually more of an annoyance than a catastrophe. The key takeaways are simple: always differentiate between the check engine light and the maintenance required light, perform a basic visual inspection for loose caps or low fluid, and most importantly, read the diagnostic trouble codes before you do anything else. The reset procedure itself is straightforward—whether you use the steering wheel menu on a 2012+ model, the odometer trick on an older one, or a universal OBD2 scanner.
Remember, resetting the light is merely clearing the message, not fixing the problem. If the light returns, it’s your car’s persistent plea for real attention. By understanding your Camry’s systems, choosing a careful service provider, and performing regular maintenance, you can keep that dashboard icon dark and your trusty Camry running smoothly for many miles to come. When in doubt, a small investment in a code reader or a quick visit to an auto parts store can save you hundreds in unnecessary diagnostics and repairs.
Frequently Asked Questions
Can I drive my Toyota Camry with the check engine light on after an oil change?
If the light is solid and the car is running normally (no noises, smoking, or loss of power), you can drive it cautiously for a short distance to get it diagnosed. However, you should not delay diagnosis. If the light is flashing, or if you notice severe performance issues, stop driving immediately and have the car towed, as a misfire can cause catastrophic damage.
Will disconnecting the battery reset the check engine light?
Yes, disconnecting the negative battery terminal for about 10-15 minutes will clear the computer’s memory and turn off the light. However, this is a blunt instrument. It will also reset your radio presets, clock, and engine idle adaptations. More importantly, it does not fix the underlying problem, so the light will likely return. It’s better to use the proper reset method or an OBD2 scanner.
How much does it cost to diagnose a check engine light?
Many auto parts stores (like AutoZone or O’Reilly) offer free code reading. A professional diagnostic fee at a repair shop typically ranges from $80 to $150. This fee is often waived if you have them perform the subsequent repair. Using your own OBD2 scanner is the most cost-effective long-term solution.
What does a steady check engine light mean versus a flashing one?
A steady (solid) check engine light indicates a non-emergency fault that needs attention soon, like a loose gas cap or a failing oxygen sensor. A flashing check engine light is a severe warning, usually signifying an active cylinder misfire that is dumping unburned fuel into the exhaust. This can overheat and destroy the catalytic converter. A flashing light requires immediate, safe shutdown of the engine.
Is there a fuse for the check engine light I can pull to turn it off?
No. The check engine light is directly controlled by the engine control module (ECM) based on sensor data. There is no dedicated fuse for the light itself. Pulling fuses related to the engine computer will likely cause the car not to start or run poorly, and the light will still come back on once power is restored if the fault remains.
My oil change light is on, not the check engine light. Is that the same thing?
No, they are completely different. The oil change light is a “Maintenance Required” reminder based on mileage/time. It has nothing to do with a diagnostic trouble code. You reset it manually after the oil change is performed. The process is simple and varies by model. For a Camry, it’s done through the steering wheel menu. For other models like a Dodge Journey or Dodge Ram, the procedure is different, but the purpose is the same: a simple service reminder reset.


