How to Remove Front Bike Tire
Contents
- 1 Key Takeaways
- 2 📑 Table of Contents
- 3 Why You Might Need to Remove Your Front Bike Tire
- 4 Tools and Equipment You’ll Need
- 5 Step-by-Step Guide to Removing the Front Bike Tire
- 6 Special Considerations for Different Bike Types
- 7 Common Mistakes to Avoid
- 8 How to Reinstall the Front Bike Tire
- 9 Maintenance Tips to Prevent Future Issues
- 10 When to Seek Professional Help
- 11 Conclusion
- 12 Frequently Asked Questions
Removing a front bike tire is a simple task once you know the steps. Whether you’re fixing a flat, replacing a worn tire, or transporting your bike, this guide walks you through the process clearly and safely—no experience needed.
Key Takeaways
- Always start by releasing the brake system to avoid damaging brake pads or cables when removing the wheel.
- Use the correct tools like a wrench or quick-release lever, depending on your bike’s axle type.
- Loosen the axle before lifting the bike to make wheel removal smoother and safer.
- Check tire pressure and inspect for damage before reassembly to ensure a safe ride.
- Keep small parts organized such as washers and nuts to avoid losing them during the process.
- Practice makes perfect—removing and reinstalling your front tire becomes quicker with repetition.
- Follow manufacturer guidelines especially for disc brake bikes to prevent rotor misalignment.
📑 Table of Contents
- Why You Might Need to Remove Your Front Bike Tire
- Tools and Equipment You’ll Need
- Step-by-Step Guide to Removing the Front Bike Tire
- Special Considerations for Different Bike Types
- Common Mistakes to Avoid
- How to Reinstall the Front Bike Tire
- Maintenance Tips to Prevent Future Issues
- When to Seek Professional Help
- Conclusion
Why You Might Need to Remove Your Front Bike Tire
There are many reasons you might find yourself needing to remove the front tire of your bike. The most common is a flat tire. Whether you picked up a nail on the road or wore down your tread over time, flats happen to every cyclist eventually. Replacing or repairing the inner tube requires removing the wheel.
Another reason is routine maintenance. Over time, tires lose pressure, develop cracks, or show signs of wear. Removing the front tire lets you inspect the rim, check spoke tension, and clean hard-to-reach areas. You might also need to remove the tire when transporting your bike in a car or storing it in a tight space. Folding bikes and commuters often remove wheels to save space.
Upgrading your bike is another scenario. Maybe you’re switching from knobby mountain bike tires to smoother road tires for better efficiency. Or perhaps you’re installing puncture-resistant tires for daily commuting. Whatever the reason, knowing how to remove the front bike tire is a foundational skill every cyclist should have.
Tools and Equipment You’ll Need
Before you start, gather the right tools. Most bikes today use either a quick-release skewer or a bolt-on axle. The tools you need depend on your bike’s design.

Visual guide about How to Remove Front Bike Tire
Image source: i.ytimg.com
For Quick-Release Axles
If your bike has a quick-release lever on the front wheel, you’re in luck—this is the easiest type to remove. You won’t need any tools. Simply flip the lever open and unscrew the nut on the opposite side by hand. The lever is usually on the left side of the bike and opens outward when released.
For Bolt-On Axles
Older bikes or some mountain bikes use bolt-on axles that require a wrench. A 15mm wrench is the most common size, but some bikes may use 13mm or 17mm. Make sure your wrench fits snugly to avoid stripping the bolt. A socket wrench with a ratchet can make the job faster, especially if the bolts are tight.
Additional Helpful Tools
While not always necessary, a few extra tools can make the process smoother. A tire lever helps if you’re replacing the tube or tire. A bike stand holds your bike steady, but if you don’t have one, you can flip the bike upside down and rest it on the handlebars and seat. A clean rag is useful for wiping grease or dirt from the axle and dropouts.
For bikes with disc brakes, you might want a spacer or zip tie to keep the brake caliper open while the wheel is off. This prevents the brake pads from sticking together. Always check your bike’s manual for specific recommendations.
Step-by-Step Guide to Removing the Front Bike Tire
Now that you have your tools ready, let’s walk through the process step by step. Whether you’re a beginner or just need a refresher, these instructions will help you remove your front tire safely and efficiently.
Visual guide about How to Remove Front Bike Tire
Image source: bikecommuterhero.com
Step 1: Prepare Your Bike
Start by finding a flat, stable surface to work on. A garage floor, driveway, or even a sidewalk works fine. If you have a bike stand, secure your bike in it. If not, carefully flip the bike over so it rests on the handlebars and seat. Make sure the bike is stable and won’t tip over.
Next, shift the front derailleur (if your bike has one) to the smallest chainring. This reduces tension and makes handling the bike easier. While the front derailleur doesn’t directly affect the front wheel, it helps prevent accidental damage.
Step 2: Release the Brakes
This step is crucial, especially if your bike has rim brakes like V-brakes or caliper brakes. If you don’t release the brakes, the wheel won’t fit through the brake pads when you try to remove it.
For V-brakes, look for a small lever on the brake cable near the handlebar. Pull it up to release tension, or use your fingers to squeeze the brake arms together and unhook the cable from the brake noodle. Some newer bikes have a quick-release mechanism built into the brake arms—just flip it open.
If your bike has disc brakes, you don’t need to disconnect the brake line, but you should avoid squeezing the brake lever while the wheel is off. The brake pads can stick together. To prevent this, insert a spacer—like a folded piece of cardboard or a plastic spacer—between the pads. Some mechanics use a zip tie to gently hold the caliper open.
Step 3: Loosen the Axle
Now it’s time to loosen the axle. If you have a quick-release skewer, flip the lever to the open position. It should move easily. If it’s stiff, you may need to loosen the nut on the opposite side slightly before flipping the lever.
For bolt-on axles, use your wrench to turn the nuts counterclockwise. Hold the wheel steady with one hand while turning the wrench with the other. Most bikes have nuts on both sides, so you’ll need to loosen both. Don’t remove them completely yet—just loosen them enough so the wheel can drop out.
Pro tip: If the nuts are tight, try using a longer wrench or a breaker bar for extra leverage. Avoid using excessive force, as this can damage the axle or dropouts.
Step 4: Remove the Wheel
With the axle loosened and brakes released, gently lift the front wheel out of the fork dropouts. The dropouts are the U-shaped slots at the bottom of the fork legs where the axle sits.
On some bikes, especially those with disc brakes, the rotor (the metal disc attached to the hub) may rub against the brake caliper as you remove the wheel. To avoid bending the rotor, tilt the wheel slightly as you pull it out. Go slowly and watch for any resistance.
Once the wheel is free, set it aside carefully. Avoid placing it on dirty or greasy surfaces to keep the tire and rim clean.
Step 5: Inspect and Store the Wheel
While the wheel is off, take a moment to inspect it. Check the tire for cuts, embedded debris, or excessive wear. Look at the rim for cracks or dents. Spin the hub to see if it turns smoothly—any grinding or wobbling could indicate a problem.
If you’re removing the wheel for storage or transport, consider covering the axle threads with tape or a plastic cap to prevent dirt from getting in. Store the wheel in a dry place away from direct sunlight.
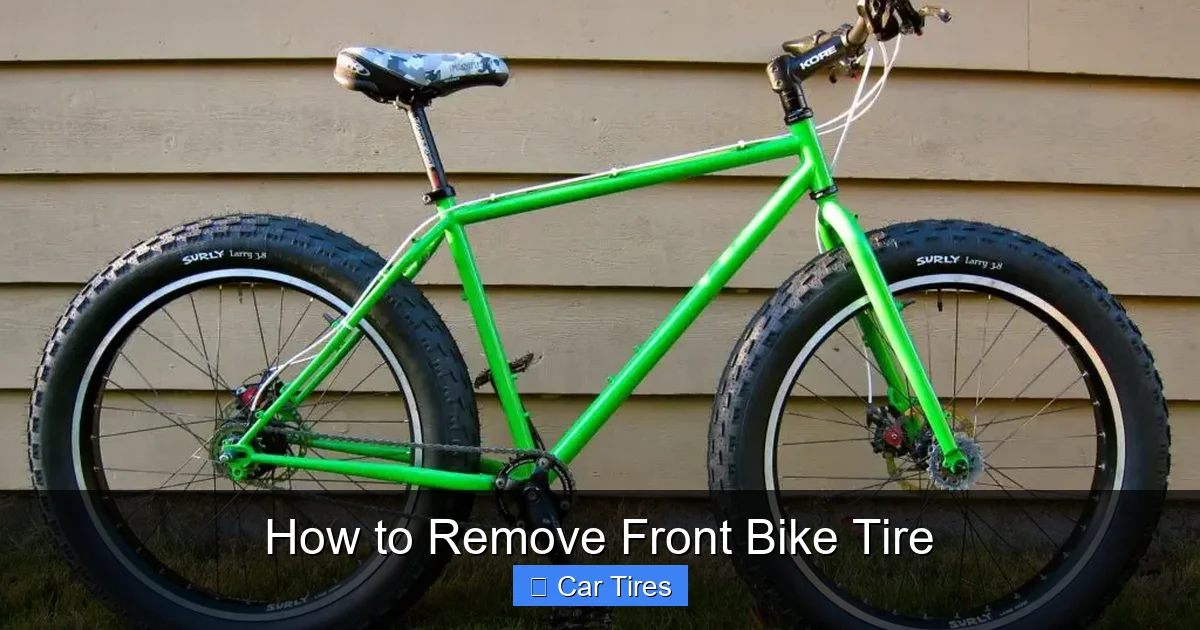
Special Considerations for Different Bike Types
Not all bikes are the same, and some require extra care when removing the front tire. Let’s look at a few common bike types and what to watch for.

Visual guide about How to Remove Front Bike Tire
Image source: m.media-amazon.com
Mountain Bikes
Mountain bikes often have wider tires and stronger axles. Many use thru-axles instead of quick-release skewers. A thru-axle is a solid rod that passes through the hub and threads into the fork. To remove it, you’ll need a hex key (usually 5mm or 6mm) or a lever tool that came with the bike.
Thru-axles provide better stiffness and alignment, especially for disc brakes. When removing, turn the axle counterclockwise until it’s loose, then pull it straight out. Be careful not to drop it—some have small washers that can fall off.
Road Bikes
Road bikes typically use quick-release skewers and have narrow, high-pressure tires. Because the tires are tight, they can be harder to remove if you’re replacing the tube. Use tire levers to avoid pinching the tube.
Road bikes also often have tight clearances between the tire and fork. When reinstalling, make sure the tire isn’t pinched or misaligned. A slight bump could cause a blowout at high speeds.
Hybrid and Commuter Bikes
These bikes combine features of road and mountain bikes. Many have quick-release axles and moderate tire widths. Some come with fenders or racks, which may need to be loosened slightly to remove the wheel. Check for any cables or straps that might get in the way.
Folding Bikes
Folding bikes are designed for easy disassembly. The front wheel often comes off quickly, but some models have unique mechanisms. Always refer to the owner’s manual, as improper removal can damage the folding hinges or cables.
Common Mistakes to Avoid
Even simple tasks can go wrong if you’re not careful. Here are some common mistakes people make when removing a front bike tire—and how to avoid them.
Forgetting to Release the Brakes
This is the number one mistake. Trying to force the wheel through closed brake pads can damage the rim, tire, or brake components. Always check that the brakes are fully open before removing the wheel.
Over-tightening or Under-tightening the Axle
When reinstalling the wheel, it’s important to tighten the axle properly. If it’s too loose, the wheel can wobble or fall out. If it’s too tight, you can damage the dropouts or make it hard to remove next time. For quick-release skewers, the lever should leave a slight imprint on your palm when closed. For bolt-on axles, tighten until snug—don’t crank it.
Ignoring the Disc Brake Rotor
On disc brake bikes, the rotor is delicate. Bending it can cause rubbing and poor braking. Always handle the wheel gently and avoid placing it on the rotor. If the rotor gets bent, you may need a truing tool to straighten it.
Losing Small Parts
Nuts, washers, and spacers are easy to lose. Lay them on a clean rag or in a small container as you remove them. Take a photo before disassembly so you remember how everything goes back together.
Not Checking Tire Direction
Some tires have a directional tread pattern. If you reinstall the tire backward, it can reduce traction and increase wear. Look for an arrow on the sidewall that shows the correct rotation direction.
How to Reinstall the Front Bike Tire
Once you’ve repaired your flat, replaced the tire, or finished transporting your bike, it’s time to put the wheel back on. The process is the reverse of removal, but there are a few key points to remember.
Align the Wheel Properly
Slide the axle into the fork dropouts, making sure it sits evenly on both sides. The wheel should be centered between the fork legs. For disc brake bikes, guide the rotor into the caliper carefully—don’t force it.
Tighten the Axle Securely
For quick-release skewers, flip the lever to the closed position. It should take moderate hand pressure to close. If it’s too easy, tighten the nut slightly. For bolt-on axles, use your wrench to tighten both nuts evenly.
Reconnect the Brakes
Reattach the brake cable or close the quick-release mechanism. Spin the wheel to make sure it clears the brake pads. For disc brakes, remove the spacer and test the brake lever—it should feel firm and responsive.
Test Before Riding
Before you hit the road, do a quick safety check. Squeeze the brake lever to ensure it works. Spin the wheel to confirm it turns freely. Give the tire a gentle tug to make sure it’s secure. Only then should you start riding.
Maintenance Tips to Prevent Future Issues
Removing your front tire doesn’t have to be a frequent chore. With regular maintenance, you can reduce the chances of flats and other problems.
Check Tire Pressure Weekly
Underinflated tires are more prone to pinch flats and wear out faster. Use a floor pump with a pressure gauge to keep your tires at the recommended PSI, which is usually printed on the tire sidewall.
Inspect Tires for Damage
Look for cuts, bulges, or embedded objects like glass or thorns. Remove any debris carefully with pliers. If you see a deep cut, it’s time to replace the tire.
Rotate Tires (If Applicable)
On some bikes, especially touring or commuter bikes, rotating the front and rear tires can extend their life. This evens out wear, especially if one tire takes more stress.
Keep the Rim Clean
Dirt and grime on the rim can damage brake pads and reduce stopping power. Wipe the rim with a damp cloth regularly, especially after riding in wet or muddy conditions.
Lubricate the Axle (Occasionally)
If your axle feels stiff, a small amount of light grease can help. Don’t overdo it—too much grease attracts dirt. Wipe off excess with a rag.
When to Seek Professional Help
Most front tire removals are straightforward, but sometimes it’s best to visit a bike shop. If you’re unsure about your bike’s brake system, have a damaged axle, or notice unusual noises after reassembly, a professional can help.
Also, if you’re replacing a tire or tube for the first time, watching a mechanic do it can be helpful. Many shops offer free clinics or quick tutorials.
Remember, safety comes first. If something doesn’t feel right, don’t force it. A small issue now can prevent a bigger problem later.
Conclusion
Learning how to remove a front bike tire is a valuable skill that every cyclist should master. It empowers you to handle flats, perform maintenance, and transport your bike with confidence. With the right tools and a little practice, the process becomes quick and easy.
Whether you ride for fitness, commuting, or adventure, knowing how to remove and reinstall your front tire keeps you moving. Follow the steps in this guide, avoid common mistakes, and keep your bike in top condition. Happy riding!
Frequently Asked Questions
Do I need special tools to remove a front bike tire?
Most bikes use either a quick-release lever or a standard wrench. Quick-release axles require no tools, while bolt-on axles need a 13mm to 17mm wrench. Thru-axles may require a hex key.
Can I remove the front tire without flipping the bike?
Yes, if you have a bike stand. Otherwise, flipping the bike upside down is the easiest way to access the front wheel and keep it stable.
What if my brake lever feels spongy after reinstalling the wheel?
This could mean air in the brake line (for hydraulic brakes) or improper cable tension (for mechanical brakes). Check your brake setup or consult a mechanic.
How tight should the quick-release lever be?
The lever should close with moderate hand pressure and leave a slight imprint on your palm. If it’s too loose, the wheel can shift; if too tight, it can damage the dropout.
Can I remove the front tire with disc brakes?
Yes, but be careful not to squeeze the brake lever while the wheel is off. Use a spacer to keep the brake pads apart and avoid bending the rotor.
How often should I remove my front tire for maintenance?
You don’t need to remove it regularly unless you’re fixing a flat or replacing the tire. However, inspect the tire and wheel during routine checks every few weeks.