
How to Regear a Jeep
Contents
- 1 Key Takeaways
- 2 📑 Table of Contents
- 3 Understanding Gear Ratios: The Heart of the Matter
- 4 Signs You Need to Regear Your Jeep
- 5 Choosing the Right Gear Ratio for Your Jeep
- 6 DIY vs Professional Installation: Which Path is for You?
- 7 Step-by-Step: The Regearing Process
- 8 Maintenance and Care After Regearing
- 9 Frequently Asked Questions

Phone Mount for Bike

Digital Tire Pressure Gauge

Steering Wheel Cover

Car Back Support Cushion
Regearing your Jeep means changing the gear ratio in the front and rear differentials to match larger tires or increased engine power. This process restores acceleration, fuel economy, and drivability that are lost when you upsized your tires or swapped an engine. Our guide walks you through recognizing the need, selecting the correct ratio, and deciding between a DIY project or professional installation to get your Jeep performing its best.
So, you’ve slapped on some massive 35-inch or even 37-inch tires on your Jeep Wrangler, or maybe you dropped in a beefier engine. Everything feels… slow. Your engine revs high on the highway, your acceleration is a snooze fest, and your fuel gauge seems to drop faster than a rock in a river. What gives? You’ve just run headfirst into the “gear ratio mismatch.” The good news? There’s a fix, and it’s called regearing. It’s one of the most transformative upgrades you can make to a modified Jeep, essentially hitting the reset button on your drivetrain’s performance. This guide will walk you through every single step of how to regear a Jeep, from the “why” to the “how” and the “how much.” Think of it as your friendly, detailed roadmap to getting your rig’s power back where it belongs—to the ground.
First, let’s demystify the term. Regearing a Jeep means opening up the front and/or rear differentials and replacing the ring and pinion gears with a set that has a different ratio. This ratio is a simple number that describes how many times the driveshaft turns compared to the wheel. A lower numeric ratio (like 3.21) is great for highway cruising and fuel economy with stock tires. A higher numeric ratio (like 4.88) is what you want for massive tires and serious off-road crawling, as it multiplies torque. When you put huge tires on without regearing, you’ve effectively made your gearing “taller,” meaning your engine has to work harder (rev higher) to turn those big hoops. Regearing brings that effective ratio back into the sweet spot for your new setup. It’s not just about power; it’s about drivability, transmission health, and even the accuracy of your speedometer.
Key Takeaways
- Regearing adjusts your differential’s gear ratio to compensate for larger tires or engine changes, restoring lost power and efficiency.
- Common signs you need to regear include high highway RPMs, sluggish acceleration, poor fuel economy, and tire rub on full turns.
- Choosing the right ratio depends on tire size, engine torque, and primary use—off-road favors lower ratios (numerically higher) for crawling, while highway needs higher ratios (numerically lower).
- DIY regearing saves money but requires significant mechanical skill, specialized tools, and precision; a professional install guarantees correct setup but costs more.
- Total cost to regear a Jeep typically ranges from $500 to $1,500 per axle for parts, plus $800-$1,500 for professional labor, depending on the axle model.
- Post-regear maintenance is critical: a proper break-in period, timely fluid changes, and regular leak/check inspections ensure long gear life.
📑 Table of Contents
Understanding Gear Ratios: The Heart of the Matter
Before you can choose a new ratio, you need to understand what the numbers mean and how they interact with your Jeep. It’s not magic; it’s math, and it’s crucial.
What Are Gear Ratios, Exactly?
A gear ratio is expressed as a number, like 3.73 or 4.10. It represents the relationship between the number of teeth on the ring gear and the pinion gear inside your differential. For example, a 4.10 ratio means the driveshaft turns 4.10 times for every one full turn of the axle shaft (and thus the wheel). A higher number (4.10, 4.56, 5.38) is a “lower” gear—it provides more mechanical advantage, multiplying torque. This is what you need for big tires or heavy off-road use. A lower number (3.21, 3.73) is a “higher” gear—it means the engine turns less per wheel revolution, which is better for highway fuel economy and top speed with smaller tires.
How Gear Ratios Affect Your Jeep’s Performance
Think of it like bicycle gears. A low gear (high numeric ratio) lets you climb a steep hill easily (more torque), but you have to pedal (rev) like crazy to go fast on flat ground. A high gear (low numeric ratio) lets you cruise fast on the flats with less pedaling, but you’ll struggle to get up a hill. Your Jeep is the same. Stock Jeeps from the factory often have ratios around 3.21 or 3.73, perfect for their stock 30- or 32-inch tires. Stretch your boots to 35s or 37s without changing the ratio, and you’ve effectively made every gear in your transmission taller. You’ll find yourself downshifting constantly on the highway just to maintain speed, your engine will scream at 3,000 RPM doing 65 mph, and you’ll feel a serious lack of “oomph” when you try to pass or climb a grade. Regearing to a 4.10 or 4.56 for 35-inch tires, or a 4.88 or 5.38 for 37s, restores that lost mechanical advantage. Your engine will operate in a healthier RPM range, acceleration will return, and your transmission won’t be as stressed. It also brings your speedometer and odometer back to accuracy, which is a nice bonus.
Common Gear Ratios for Different Jeep Setups
There’s no single “best” ratio; it’s a spectrum based on your goals. Here’s a general guideline for popular Jeep Wrangler (JL/JT) and Cherokee (XJ) setups with typical tire sizes:
- 33-35 Inch Tires: 4.10 or 4.56. This is the most common sweet spot. It restores stock-like behavior for daily driving and light to moderate off-roading. You’ll get decent highway RPMs (around 2,200 at 65 mph for a 4.10 on 35s) and excellent low-speed control.
- 35-37 Inch Tires: 4.56 or 4.88. For serious off-roaders with big tires, 4.56 is a great all-arounder. If you’re running 37s or doing extreme rock crawling, 4.88 or even 5.38 (in Dana 44 & 60 axles) gives you monstrous torque at the wheels for creeping over obstacles.
- 37+ Inch Tires or Heavy Builds: 5.13 or 5.38. This is for the hardcore. It will give you incredible crawling ability but will make highway cruising noisy and less efficient. Your engine will rev higher at speed.
- Stock Tires or Slight Oversize (31-32s): 3.73 or 4.10. If you have a stock-ish Jeep and just want a tiny bump in low-end torque, 4.10 is a mild but effective upgrade.
Pro Tip: Always consider your engine. A turbocharged 2.0L or 3.6L V6 in a Wrangler 4xe has different torque characteristics than a carbureted 4.0L in an old Cherokee. A V6 has more low-end torque, so you might get away with a slightly higher (numerically lower) ratio than a 4.0L would need on the same tires. Online gear ratio calculators are your best friend here. You plug in your tire size, desired cruising RPM, and transmission gear ratios, and it spits out recommended axle ratios. It’s science, not guesswork.
Signs You Need to Regear Your Jeep
How do you know for sure it’s time to open up those diffs? The symptoms are usually pretty obvious once you know what to look for. It’s rarely a sudden failure; it’s a gradual degradation in drivability.

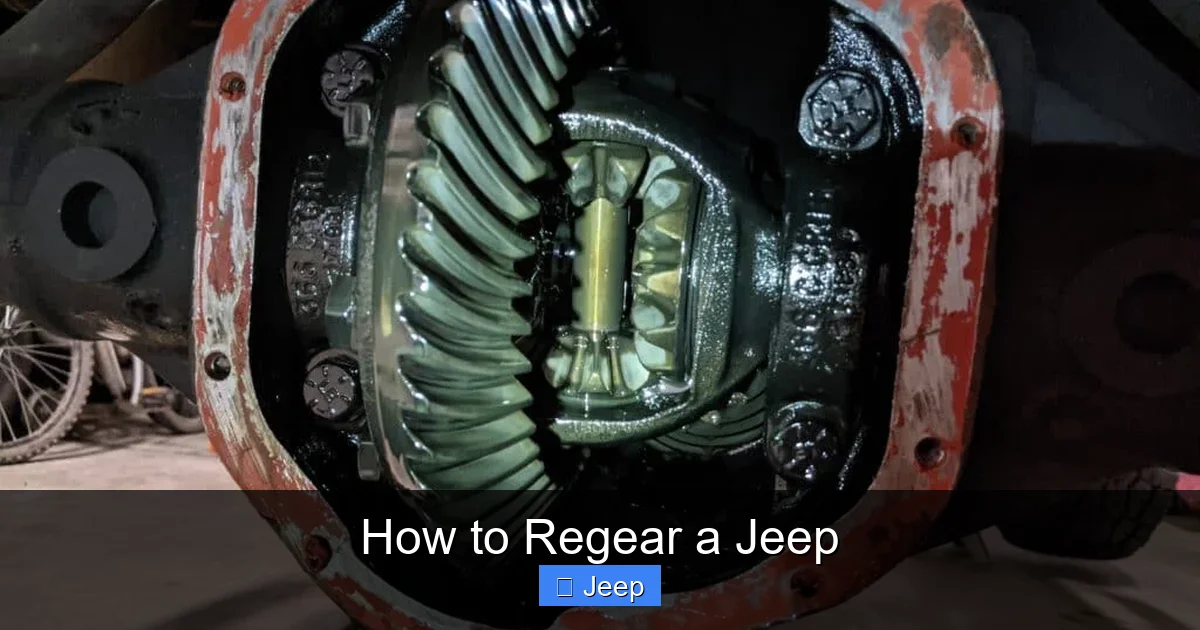
Visual guide about How to Regear a Jeep
Image source: images.squarespace-cdn.com
Performance Symptoms on Pavement
These are the most common and frustrating clues. You’ll experience them daily on your commute or road trip.
- High Engine RPM at Highway Speeds: This is the #1 tell. If your tachometer is reading 2,800-3,200 RPM at 65-70 mph and your engine sounds like it’s working hard, your effective gear ratio is too tall. Stock gearing on stock tires might read 2,000 RPM at that speed.
- Sluggish Acceleration and Passing Power: Merging onto the highway or passing a slow-moving truck feels dangerous. Your Jeep feels like it’s in a higher gear than it is. You’re constantly downshifting to get any meaningful power.
- Poor Fuel Economy: Your engine is operating outside its optimal efficiency band, constantly at higher RPMs. You might see a drop of 2-4 MPG or more, especially on highway drives.
- Transmission “Hunting”: Your automatic transmission is confused. It can’t find the right gear and keeps shifting up and down erratically as you maintain speed, especially on slight inclines. This stresses the transmission.
Physical and Off-Road Indicators
Sometimes the signs are more mechanical or only appear when you’re exploring trails.
- Tire Rub: This is a classic sign you’ve gone too far without regearing. When you turn the wheel sharply (like in a parking lot or on a tight trail), the inside edge of your front tires rubs against the fender liner or suspension components. This happens because the increased tire size changes the steering geometry and scrub radius. While a lift and proper wheel offset can help, regearing is often part of the full solution for big tires.
- Stalled Engine or Bogging on Hills: Even in a low transmission gear, your engine bogs down and threatens to stall when climbing a moderate incline. It can’t generate enough torque at the wheels to maintain momentum.
- Difficulty Maintaining Speed Uphill: On a long grade, your speed drops significantly no matter how much you press the throttle, and the transmission refuses to downshift appropriately.
If you’re experiencing several of these, especially the high-RPM highway issue, it’s a strong indicator that your axle gear ratio is no longer matched to your tire size and you should seriously consider regearing.
Choosing the Right Gear Ratio for Your Jeep
This is the most critical decision. Choose wrong, and you’ll be disappointed or even damage your drivetrain. Choose right, and it’s like giving your Jeep a new engine. The process involves balancing tire size, engine power, and your driving habits.

Visual guide about How to Regear a Jeep
Image source: images.squarespace-cdn.com
Key Factors to Consider
Don’t just pick a number from a forum. Think through these variables.
- Tire Size (The Biggest Factor): This is your starting point. Measure your actual tire’s rolling diameter (not just the sidewall number). A 35×12.50R17 is about 34.5 inches tall. A 37×12.50R17 is about 36.5 inches. The bigger the tire, the lower (numerically higher) the gear ratio you need to bring the effective ratio back to stock or near-stock.
- Engine Type and Power: A torquey diesel or a V6 can handle a slightly higher (numerically lower) gear ratio on big tires than a smaller, less powerful 4-cylinder. Why? Because it has more low-end grunt to turn those big tires even with a taller gear. If your engine is weak, you’ll need more mechanical advantage (a lower gear/higher number) to compensate.
- Primary Use (The 80/20 Rule): What do you do 80% of the time? If it’s daily driving and highway trips, you’ll want a ratio that keeps your RPMs reasonable at 70 mph. This might mean leaning toward a 4.10 over a 4.88 on 35s. If you’re 80% off-road rock crawling, you’ll prioritize low-speed torque and might accept a noisier, less efficient highway experience with a 4.88 or 5.13. The 20% use case should still be tolerable, but the 80% is your priority.
- Transmission and Transfer Case: Manual transmission users often prefer slightly lower (numerically higher) ratios because they have more control over RPMs with the clutch. Automatic transmission users might opt for a slightly higher (numerically lower) ratio to keep the transmission from shifting excessively. Your transfer case’s low range ratio (like 4:1 or 2.72:1) also plays a role in ultimate crawling ability, but regearing affects your street and high-range 4WD driving most directly.
Using Gear Ratio Charts and Calculators
Do not guess. Use the tools available. Many off-road and axle manufacturers (like Rubicon Express, Atlas, Yukon) provide detailed gear ratio charts. You input your tire size, desired cruising RPM, and sometimes transmission gear ratios. The calculator outputs the ideal axle ratio. For example, a common formula is: (New Tire Size / Old Tire Size) x Old Gear Ratio = New Target Gear Ratio. If your stock tires are 31 inches with 3.73 gears, and you go to 35-inch tires: (35/31) * 3.73 ≈ 4.21. So a 4.10 or 4.56 would be your target range. This is a starting point. Always cross-reference with online calculators that factor in transmission overdrive. Remember: if you’re installing a lift kit for those big tires, you’ll also want to review how much it costs to get a Jeep lifted as part of your overall budget and planning.
DIY vs Professional Installation: Which Path is for You?
This is the million-dollar question (sometimes literally). Regearing is not a simple bolt-on. It’s a precision machine shop job done in your garage. The decision hinges on your skill, tools, and tolerance for risk.
Visual guide about How to Regear a Jeep
Image source: images.squarespace-cdn.com
The DIY Approach: Pride, Savings, and Peril
Doing it yourself can save you $1,000-$3,000 in labor, which is a huge chunk of change. There’s also immense pride in knowing you did the work on your own rig. However, the barrier to entry is high. You need:
- Specialized Tools: A high-quality dial indicator with magnetic base to set pinion depth and backlash, a bearing puller set, a press for installing bearings, torque wrenches (inch-pound and foot-pound), a ring gear bolt wrench, and a pinion yoke holder. These tools can cost $500-$1,000+ if you don’t already have them.
- A Clean, Organized Workspace: You need a clean floor, good lighting, and space to lay out hundreds of small, critical parts in order.
- Mechanical Aptitude and Patience: You must understand how a differential works, be able to read micrometer readings, and have the patience of a saint. Setting backlash and pinion depth correctly is a精细 process measured in thousandths of an inch. One mistake can destroy a $600 set of gears in minutes.
- Service Manual: You absolutely need the factory service manual for your specific Jeep and axle (e.g., Dana 30, Dana 44, Dana 60). It has the critical torque specs, measurement procedures, and sequence.
The DIY process involves completely disassembling the differential, pressing off old bearings, installing new ones, setting the pinion depth (with shims), setting the backlash (with shims or a adjustable carrier), and ensuring perfect tooth contact pattern with gear marking compound. It’s rewarding if you succeed, but the learning curve is steep. If you’re not 100% confident, this is not the project to learn on. A botched regear leads to whining, overheating, and catastrophic gear failure, leaving you stranded and costing more to fix.
Professional Installation: Peace of Mind and Guarantees
Paying a reputable shop has clear advantages. They have:
- Experience and Specialized Equipment: They do this weekly. They have industrial presses, dial indicators, and laser alignment tools. They know the quirks of each axle model.
- Warranty: Most shops offer a warranty on their workmanship and the parts (if they supply them). If something whines or fails, they fix it.
- Speed and Convenience: They can often do an axle in a day. You drop the Jeep off and pick it up.
- Expert Advice: A good shop will tell you if your plan is flawed (e.g., “You can’t put 5.38s in a Dana 30,” or “That ratio is too low for your daily driving”).
The downside is cost. As mentioned, labor adds significantly. For a complete breakdown of what you can expect to pay for parts and labor, our detailed guide on how much it costs to regear a Jeep breaks down pricing by axle model and region. It’s an investment, but for most people, it’s the smart play unless you’re a seasoned mechanic with the right tools and a sacrificial axle to practice on.
Cost Comparison: The Bottom Line
Let’s talk real numbers. Gear sets themselves (ring and pinion) for common Jeep axles (Dana 30, 44) run $400-$800 per axle for quality brands like Yukon, Richmond, or Rubicon Express. Dana 60 gears are $600-$1,200+. Then you need bearings, seals, and gaskets ($100-$200). So parts alone are $500-$1,000+ per axle. Professional labor adds $800-$1,500 per axle, depending on the shop and region. So total professional cost: $1,300-$2,500 per axle. DIY cost is just parts + your time. If you have the tools, you save the labor. But factor in the potential cost of a mistake. For a first-timer, the professional route is often more economical in the long run when you consider the risk of destroying parts.
Step-by-Step: The Regearing Process
Whether you’re watching a pro do it or tackling it yourself, understanding the steps is key. Here’s a generalized overview of the process for a typical Jeep Dana 44 axle. Note: This is for educational purposes. Always follow the specific instructions in your service manual.
Tools and Preparation
Gather everything: new gear set, bearings, seals, gaskets, gear marking compound, RTV silicone, all specified fluids (hypoid gear oil, typically 75W-90), and every tool listed earlier. Disconnect the battery. Safely jack up and support the Jeep. Remove the wheel, brake caliper, and rotor (to give yourself clearance). Unbolt the differential cover and let the fluid drain completely into a pan. This is messy—wear gloves and eye protection.
Disassembly and Inspection
With the cover off, rotate the ring gear by hand. Note the backlash (the play between the teeth) and the pattern if you’re reusing old gears (you’re not). Remove the pinion nut and yoke. Remove the bearing caps from the carrier and note their orientation (they’re not usually interchangeable left-to-right). Carefully press the old bearings off the carrier and pinion. This is where a proper bearing puller is essential to avoid damage. Once the carrier is out, you can remove the ring gear bolts and separate the ring gear from the carrier. At this point, inspect everything: the axle shafts, the differential case, the pinion, and the old bearings for wear, pitting, or scoring. This is a great time to replace axle seals and wheel bearings if they show any sign of age.
Installing New Gears and Bearings
Press the new bearings onto the carrier and pinion. This requires a hydraulic press and the correct size drivers to tap the bearings on evenly. Never hammer bearings directly. Install the new ring gear onto the carrier, tightening the bolts in the specified star pattern to the exact torque (often 70-90 ft-lbs). Use Loctite on the threads if specified. Now, you install the carrier assembly back into the differential case. This is where shims come in. The carrier bearings ride on shims that set the position of the carrier, which in turn sets the backlash (the gap between the ring and pinion teeth). You’ll start with a guess based on your manual, then measure.
Setting Backlash and Pinion Depth: The Critical Adjustments
This is the heart of the job and where most DIYers fail. You must use a dial indicator.
- Backlash: Mount the dial indicator on the axle tube with the probe touching a ring gear tooth. Move the pinion by hand and read the total indicator movement. That’s your backlash. Factory spec is usually 0.006″-0.010″. You adjust it by adding or removing shims from one side of the carrier (moving it closer or further from the ring gear). Change shims, remeasure, repeat.
- Pinion Depth: This is even more finicky. You install the pinion with its bearing and yoke (no crush sleeve yet) and measure the distance from the pinion face to a reference point on the housing. You compare this to the “ideal” depth for your gear set (provided by the manufacturer). You add or remove shims from behind the pinion bearing to hit that depth spec exactly. A thousandth of an inch matters.
Once both are in spec, you assemble the pinion with its new crush sleeve (a steel sleeve that you tighten the pinion nut onto, which compresses to set the preload on the pinion bearings). You torque the pinion nut to the specified value (often 200-300 ft-lb) while constantly checking the pinion bearing preload (the drag on the pinion). It must be correct—too loose and the pinion wobbles; too tight and the bearings overheat and fail.
Reassembly and Fluid Fill
With backlash and pinion depth set, you reinstall the pinion yoke and nut to final torque. You then reinstall the differential cover with a new gasket and RTV sealant. Fill the differential with the correct amount and type of gear oil. For a Jeep, you typically need about 2.5 quarts of 75W-90 hypoid oil. If you have a limited-slip differential (like a Trac-Lok), you must add the correct amount of friction modifier (usually 4 ounces) as per the manual. Reinstall the brake caliper and rotor, torque all bolts to spec, and you’re done on that axle. Repeat for the other axle if doing both.
Maintenance and Care After Regearing
The job isn’t over when the cover goes back on. Proper break-in and ongoing care are vital to ensure your new gears live a long, quiet life.
The Critical Break-In Period
New ring and pinion gears have microscopic high spots. The break-in process wears these down gently and creates a perfect mating surface. During the first 500-1,000 miles:
- Avoid Hard Acceleration: Don’t launch your Jeep or do full-throttle runs. Accelerate moderately.
- Vary Your Load: Drive on both highways and backroads at varying speeds and loads. This helps wear the gears evenly.
- Do Not Tow or Haul Heavy Loads: Put minimal stress on the drivetrain for the first few hundred miles.
- Check Fluid Frequently: After the first 100 miles, check the differential fluid level. It’s common for a tiny amount of fluid to be lost as everything settles. Top it off if needed.
Some shops recommend a “hot setup” where you drive the Jeep normally for 15-20 minutes to heat the fluid, then let it cool and check the level again. Always follow your gear manufacturer’s specific break-in instructions.
Regular Inspection Schedule
Even after break-in, keep an ear and eye out.
- Listen: Any new whining, humming, or clunking noise from the axle area, especially one that changes with vehicle speed (not engine RPM), is a red flag. A constant whine that increases with speed often indicates incorrect pinion depth or bearing preload.
- Feel: Any new vibrations through the seat or floor? Could be an imbalance, but also a sign of gear issues.
- Look: Periodically check for leaks around the differential cover, pinion seal, and axle shafts. A small drip can become a big problem, leading to low fluid and gear destruction.
- Fluid Checks: Check your differential fluid at every oil change. Look for metal particles (a few are normal initially, but a lot is bad) or a burnt smell (indicates overheating). Change the fluid according to your manual or every 30,000-50,000 miles, especially if you wheel in water or mud.
Fluid Changes and Leak Prevention
Use only the manufacturer-recommended gear oil viscosity and type. For most Jeeps, SAE 75W-90 is standard. If you have a limited-slip differential, you must use fluid with the correct friction modifier or add the modifier separately. Never mix different types or brands. When changing fluid, replace the fill and drain plugs with new washers. Use a high-quality RTV sealant on the cover gasket. Inspect the pinion and axle shaft seals during every service; replacing a seal is cheap insurance against a bearing failure.
Regearing is a profound modification. It’s the key that unlocks the full potential of your Jeep’s big-tire build. It transforms a sluggish, inefficient rig into a responsive, capable machine that feels right both on the highway and the trail. While the process is complex, understanding the principles—ratio selection, the signs you need it, and the realities of installation—empowers you to make the best decision for your Jeep and your wallet. Whether you choose the rewarding path of a careful DIY or the peace of mind of a professional shop, the result is the same: a Jeep that performs as it should. Do your research, use the right parts, and respect the precision required. Your future self, cruising down the highway at 2,200 RPM with a grin on your face, will thank you.
Frequently Asked Questions
How much does it cost to regear a Jeep?
Total cost typically ranges from $1,300 to $2,500 per axle when professionally installed. This includes $400-$800 for the gear set and bearings, plus $800-$1,500 in labor. DIY costs are just for parts ($500-$1,000+), but require significant tools and expertise. For the most current pricing on your specific Jeep model and axle, consult our comprehensive cost guide.
How long does a regear take?
A professional shop can usually complete one axle in 4-8 hours. If doing both axles, plan on 1-2 business days. For a skilled DIYer with all tools ready, it might take a full weekend per axle. For a first-timer, it could easily stretch into a week of evenings and troubleshooting.
What tools are absolutely necessary for a DIY regear?
You need a dial indicator with magnetic base, a high-quality bearing puller set, a hydraulic press, torque wrenches (inch-lb and ft-lb), a ring gear bolt wrench, a pinion yoke holder, and various socket sets. You also need the factory service manual for your specific Jeep and axle. Missing any of these can lead to an incorrect setup or damaged parts.
What gear ratio is best for 35-inch tires on a Jeep Wrangler with a 3.6L V6?
For a 3.6L V6 in a Wrangler JL with 35-inch tires, the most popular and recommended ratios are 4.10 or 4.56. A 4.10 offers a great balance of highway drivability (around 2,200 RPM at 65 mph) and off-road torque. A 4.56 provides more low-end grunt for rocks but will rev slightly higher on the highway. Use an online gear calculator with your specific tire size and transmission gearing for the most precise recommendation.
Can I regear only one axle, or do I have to do both?
You can regear just one axle, but it’s not recommended for full-time


