
How to Change the Brake Light on a 2018 Hyundai Elantra

Changing the brake light on your 2018 Hyundai Elantra is a straightforward DIY task that typically takes 15-30 minutes and costs under $20 for the bulb. You’ll need basic tools like a flathead screwdriver and a socket set, plus the correct replacement bulb (usually a 3157 or 7443). Always disconnect the battery first to avoid electrical shorts, and avoid touching the new bulb’s glass with your fingers. Follow our detailed steps to access the trunk housing, replace the bulb, and test thoroughly before reassembly.
Let’s talk about your brake lights. They’re more than just a legal requirement—they’re a critical communication tool between you and the driver behind you. When that third brake light on your 2018 Hyundai Elantra goes out, it’s not just an annoyance; it’s a safety issue. The good news? Replacing it is one of the easiest DIY car repairs you can do. No special skills, no expensive tools. In this complete guide, we’ll walk through every single step, from popping the trunk to verifying a perfectly working light. By the end, you’ll have saved a shop fee, gained confidence, and made your Elantra safer. Ready? Let’s get started.
Key Takeaways
- Safety First: Always disconnect the negative battery terminal before starting to prevent electrical shocks or short circuits.
- Correct Bulb Type: The 2018 Elantra typically uses a 3157 (dual filament) or 7443 bulb—confirm in your owner’s manual or with an auto parts store.
- Avoid Oil Contamination: Wear gloves or use a clean cloth when handling the new bulb; oil from your skin can cause hot spots and premature failure.
- Test Before Reassembly: Temporarily reconnect the battery to check the new bulb’s function before closing the trunk to avoid repeat work.
- Check for Corrosion: Inspect the bulb socket and wiring for white/green corrosion; clean with electrical contact cleaner if needed.
- Proper Reassembly: Ensure all plastic retaining clips and covers are securely reattached to prevent water leaks or rattles.
- Dashboard Warning: If the brake light warning persists on the dash after bulb replacement, it may indicate a deeper electrical issue requiring professional diagnosis.
📑 Table of Contents
- Understanding Your 2018 Hyundai Elantra Brake Light System
- Gathering Your Tools and Replacement Bulb
- Accessing the Third Brake Light Assembly
- Removing the Old Bulb and Inspecting the Socket
- Installing the New Bulb and Reassembly
- Testing and Final Reassembly
- Troubleshooting Common Issues After Replacement
- When to Call a Professional
- Conclusion: A Simple Fix with Big Impact
Understanding Your 2018 Hyundai Elantra Brake Light System
Before we touch a tool, it helps to know what we’re working with. Your Elantra has three brake light circuits: the two main tail lights (which also serve as brake lights) and the high-mounted third brake light, often called the “CHMSL” (Center High-Mounted Stop Lamp). This guide focuses on the third brake light, located at the top center of your rear windshield. It’s a sealed unit with two bulbs: one for the brake light and one for the reverse light (in some models). The entire assembly pops out from inside the trunk for easy access. This design is common in many modern sedans and makes for a quick repair.
Why Did It Burn Out?
Brake lights are on every time you press the pedal, so they see a lot of use. The most common cause of failure is simply age—the filament inside the bulb gets brittle and breaks. Other culprits include a bad socket connection, moisture getting into the assembly, or a voltage surge. While we’re replacing the bulb, it’s smart to check the socket for corrosion (a white, crusty residue) and the wiring for any fraying. A little preventative cleaning now can save you from another burnout in a few months.
Gathering Your Tools and Replacement Bulb
This job requires minimal equipment. Having everything ready before you start will make it smooth and frustration-free.
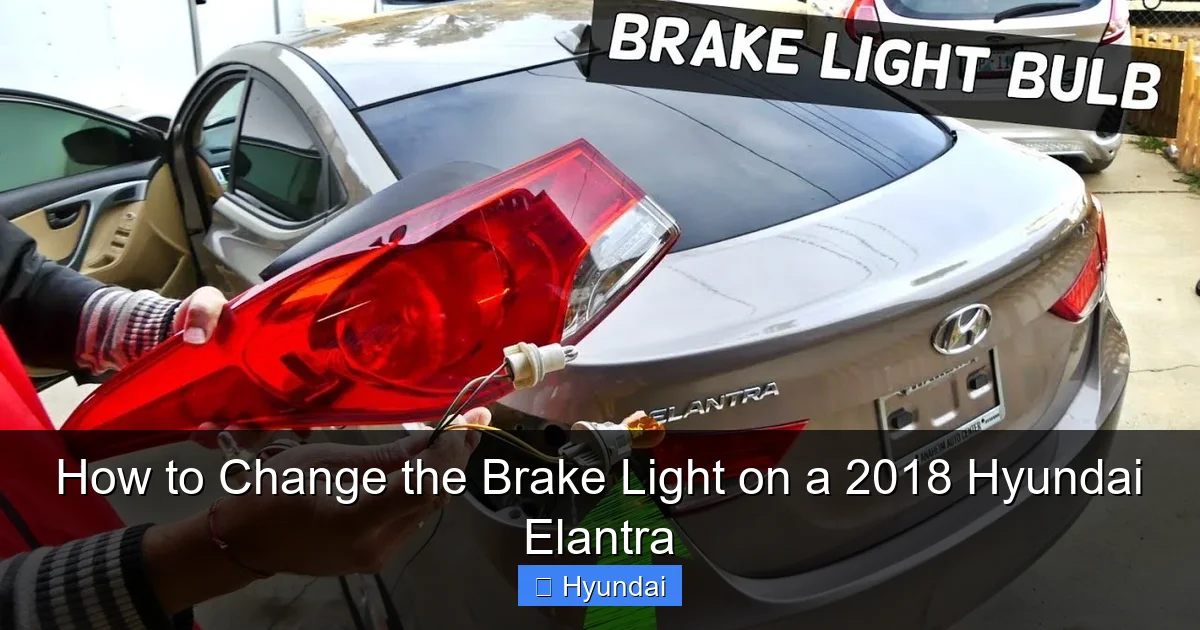
Visual guide about How to Change the Brake Light on a 2018 Hyundai Elantra
Image source: i.ytimg.com
Essential Tools
- Flathead Screwdriver: For prying off plastic trunk trim covers. A 1/4-inch or 5mm works well.
- Socket Set (Optional): Some Elantra models have a 10mm nut securing the light assembly. A small ratchet and socket make this easier, but pliers can work in a pinch.
- Gloves: Disposable nitrile gloves are perfect. They keep oils from your skin off the bulb glass.
- Clean Cloth: To handle the bulb if you don’t have gloves, and for cleaning contacts.
- Flashlight or Headlamp: The trunk area can be dark, especially if you’re working at dusk.
Choosing the Right Bulb
This is crucial. Using the wrong bulb can cause flickering, premature failure, or even melt the plastic lens. For a 2018 Hyundai Elantra, the third brake light bulb is most commonly a 3157 (dual filament, 27/8 watts) or a 7443. The 7443 is actually a more modern, LED-friendly version but is often mechanically compatible. The safest method is to check your owner’s manual—the bulb type is listed in the light specifications section. If you don’t have the manual, remove the old bulb first and take it to any auto parts store; they’ll match it instantly. Expect to pay $5-$15 for a quality halogen bulb from brands like Sylvania or Philips. While you’re at the store, pick up a small pack of electrical contact cleaner—it’s invaluable for cleaning corroded sockets.
Pro Tip: Many drivers are now upgrading to LED bulbs for brake lights because they’re brighter and last longer. If you go this route, ensure the LED bulb is “CANBUS compatible” or comes with a load resistor. Otherwise, your car’s computer might think the bulb is out and throw a warning light. For a simple, no-hassle swap, stick with the OEM-style halogen bulb.
Accessing the Third Brake Light Assembly
Now for the fun part: getting to the bulb. All work is done from inside the trunk. Clear out any cargo so you have full access to the rear shelf.
Visual guide about How to Change the Brake Light on a 2018 Hyundai Elantra
Image source: i.pinimg.com
Step 1: Open the Trunk and Locate the Cover
Fully open your trunk. Directly behind the third brake light, you’ll see a plastic trim panel covering the mounting hardware. On the 2018 Elantra, this is usually a rectangular or trapezoidal piece of textured plastic. It’s held in place by several plastic clips or sometimes a small bolt.
Step 2: Remove the Trunk Trim
Start at one corner. Slide the flathead screwdriver under the edge of the trim panel and gently pry. The plastic clips are designed to pop out, but they can be stubborn. Work your way around the perimeter. If you feel significant resistance, look for a hidden 10mm bolt—it’s often disguised under a plastic cap in the center or a corner. Remove the bolt with your socket, then continue prying. Once all clips are disengaged, carefully lift the trim panel away. You’ll now see the back of the brake light assembly, with a wiring harness plug and usually one or two mounting nuts or clips.
Step 3: Disconnect the Wiring Harness
Locate the plastic electrical connector plugged into the back of the light assembly. Press the release tab (usually on the top or side) and pull the connector straight off. Don’t yank on the wires; grip the plastic housing. If it’s corroded or stuck, a gentle wiggle while pressing the tab should free it. Once disconnected, set the wiring aside carefully.
Step 4: Remove the Light Assembly
With the wiring disconnected, the assembly is held by either:
- Two plastic retaining clips: Squeeze them inward and pull the assembly out.
- One or two 10mm nuts: Use your socket to remove them, then pull the assembly out.
Support the assembly with one hand as you remove the last fastener to prevent it from dropping. Gently pull it straight out toward you. It may have a rubber grommet seal; just work it loose.
Removing the Old Bulb and Inspecting the Socket
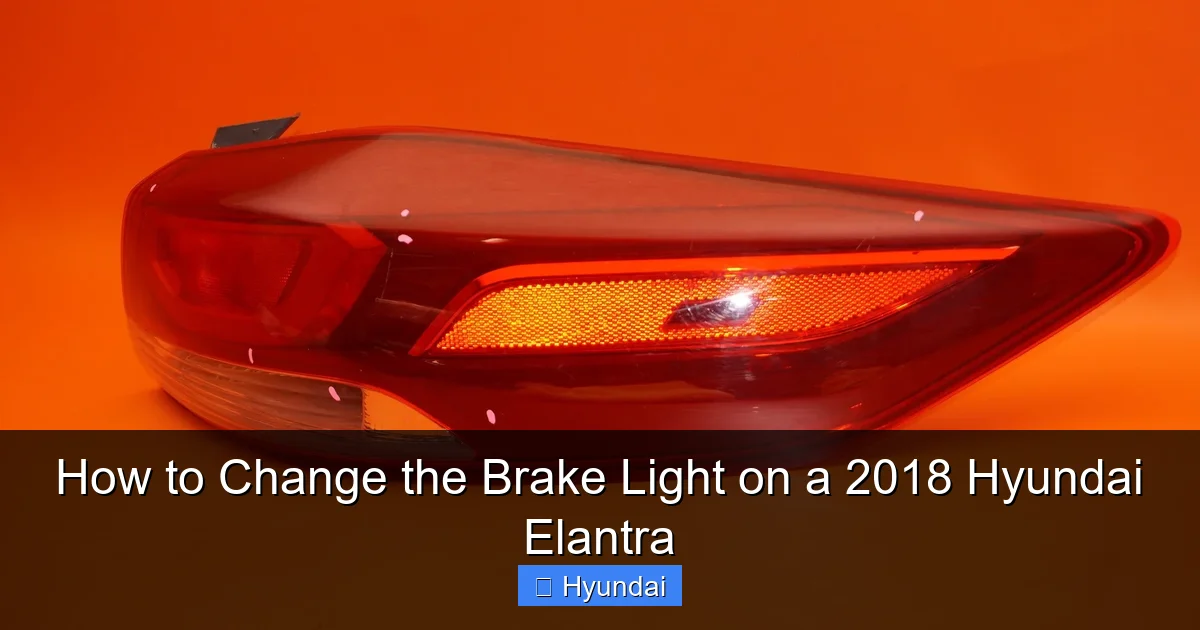
Now you have the assembly in your hands. Place it on a clean part of the trunk carpet, lens side up to avoid scratches.
Visual guide about How to Change the Brake Light on a 2018 Hyundai Elantra
Image source: sfvauto.s3-us-west-1.amazonaws.com
Identify the Bulb Socket
The assembly has two bulb holders. The brake light is the larger of the two (since it’s brighter). The socket is a plastic twist-lock type. You’ll see tabs on the socket that align with grooves in the assembly.
Twist and Remove the Socket
Turn the socket counterclockwise (lefty-loosey) about a quarter turn. It will release and pull out easily, bringing the old bulb with it. If it’s stuck due to heat or corrosion, use your gloved hand for better grip. Don’t use excessive force; a little penetrating spray (like WD-40) on the seam can help if it’s really stuck.
Extract the Old Bulb
The bulb simply pulls straight out of the socket. There’s a small plastic retaining clip or spring that holds it; press it down gently while pulling the bulb. Note the orientation—some bulbs have a specific offset base that must align with a tab in the socket. Take a photo with your phone if you’re unsure.
Critical Inspection Time
Before installing the new bulb, inspect the socket and the back of the assembly. Look for:
- Corrosion: White, green, or bluish crust on the metal contacts. This is a common cause of intermittent failures.
- Burned Pins: Blackening or melting on the socket’s metal terminals.
- Water Intrusion: Signs of moisture, rust, or mineral deposits inside the socket.
If you see corrosion, spray a little electrical contact cleaner into the socket, let it evaporate, and wipe with a clean cloth. For heavy corrosion, a small wire brush can gently clean the metal tabs. This step is often the difference between a repair that lasts and one that fails in a month.
Installing the New Bulb and Reassembly
With a clean socket and a fresh bulb in hand, it’s time for the reverse process. But precision matters here.
Handle the Bulb Correctly
Put on your nitrile gloves. If you don’t have gloves, hold the bulb with a clean, lint-free cloth. Never touch the glass envelope with your bare fingers. The oils from your skin will create a hot spot when the bulb heats up, causing it to crack or fail prematurely. If you accidentally touch the glass, clean it thoroughly with rubbing alcohol and a soft cloth before installing.
Insert the New Bulb
Align the bulb’s base with the socket’s grooves. Most bulbs have a small offset pin that must match a slot. Press the bulb firmly into the socket until it seats completely. You should feel a slight click or the retaining clip snap into place. Give it a gentle tug to ensure it’s secure.
Reinstall the Socket
Position the socket back into the assembly’s opening, making sure the alignment tabs match. Twist it clockwise until it locks firmly. It should not spin freely.
Reattach the Light Assembly
Before putting the assembly back, it’s wise to test the bulb. But first, reconnect the wiring harness. Push the connector on until you hear the tab click. Now, carefully slide the assembly back into its opening. If it uses clips, squeeze them and push the assembly in until you hear a snap. If it uses nuts, start the nuts by hand, then tighten them with the socket—don’t overtighten; snug is sufficient. Reinstall any rubber grommets in their proper positions.
Testing and Final Reassembly
This is the moment of truth. Don’t close that trunk yet!
Perform a Functional Test
Reconnect the negative battery cable you disconnected earlier. Have a friend press the brake pedal while you stand behind the car. You should see the new brake light illuminate brightly and steadily. If it doesn’t come on, or if it’s dim/flickering, disconnect the battery immediately and recheck:
- Is the bulb seated correctly?
- Is the connector fully engaged?
- Is there still corrosion on the contacts?
If it works, have your friend hold the pedal down and turn on the headlights to ensure the tail light function (if your third light also serves as a tail light) is working.
Check for Dashboard Warnings
Start the car and look at your instrument cluster. The brake light warning indicator (usually a red exclamation mark inside a brake symbol) should be off. If it remains illuminated, your car’s computer still senses a problem. This could be due to:
- A bulb with incorrect wattage (LED vs. halogen mismatch).
- A faulty socket or wiring issue not resolved by the bulb change.
- A problem elsewhere in the brake system (low fluid, worn pads) that triggered the light independently.
If the warning persists after confirming the bulb works, you’ll need to diagnose the electrical circuit or brake system. For some models, a system reset may be required after a bulb replacement. While reset procedures vary by make, you might find guidance for other vehicles helpful—like how to reset the brake system light on a Honda Civic—though always consult your Elantra’s manual first.
Reinstall the Trunk Trim
Once the light tests perfectly, disconnect the battery again (safety first!). Reinstall the plastic trim panel by aligning it and pressing firmly on all corners until the clips snap back. If you removed a bolt, reinstall it and tighten snugly. Reconnect any cargo net hooks or lining you removed.
Troubleshooting Common Issues After Replacement
What if the new bulb doesn’t work? Don’t panic. Here’s a systematic approach.
Bulb Doesn’t Illuminate At All
First, re-check the bulb installation. Remove it and re-seat it. Ensure the socket’s locking tab engaged. Next, inspect the fuse. The brake light fuse is in the under-hood fuse box (check your manual for exact location, often labeled “STOP” or “BRAKE”). Pull it with needle-nose pliers and check the metal strip inside—if it’s broken, replace it with a new fuse of the same amperage. A blown fuse could indicate a short circuit, so if the new fuse blows immediately, there’s a wiring problem needing professional help.
Bulb Works Intermittently or Is Dim
This usually points to a poor connection. Remove the bulb and socket again. Clean all metal contact points on both the bulb and inside the socket with electrical contact cleaner and a small wire brush. Check the wiring harness plug for bent pins or corrosion; clean those too. Also, wiggle the wires gently while the bulb is on to see if the light flickers—this indicates a broken wire inside the insulation that needs repair.
The Other Brake Light Is Out Too
If both third brake lights (if your model has two) or the main tail/brake lights are out, the problem is likely a shared fuse or a wiring issue behind the trunk liner, not just the bulb. Check the fuse first. If the fuse is good, you may have a damaged wire harness from trunk contents shifting over time.
Dashboard Brake Warning Light Stays On
As mentioned, this can be a separate issue. First, confirm the brake light itself is bright and steady. If it is, the dash warning might be for the parking brake (is it fully released?), low brake fluid, or worn brake pads. Check your owner’s manual for the exact meaning of the symbol. If it’s specifically a “bulb out” indicator and the light works, the socket’s electrical resistance might be off. Some vehicles, including certain Dodge Rams, have a dedicated reset procedure for the brake light warning after a bulb change—similar to resetting the brake light on a Dodge Ram 1500. However, resetting should only be done after verifying the bulb and socket are perfect; otherwise, you’re masking a real problem.
When to Call a Professional
While this is a DIY-friendly job, some situations warrant a mechanic’s expertise. If you’ve replaced the bulb, cleaned the socket, checked the fuse, and the light still doesn’t work, there may be a break in the wiring harness—a repair that requires splicing and soldering. Similarly, if the brake warning light on the dash persists and you’ve ruled out the bulb, it could indicate a failing brake fluid level sensor, a problem with the ABS module, or worn brake components. These are safety-critical systems. Also, if your Elantra has a LED brake light strip (some higher trims), the entire module may need replacement if an individual LED fails, which is more complex. Don’t guess when it comes to brakes—when in doubt, seek professional help.
Conclusion: A Simple Fix with Big Impact
Congratulations! You’ve just mastered one of the most common and useful car repairs. Changing the brake light on your 2018 Hyundai Elantra isn’t just about saving $50-$100 at the shop; it’s about taking control of your vehicle’s maintenance and ensuring your signals are clear to everyone on the road. The process reinforces a valuable DIY mindset: disconnect power, inspect before installing, test before reassembling. These principles apply to countless other jobs, from changing an air filter on a Honda Civic to more complex tasks. Keep your brake lights in top shape—check them monthly with a friend’s help or by backing up against a wall at night and looking at their reflection. A working brake light is one of the simplest yet most vital safety features on your car. Now that you know how to fix it, you’re equipped to keep your Elantra shining bright and stopping safely for years to come.
Frequently Asked Questions
What type of bulb does a 2018 Hyundai Elantra third brake light use?
The 2018 Elantra typically uses a 3157 dual-filament bulb (27 watts for brake, 8 watts for tail light) or a 7443. Always verify by checking your owner’s manual or removing the old bulb first for an exact match.
How long does it take to change the brake light on a Hyundai Elantra?
For a first-timer, budget about 20-30 minutes. With practice, you can do it in under 15 minutes. Most of the time is spent accessing the assembly inside the trunk.
Why is my brake light still not working after I replaced the bulb?
First, ensure the bulb is seated properly and you used the correct type. Then check the fuse (located in the under-hood fuse box). If the fuse is good, inspect the socket for corrosion and clean the contacts. A persistent issue may indicate a wiring problem or a faulty socket.
Can I drive with a malfunctioning brake light?
You should not. It’s illegal in all states and significantly increases your risk of a rear-end collision. A non-working brake light gives drivers behind you no warning when you slow down. Fix it immediately.
Do I need to reset the brake light warning after replacing the bulb?
Usually, no. The system will self-check and turn off the warning once it detects the new bulb’s proper resistance. If the warning stays on after confirming the bulb works, there may be an underlying electrical or brake system issue that needs diagnosis.
How much does a brake light bulb cost, and can I use an LED?
A standard halogen bulb costs $5-$15. LED bulbs are an upgrade ($15-$30) but must be CANBUS-compatible to avoid warning lights. For a straightforward, reliable fix, stick with the OEM-specified halogen bulb.
