How to Jump Start a Hyundai Elantra
Contents
- 1 Key Takeaways
- 2 📑 Table of Contents
- 3 Introduction: Don’t Panic, You Can Handle This
- 4 Understanding Your Elantra’s Battery and Why It Dies
- 5 Safety First: The Non-Negotiable Rules
- 6 Gathering Your Tools: The Right Gear for the Job
- 7 The Step-by-Step Jump Start Process: Order is Everything
- 8 After the Jump: Crucial Next Steps
- 9 When Jump Starting Isn’t Enough: Battery Replacement and Professional Help
- 10 Conclusion: Confidence Through Knowledge
- 11 Frequently Asked Questions
Jump starting a Hyundai Elantra is a straightforward process if you follow the correct safety steps and cable connection order. Always connect the positive clamp to the positive terminal first, then the negative to an unpainted metal ground on the dead car. After the engine starts, let it run for 20-30 minutes to recharge the battery. If the battery repeatedly dies, it likely needs testing or replacement by a professional.
Key Takeaways
- Safety is paramount: Always wear eye protection and ensure cables are clear of moving parts and the battery.
- Connection order is critical: Positive-to-positive first, then negative-to-ground on the dead vehicle to minimize spark risk.
- Know your battery type: Modern Elantras often use AGM batteries; consult your owner’s manual for specific instructions.
- Post-jump procedure matters: Drive for at least 20 minutes after starting to recharge the battery properly.
- A repeated dead battery is a symptom: It usually indicates a failing battery, a faulty alternator, or a parasitic draw that needs diagnosis.
📑 Table of Contents
- Introduction: Don’t Panic, You Can Handle This
- Understanding Your Elantra’s Battery and Why It Dies
- Safety First: The Non-Negotiable Rules
- Gathering Your Tools: The Right Gear for the Job
- The Step-by-Step Jump Start Process: Order is Everything
- After the Jump: Crucial Next Steps
- When Jump Starting Isn’t Enough: Battery Replacement and Professional Help
- Conclusion: Confidence Through Knowledge
Introduction: Don’t Panic, You Can Handle This
There you are, running late for an important meeting or a family dinner. You get in your reliable Hyundai Elantra, turn the key (or press the start button), and all you hear is a dreaded click-click-click or a slow, labored crank. Your heart sinks. A dead battery is one of the most common—and frustrating—car problems. But before you call for a costly tow or a ride-share, take a breath. Jump starting your Elantra is a skill every driver should have. It’s not magic; it’s simple science and procedure. This guide will walk you through every single step, from the absolute basics of what’s happening under the hood to the precise, safe method for getting your Elantra roaring again. We’ll cover modern considerations for your specific model, common mistakes to avoid, and what to do when the jump start isn’t a permanent fix. By the end, you’ll be prepared and confident.
Understanding Your Elantra’s Battery and Why It Dies
Before we touch a single cable, it helps to understand the “why.” Your Hyundai Elantra’s battery is a 12-volt lead-acid (or AGM) reservoir of chemical energy. Its sole job is to provide a massive burst of power to the starter motor to crank the engine. Once the engine is running, the alternator takes over, powering all the car’s electronics and recharging the battery. A battery dies when its charge is depleted. This happens for several reasons:
Visual guide about How to Jump Start a Hyundai Elantra
Image source: i.ytimg.com
- Parasitic Drain: Something (a faulty relay, a glovebox light left on, an aftermarket alarm) is drawing power even when the car is off.
- Old Age: Batteries have a lifespan, typically 3-5 years. Extreme temperatures accelerate wear.
- Short Trips: If you only drive a few miles at a time, the alternator may not have enough time to fully recharge the battery after starting the car. Regular, longer drives are important for battery health, a principle that also applies to maintaining proper oil levels in your Elantra for overall engine longevity.
- Extreme Cold: Cold weather thickens engine oil and reduces a battery’s available cranking power by up to 50%.
- A Faulty Alternator: If the alternator isn’t charging the battery while you drive, the battery will slowly drain until it’s empty.
Knowing it’s likely a charge issue and not an instant “brick” is reassuring. A jump start provides the missing external charge to get the engine turning, allowing the alternator to take over the job of recharging.
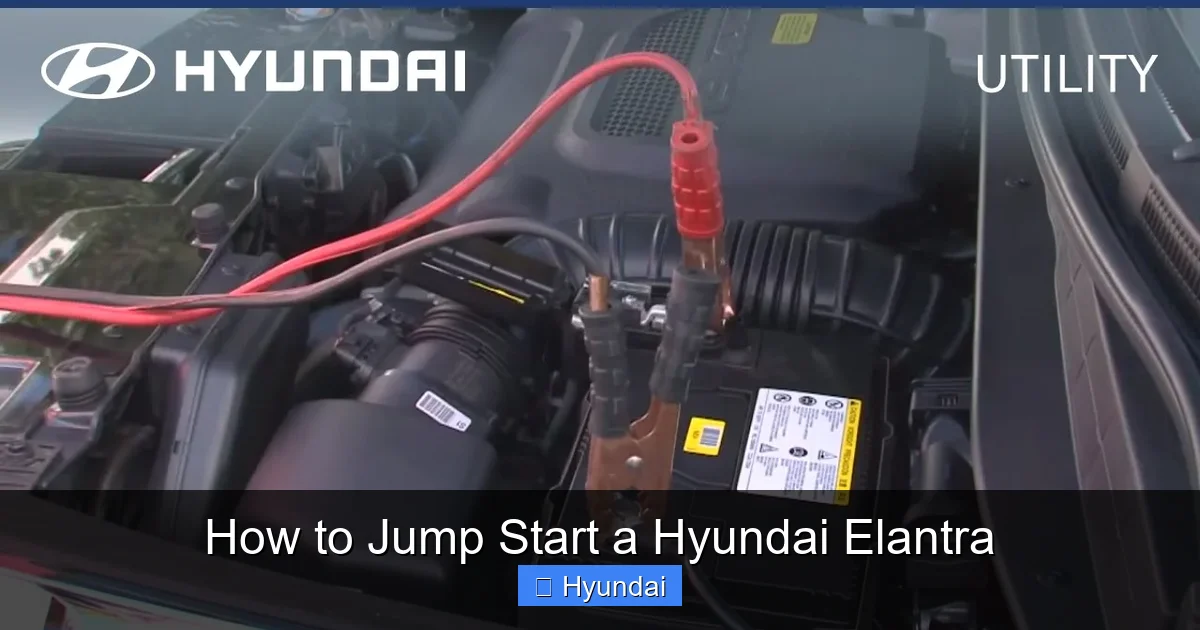
Locating the Battery and Terminals in Your Elantra
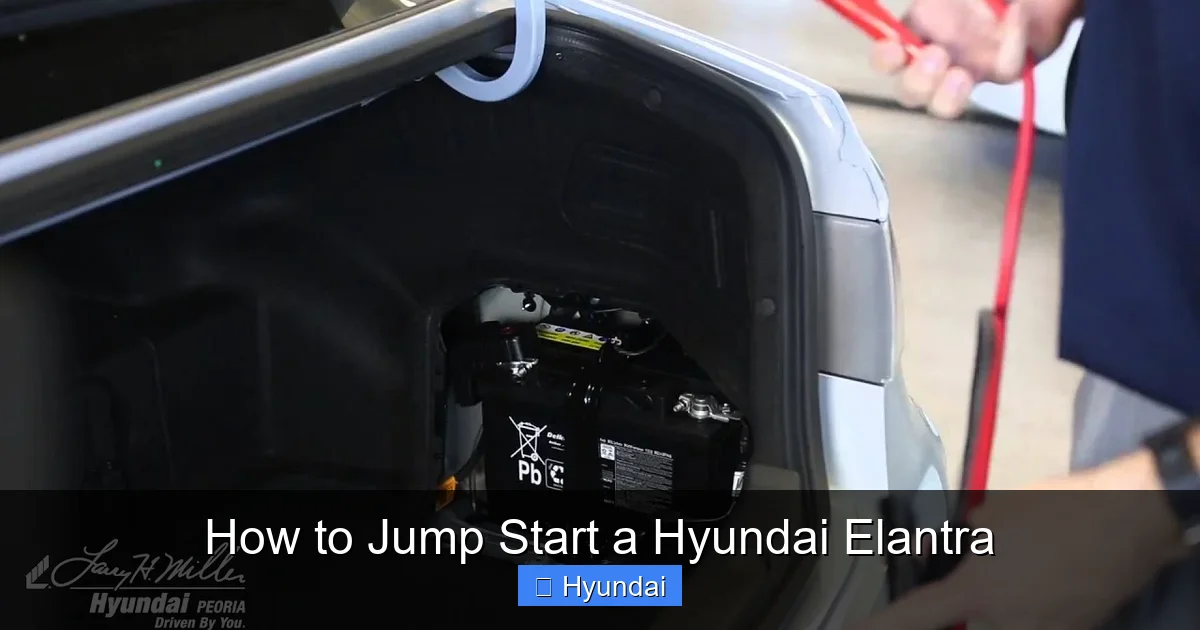
In most Hyundai Elantra models (2010s-2020s), the battery is located in the engine bay, but not always in the traditional front corner. Many recent models place it in the trunk, under a cover panel near the spare tire, to improve weight distribution and interior space. Your first task is to find it. Consult your owner’s manual—it will have a diagram. Look for a rectangular black box with two large metal terminals, one marked with a plus (+) sign (red) and one with a minus (-) sign (black or uncovered). The positive terminal is almost always covered with a red plastic cap. Familiarize yourself with these terminals. You’ll be connecting clamps to them.
Safety First: The Non-Negotiable Rules
Jump starting involves high electrical current. A car battery can deliver hundreds of amps. A spark near a battery can cause an explosion, as batteries emit flammable hydrogen gas, especially if they are old or damaged. Following these rules is not optional.
Visual guide about How to Jump Start a Hyundai Elantra
Image source: i.ytimg.com
- Read Both Manuals: Check your Hyundai Elantra owner’s manual first. Some vehicles have specific instructions or even prohibit jump starts (some hybrids have special procedures). Also, check the manual for the vehicle providing the jump (the “donor” car).
- Park Safely: Park the donor car close enough for the cables to reach, but do not let the vehicles touch. Turn off both engines, engage parking brakes on both, and remove the keys. For automatic transmissions, ensure they are in “Park” (P). For manuals, put them in neutral.
- Eye and Hand Protection: Always wear safety glasses and gloves. Battery acid is corrosive.
- Inspect the Dead Battery: Look for visible damage—cracks in the case, bulging sides, or leaking acid. If you see any of this, DO NOT ATTEMPT A JUMP START. The battery is unsafe and must be replaced professionally.
- Keep Cables Clear: Ensure jumper cable clamps will not come near the engine’s moving parts (fan, belts) once the engines are running.
- No Smoking: Absolutely no flames or sparks near the battery.
Understanding Your Elantra’s Electrical System
Modern cars like the Elantra are packed with sensitive electronics—engine control units (ECUs), infotainment systems, sensors. A voltage surge from improper jump starting can fry these components, leading to a repair bill that dwarfs the cost of a new battery. This is why the correct connection sequence is so vital. It’s designed to route the surge away from the dead car’s electronics. The final connection on the dead car’s side is made to a clean, unpainted metal surface away from the battery (the “ground”). This creates a safer path for the initial spark.
Gathering Your Tools: The Right Gear for the Job
You need two primary things: a set of jumper cables and a donor vehicle.
Visual guide about How to Jump Start a Hyundai Elantra
Image source: i.ytimg.com
Jumper Cables: Size Matters
Not all cables are equal. They are rated by gauge (thickness). For a Hyundai Elantra, you want at least 4-gauge cables. Thicker (lower number) cables carry more current more efficiently, making the process faster and more reliable. Longer cables (12-20 feet) give you more flexibility in parking. Heavy-duty clamps with solid copper jaws are a must for a good connection. If you don’t own cables, consider investing in a quality set. They are a one-time purchase that pays for itself in peace of mind. Alternatively, a portable jump starter (battery booster pack) is an excellent standalone tool that eliminates the need for a second vehicle.
The Donor Vehicle: A Healthy Battery is Key
The car providing the jump must have a fully charged, healthy battery. A weak donor battery won’t help. A large engine vehicle (like a V8 truck) is ideal, as its battery has more reserve power, but any running gasoline vehicle will work. Do not use a mini-truck or motorcycle battery. Also, avoid using another hybrid or electric vehicle unless the manufacturer explicitly states it’s safe, as their high-voltage systems can be complicated. A standard gasoline sedan or SUV is perfect.
Optional but Helpful Gear
- A wire brush or fine-grit sandpaper to clean corroded terminals.
- A baking soda and water solution to clean terminal corrosion safely.
- A battery terminal protector spray to prevent future corrosion.
The Step-by-Step Jump Start Process: Order is Everything
Now, let’s do this. Follow these steps exactly in order. I’ll refer to the dead Hyundai Elantra as “Car A” and the working donor car as “Car B.”
Step 1: Preparation and Positioning
Park Car B facing Car A, about 18 inches apart, but not touching. Pop both hoods. If your Elantra’s battery is in the trunk, access it there. Turn off all accessories in both cars—radio, lights, A/C, defrosters. Remove the keys. Engage parking brakes. This is your final safety check.
Step 2: Identify Terminals and Clean If Necessary
On Car A (Elantra), identify the positive (+) and negative (-) terminals. If they are covered in white or blue crusty corrosion, clean it off. A mixture of baking soda and water applied with a brush works wonders. Corrosion creates resistance and can prevent a good connection. Ensure the terminals are as clean and shiny as possible. Do the same for Car B’s terminals if needed.
Step 3: Connect the First Clamp (Positive)
Take the red positive (+) clamp from the jumper cables. Attach it firmly to the positive (+) terminal on Car A’s (Elantra) battery. Make sure it has a solid metal-to-metal connection and won’t slip off.
Step 4: Connect the Second Clamp (Positive to Donor)
Take the other red positive (+) clamp and attach it to the positive (+) terminal on Car B’s (donor) battery. This completes the positive side of the circuit.
Step 5: Connect the Third Clamp (Negative to Donor)
Now, take the black negative (-) clamp and attach it to the negative (-) terminal on Car B’s (donor) battery. At this point, the circuit is almost complete, but the final connection on the dead car will create a small, controlled spark away from the battery.
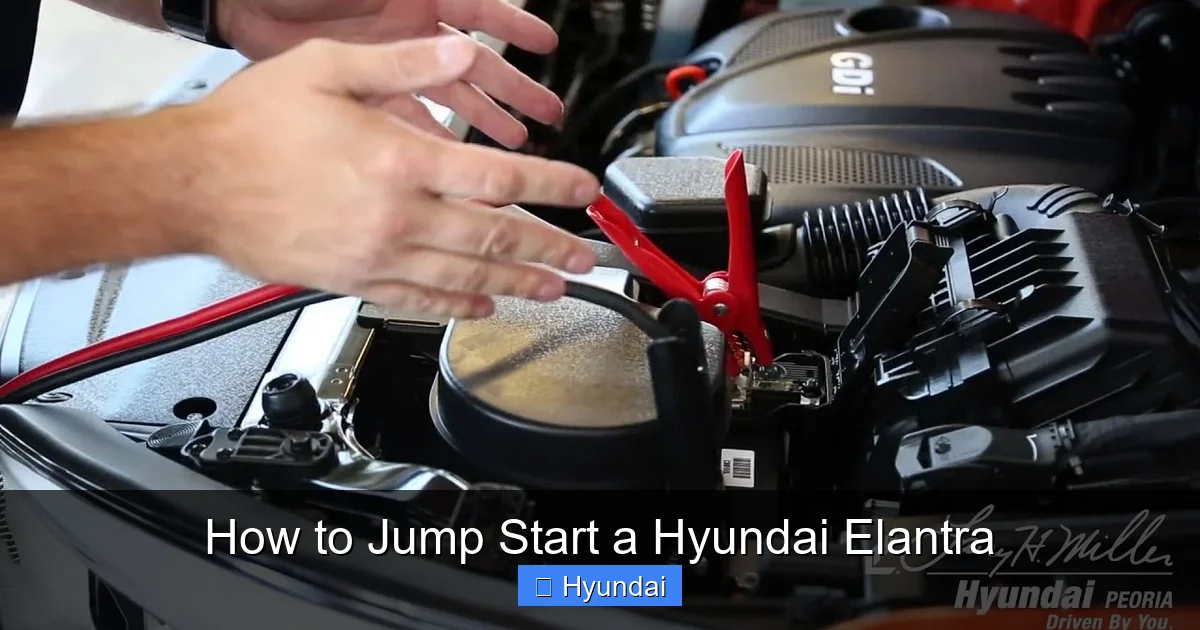
Step 6: Connect the Final Clamp (Negative Ground on Elantra)
This is the most important step for safety. Take the final black negative (-) clamp. Do NOT connect it to the negative terminal on Car A’s (Elantra) battery. Instead, find a clean, unpainted, shiny metal surface on the Elantra’s engine block or chassis. Look for a bolt, bracket, or engine hanger that is bare metal. This is your “ground.” The connection point should be as far from the battery as the cable allows. This ensures any spark from the final connection occurs away from the battery, where explosive hydrogen gas might be present. A common spot is a bolt on the engine block or a large bolt on the strut tower. Scrape away any paint or rust to expose clean metal. Clamp it securely.
Step 7: Start the Donor Car
Start Car B’s engine and let it idle at a moderate RPM (around 1500-2000 rpm). This will maximize the alternator’s output and begin charging Car A’s battery. Let it run for about 30-60 seconds. You can lightly rev the donor engine to about 2000 rpm for 30 seconds to push more current through.
Step 8: Start the Hyundai Elantra
Now, try to start Car A (your Elantra). Turn the key to “Start” or press the start button. It may crank slowly at first. Do not crank the engine for more than 5-6 seconds at a time. If it doesn’t start, wait 10-15 seconds and try again. The donor car should remain running. After 2-3 attempts, if it still doesn’t start, stop. You may have a bigger problem (bad starter, completely sulfated battery) or a poor connection. Recheck all clamps for tightness and clean metal contact.
Step 9: Success! Now, Remove the Cables in Reverse Order
Once the Elantra starts and is running smoothly (it might idle a bit rough at first), you must remove the cables in the exact reverse order you connected them. This prevents any accidental shorting.
- Remove the black clamp from the Elantra’s ground point.
- Remove the black clamp from the donor car’s negative terminal.
- Remove the red clamp from the donor car’s positive terminal.
- Finally, remove the red clamp from the Elantra’s positive terminal.
Do not let any clamps touch each other or any metal surface on either car during removal. Coil the cables neatly away from the engines.
Step 10: Keep It Running
Leave your Elantra’s engine running. Do not turn it off yet. You need to drive it to allow the alternator to fully recharge the battery. Idling in the driveway for 10 minutes is not enough. The battery was deeply discharged and needs a sustained charge.
After the Jump: Crucial Next Steps
Your Elantra is running. Great! But the job isn’t done. What you do now determines whether you’ll be stranded again tomorrow or next week.
Let It Run and Drive
As mentioned, drive your Elantra for at least 20-30 minutes of continuous driving. Highway speeds are best, as they make the alternator spin faster and produce more charging power. Avoid stop-and-go traffic for this initial drive. This replenishes the battery’s charge. If you have a short commute, consider taking a longer route home. Remember, a battery’s charge is also related to the vehicle’s overall health; for instance, ensuring your Elantra has the correct fuel level prevents the fuel pump from working too hard and adding unnecessary strain to the electrical system.
Check for the Root Cause
A single jump start due to leaving the lights on is a one-time mistake. But if your Elantra’s battery dies again within a few days or weeks, you have a problem that a jump won’t fix. You need to diagnose the cause:
- Test the Battery: Take the battery to any auto parts store (AutoZone, Advance, O’Reilly). They will test it for free and tell you if it’s bad or just low on charge.
- Check the Alternator: If the battery tests good but dies again quickly, the alternator may not be charging. A shop can test output voltage.
- Check for Parasitic Draw: A hidden electrical leak can drain a good battery overnight. This requires a professional diagnostic.
Consider a Trickle Charger
If you don’t drive your Elantra often (less than once a week), invest in a battery trickle charger or maintainer. You plug it into a wall outlet and it provides a small, steady charge that keeps the battery at peak condition without overcharging. It’s an excellent preventative tool, similar to how using the correct oil for your specific Elantra model year prevents engine wear.
When Jump Starting Isn’t Enough: Battery Replacement and Professional Help
Sometimes, a jump start is just a temporary band-aid. Here’s when you need to move to the next step.
Signs of a Failed Battery
Look for these red flags:
- The engine cranks very slowly, even after a recent jump.
- The battery case is swollen or bulging.
- You see visible corrosion that returns quickly after cleaning.
- The battery is over 4 years old.
- The “check battery” or “check engine” light is on.
Choosing the Right Replacement Battery
When buying a new battery, you need the right size, type, and Cold Cranking Amps (CCA). The easiest way is to:
- Look at the label on your current battery—it will have a group number (e.g., 48, 49, 51R).
- Use an online retailer or auto parts store lookup tool with your Elantra’s year, make, and model.
- Consider an AGM (Absorbent Glass Mat) battery if your Elantra originally had one or if you want a higher-performance, maintenance-free option with better longevity, especially for models with start-stop systems.
Installation is usually simple, but if you’re not comfortable, most shops will install the battery you purchase for a small fee. They will also properly dispose of your old one.
When to Call a Professional
Call a tow truck or mobile mechanic if:
- The battery is damaged, leaking, or swollen.
- You followed all steps and the car still won’t start after multiple attempts.
- You hear a rapid clicking sound when turning the key—this can indicate a bad starter or a severe battery connection issue.
- You are uncomfortable or unsafe performing any step.
For complex electrical issues or if your Elantra is a hybrid (which has a high-voltage battery system and a standard 12V battery), professional diagnosis is essential. The procedures for hybrids can differ, and you should always consult the specific hybrid owner’s manual first.
Conclusion: Confidence Through Knowledge
Jump starting your Hyundai Elantra doesn’t have to be a stressful, mysterious event. It’s a logical sequence of steps built on a foundation of safety. Remember the golden rules: connect positive first, connect the final negative to a ground on the dead car, and remove in reverse. Understand that a jump start is a rescue, not a repair. If your battery leaves you stranded once, it might just be an anomaly. If it happens repeatedly, treat it as a symptom and diagnose the underlying cause—whether it’s the battery itself, the alternator, or an electrical gremlin. By mastering this skill, you save time, money, and the hassle of being stranded. You also gain a deeper understanding of your vehicle. Now, keep a quality set of jumper cables in your trunk, or even better, a portable jump starter. You’ll be glad you did the next time you hear that telltale click.
Frequently Asked Questions
What happens if I connect the jumper cables in the wrong order?
Connecting the clamps incorrectly, especially attaching the final negative clamp to the dead battery’s negative terminal, creates a high risk of sparks near the battery. This can ignite explosive hydrogen gas, causing the battery to explode. It can also send a power surge through the car’s computer systems, causing severe electronic damage. Always follow the positive-positive, then negative-to-ground sequence.
Can I jump start a Hyundai Elantra Hybrid?
Yes, but with extreme caution and specific steps. The Elantra Hybrid has a standard 12-volt battery (like any car) that powers the accessories and starter, separate from the high-voltage hybrid battery. You can jump start the 12V battery following the standard procedure. However, you must NEVER attempt to jump start the high-voltage hybrid battery. Always consult your hybrid owner’s manual first, as some models have specific locations for the 12V jump start terminals in the engine bay that are safer to use than directly on the battery.
How many times can I try to start the car before it’s a problem?
Limit each crank attempt to 5-6 seconds. If the engine doesn’t start, wait at least 10-15 seconds before trying again. This prevents overheating the starter motor and gives the donor battery a moment to recover. After 2-3 attempts, if the car still doesn’t start, stop. Continuing will likely not help and could damage components. Recheck all your connections for tightness and cleanliness.
My battery terminals are corroded. Can I still jump start it?
Yes, but you must clean the corrosion first. Corrosion (white/blue powder) creates electrical resistance, preventing a good connection. Disconnect the battery cables (negative first), then clean the terminals and cable ends with a baking soda and water solution and a wire brush. Rinse with water and dry thoroughly. Reconnect the cables (positive first) before attempting the jump start. For future prevention, apply a thin layer of dielectric grease or use a terminal protector spray.
Is it better to use a battery charger instead of a jump start?
A battery charger is a great alternative, especially if you have time. It provides a slow, steady charge that is gentler on the battery and the car’s electronics. It’s ideal for a battery that is just low, not completely dead. A jump start provides a massive, instantaneous current to crank the engine. If you have a charger and several hours (or overnight), using it is perfectly fine. A jump start is for when you need to be on the road immediately.
My check engine light came on after a jump start. Is that normal?
It can be. A severely discharged battery can cause voltage drops that confuse the car’s computer, temporarily illuminating the check engine light. Once the battery is fully recharged by driving, the light may go off on its own after a few drive cycles. However, if the light persists, it indicates a stored trouble code that needs to be read with a diagnostic scanner. It could be unrelated, or it could point to an issue with the charging system (alternator) that caused the battery to die in the first place. Have the codes checked to be safe.