
How to Blow Out Rv Water Lines
Contents
- 1 Key Takeaways
- 2 📑 Table of Contents
- 3 Why Blowing Out RV Water Lines Matters
- 4 When Should You Blow Out RV Water Lines?
- 5 Tools and Supplies You’ll Need
- 6 Step-by-Step Guide to Blowing Out RV Water Lines
- 7 Safety Tips and Common Mistakes to Avoid
- 8 Alternative Methods and When to Use Them
- 9 Maintaining Your RV Plumbing Year-Round
- 10 Conclusion
- 11 Frequently Asked Questions
Blowing out RV water lines is a crucial step in winterizing your recreational vehicle to prevent costly freeze damage. This guide walks you through the entire process—from gathering supplies to using an air compressor—ensuring your plumbing stays safe during cold months.
Key Takeaways
- Prevent freeze damage: Blowing out water lines removes standing water that can expand and crack pipes when temperatures drop below freezing.
- Use the right tools: An air compressor with a regulator, blow-out plug, and safety gear are essential for a safe and effective process.
- Drain all water sources first: Always empty tanks, faucets, and appliances before blowing air through the system to avoid trapping moisture.
- Work systematically: Start from the farthest fixture and work backward to ensure every line is cleared of water.
- Check for leaks: After blowing out lines, inspect connections and valves for signs of wear or damage that could cause problems later.
- Don’t skip the antifreeze step: For complete protection, follow up with RV antifreeze in low-point drains and toilet traps.
- Safety first: Wear eye protection and never exceed 50 PSI when blowing out lines to avoid injury or system damage.
📑 Table of Contents
Why Blowing Out RV Water Lines Matters
Imagine pulling your RV out of storage after a long, cold winter—only to discover cracked pipes, burst fittings, or a flooded underbelly. It’s a nightmare no camper wants to face, and it’s entirely preventable. One of the most effective ways to protect your RV’s plumbing system during freezing temperatures is by blowing out the water lines. This simple yet critical maintenance task removes standing water from your freshwater system, preventing it from expanding and causing damage when it freezes.
Water expands by about 9% when it freezes. That might not sound like much, but inside the narrow confines of your RV’s water lines, that expansion creates immense pressure—enough to crack plastic pipes, split rubber hoses, or damage valves and seals. Even a small amount of trapped water in a low spot can lead to big problems. Whether you’re storing your RV for the winter or preparing for a cold-weather trip, blowing out the water lines is a smart, proactive step that saves time, money, and stress down the road.
Many RV owners assume that simply draining the tanks and opening faucets is enough. While that helps, it’s not foolproof. Water can cling to the sides of pipes, hide in traps, or remain in low points due to gravity. That’s where blowing out the lines with compressed air comes in. It forces any remaining moisture out of the system, giving you peace of mind that your plumbing is truly dry. Plus, it’s a relatively quick process once you know what you’re doing—usually taking less than 30 minutes with the right tools.
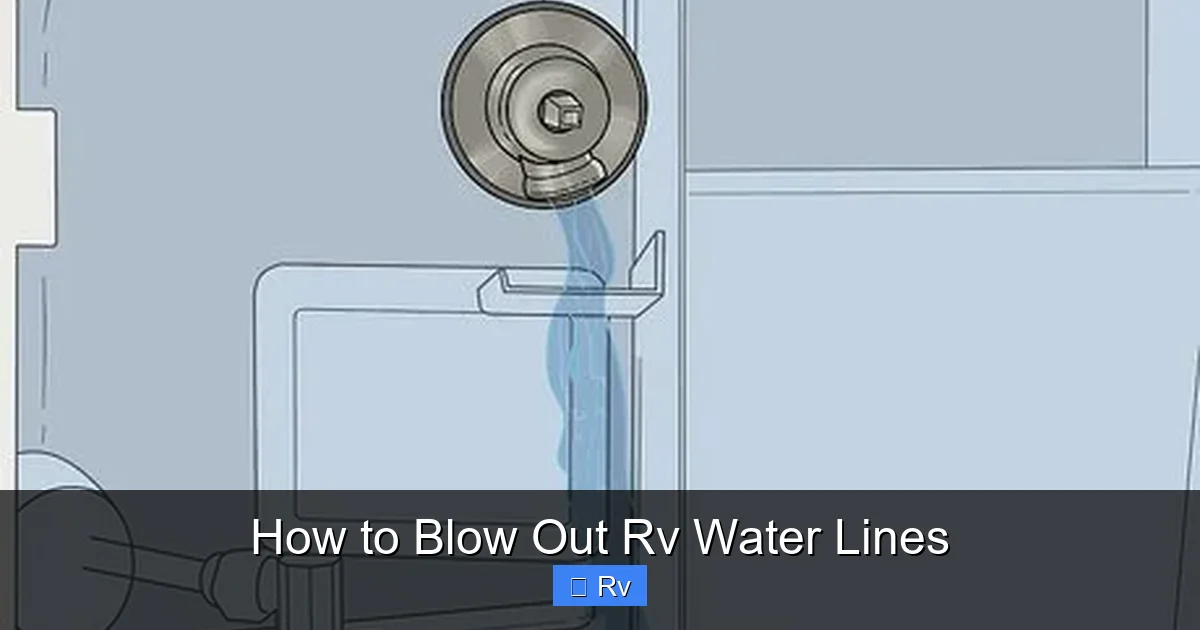
When Should You Blow Out RV Water Lines?
The best time to blow out your RV water lines is before the first hard freeze of the season. In most regions, this means late fall—typically October or November, depending on your climate. If you live in a mild area where temperatures rarely dip below 32°F (0°C), you might get away with less frequent winterizing. But if you’re in a colder zone or plan to store your RV outdoors, don’t wait. A single night of sub-freezing temps can do serious damage.

Visual guide about How to Blow Out Rv Water Lines
Image source: camperupgrade.com
You should also consider blowing out the lines if you’re preparing for an extended trip in cold weather. Even if you’re not storing the RV long-term, overnight lows can still pose a risk—especially if you’re boondocking or parked in an exposed area. Some RVers blow out their lines at the end of each camping season, while others do it monthly during winter months if they use their RV regularly. The key is consistency: don’t assume your system stayed dry just because it didn’t freeze last week.
Another good rule of thumb? Blow out the lines whenever you notice moisture in the system after draining. If water still trickles from faucets or you hear gurgling in the pipes, there’s likely residual water that needs to be cleared. And if you’ve recently repaired or replaced any part of your plumbing, it’s wise to blow out the lines afterward to ensure no water was introduced during the process.
Tools and Supplies You’ll Need
Before you start, make sure you have the right equipment. Trying to blow out RV water lines without the proper tools can be frustrating—or even dangerous. Here’s a checklist of what you’ll need:

Visual guide about How to Blow Out Rv Water Lines
Image source: wikihow.com
Essential Tools
- Air compressor: A portable electric or gas-powered compressor with at least 2–3 CFM (cubic feet per minute) output. Small pancake compressors work well for most RVs.
- Blow-out plug or adapter: This screws into the city water inlet and connects to your air compressor hose. It often includes a pressure relief valve for safety.
- Air hose: A sturdy, flexible hose that connects the compressor to the blow-out plug. Make sure it’s long enough to reach comfortably.
- Pressure regulator: Built into most blow-out plugs, but double-check. You never want to exceed 50 PSI when blowing out lines.
- Safety gear: Safety glasses and gloves are a must. Compressed air can cause injury if it hits your eyes or skin.
Additional Supplies
- RV antifreeze (non-toxic, RV-safe): For final protection in drains and traps.
- Bucket or container: To catch any water that drains during the process.
- Wrench or pliers: For loosening drain plugs or fittings if needed.
- Towels or rags: For wiping up spills and drying connections.
- Flashlight: To inspect hard-to-see areas under the RV or inside cabinets.
You can find most of these items at hardware stores, RV supply shops, or online. A basic blow-out kit typically costs between $30 and $60 and includes the plug, hose, and regulator. Investing in quality tools pays off in reliability and safety.
Step-by-Step Guide to Blowing Out RV Water Lines
Now that you’re prepared, let’s walk through the process step by step. Follow these instructions carefully to ensure every line is cleared and your RV stays protected.
Visual guide about How to Blow Out Rv Water Lines
Image source: wikihow.com
Step 1: Drain All Water Sources
Start by completely draining your freshwater system. Open all faucets—both inside and outside—including the shower, sink, and outdoor shower if you have one. Don’t forget the toilet! Flush it several times to empty the bowl and tank. Next, locate and open all low-point drain valves. These are usually found under the RV and labeled “hot” and “cold.” Let the water flow out until it stops.
Don’t skip the water heater. Turn it off and let it cool completely. Then open the pressure relief valve and drain plug to empty it. If you have a bypass valve (most modern RVs do), make sure it’s set to bypass so antifreeze won’t enter the heater later. Finally, drain any external water sources like ice makers, washing machines, or water filters.
Step 2: Turn Off Water Pump and Disconnect Hoses
Switch off the water pump at the control panel or breaker. This prevents it from running dry and burning out. Disconnect any external water hoses, including the city water connection and freshwater fill hose. Store them indoors if possible to prevent freezing.
Step 3: Attach the Blow-Out Plug
Remove the cap from the city water inlet and screw in the blow-out plug. Make sure it’s tight to prevent air leaks. Connect your air hose to the plug and the other end to the compressor. Double-check all connections before turning on the compressor.
Step 4: Set the Air Pressure
Set your compressor to a maximum of 50 PSI. Most experts recommend 30–40 PSI for safety. Higher pressure can damage seals or push water into places it shouldn’t go. If your blow-out plug has a built-in regulator, use that. Otherwise, adjust the compressor’s output manually.
Step 5: Blow Out the Lines
Turn on the compressor and let it build pressure. Once it’s ready, slowly open the blow-out plug valve. You’ll hear air rushing through the system. Now, go inside the RV and open each faucet one at a time—starting with the one farthest from the water inlet (usually the bathroom sink or shower). Hold it open until you hear only air coming out, not water. Repeat for every faucet, including outdoor showers and toilet flush valves.
After all faucets are clear, open the low-point drains again. You may see a little more water come out—that’s normal. Let air blow through them for 30–60 seconds to ensure they’re dry.
Step 6: Add Antifreeze to Drains and Traps
Even after blowing out the lines, small amounts of water can remain in P-traps under sinks and showers. Pour 4–6 ounces of RV antifreeze into each drain to protect them. Don’t forget the toilet bowl—add a cup of antifreeze and flush it to coat the trap. This extra step is crucial for complete freeze protection.
Step 7: Final Checks and Cleanup
Turn off the compressor and disconnect the hose. Remove the blow-out plug and replace the city water cap. Wipe down all connections and store your tools. Do a final walk-through to ensure everything is secure and dry. You’re done!
Safety Tips and Common Mistakes to Avoid
Blowing out RV water lines is generally safe when done correctly, but there are risks if you rush or skip steps. Here are some key safety tips and pitfalls to watch out for:
Never Exceed 50 PSI
High pressure can rupture pipes, damage valves, or cause fittings to blow off. Always use a regulator and monitor the gauge. If you’re unsure, start low and increase gradually.
Wear Eye Protection
Compressed air can propel debris or water droplets at high speed. Safety glasses are non-negotiable.
Don’t Blow Out a Hot Water Heater
Always bypass the water heater before blowing out lines. If air goes through it while it’s full, you could damage the tank or heating elements.
Avoid Skipping Faucets
It’s easy to forget an outdoor shower or a rarely used sink. Make a checklist and go room by room.
Don’t Forget the Toilet
The toilet flush valve holds water. Open it fully and let air blow through until it’s dry.
Check for Leaks Afterward
Once you’re done, inspect all connections for signs of wear or damage. A small leak now can become a big problem later.
Alternative Methods and When to Use Them
While blowing out lines with air is the most thorough method, it’s not the only option. Some RVers prefer using antifreeze to winterize their systems. This involves pumping non-toxic antifreeze through the entire plumbing system instead of using air. It’s effective but more expensive and requires careful disposal.
Another method is the “drain and disconnect” approach—simply draining all water and leaving faucets open. This works in mild climates but isn’t reliable in areas with hard freezes. For maximum protection, many experts recommend combining methods: blow out the lines first, then add antifreeze to traps and drains.
If you’re not comfortable doing it yourself, consider hiring a professional. Many RV dealers and service centers offer winterizing packages that include blowing out lines, adding antifreeze, and inspecting the system. It’s a small price to pay for peace of mind.
Maintaining Your RV Plumbing Year-Round
Blowing out water lines is just one part of RV plumbing care. To keep your system in top shape, perform regular maintenance throughout the year. Inspect hoses and fittings for cracks or leaks. Replace worn seals and gaskets. Keep the water filter clean and replace it as recommended. And always use a water pressure regulator when connecting to city water to prevent surges that can damage pipes.
During the camping season, flush your freshwater tank periodically to remove sediment and bacteria. Use a tank cleaner or vinegar solution every few months. And if you store your RV for long periods, consider using a dehumidifier or moisture absorber to prevent condensation inside the plumbing.
By taking these steps, you’ll extend the life of your RV’s plumbing system and avoid unexpected repairs. A little effort now saves a lot of hassle later.
Conclusion
Blowing out RV water lines is a simple, effective way to protect your investment from freeze damage. With the right tools and a systematic approach, you can complete the job in under an hour and enjoy worry-free storage or travel all winter long. Remember to drain all water sources first, use safe air pressure, and finish with antifreeze in the drains. And don’t forget safety gear—your eyes and hands will thank you.
Whether you’re a seasoned RVer or a first-time owner, this task is well within your reach. Take the time to do it right, and your RV will reward you with reliable performance season after season. So grab your compressor, follow this guide, and rest easy knowing your water lines are ready for whatever the weather brings.
Frequently Asked Questions
Can I use my car’s air compressor to blow out RV water lines?
Most car compressors don’t provide enough CFM (cubic feet per minute) to effectively clear RV water lines. A dedicated portable compressor with at least 2–3 CFM is recommended for best results.
How much antifreeze do I need after blowing out the lines?
You’ll need about 4–6 ounces per drain (sink, shower) and 1–2 cups for the toilet. A gallon of RV antifreeze is usually enough for a typical RV.
What happens if I don’t blow out my RV water lines?
Trapped water can freeze, expand, and crack pipes, valves, or fittings. This leads to leaks, flooding, and costly repairs when you de-winterize.
Can I blow out RV water lines without a compressor?
It’s not recommended. While some people use manual pumps or shop vacs, they’re less effective and may not remove all moisture. An air compressor is the safest and most reliable method.
Is it okay to blow out lines if the water heater is on?
No. Always turn off and bypass the water heater before blowing out lines. Air pressure can damage the tank or heating elements if water remains inside.
How often should I blow out my RV water lines?
Once before winter storage is usually sufficient. However, if you use your RV in cold weather, consider blowing out the lines monthly or after any period of disuse in freezing conditions.


