
How to Adjust Jeep Wrangler Headlights
Contents
- 1 Key Takeaways
- 2 📑 Table of Contents
- 3 Why Proper Headlight Aim is Non-Negotiable for Your Wrangler
- 4 Essential Tools and Preparation Before You Start
- 5 Locating the Adjustment Screws on Your Specific Wrangler Model
- 6 The Step-by-Step Adjustment Process: From Setup to Perfection
- 7 Special Considerations: Lifts, LED Upgrades, and Troubleshooting
- 8 Conclusion: A Simple Task with a Major Impact
- 9 Frequently Asked Questions


Properly adjusted headlights are crucial for your safety and the safety of others on the road. Misaligned Wrangler headlights can blind oncoming drivers or leave you in the dark. This guide provides a detailed, model-specific process for adjusting both low and high beams on your Jeep Wrangler, whether you have a JK, JL, or TJ. You’ll learn to locate adjustment screws, use the wall method for precision, and understand how modifications like lifts or new LED headlights affect your aim. With simple tools and patience, you can perform this essential maintenance task yourself.
Few things are as unsettling as driving your trusty Jeep Wrangler down a dark road and realizing your headlights are lighting up the treetops instead of the pavement. Or worse, you get flashed by an oncoming driver because your beams are in their eyes. Proper headlight adjustment isn’t just about convenience; it’s a critical safety issue. For a vehicle designed for adventure and off-road exploration, having your Wrangler’s illumination correctly aimed is non-negotiable. Whether you’ve just installed a set of powerful new LED headlights, lifted your suspension for bigger tires, or simply noticed a change in your beam pattern over time, knowing how to adjust them yourself is an essential skill for any Jeep owner. This comprehensive guide will walk you through the entire process, from finding the adjustment screws on your specific model to achieving a perfect, DOT-compliant beam pattern using the classic “wall method.”
The process is straightforward and requires minimal tools, but it demands patience and attention to detail. We’ll break it down for the modern JK (2007-2018) and JL (2018+) models, as well as touch on the classic TJ/YJ. You’ll learn that adjusting your headlights is a precise task where a quarter-turn of a screw can make a world of difference. We’ll also cover special scenarios, like what to do after a lift kit installation or when switching to brighter aftermarket bulbs. By the end of this article, you’ll have the confidence to ensure your Jeep’s “eyes” are always looking where they should, providing maximum visibility without endangering others.
Key Takeaways
- Safety First: Correct headlight aim prevents you from blinding other drivers and ensures you can see the road clearly at night.
- Model Differences Matter: The location and type of adjustment screws vary significantly between JK, JL, and older TJ Wrangler models.
- Wall Method is Key: The most accurate way to adjust your beams is by projecting them onto a vertical wall at a specific distance.
- Lifts and Upgrades Change Everything: Installing a lift kit or aftermarket headlights almost always necessitates a full headlight re-adjustment.
- Adjust Low Beams First: Always set your low beam pattern before checking or adjusting the high beams, as they share the same assembly.
- Simple Tools Required: You typically only need a screwdriver and some tape or chalk—no special mechanic tools are necessary.
- Check Regularly: Headlight alignment can shift over time due to vibration or minor bumps, so check them at least once a year.
📑 Table of Contents
- Why Proper Headlight Aim is Non-Negotiable for Your Wrangler
- Essential Tools and Preparation Before You Start
- Locating the Adjustment Screws on Your Specific Wrangler Model
- The Step-by-Step Adjustment Process: From Setup to Perfection
- Special Considerations: Lifts, LED Upgrades, and Troubleshooting
- Conclusion: A Simple Task with a Major Impact
Why Proper Headlight Aim is Non-Negotiable for Your Wrangler
Before we get our hands dirty, let’s understand exactly why this matters so much. Your Jeep Wrangler’s headlight system is engineered to produce a very specific beam pattern. The low beams have a sharp, flat cutoff line to illuminate the road ahead without glare for oncoming traffic. The high beams project a focused, centered pattern for maximum distance. When this pattern is altered—by a loose mounting bolt, a suspension modification, or a poorly installed aftermarket headlight—the result is wasted light and dangerous glare.
Driving with misaligned headlights is a leading cause of nighttime accidents. If your beams point too high, you blind other drivers, causing them to swerve or lose sight of the road. If they point too low, you can’t see more than a few car lengths ahead, turning every night drive into a white-knuckle experience. For a Wrangler owner, this is especially critical. You might be navigating backcountry roads, forest service trails, or rocky paths where seeing a branch, pothole, or animal at the last second is vital. Furthermore, improperly aimed headlights can lead to a failed vehicle inspection in many states. Taking 20 minutes to check and adjust them is a small price to pay for safety, legality, and peace of mind.
The “Wall Method”: Your Golden Standard for Accuracy
While some shops use expensive laser alignment tools, the most reliable and accessible method for DIYers is the wall method. It’s based on simple geometry and works perfectly for any vehicle. The core principle is this: you park your Wrangler a precise distance from a flat, vertical surface (like a garage door or a blank wall), mark the projected beam patterns, and then adjust the screws until those marks are in the correct position relative to your headlight’s centerline. We will detail the exact measurements and markings in the step-by-step section. For now, know that this method eliminates guesswork. It turns a subjective “that looks about right” into an objective, measurable task. Always use this method for final verification; aiming by sight from the driver’s seat is notoriously inaccurate.
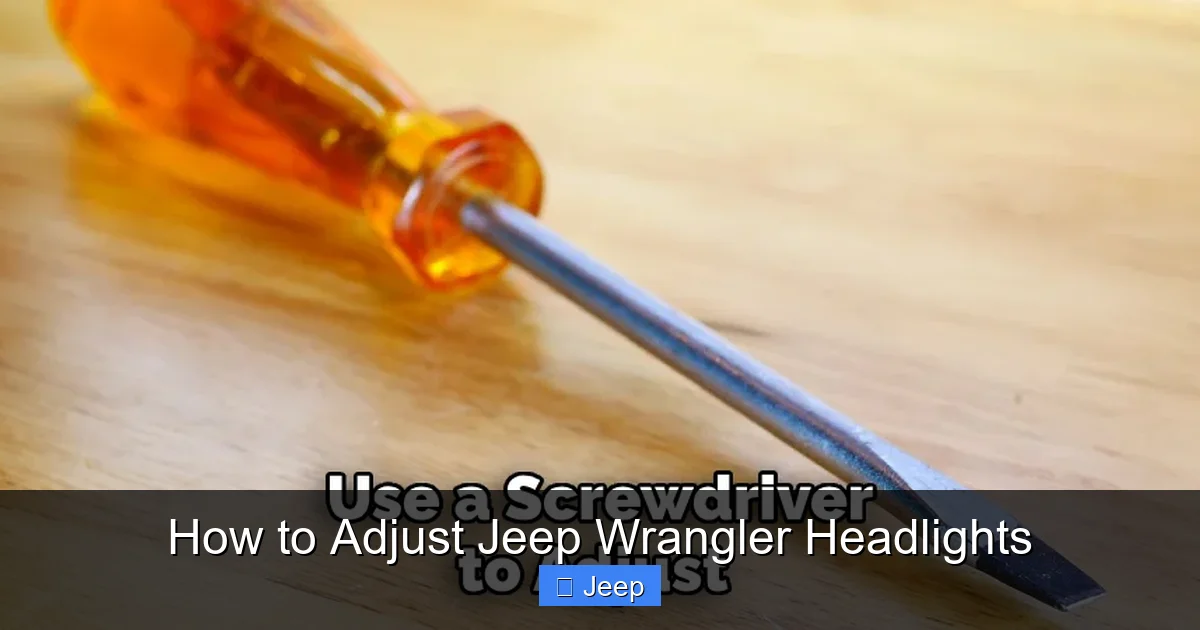
Essential Tools and Preparation Before You Start
Adjusting your Jeep Wrangler headlights is a minimalist’s project. You don’t need a full socket set or a hydraulic lift. Gathering these items beforehand will make the process smooth and efficient.
Visual guide about How to Adjust Jeep Wrangler Headlights
Image source: jeepfixes.com
- A Flathead or Phillips Screwdriver: This is your primary tool. Most Wrangler headlight adjustment screws are designed for a standard screwdriver. Check your specific model; some later JLs might use a Torx bit. Having a set of small screwdrivers on hand is wise.
- A Measuring Tape: You’ll need this to measure the precise distance from your Wrangler to the wall and to mark horizontal and vertical reference lines on that wall.
- Masking Tape or Chalk: Use this to create clear, visible lines on the wall. Masking tape is excellent because it’s easy to remove and doesn’t leave marks.
- A Dark Location: This might sound obvious, but you need to perform the adjustment at night or in a very dark garage. Daylight will wash out the beam patterns, making accurate adjustment impossible.
- A Level Surface and Straight Wall: Park your Wrangler on as level a ground as possible. The wall you use should be smooth, vertical, and free of obstructions like shelves or decorations that could cast shadows.
- Owner’s Manual (Optional but Helpful): It may have factory specifications for headlight aim, though the wall method is universally accepted.
Once you have your tools, prepare your workspace. If using a garage door, park your Wrangler straight and centered, about 10-25 feet from the door (exact distance depends on the method you follow). Ensure your tires are properly inflated and your suspension is at its normal ride height. If you’ve just installed a lift kit or taller tires, this is the perfect time to adjust, but be aware that the suspension may settle over a few hundred miles, requiring a minor readjustment later. Also, make sure your Wrangler’s battery is fully charged or connected, as you’ll need to turn the headlights on and off repeatedly.
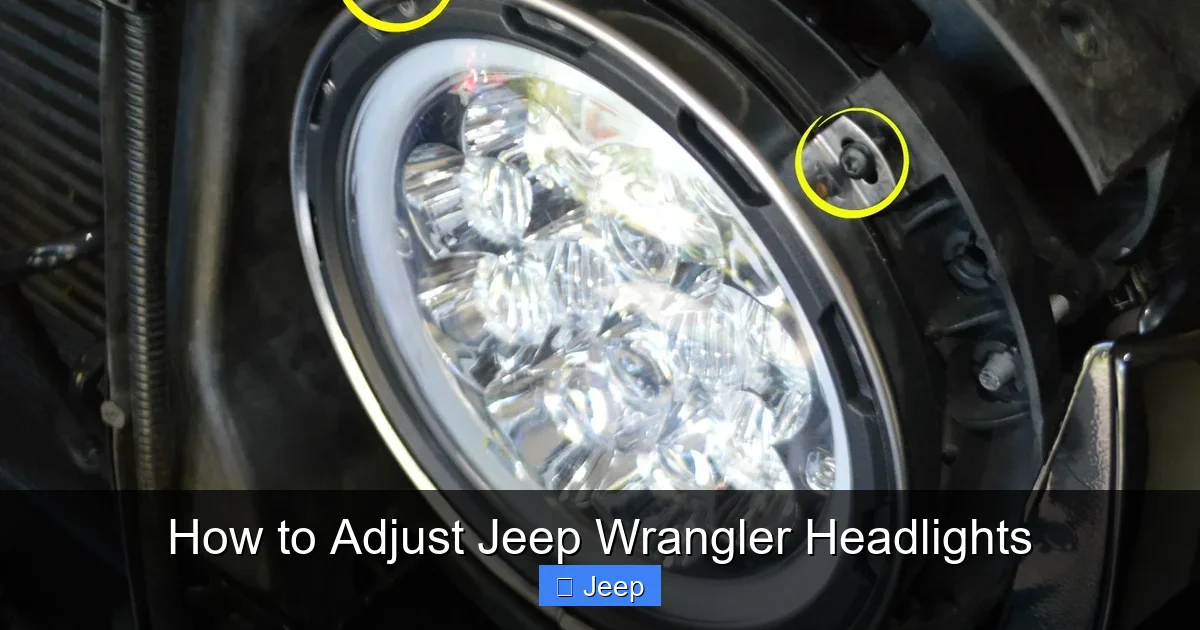
Locating the Adjustment Screws on Your Specific Wrangler Model
This is the first real hands-on step, and it’s where model knowledge becomes crucial. The location and orientation of the adjustment screws are not the same across all Wrangler generations. Opening the hood and identifying these screws correctly is half the battle.
Visual guide about How to Adjust Jeep Wrangler Headlights
Image source: jeepfixes.com
Jeep Wrangler JK (2007-2018) and JKU
On the JK and JKU, the headlight assemblies are relatively accessible from the front of the engine bay. You’ll find two adjustment screws per headlight, typically located on the backside of the headlight housing.
- Vertical Adjustment Screw: This is usually on the top or upper-rear of the housing. It’s often a Phillips-head screw. Turning this screw raises or lowers the beam pattern. Clockwise typically raises the beam, counter-clockwise lowers it, but always verify by testing.
- Horizontal Adjustment Screw: This is located on the side of the housing, usually the outer side (toward the fender). It’s often a hex or Torx head. This screw moves the beam pattern left or right. Turning it will pivot the beam. The goal is to keep the beam centered, not pointing toward the curb or oncoming lanes.
On the JK, you may need to remove the plastic radiator cover or shroud for better access. The screws can be tight and may require a bit of force, but be gentle to avoid stripping the heads. A socket with a screwdriver bit can provide more torque if needed.
Jeep Wrangler JL (2018-Present) and JLU
The JL’s headlight system is more integrated and often features a sealed LED or HID projector unit. Access can be slightly trickier. The adjustment screws are still on the rear of the headlight assembly but may be located under the hood liner or behind other components.
- Vertical Adjustment: Look for a small screw, often a Torx T20 or T25, near the top-center of the headlight’s back.
- Horizontal Adjustment: This screw is typically on the inner side of the headlight (closer to the grille) on JL models. It might be harder to reach. You may need to use an extension bar on your socket or a flexible screwdriver.
For JLs with factory LED headlights, the adjustment process is identical, but the screws can be more delicate. Consult your owner’s manual for any JL-specific instructions or diagrams. Some JL trims may have headlights that require removing the entire front grille assembly for full access, which is a more involved process. However, most adjustments can be done from the engine bay with patience.
Jeep Wrangler TJ/YJ (1997-2006)
If you’re still rocking a classic TJ or YJ, your headlights are the older, round sealed-beam style. These are much simpler. There is typically one large nut on the back of the headlight that controls both vertical and horizontal aim. Loosening this nut allows you to physically pivot the entire headlight assembly within its mounting bracket. You’ll make your adjustments by moving the whole housing, then retightening the nut. There is no separate screw for each axis. This method is less precise but effective. Be careful not to overtighten and crack the headlight lens.
Regardless of your model, once you’ve identified the screws, give them a gentle turn to feel their range of motion. Do not force them once they become tight, as you’ve reached the end of their adjustment travel. If your headlights seem to have no adjustment left, it may be because the mounting hardware is loose or damaged, which needs repair before proper alignment is possible.
The Step-by-Step Adjustment Process: From Setup to Perfection
Now for the main event. Follow these steps meticulously for a perfect beam pattern. The process is the same for all models once you’ve found the screws.
Visual guide about How to Adjust Jeep Wrangler Headlights
Image source: jeepfixes.com
Step 1: Prepare Your Wrangler and the Test Wall
Park your Wrangler on a level surface, facing a flat, vertical wall. A garage door works perfectly. The distance from the front of your Wrangler to the wall should be 25 feet (7.6 meters) for the most accurate results. If space is limited, 10-15 feet can be used, but the 25-foot standard is ideal. Ensure your Wrangler’s tires are straight, and the steering wheel is centered. Turn off all lights except the headlights. If your Wrangler has fog lights, turn them off too.
On the wall, you need to create two reference marks:
- Centerline: Measure the height from the ground to the exact center of your headlight lens (on the front of your Wrangler). Mark this same height on the wall with a horizontal line of tape. This is your “headlight center height” reference.
- Vertical Centerline: Find the exact center point between your two headlights on the front bumper. Measure from this center point to the wall. Mark a vertical line on the wall directly in front of this center point. This helps ensure your beams are symmetric.
Step 2: Project and Mark the Initial Beam Pattern
With your Wrangler parked and the setup complete, turn on your low beam headlights only. Do not use high beams for this initial marking. Go to the wall and observe the beam pattern. You should see a distinct, sharp cutoff line on the top of each beam. The pattern should be mostly flat and horizontal, with the brightest part of the beam slightly to the right (for US drivers) to illuminate road signs without dazzling oncoming traffic.
Using your tape, carefully mark the top of the cutoff line for each headlight on the wall. Also, mark the inner and outer edges of the main beam hotspot if visible. Step back and look at your markings. They will likely be uneven or incorrectly positioned if you’re reading this guide. This is your starting point. Now you know where the beams are hitting relative to your reference lines.
Step 3: Adjust the Vertical Aim (Low Beams)
Return to your Wrangler’s engine bay. Identify the vertical adjustment screw for the headlight you’re working on (start with the driver’s side). Turn the screw slowly. Turn it clockwise to raise the beam, counter-clockwise to lower it. After each 1/4 to 1/2 turn, go back to the wall and check the position of the cutoff line mark you made.
The Goal for Vertical Aim: The top of the low beam cutoff line should be at or slightly below your “headlight center height” reference line you marked on the wall. For most vehicles, the SAE standard specifies that at 25 feet, the beam should be aimed so the cutoff is at the headlight center height or up to 4 inches below it. The hottest, brightest part of the beam should be about 2-3 inches below the cutoff line and centered horizontally. Adjust until the cutoff line is in this zone. Be patient and make small adjustments.
Step 4: Adjust the Horizontal Aim (Low Beams)
With the vertical aim close, move to the horizontal adjustment screw. This screw pivots the beam left and right. Again, turn in small increments and check the wall.
The Goal for Horizontal Aim: The beam pattern should be straight and symmetrical relative to your vehicle’s centerline. The cutoff line should be parallel to your vertical reference line on the wall. For US vehicles, the beam should be aimed slightly to the right (the driver’s side beam should be aimed slightly right of center, and the passenger side beam should be aimed straight or very slightly right). This “right-hand bias” prevents dazzling oncoming drivers. A good rule is that the center of the hot spot for each beam should be about 1-2 inches to the right of the vehicle’s centerline when projected on the wall at 25 feet. If your beam is pointing too far left (toward oncoming traffic) or too far right (into the bushes), use the horizontal screw to correct it.
Step 5: Verify and Adjust High Beams
Once your low beams are perfectly aimed, it’s time for the high beams. Turn off the low beams and turn on the high beams. Go to the wall. The high beam pattern will be a single, round, focused spot of light, usually centered in the headlight assembly.
The Goal for High Beams: The center of this hot spot should be at the exact same vertical and horizontal aim point as your low beams were. In other words, it should hit the wall at the same spot where your low beam’s main hotspot was located. This ensures that when you flash your high beams, you’re not suddenly pointing them over the treetops or into a ditch. If the high beam is significantly off, you may need to adjust the screws again while the high beams are on. Often, getting the low beams perfect will result in correct high beams, but always verify.
Step 6: Final Check and Road Test
With all adjustments complete, double-check both low and high beams against your wall markings. Ensure the screws are snug but not over-tightened (which could crack the housing). Reinstall any parts you removed to access the screws.
Now, take your Wrangler for a short drive on a dark, familiar road. Observe the beam pattern on the road surface. The low beams should have a sharp, flat cutoff with good illumination from just in front of the car out to about 200-300 feet. The high beams should provide a strong, centered cone of light that extends far down the road. Most importantly, watch for oncoming traffic. If you get flashed, your beams are still too high or too far left. You’ll need to repeat the process, lowering the vertical aim or adjusting the horizontal aim slightly more to the right. This road test is the final, real-world validation.
Special Considerations: Lifts, LED Upgrades, and Troubleshooting
The basic adjustment process is universal, but certain modifications and issues require special attention. Here’s how to handle common scenarios Wrangler owners face.
How a Lift Kit or Larger Tires Affect Headlight Aim
This is one of the most common reasons for needing to adjust Wrangler headlights. When you install a lift kit (whether it’s a spacer lift, coil lift, or long-arm kit) and/or significantly larger tires, you raise the entire front end of your Jeep. Your headlight assemblies, which are mounted to the frame or fenders, are now physically higher relative to the road. Even if the headlights themselves are perfectly adjusted, their angle has changed because their mounting point has moved. The result is the same as if you had turned the vertical adjustment screw all the way up: your beams will now point directly into the eyes of oncoming drivers.
What to do: You must perform a full headlight adjustment after installing a lift or tall tires. Follow the entire wall method process described above. You will almost certainly need to lower the vertical aim significantly, often to the very bottom of the adjustment screw’s travel. If you find you run out of downward adjustment, it means your lift is so tall that the factory headlight mounting points can no longer compensate. In this case, you have two options: install an aftermarket headlight bracket that relocates the headlight slightly downward, or consider a different headlight housing designed for lifted applications. This is a critical step to do immediately after your lift installation, before any night driving.
If you’re researching lift kits, it’s helpful to understand the costs and types involved. You can find detailed information on how much it costs to get a Jeep lifted, which will help you plan for this and other necessary adjustments.
Upgrading to Aftermarket LED or HID Headlights
Swapping your stock halogen bulbs for a brighter LED or HID unit is a popular Wrangler upgrade. However, this change almost always necessitates a headlight adjustment. Why?
- Different Light Source Position: The filament or LED chip in an aftermarket bulb is not in the exact same focal point as the original bulb. This shifts the beam pattern’s origin point.
- Different Beam Pattern: Aftermarket bulbs, especially cheap ones, may have a different reflector or lens design that produces a scattered or uneven pattern that needs correcting.
- Increased Brightness: A brighter, more intense beam that is even slightly misaimed becomes exponentially more dangerous because it causes more glare.
What to do: After installing any new headlight bulb or assembly, you must perform the full adjustment procedure. Do not assume they are “aimed correctly out of the box.” For the best results, use high-quality, DOT-compliant LED headlights specifically designed for your Wrangler’s housing (JK or JL). These are engineered to replicate the original beam pattern as closely as possible. A great resource is our reviews of the 10 Premium LED Headlights for Jeep Wrangler JL and the 10 Best Jeep Wrangler JK LED Headlights to find models known for proper beam alignment.
Troubleshooting: What If My Adjustments Don’t Seem to Work?
You followed all the steps, turned the screws, but the beam on the wall isn’t moving. Here are the most common culprits:
- You’re Adjusting the Wrong Screw: Double-check your model’s layout. You might be turning a screw that holds the headlight in place, not the aim screw. The aim screws are usually smaller and have a limited range of motion.
- Loose Headlight Assembly: If the main mounting bolts that hold the entire headlight housing to the fender or frame are loose, the whole unit will shift instead of the screws adjusting the internal reflector. Park your Wrangler and check the main mounting bolts first. They must be snug.
- Stripped Adjustment Screw or Socket: The plastic gear inside the headlight housing that the screw turns can strip out, or the screw head itself can be stripped. This is a failure of the headlight mechanism. The only fix is to replace the headlight assembly or, in some cases, the internal adjuster mechanism.
- Aftermarket Headlight with Poor Quality Internals: Some very low-cost aftermarket headlights have non-functional or imprecise adjustment mechanisms. If the beam pattern is terrible and the screws do nothing, the headlight itself may be defective.
- You’re Using the High Beams to Check Low Beam Aim: The high beam pattern is different. Always use low beams for the primary aim.
Conclusion: A Simple Task with a Major Impact
Adjusting the headlights on your Jeep Wrangler is one of the most satisfying and impactful DIY maintenance tasks you can perform. It takes less than 30 minutes, costs nothing in tools, and has an immediate, dramatic effect on your safety and driving comfort. You’ve now learned that it’s not magic—it’s a methodical process of locating the correct screws, using the reliable wall method, and making tiny, precise turns until your beam pattern is perfect.
Remember the key principles: always adjust on a dark night, always use low beams for the primary aim, and always verify with a road test. Make it a habit to check your headlight aim whenever you do other modifications. If you lift your Wrangler, adjust them. If you put on new tires or a new front bumper that might shift the assembly, check them. If you simply notice your beams seem off after a season of rough trails, give them a once-over.
Your Jeep Wrangler is a tool for adventure, and proper visibility is what turns a dark backcountry road from a hazard into a path. By mastering this simple skill, you take full ownership of your vehicle’s safety and performance. So grab your screwdriver, wait for dusk, and give your Wrangler’s eyes the proper focus they deserve. The night road ahead will be brighter and safer because of it.
Frequently Asked Questions
What tools do I absolutely need to adjust my Jeep Wrangler headlights?
You only need a basic screwdriver (flathead or Phillips, depending on your model) and a measuring tape. Masking tape and a dark location are also essential for the wall method.
How often should I check my Wrangler’s headlight alignment?
You should check your headlight aim at least once a year. You must always check and adjust them after any suspension lift, tire size change, or after installing new headlight bulbs or assemblies.
Can I adjust my headlights myself, or should I take it to a professional?
You can absolutely adjust them yourself with this guide. It’s a simple, beginner-friendly DIY task. A professional adjustment at a shop might cost $30-$50 and takes the same amount of time, so doing it yourself saves money and gives you valuable knowledge.
What are the dangers of driving with misaligned Wrangler headlights?
Misaligned headlights either blind oncoming drivers (if aimed too high) or fail to illuminate the road adequately (if aimed too low). Both scenarios drastically increase your risk of a nighttime accident and can result in a failed vehicle inspection.
Is the adjustment process different for LED headlights compared to stock halogens?
The physical adjustment process using the screws is identical. However, LED or HID aftermarket headlights often have different internal optics, so you may need to adjust them more frequently or to a different starting point. Always perform a full adjustment after installing any new headlight type.
If I lift my Jeep, will I need to adjust the headlights every time?
Yes, a lift kit changes the angle of your headlights relative to the road. You must perform a full headlight adjustment immediately after installing a lift. You may also need to re-check them after 500-1,000 miles as the suspension settles into its final position.


