
How Do I Transfer My Tesla to a New Owner?
Contents
- 1 Key Takeaways
- 2 📑 Table of Contents
- 3 Why Transferring a Tesla Is Completely Different
- 4 Pre-Transfer Checklist: Get Your Ducks in a Row
- 5 The Step-by-Step Transfer Process: For the Seller
- 6 Handling Finances, Liens, and Leases
- 7 Post-Transfer Tasks: Closing the Loop
- 8 Common Pitfalls and How to Avoid Them
- 9 Conclusion: A Smooth Ride to the Finish Line
- 10 Frequently Asked Questions


Transferring a Tesla requires a unique, digital-first process distinct from traditional cars. The most critical step is the seller permanently removing the vehicle from their Tesla account via the mobile app before the new owner can claim it. You must also handle traditional state DMV paperwork for the title and registration, settle any outstanding loans or leases, and cancel insurance. Following a clear, sequential checklist ensures a secure and legally compliant transfer for both parties.
So, you’ve decided to part ways with your Tesla. Maybe you’re upgrading to a new model, or perhaps life has taken you in a different direction. Selling any car has its steps, but selling a Tesla? That’s a whole different ball game. The process is a fascinating blend of high-tech digital account management and good, old-fashioned paperwork. It’s not just about handing over the keys; it’s about correctly severing a digital connection and establishing a new one. If you get this wrong, your former car could still be linked to your account, or worse, the new owner might not be able to use it properly. This guide will walk you through every single step, from the first click in your Tesla app to the final DMV form, ensuring a smooth, secure, and legally sound transfer for everyone involved.
Key Takeaways
- Digital Claim is Mandatory: The new owner must claim the Tesla in their Tesla account; this is the single most important step that cannot be skipped.
- Seller Removes First: The seller must initiate the transfer in the Tesla app by removing the vehicle from their account before the buyer can add it.
- Title & Registration are State Matters: Tesla does not handle DMV title/registration transfers. You must complete and file your state’s forms, which often require notarization.
- Secure Payment Before Paperwork: Never transfer ownership or release the title until you have received confirmed, secured payment, especially for private sales.
- Cancel Insurance Promptly: The seller must cancel their insurance policy on the vehicle immediately after the sale is final to avoid liability.
- Supercharger & Accessories Transfer: Free Supercharging (if applicable) and paid upgrades transfer with the vehicle but require the digital claim to be completed first.
- Test Drives Require Care: For private sales, meet in a safe, public place and consider a short, accompanied test drive. Never hand over keys or app access alone.
📑 Table of Contents
- Why Transferring a Tesla Is Completely Different
- Pre-Transfer Checklist: Get Your Ducks in a Row
- The Step-by-Step Transfer Process: For the Seller
- Handling Finances, Liens, and Leases
- Post-Transfer Tasks: Closing the Loop
- Common Pitfalls and How to Avoid Them
- Conclusion: A Smooth Ride to the Finish Line
Why Transferring a Tesla Is Completely Different
Selling a traditional gas-powered car is fairly straightforward: sign the title, fill out a bill of sale, submit a release of liability form to the DMV, and hand over the keys. The buyer then takes the signed title to the DMV to get a new registration in their name. With a Tesla, you do all of that… plus a crucial, non-negotiable digital step that happens inside Tesla’s servers. Your Tesla isn’t just a car; it’s a connected device tied to your personal Tesla account. This account controls everything: locking/unlocking, climate settings, Supercharger billing, and even performance upgrades. Before the new owner can claim any of that, you must digitally “divorce” the car from your account. Until you do this, the vehicle remains, in Tesla’s system, legally and functionally yours. This is the core difference and the first step in our process.
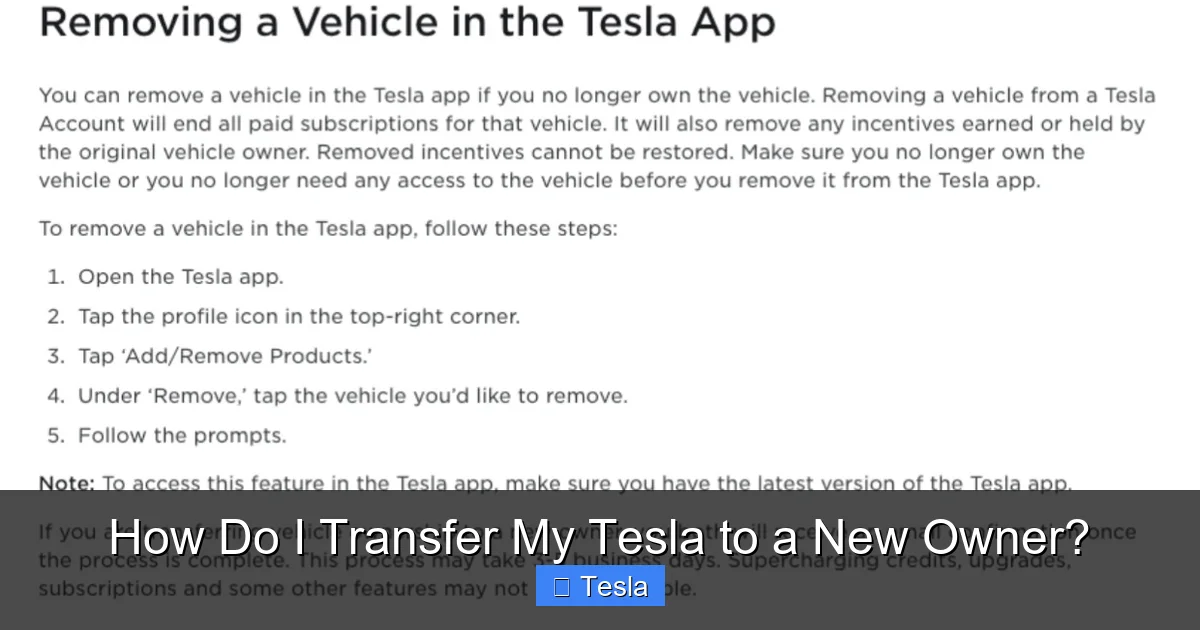
The Digital Handshake: The Tesla App Transfer
The heart of the Tesla transfer process is the “Remove Vehicle” function in the Tesla mobile app. This is not something you can do over the phone with Tesla Support; it’s a self-service action you must take. Once you remove the car, Tesla’s system generates a unique “Vehicle Claim Code.” You then provide this code to the buyer. The buyer uses this code in their own Tesla app to add the vehicle to their account. This digital handshake is what officially severs your connection and establishes theirs. Without it, the car is a ghost in the system—it might drive, but the new owner cannot use the Tesla app for any function, cannot see its location, cannot schedule service, and cannot access paid features. It is absolutely the first and most important task on your pre-transfer checklist.
Paperwork is Still King at the DMV
While Tesla handles the digital link, your state’s Department of Motor Vehicles (or equivalent) handles the legal ownership. The physical Certificate of Title (often called the “pink slip”) is the legal document that proves ownership. You must sign it over to the buyer. The specific process varies by state. Some states require the title to be notarized. Some require a separate bill of sale, even for a gift. Some require you to file a specific “Notice of Transfer” or “Release of Liability” form to protect yourself from liability after the sale. You cannot skip this. The buyer cannot register the car in their name without a properly signed title from you. It’s a paper trail that has existed for a century, and it remains essential. Think of the Tesla app transfer as the “software update” and the DMV paperwork as the “legal title.” You need both for the transfer to be complete.
Pre-Transfer Checklist: Get Your Ducks in a Row
Before you even list your Tesla or agree on a price with a buyer, there’s homework to do. Getting organized upfront prevents delays, confusion, and potential disputes later. This checklist covers the financial and administrative loose ends you must tie up. A clean title and clear financial standing are non-negotiable for a smooth sale. If you have an outstanding loan or lease, you are not the sole owner in the eyes of the lender, and they must be involved. Trying to transfer a Tesla with a lien without the lender’s explicit process is a recipe for disaster and could be considered fraud.
Visual guide about How Do I Transfer My Tesla to a New Owner?
Image source: overtipsy.com
Secure the Title and Check for Liens
Locate your physical Certificate of Title. If you can’t find it, you’ll need to apply for a duplicate from your state’s DMV, which can take weeks. This should be your first move if the title is missing. Next, verify there are no outstanding liens. If you financed the car, the lender likely holds the title until the loan is paid off. You must pay off the loan in full to get the title. Contact your lender for a “payoff quote” and instructions. They will typically send the title directly to you or to the buyer’s address upon receipt of the final payment. If you’re leasing, you cannot sell the car privately; you must go through the lease-end process or buy out the lease first. For more complex situations involving loans, you might need to research how to sell a car with a title loan on it.
Gather Your DMV Forms
Go directly to your state’s DMV website. Search for “vehicle transfer” or “selling a vehicle” forms. Download and read the instructions for the Bill of Sale (if required/used), the Assignment of Title section, and any Notice of Transfer or Release of Liability form. Some states, like New York, have very specific rules. Familiarizing yourself with the exact wording and formatting required will save you a trip back to the DMV. In many cases, having these forms pre-filled (except for buyer info and odometer reading) makes the final transaction faster and less stressful. Pay special attention to whether your state requires a notary public to witness the title signature; this is common and a step many sellers forget.
Clean the Car and Gather Accessories
This seems simple, but it’s part of the professional handoff. Give the Tesla a thorough cleaning, inside and out. Remove all personal items from the trunk, glovebox, and center console. Gather all physical accessories that belong with the car: the original charge cable (if you have it), the tire inflator kit, the owner’s manuals, and any extra key fobs or key cards. If you have aftermarket modifications, decide if they stay or go. It’s best to remove any customizations you want to keep before the buyer sees the car. A clean, well-presented Tesla with all its original bits signals a well-cared-for vehicle and can help you get your asking price.
The Step-by-Step Transfer Process: For the Seller
You’ve found a buyer, agreed on a price, and they’ve secured financing (if needed). Now it’s go-time. The transfer process has a strict sequence. Do not let the buyer pay you and drive away before you have completed your digital removal step. Conversely, do not remove the car from your account before you have the payment secured in your bank account. The sequence is: 1) Secure Payment, 2) Remove from Tesla Account, 3) Sign & Hand Over Paperwork. Let’s break down each of these critical actions.

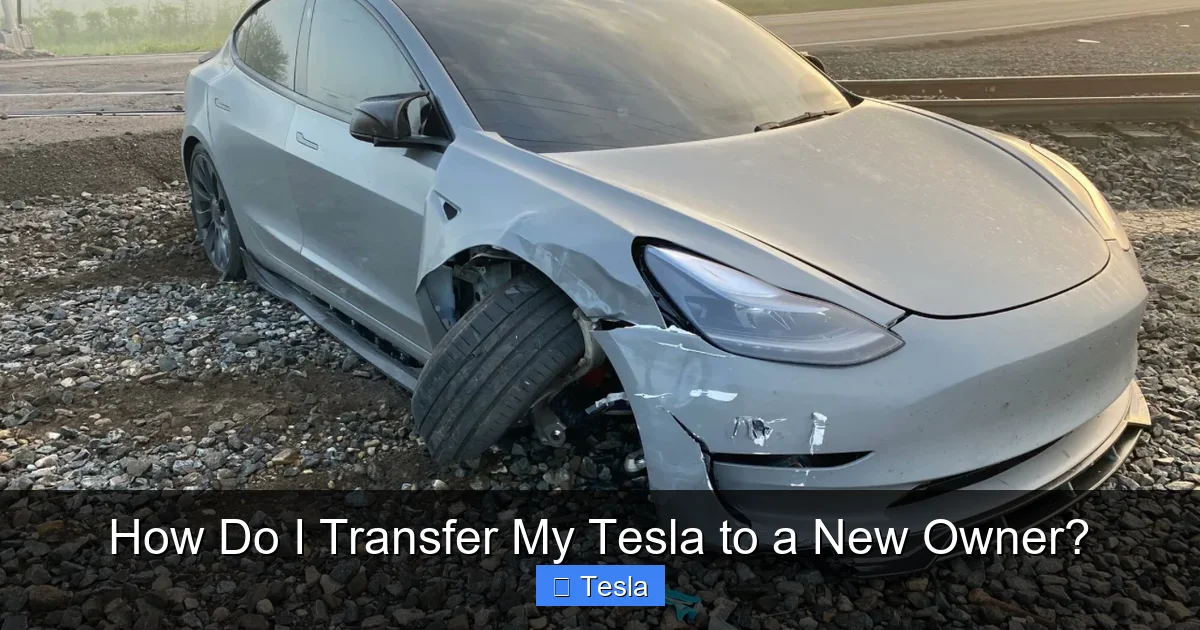
Visual guide about How Do I Transfer My Tesla to a New Owner?
Image source: d2q97jj8nilsnk.cloudfront.net
Step 1: Secure the Payment First
This is the golden rule of any private-party sale: cash or verified funds only. For large sums, a cashier’s check from a reputable bank is good, but verify its authenticity with the issuing bank before releasing the car. Even better, conduct the transaction at the buyer’s bank where they can wire the funds directly into your account in your presence. Avoid personal checks, money orders (which can be fraudulent), and any form of payment that can be stopped or reversed later. Apps like Zelle or Venmo are convenient for smaller amounts but be wary of large transactions due to limits and potential scams. If the buyer is financing through a bank or credit union, they will typically send a check directly to you made out to you and the lienholder (if any). Never sign over the title until the check has cleared and the funds are irrevocably in your account. If you have a lien, coordinate the payoff with your lender and the buyer’s lender simultaneously.
Step 2: Remove the Tesla from Your Account (The Digital Handoff)
Once the money is safe, open your Tesla mobile app. Ensure you are connected to the internet. Go to the “Product” section. Find the specific vehicle you are selling. Tap on it, then look for “Sell or Trade In” or “Remove Vehicle” (the exact menu path can vary slightly with app updates). You will be asked to confirm. Read the prompts carefully. Tesla will warn you that this action is permanent and that you will lose all access to the vehicle, including its location, trip data, and any paid features. Confirm the removal. Within a few moments, the car will disappear from your app’s garage. This is your trigger. Immediately after you do this, contact the buyer and give them the unique Vehicle Claim Code that Tesla now displays in your app (or may have sent via email). This code is typically a series of numbers/letters. Instruct them to open their Tesla app, go to “Add Vehicle,” and enter this code. They must do this while physically in the car with the key card/key fob present. The car will then appear in their app, and all its functions—including Supercharging and any upgrades—will transfer seamlessly. If the buyer has a Tesla already, they must add this new one to their existing account.
Step 3: Complete the Physical Paperwork
With payment secured and the digital transfer complete, you can now handle the physical documents. Meet the buyer in a safe, public place like a parking lot. Have your pre-filled DMV forms ready. The most important document is the Certificate of Title. On the back (or designated assignment section), you will fill in:
- Buyer’s Name and Address: Exactly as it should appear on the new title.
- Odometer Reading: You must write the exact mileage at the time of sale. This is legally required.
- Date of Sale:
- Sale Price:
- Your Signature: Sign your name exactly as it appears on the front of the title.
If your state requires notarization, do not sign until you are in front of the notary. Both you and the buyer may need to sign in the notary’s presence. Give the buyer the fully executed title, the bill of sale (if you created one), and any maintenance records. Have them sign a receipt or bill of sale for your records. Finally, if your state has a Release of Liability form, fill it out online or mail it to the DMV immediately. This form protects you from tickets, tolls, or accidents that might occur after the sale but before the buyer registers the car. Understanding your state’s specific registration requirements is key here, as the rules differ.
Handling Finances, Liens, and Leases
This is where things get complicated for many sellers. A clean, lien-free title is the ideal scenario. But what if you still owe money? What if you’re leasing? The process changes significantly, and you must involve the financial institution holding the loan or lease. Trying to handle this alone will almost certainly fail, as the physical title is held by the lender. You cannot sign it over. The lender is the legal owner until the debt is satisfied. Therefore, the transfer becomes a three-way transaction between you, the buyer, and your lender.
Visual guide about How Do I Transfer My Tesla to a New Owner?
Image source: miro.medium.com
Selling a Tesla with an Outstanding Loan
If you have a traditional auto loan, your lender’s name is likely listed as the “lienholder” on the title. Your goal is to get the lien released. Here is the standard process:
- Get a Payoff Quote: Call your lender for the exact “payoff amount” as of a specific date. This amount includes the remaining principal plus any interest up to that date.
- Coordinate with the Buyer: The buyer (or their bank) will need to send a check for the payoff amount. This check is often made out to both you and the lender (e.g., “John Smith & ABC Bank”). You cannot cash it alone.
- Lender Releases Title: Once the lender receives and cashes the payoff check, they will release the title. They will either mail the now-clean title to you (so you can sign it over) or, more commonly for larger transactions, directly to the buyer or the buyer’s bank. You must confirm this process with your lender before the sale.
- Timing is Everything: This process can take 1-3 weeks. The buyer should be prepared for this delay. You cannot complete your Tesla app removal until the loan is paid off and the title is in hand (or the lender confirms release), because the lender technically still “owns” the car in Tesla’s system until the lien is satisfied. Discuss this timeline openly with the buyer to avoid them thinking you are stalling.
If the sale price is higher than the payoff amount, you keep the difference. If it’s lower, you must pay the difference to the lender to release the title (a “short sale,” which lenders rarely approve for private sales).
Lease-End vs. Private Sale
You generally cannot sell a leased Tesla privately. The leasing company (like Tesla Finance or a bank) owns the vehicle. You have two legal paths:
- Buy Out the Lease: At any point during the lease, you can request a “buyout” or “early termination” quote from the leasing company. This price is set by your contract. You pay that amount, they send you the title (often with a lien if you finance the buyout), and then you can sell the car. This is often not financially advantageous unless the car’s market value is significantly higher than the buyout price.
- Turn In at Lease End: The standard process. You return the car to the leasing company (or a designated dealership) at the end of the term, pay any excess wear-and-tear/mileage fees, and walk away. You have no ownership to transfer.
Attempting to transfer a leased vehicle’s Tesla account without the leasing company’s involvement is a violation of your contract and could lead to significant penalties. Always read your lease agreement first.
Post-Transfer Tasks: Closing the Loop
The buyer has the keys, the title, and the claim code. They’ve added the car to their Tesla account. You’ve deposited the check. It’s tempting to call it a day. Don’t. There are a few final, vital steps to protect yourself and ensure a completely clean break.
Cancel Your Insurance Immediately
Do not wait until the next billing cycle. Call your insurance company as soon as the sale is final and the buyer has taken possession. Tell them you sold the vehicle on [date] and provide the VIN and new owner’s name if you have it. Request a written cancellation confirmation for your records. This is your primary protection against liability. If the buyer gets into an accident before they get insurance in their own name, and your policy is still active, you could be held responsible. The buyer must get their own insurance before driving the car away. Make this a condition of the sale. You can also research specific scenarios about insurance liability to understand your full exposure.
Notify Tesla of the Change in Ownership (Optional but Wise)
While the app removal is the key action, some sellers also contact Tesla Support (via the app or phone) to log a note that the vehicle has been sold. Have your VIN, the sale date, and the buyer’s name (if you have it) ready. This creates an additional record in Tesla’s system. It’s not strictly necessary if you completed the app removal correctly, but it provides peace of mind and an extra layer of confirmation that your association with the car is over.
Keep All Documentation
File away the signed title, bill of sale, payment receipt (canceled check, wire confirmation), the Release of Liability form submission confirmation, and your insurance cancellation letter. Keep these for at least 3-5 years, or indefinitely if there are any tax implications from the sale (like reporting a capital gain). This paperwork is your legal proof that you no longer own the vehicle and that you transferred it in good faith.
Common Pitfalls and How to Avoid Them
Even with the best intentions, sellers can stumble. Here are the most frequent mistakes and how to sidestep them.
Mistake 1: Removing the Car Before Getting Paid
The Risk: You digitally hand over the car (via the claim code) but never receive payment. The buyer now has a fully functional Tesla in their app, but you have no money. They can simply stop communicating. You’ve given away a valuable asset.
The Fix: Make the payment receipt the absolute trigger for the digital transfer. Do not give the claim code until the funds are cleared and in your bank account. If the buyer wants to test the app connection, they can do it after you’ve confirmed the money is there, with you sitting next to them in the car. It takes two minutes.
Mistake 2: Forgetting the Odometer Disclosure
The Risk: An unsigned or blank odometer reading on the title is a major red flag for the DMV and future buyers. It can invalidate the title transfer and raise questions about mileage fraud.
The Fix: Before meeting, fill in the odometer reading on the title in permanent ink. Double-check the digits. Have the buyer initial next to it if your state requires it. This is non-negotiable.
Mistake 3: Not Understanding State-Specific Rules
The Risk: Assuming your process is the same as a friend’s in another state. Some states require notarization. Some require a specific DMV form to be filed by the seller within days. Some have different tax implications.
The Fix: Go to your official state DMV website. Read the “Private Party Sale” or “Transferring Ownership” page in its entirety. Print the forms. If you’re unsure, call the DMV directly. A 10-minute phone call can prevent a rejected title application and weeks of delay. For example, selling a car privately in New York involves specific steps that differ from California or Texas.
Mistake 4: Ignoring the Notary Requirement
The Risk: You sign the title at home, meet the buyer, and they take it to the DMV only to be told it must be notarized. Now they have to track you down again, find a notary, and re-sign. The sale falls apart.
The Fix: Before the meeting, check your state’s DMV site for the notary requirement. If it’s required, either go to a notary together at the meeting place (many UPS Stores or banks have them), or meet at a notary’s office. Do not sign the title until the notary is present and can witness both signatures if needed.
Mistake 5: Letting the Buyer Drive Away Uninsured
The Risk: An uninsured driver gets into an accident in “your” car (still registered to you until DMV processes the title). Lawsuits and financial ruin can follow.
The Fix: Make it a strict, written condition of the sale: “Buyer agrees to provide proof of valid insurance on [VIN] prior to taking possession.” Ask to see the insurance card or app on their phone. Do not hand over the keys or claim code until you’ve seen it. This is a standard practice for responsible sellers.
Conclusion: A Smooth Ride to the Finish Line
Transferring a Tesla ownership isn’t hard; it’s just different. It’s a two-track process: one track is the modern, digital handoff via the Tesla app, and the other is the timeless, paper-based world of title and registration. By understanding that you must complete both tracks successfully, and by following the sequence outlined here—secure payment first, perform the app removal second, and finalize the DMV paperwork third—you can navigate this process with confidence. Preparation is your best friend: get your title in order, understand your state’s rules, and communicate clearly with the buyer. Remember, you are not just selling a car; you are transferring a digital key and a legal title. Handle both with care, document everything, and you’ll close this chapter cleanly, leaving you free to enjoy your next adventure and your new owner free to enjoy their new Tesla.
Frequently Asked Questions
Do I need to be with the buyer for them to claim the Tesla in their app?
Yes, absolutely. The buyer must be physically inside the car with the key card or key fob present to complete the claim process. The car needs to be powered on (or at least in “Ready to Drive” mode) and connected to the internet for the claim to succeed. You should be present to witness this and confirm it’s done correctly before you leave.
Can the buyer test drive the Tesla before we complete the sale?
Yes, but with extreme caution. For a private sale, always meet in a safe, public, well-lit place like a busy supermarket parking lot during daylight. Go with the buyer on the test drive. Never simply hand over the keys or key card and let them go alone. You are liable until the sale is final and payment is secured. A short, 5-10 minute drive around the area is sufficient to check basic functions.
What if the buyer is paying with a personal check or wants to pay in installments?
Strongly avoid both. A personal check can bounce days after you’ve signed over the title and released the car, leaving you with no recourse. Installment payments are a high-risk agreement with no legal security unless you draft a detailed, notarized contract and retain the title until fully paid—which means the buyer cannot register the car. For a private sale, insist on a certified bank check, cashier’s check (verified at the issuing bank), or a direct bank wire where you see the funds hit your account before handing anything over.
My state requires a notarized bill of sale. Where do I get this done?
A notary public can be found at many banks, credit unions, UPS Stores, office supply stores, and dedicated notary offices. You and the buyer will need to sign the bill of sale in front of the notary, who will then affix their seal and signature. Call ahead to confirm they offer notary services and what ID they require. Some states allow online remote notarization, but check your state’s DMV rules first.
Will the buyer keep my free Supercharging (if my car has it)?
Yes, if your vehicle has free, unlimited Supercharging for life (or a specific period) attached to the VIN, that benefit transfers with the vehicle to the new owner once they successfully claim the car in their Tesla account. It is tied to the car, not your personal account. However, any referral program benefits or paid upgrades purchased for your specific account (like Full Self-Driving capability) will transfer with the digital claim. The buyer will not have access to your Tesla account itself.
When should I cancel my insurance?
Cancel your insurance policy effective on the date of sale, as soon as the transaction is complete and payment is in hand. Do not wait for the buyer to register the car. Call your insurer, provide the sale date and the buyer’s name (if you have it), and request written confirmation of the cancellation. This prevents you from being liable for any incidents after that date. The buyer must obtain their own insurance before driving the car away.


