
How to Play Music from Usb in a Tesla Model Y
Playing music from a USB drive in your Tesla Model Y is a straightforward way to enjoy high-quality, offline audio without using cellular data. Simply format a compatible USB drive to FAT32, organize your music files into folders, and plug it into the front USB port. The system supports common formats like MP3 and FLAC, but proper folder structure is key for easy navigation. If issues arise, common fixes include reformatting the drive, checking file compatibility, or trying a different USB port.
Key Takeaways
- Format Matters: Your USB drive must be formatted to FAT32 (not exFAT or NTFS) for the Tesla Model Y to recognize it.
- File Format Support: The Model Y plays MP3, AAC, WAV, and FLAC files, but not all codecs within these containers are guaranteed.
- Folder Structure is Key: Organize music into folders (e.g., by artist/album); the Tesla interface browses folders, not embedded metadata alone.
- Use the Front USB Ports: Only the front USB-C ports (inside the center console or dashboard) support media playback; rear ports are for charging only.
- Troubleshooting Basics: If music doesn’t play, try a different USB drive, reformat to FAT32, or check for corrupted files—avoid using hubs.
- Audio Quality Tips: For best sound, use lossless formats like FLAC and a high-quality USB drive to minimize read errors and skipping.
- No Internet Required: USB playback works entirely offline, perfect for areas with poor connectivity or to save on data usage.
📑 Table of Contents
- Why Use a USB Drive for Music in Your Tesla Model Y?
- Step-by-Step: Setting Up Your USB Drive for the Tesla Model Y
- Supported Audio Formats and Quality in Tesla Model Y
- Organizing Your Music Library for Seamless Browsing
- Troubleshooting Common USB Music Issues in Model Y
- Advanced Tips for Audiophiles and Power Users
- Conclusion: Your Personal Concert On Wheels
Why Use a USB Drive for Music in Your Tesla Model Y?
Let’s be honest: Tesla’s streaming options are impressive. You can tap into Spotify, Tidal, or even Tesla’s own streaming service with a premium connectivity subscription. But what happens when you’re driving through a tunnel, venturing into a remote area with spotty cell service, or simply want to avoid eating into your data plan? That’s where the humble USB drive shines. Playing music from a USB in your Tesla Model Y gives you a reliable, high-fidelity, and completely offline audio library that’s always ready to go. It’s a fantastic backup and a preferred method for audiophiles who want uncompressed sound without streaming bitrate limits.
Plus, there’s a certain nostalgia and control to it—you curate your exact collection, no algorithms deciding what you hear next. Whether you’re a casual listener or a serious music enthusiast, mastering USB playback is a essential Tesla skill. This guide will walk you through everything, from choosing the right flash drive to organizing thousands of songs and solving those frustrating hiccups. We’ll keep it simple, practical, and geared toward getting you listening as fast as possible.
The Advantages of Going Offline
Before we dive into the nuts and bolts, let’s highlight why you might choose USB over Bluetooth or streaming. Bluetooth is great for quick phone playback, but it compresses audio and can be finicky with connection drops. Streaming requires a stable internet connection and a subscription. USB playback, however, offers a direct digital connection to the car’s media system. It supports lossless audio formats (like FLAC) that streaming services often downgrade, meaning you hear the music as the artist intended—richer bass, clearer highs, and a fuller soundstage. It’s also remarkably stable. Once set up, it just works. No buffering, no login prompts, no sudden interruptions because a cell tower dropped out. For road trips, this is a game-changer.
Understanding Tesla’s Minimalist Media System
The Tesla Model Y’s interior is famously sleek, with most controls handled by the central touchscreen. The media system is no exception. There’s no traditional “ eject ” button or complex menu hierarchy. Instead, when you insert a compatible USB drive, the car automatically scans it and adds a “USB” source to your media player. You then navigate your folders directly on the screen. This simplicity is great but can be confusing if your drive isn’t set up correctly. The system expects a very specific folder structure and file format. Don’t worry; we’ll break it down so clearly that you’ll never get stuck.
Step-by-Step: Setting Up Your USB Drive for the Tesla Model Y
Getting started is easier than you think, but precision is crucial. A small mistake in formatting or file placement can mean the Tesla simply doesn’t see your music. Follow these steps exactly for a seamless experience.
Visual guide about How to Play Music from Usb in a Tesla Model Y
Image source: static.quickcreator.io
1. Choose the Right USB Drive
Not all USB drives are created equal. For reliable playback in your Model Y, look for a standard USB-A or USB-C flash drive (depending on your Model Y’s port type—most 2020+ models have USB-C). Capacity-wise, 32GB to 128GB is plenty for a massive music library. Avoid using external hard drives that require their own power source; the Tesla’s USB ports may not provide enough juice. Stick to simple, bus-powered flash drives from reputable brands like SanDisk, Samsung, or Kingston. A drive with a fast read speed (USB 3.0 or higher) is ideal to prevent audio skipping, especially with large lossless files.
Pro Tip: Dedicate one USB drive solely to your Tesla music. Don’t use it for work files or other random data. This keeps the folder structure clean and avoids confusion.
2. Format the Drive to FAT32
This is the most critical step. The Tesla Model Y’s media system only recognizes drives formatted with the FAT32 file system. It will not read exFAT, NTFS, or HFS+ (Mac default). Here’s how to format correctly:
- On Windows: Insert the USB drive. Open File Explorer, right-click the drive, and select “Format.” Choose “FAT32” as the file system. Ensure “Quick Format” is checked for speed. Click “Start.” If the option to format as FAT32 is grayed out (often for drives larger than 32GB), use a third-party tool like GUIFormat or the command line (diskpart).
- On Mac: Insert the USB drive. Open Disk Utility (Applications > Utilities). Select the USB drive (not just the volume). Click “Erase.” Name it (e.g., “TeslaMusic”). Choose “MS-DOS (FAT)” as the format—this is Mac’s version of FAT32. Scheme should be “Master Boot Record.” Click “Erase.”
Warning: Formatting erases all data on the drive. Back up any existing files first.
3. Organize Your Music Files into Folders
The Tesla interface does not read embedded ID3 tags (song titles, artists, album art) as reliably as a dedicated music player like iTunes. Instead, it browses the folder hierarchy on your USB drive. Think of it like an old-school CD changer. You must create a logical folder structure.
A recommended structure is:
- Root Folder (USB Drive Name): This is the top level.
- Artist Folders: Inside the root, create a folder for each artist (e.g., “Daft Punk,” “Taylor Swift”).
- Album Folders: Inside each artist folder, create folders for each album (e.g., “Random Access Memories,” “1989”).
- Audio Files: Place all song files for that album directly inside the album folder. Include album artwork (JPG or PNG) in the same folder if you want it to display on the Tesla screen.
Example path: USB Drive > Daft Punk > Random Access Memories > 01_Get_Lucky.mp3. Avoid nesting folders too deep; 2-3 levels is plenty. The Tesla can handle more, but simpler is better for quick browsing while driving.
4. Copy Your Music and Safely Eject
Copy your organized music folders from your computer to the newly formatted USB drive. Ensure all files are fully transferred before ejecting. On Windows, use the “Safely Remove Hardware” icon. On Mac, drag the USB drive icon to the Trash (which turns into an eject symbol). Never just pull the drive out; this can corrupt files or the file system.
5. Plug Into Your Model Y and Select USB
With your car powered on (or in accessory mode), insert the USB drive into one of the front USB ports. These are typically located inside the center console bin or on the dashboard near the cupholders. The rear USB ports are for charging only and will not show media. The Tesla touchscreen should automatically detect the drive within a few seconds. Tap the media player icon (the musical notes) at the bottom of the screen. At the top of the media pane, you’ll see sources like “Radio,” “Streaming,” and now “USB.” Tap “USB” to browse your folders. Use the left/right arrows or swipe to navigate through your artist/album folders. Tap a song to play.
Supported Audio Formats and Quality in Tesla Model Y
Knowing which file formats work saves you from the disappointment of loading a drive full of unsupported files. Tesla’s media system is fairly flexible but has its limits.
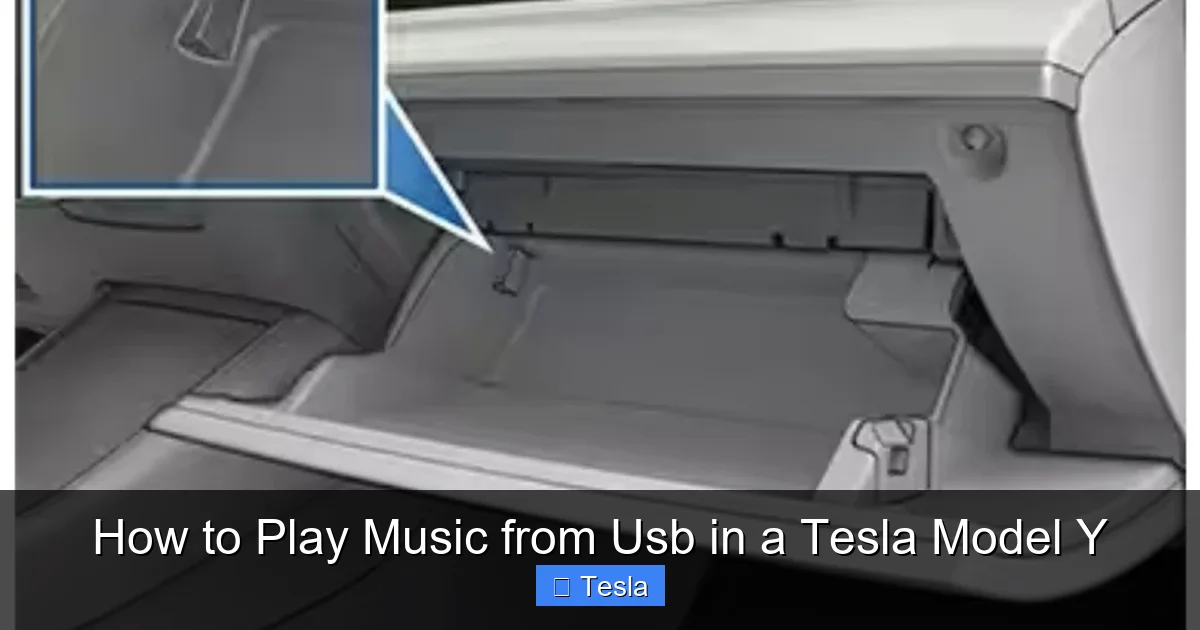
Visual guide about How to Play Music from Usb in a Tesla Model Y
Image source: i0.wp.com
Commonly Supported Formats
The Model Y reliably plays:
- MP3: The most universal format. Bitrates from 128kbps to 320kbps work. Variable bitrate (VBR) is fine.
- AAC: The format used by iTunes and Apple Music. Often provides better quality than MP3 at similar bitrates.
- WAV: Uncompressed, lossless audio. Files are large but deliver studio-quality sound. No quality loss.
- FLAC: Compressed lossless audio. This is the sweet spot for audiophiles—smaller than WAV but identical audio quality when decoded. Highly recommended if you have storage constraints.
Note: While these formats are supported, some less common codecs within these containers (e.g., certain MP3 encoder versions) might not play. Stick to standard encodings.
Unsupported or Problematic Formats
Avoid these:
- ALAC: Apple’s lossless format. While some users report success, it’s not officially guaranteed and can be hit-or-miss.
- OGG Vorbis, Opus: Common in Linux or web streaming. Not supported.
- Protected or DRM-encoded files: Music purchased from iTunes with old FairPlay DRM or other protected sources will not play.
- Video files: The Tesla media player is audio-only for USB. Video files (MP4, AVI) are ignored.
If you have a mixed library, use a free tool like Fre:ac or dBpoweramp to batch convert files to MP3 or FLAC before copying to the USB drive.
Bitrate, Sample Rate, and Audio Quality
For the best listening experience, prioritize lossless formats (FLAC or WAV). These preserve every bit of the original recording. If you must use lossy formats like MP3, use a bitrate of at least 256kbps (VBR or CBR). The Tesla’s audio system is quite good, so you’ll notice the difference between a 128kbps and a 320kbps file, especially on premium sound packages.
Sample rates (e.g., 44.1kHz, 48kHz, 96kHz) are also supported. Most music is 44.1kHz (CD quality). High-resolution audio (96kHz/24-bit) in FLAC will play, but the benefit is marginal unless you have exceptionally good hearing and a quiet cabin. The Tesla’s DAC (digital-to-analog converter) is capable, but the speakers and cabin acoustics are the bigger limiting factors.
Organizing Your Music Library for Seamless Browsing
You could dump 10,000 songs into one folder, but finding “that one track” while driving would be a nightmare. Smart organization is the key to a pleasant USB music experience in your Model Y.

Visual guide about How to Play Music from Usb in a Tesla Model Y
Image source: wonderfulengineering.com
Folder Structure Best Practices
We touched on this earlier, but let’s go deeper. The Tesla interface displays folders in a simple list. It does not automatically group songs by artist or album unless you put them in separate folders. Your folder structure is your only navigation method.
- Avoid Single Root Folder with All Files: This forces you to scroll endlessly through every single song title alphabetically. It’s tedious and unsafe while driving.
- Artist > Album > Songs is the gold standard. It mimics how you’d physically organize CDs. You can then easily tap an artist, then an album, then play.
- Use Playlist Folders: If you love playlists, create a folder named “Playlists” and inside it, create M3U playlist files (a simple text-based playlist format). The Tesla supports M3U files. You can generate these with software like MediaMonkey or VLC. This lets you have curated mixes without duplicating song files.
- Keep Folder Names Short and Clean: Avoid special characters like ?, !, or :. Stick to letters, numbers, spaces, and underscores. “Pink Floyd” is fine; “Pink_Floyd:_The_Dark_Side_of_the_Moon” is better.
Embedding Album Artwork
Yes, the Tesla can show album art! But it has a specific requirement. The image file (JPG or PNG) must be in the same folder as the audio files for that album. The filename should be something simple like “folder.jpg” or “album.png.” The car will scan for an image in the folder and display it on the screen when playing songs from that folder. Ensure the image is at least 500×500 pixels for clear display. Don’t rely on embedded artwork within the MP3/FLAC file; the Tesla often ignores that. Place a separate image file in each album folder.
Managing Large Libraries and Multiple Drives
If you have a massive collection, one USB drive might not suffice (even at 128GB). You have a few options:
- Multiple Drives: Label each drive clearly (e.g., “Tesla USB 1 – Rock,” “Tesla USB 2 – Jazz”). Swap them as desired. The car will remember the last played position on each drive separately.
- Use a High-Capacity Drive: 256GB USB drives are common and affordable. Ensure it’s a quality brand to avoid corruption.
- Curate Your Collection: Don’t feel pressured to take everything. Create a “best of” drive with your most-played albums. This keeps browsing fast and the drive reliable.
Important: The Tesla reads the entire directory structure when you first insert the drive. With 10,000+ files, this can take 30-60 seconds. Be patient. Once cached, navigation is quick.
Troubleshooting Common USB Music Issues in Model Y
Even with perfect setup, things can go wrong. Don’t panic—most USB music problems have simple fixes.
“USB Device Not Recognized” or No USB Source Appears
This is the most common issue. Here’s your diagnostic checklist:
- Check the Port: Are you using a front USB port? The rear ports won’t work for media. Try both front ports (if your Model Y has two).
- Reformat the Drive: Is it definitely FAT32? Double-check on your computer. If it’s exFAT, reformat it. This solves 80% of problems.
- Try a Different USB Drive: Some cheap or very old drives have compatibility issues. Use a known-good, modern USB 3.0 drive.
- Power Cycle the Car: Put the car in “Park,” then power it down (touchscreen > Safety > Power Off). Wait 2-3 minutes, then restart. This resets the media system.
- Check Drive Health: The drive might be failing. Try it on your computer—does it read/write fine? If not, replace it.
Music Shows But Won’t Play, or Skips/Stutters
If folders appear but songs won’t start or playback is erratic:
- File Corruption: A single bad file can sometimes stall playback. Try playing a different song from the same folder. If only one song fails, that file is likely corrupt. Re-copy it from your source.
- Unsupported Codec: Even within MP3, some unusual bitrates or encoder settings can cause issues. Convert problematic files to a standard 320kbps CBR MP3 or FLAC.
- Drive Speed Too Slow: A slow USB 2.0 drive with large FLAC files might struggle to read fast enough, causing skips. Use a USB 3.0 drive, even if the port is USB 2.0—it’s backward compatible and often faster.
- Too Many Files in One Folder: While the Tesla can handle many files, having hundreds in a single folder can slow down directory reading. Stick to the artist/album structure.
- USB Port Power: If you’re using a powered USB hub (not recommended), it might be drawing too much or too little power. Connect the drive directly.
Album Art Not Displaying
If you’ve placed image files in the album folder but no art shows:
- Image Format/Size: Use JPG or PNG. Ensure the image is at least 500×500 pixels. Very small images may be ignored.
- Filename: The Tesla looks for common names like “folder.jpg,” “album.jpg,” “cover.jpg.” Rename your image to “folder.jpg” in each album folder for best results.
- File Placement: The image must be in the same folder as the audio files, not in a parent or subfolder.
- Cache Issue: Sometimes the car needs a refresh. Eject the USB, restart the car, and reinsert. The system rebuilds its cache.
USB Drive Gets Very Hot
If the USB drive becomes uncomfortably hot to the touch after prolonged use:
- This can happen with some drives under heavy read load. It’s usually not dangerous but can lead to premature failure.
- Ensure the drive isn’t covered or in a confined space (like a closed center console bin with no ventilation).
- Consider a different USB drive with better power efficiency.
- In extreme cases, a very hot drive might disconnect. If this happens, check for ventilation and avoid leaving the drive in a hot car when not in use. For more on protecting your car’s interior and electronics from heat, you might want to look into how to prevent a car from overheating in summer.
Advanced Tips for Audiophiles and Power Users
Once you’ve mastered the basics, these tips will elevate your USB music experience in the Model Y.
Using Lossless FLAC for Studio Quality
If you rip your own CDs or purchase hi-res downloads, store them as FLAC. The Tesla’s DAC can handle 24-bit/96kHz FLAC files without issue. The soundstage opens up, instruments sound more distinct, and there’s no compression artifact. The trade-off is file size: a typical album in FLAC might be 300-500MB vs. 100MB for a high-bitrate MP3. A 128GB drive can hold about 250-300 FLAC albums, or well over 1,000 MP3 albums. Choose based on your storage capacity and listening preferences.
Creating and Using M3U Playlists
Want to mix songs from different artists into a “Road Trip” playlist? Use M3U files. An M3U file is a simple text file with a .m3u extension that lists file paths. Here’s how:
- On your computer, create a new text file in your USB drive’s root folder or a “Playlists” folder.
- Rename it to “Road_Trip.m3u” (ensure the extension is .m3u, not .txt).
- Open it with a text editor and add lines with the relative paths to your songs. Example:
Artist1/Album1/song1.mp3
Artist2/Album2/song2.flac
Artist3/Album3/song3.mp3
- Save the file. When you plug the USB into your Tesla, you should see the “Road_Trip.m3u” file as a playable item. Tap it to play your custom sequence.
- You can create M3U files using dedicated software like MediaMonkey (free) which can auto-generate them from your library, or even some music players like VLC have “Save Playlist” functions that output M3U.
Maintaining Your USB Music Library
Over time, you’ll add and remove songs. Keep these habits:
- Always Eject Before Unplugging: Never remove the USB while the car is reading or writing (e.g., during fast-forward or when adding new files). Always use the on-screen eject option first.
- Periodically Reformat: If you notice slowdowns or errors, back up your music, reformat the drive to FAT32, and copy files back. This clears any file system errors.
- Keep a Backup: Your USB drive can fail. Keep a master copy of your organized music folder on your computer or a backup drive.
- Update Album Art: If you add new albums, ensure their folder.jpg is present. You can batch-download album art with tools like Album Art Downloader.
Integrating with Tesla’s Other Features
Your USB music works seamlessly with Tesla’s driving features. You can use steering wheel scroll wheel to adjust volume, and the left/right buttons to skip tracks (if configured in settings). The “Favorites” button on the steering wheel can be set to “Next Track” for easy skipping. You can also create “Shortcuts” on the touchscreen’s bottom dock for your most-played playlists or folders (tap the “…” menu on a folder/playlist and select “Add to Shortcuts”). This lets you jump to your workout mix or podcast folder with one tap, minimizing distraction.
Conclusion: Your Personal Concert On Wheels
Setting up USB music playback in your Tesla Model Y might seem like a small thing, but it dramatically enhances the ownership experience. It’s the perfect blend of old-school reliability and cutting-edge electric vehicle tech. You now have a private, high-quality, always-available music library that doesn’t depend on a cell signal or a monthly subscription. By following the steps—formatting to FAT32, organizing into artist/album folders, using supported formats like FLAC or MP3, and troubleshooting with our tips—you’ll have a system that works flawlessly trip after trip.
Remember, the key is in the preparation. A well-organized FAT32 drive is all it takes. Once you’ve conquered USB playback, you might start thinking about other ways to personalize and protect your Model Y. Many owners explore options like wrapping the exterior for a unique look or tinting the windows to reduce glare and cabin heat—which also helps keep your USB drive and electronics cooler on sunny days. Whether you’re cruising city streets or embarking on a cross-country adventure, your USB library will be the perfect soundtrack.
So grab a flash drive, start organizing those folders, and get ready to experience your music like never before—powered by electricity and silicon, but rooted in the simple joy of a well-curated collection. Happy listening!
Frequently Asked Questions
What file system must my USB drive use for a Tesla Model Y?
Your USB drive must be formatted to FAT32. The Tesla will not recognize exFAT, NTFS, or other file systems. Use your computer’s formatting tool or a third-party app to convert it.
Why isn’t my USB music showing up in the Tesla?
First, ensure you’re using a front USB port. Second, double-check the drive is FAT32. Third, try a different USB drive, as some models are incompatible. Finally, power cycle the car (Safety > Power Off) and try again.
Which audio formats can I play from USB?
The Tesla Model Y reliably plays MP3, AAC, WAV, and FLAC files. Avoid ALAC, OGG, or DRM-protected files. For best quality, use FLAC or high-bitrate MP3 (256kbps+).
How should I organize my music folders on the USB drive?
Create a clear hierarchy: Root folder > Artist folder > Album folder > Audio files. This makes browsing on the Tesla’s screen intuitive. Include a “folder.jpg” image in each album folder to display album art.
Can I use a USB hub to connect multiple drives?
No. The Tesla’s USB ports do not provide enough power for most hubs, and the system typically won’t recognize multiple drives through a single port. Use one dedicated drive per port if you need more storage.
Does playing music from USB use my Tesla’s cellular data?
No. USB playback is entirely local and offline. It does not require an internet connection or use any data from your premium connectivity subscription. It’s a great way to save data while on the road.


