
Rv Running Lights Not Working
Contents
RV running lights not working can compromise your safety and legality on the road. This guide walks you through diagnosing, troubleshooting, and fixing the most common issues—from blown fuses to corroded connectors—so you can get back to traveling with confidence.
Key Takeaways
- Check the fuse first: A blown fuse is the most common cause of RV running lights failing—always inspect the fuse box before digging deeper.
- Inspect wiring and connections: Loose, frayed, or corroded wires can interrupt power flow; clean and secure all connections.
- Test the ground connection: A poor ground is a frequent culprit—ensure the ground wire is tightly attached to a clean metal surface.
- Use a multimeter for diagnosis: A simple voltage test can quickly identify whether power is reaching the lights.
- Replace bulbs correctly: Always use the right bulb type and wattage; mismatched bulbs can cause electrical issues.
- Protect against moisture: Seal light housings and connectors to prevent water damage, especially in older RVs.
- Consult your owner’s manual: Wiring diagrams and fuse layouts vary by model—your manual is your best reference.
📑 Table of Contents
Why Your RV Running Lights Might Not Be Working
Picture this: You’re pulling into a scenic campground at dusk, ready to unwind after a long drive. You flip the switch to turn on your running lights—only to realize they’re completely dark. Suddenly, your peaceful evening turns stressful. Not only are you worried about being seen by other drivers, but you’re also concerned about potential safety hazards or even getting pulled over for non-compliance with road regulations.
RV running lights not working is a surprisingly common issue, and it can happen to even the most experienced travelers. These lights—also known as clearance lights, marker lights, or side marker lights—are essential for visibility, especially during low-light conditions. They help other drivers see the size and shape of your RV, reducing the risk of accidents. When they fail, it’s not just an inconvenience; it’s a safety risk.
But don’t panic. In most cases, the problem is fixable with a little know-how and some basic tools. Whether you’re a full-time RVer or a weekend warrior, understanding why your running lights aren’t working—and how to fix them—can save you time, money, and stress. This guide will walk you through the most common causes, step-by-step troubleshooting methods, and preventive tips to keep your lights shining bright on every journey.
Common Causes of RV Running Lights Not Working
Visual guide about Rv Running Lights Not Working
Image source: rvprofy.nyc3.cdn.digitaloceanspaces.com
Before jumping into repairs, it’s important to understand what might be causing your RV running lights not working. Electrical issues in RVs can be tricky because of the complex wiring systems and the constant movement that can loosen connections over time. However, most problems fall into a few predictable categories.
One of the most frequent causes is a blown fuse. RVs have multiple fuse panels—some in the cabin, others near the battery or under the hood. If the fuse for the running lights has blown, no power will reach the lights, even if everything else seems fine. Fuses can blow due to power surges, short circuits, or simply age.
Another common issue is poor grounding. Unlike cars, RVs often rely on the chassis as a ground path. If the ground wire becomes loose or corroded, the circuit won’t complete, and the lights won’t turn on. This is especially true for older RVs or those that have seen a lot of miles.
Wiring problems are also high on the list. Over time, wires can fray, become disconnected, or get pinched during maintenance. Rodents can even chew through insulation, causing hidden damage. Additionally, moisture intrusion can corrode connectors and sockets, leading to intermittent or complete failure.
Bulb failure is another obvious but often overlooked cause. Running lights use small incandescent or LED bulbs that can burn out just like any other light. However, because they’re often tucked away in hard-to-reach spots, people sometimes assume the problem is electrical when it’s simply a dead bulb.
Finally, switch or relay issues can prevent power from reaching the lights. The switch that controls the running lights might be faulty, or a relay in the electrical system could be stuck open. These components are less commonly the issue, but they’re worth checking if other fixes don’t work.
Blown Fuses: The Usual Suspect
Let’s start with the simplest fix: checking the fuse. A blown fuse is the number one reason RV running lights stop working. Fuses are designed to protect your electrical system by breaking the circuit when too much current flows. If a power surge occurs—say, from plugging into a faulty campground outlet—the fuse may blow to prevent damage to your lights or wiring.
To check the fuse, locate your RV’s fuse panel. This is usually found near the driver’s seat, under the dashboard, or in a compartment near the battery. Refer to your owner’s manual for the exact location and fuse layout. Look for the fuse labeled “running lights,” “marker lights,” or “clearance lights.” It’s often a small blade-type fuse, similar to those in a car.
Once you’ve found it, visually inspect the fuse. If the metal strip inside is broken or discolored, it’s blown. You can also use a multimeter to test continuity. If the fuse is bad, replace it with one of the same amperage rating. Never use a higher-rated fuse—this can lead to overheating and fire.
Pro tip: Always carry spare fuses in your RV toolkit. It’s a small investment that can save you from being stranded in the dark.
Grounding Issues: The Silent Killer
If the fuse is fine, the next place to look is the ground connection. In RVs, many lights are grounded through the metal frame or body. This means the ground wire is often just a screw or bolt that attaches the light housing to the chassis. Over time, this connection can loosen or corrode, breaking the circuit.
To test the ground, use a multimeter set to continuity or resistance. Place one probe on the ground wire (or the metal part of the light housing) and the other on a known good ground, like the negative terminal of the battery. If there’s no continuity, the ground is faulty.
Fixing a bad ground is usually straightforward. Remove the light assembly, clean the mounting surface with sandpaper or a wire brush, and reattach the ground wire securely. You can also add a dedicated ground wire from the light to the battery’s negative terminal for extra reliability.
Wiring and Connection Problems
Even if the fuse and ground are good, damaged wiring can still cause RV running lights not working. Wires can become brittle, frayed, or disconnected due to vibration, heat, or moisture. Rodents are also notorious for chewing through insulation, especially in older RVs stored for long periods.
Start by visually inspecting the wiring near the lights. Look for cracks, burns, or exposed copper. Pay special attention to connectors and wire nuts—these are common failure points. If you find damage, cut out the bad section and splice in a new piece of wire using heat-shrink connectors or crimp connectors.
For hard-to-reach areas, use a multimeter to test for voltage at the light socket. If power is reaching the socket but the light still doesn’t work, the issue is likely the bulb or socket. If no power is present, trace the wire back toward the fuse panel to find where the break is.
Bulb and Socket Failures
Sometimes, the problem is as simple as a burned-out bulb. Running lights typically use small wedge-base bulbs (like 1156 or 1141) or LED equivalents. These can last for thousands of hours, but they don’t last forever.
To check a bulb, remove it from the socket and inspect the filament (for incandescent bulbs). If it’s broken or blackened, replace it. For LED bulbs, look for signs of damage or discoloration. You can also test the bulb by installing it in a known working socket.
The socket itself can also fail. Corrosion, melted plastic, or loose contacts can prevent the bulb from making a proper connection. Clean the socket with electrical contact cleaner and a small brush. If it’s damaged, replace the entire socket assembly.
Always use the correct bulb type and wattage. Using a higher-wattage bulb can overload the circuit and blow the fuse. Check your owner’s manual or the old bulb for specifications.
Switch and Relay Malfunctions
If all else fails, the issue might be with the switch or relay that controls the running lights. The switch is usually located on the dashboard or near the driver’s seat. If it’s faulty, it won’t send power to the lights even when turned on.
To test the switch, use a multimeter to check for voltage at the output terminal when the switch is in the “on” position. If there’s no voltage, the switch may need to be replaced.
Relays are electromagnetic switches that control high-current circuits. If the relay for the running lights is stuck open or burned out, the lights won’t receive power. Relays are often located in the fuse panel or a separate relay box. Swap the suspected relay with a known working one (like the horn relay) to see if that fixes the issue.
Step-by-Step Troubleshooting Guide
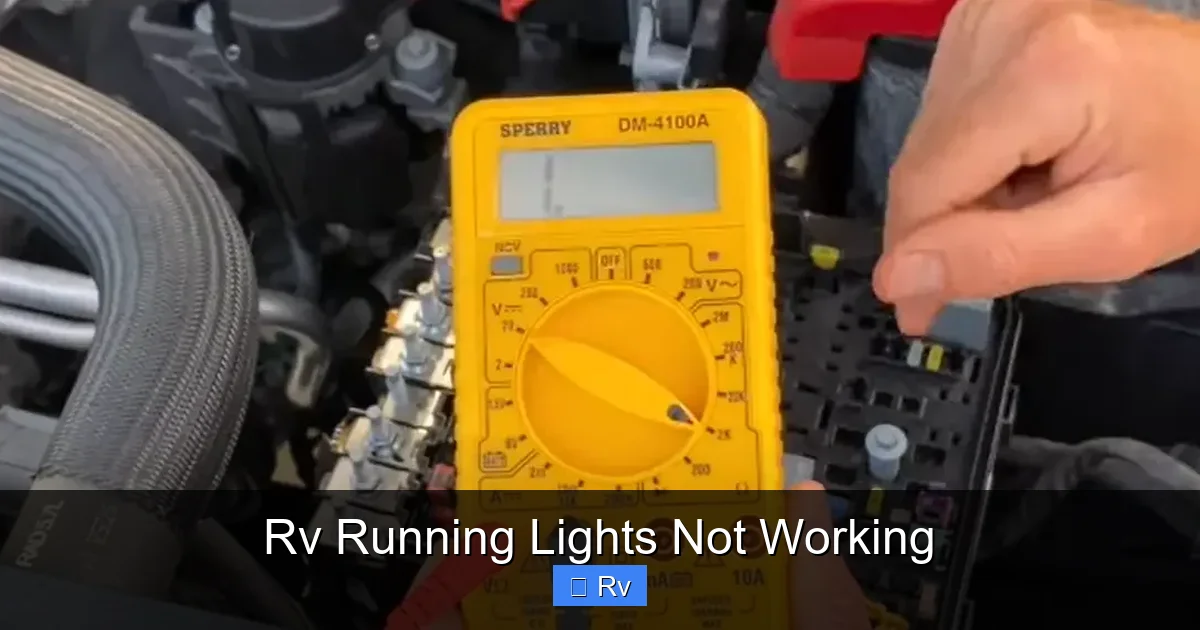
Visual guide about Rv Running Lights Not Working
Image source: rvprofy.com
Now that you know the common causes, let’s walk through a systematic approach to diagnosing and fixing RV running lights not working. This step-by-step guide will help you identify the problem quickly and avoid unnecessary repairs.
Step 1: Check the Fuse
Start by locating the fuse panel and finding the fuse for the running lights. Use your owner’s manual to identify the correct fuse. Visually inspect it for damage, or use a multimeter to test continuity. Replace if necessary.
Step 2: Test for Power at the Light
Use a multimeter to check for voltage at the light socket. Set the meter to DC volts and touch the probes to the positive and ground terminals in the socket. If you see 12 volts (or close to it), power is reaching the light. If not, the issue is upstream—check wiring, switches, or relays.
Step 3: Inspect the Ground Connection
Check the ground wire or mounting point for the light. Clean any corrosion and ensure the connection is tight. Test continuity between the ground and the battery’s negative terminal.
Step 4: Examine the Bulb and Socket
Remove the bulb and inspect it for damage. Test it in another socket if possible. Clean the socket and check for corrosion or loose contacts.
Step 5: Trace the Wiring
If power isn’t reaching the light, trace the wire back from the socket toward the fuse panel. Look for breaks, burns, or disconnected wires. Repair or replace as needed.
Step 6: Test the Switch and Relay
Use a multimeter to test the switch for output voltage when turned on. Swap the relay with a known working one to see if that resolves the issue.
Step 7: Reassemble and Test
Once you’ve made repairs, reassemble the light and test it. Turn on the running lights and verify that all lights are working properly.
Preventive Maintenance Tips
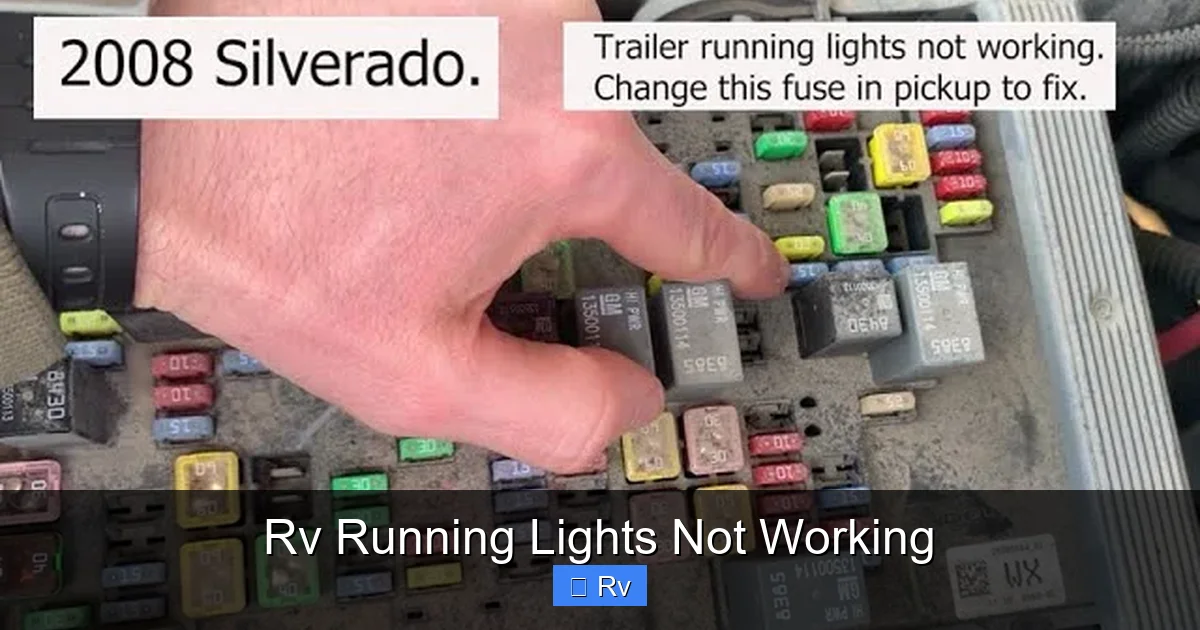
Visual guide about Rv Running Lights Not Working
Image source: i.ytimg.com
The best way to deal with RV running lights not working is to prevent the problem from happening in the first place. Regular maintenance can save you from unexpected failures on the road.
Inspect Lights Regularly
Make it a habit to check your running lights before every trip. Walk around your RV and verify that all lights are functioning. This is also a good time to clean the lenses and check for cracks or moisture inside the housings.
Protect Against Moisture
Moisture is the enemy of electrical systems. Seal light housings with silicone sealant to prevent water intrusion. Use dielectric grease on connectors to repel water and prevent corrosion.
Secure Wiring
Use zip ties or wire loom to secure loose wires and prevent them from rubbing against sharp edges. This reduces the risk of fraying and short circuits.
Store Spare Parts
Keep spare bulbs, fuses, and connectors in your RV toolkit. This ensures you can make quick repairs no matter where you are.
Schedule Annual Inspections
Once a year, do a thorough inspection of your RV’s electrical system. Check all lights, fuses, and wiring. This proactive approach can catch small issues before they become big problems.
When to Call a Professional
While many RV running light issues can be fixed with basic tools and knowledge, some problems require professional help. If you’ve gone through the troubleshooting steps and still can’t get your lights working, it may be time to call an RV technician.
Complex wiring issues, such as shorts in the main harness or problems with the RV’s electrical panel, often require specialized equipment and expertise. Similarly, if you suspect a deeper electrical issue—like a failing converter or battery—it’s best to have a professional diagnose and repair it.
Don’t risk further damage or safety hazards by attempting repairs beyond your skill level. A qualified technician can quickly identify and fix the problem, giving you peace of mind on the road.
Conclusion
RV running lights not working is a frustrating but manageable issue. By understanding the common causes—blown fuses, poor grounding, wiring damage, bulb failure, and switch problems—you can diagnose and fix most problems yourself. Regular maintenance and preventive care will keep your lights shining bright and your travels safe.
Remember, safety starts with visibility. Don’t ignore a single dark light. Take the time to inspect, test, and repair your running lights before hitting the road. With the right tools and a little patience, you’ll be back to enjoying the open highway—safely and confidently.
Frequently Asked Questions
Why are my RV running lights not working even though the fuse is good?
If the fuse is intact but the lights still don’t work, the issue could be a bad ground, damaged wiring, or a faulty switch. Use a multimeter to test for power at the light socket and check the ground connection.
Can I use LED bulbs in my RV running lights?
Yes, LED bulbs are a great upgrade—they use less power, last longer, and produce brighter light. Just make sure they’re the correct size and type for your fixture.
How do I find the right fuse for my RV running lights?
Check your RV owner’s manual for the fuse layout. The running lights fuse is usually labeled clearly. If you don’t have the manual, look for a diagram on the fuse panel cover.
Why do my RV running lights flicker?
Flickering lights often indicate a loose connection, corroded socket, or poor ground. Inspect the wiring and connections, and clean or tighten as needed.
Can rodents cause RV running lights not working?
Yes, rodents can chew through wiring insulation, causing shorts or open circuits. Inspect your wiring regularly, especially if your RV has been stored for a long time.
Do I need special tools to fix RV running lights?
A basic toolkit with a multimeter, screwdrivers, wire strippers, and electrical tape is usually enough. For more complex repairs, you may need crimping tools or a soldering iron.


