
How to Fix Car Cover Seams: A Step-by-Step DIY Repair Guide
Quick Answer
To fix car cover seams, clean and dry the damaged area, inspect the stitching, and choose a repair method that matches the cover’s fabric and coating. Small gaps can often be repaired with compatible polyester thread and a sewing machine, while minor seam leaks may respond to a manufacturer-approved seam sealer. For larger splits, use a compatible fabric patch or professional repair, following the cover manufacturer’s vehicle-care guidance as a general reference for protecting your car.
Choose the right repair
- Loose stitching: Restitch the seam with compatible thread and small, even stitches.
- Leaking seam: Apply a compatible seam sealer to the clean, dry seam.
- Torn fabric: Reinforce the damaged area with a compatible patch before the tear spreads.
- Coated material: Check product compatibility before applying adhesives, tape, or heat.
- Widespread damage: Compare repair costs with replacing the cover.
Before putting the cover back on
- Let the repair cure completely according to the product instructions.
- Check the seam for gaps, weak stitching, and signs of peeling.
- Make sure the cover fits without excessive tension across the repaired area.
Car cover seams take a surprising amount of stress from wind, stretching, folding, and repeated installation. When stitching starts to separate, a small repair can often prevent a minor problem from becoming a long tear.
In this guide, I’ll explain how to identify the damage, select suitable repair materials, and fix common seam problems without accidentally damaging the cover’s protective coating.
In This Guide
- Why Do Car Cover Seams Fail?
- What Tools and Materials Do You Need?
- How Do You Repair Loose or Split Stitching?
- How Do You Seal a Leaking Car Cover Seam?
- How Do You Repair Torn Seams and Fabric?
- Which Car Cover Seam Repair Method Should You Choose?
- How Do You Test the Repair and Prevent Future Damage?
- Frequently Asked Questions
Why Do Car Cover Seams Fail?
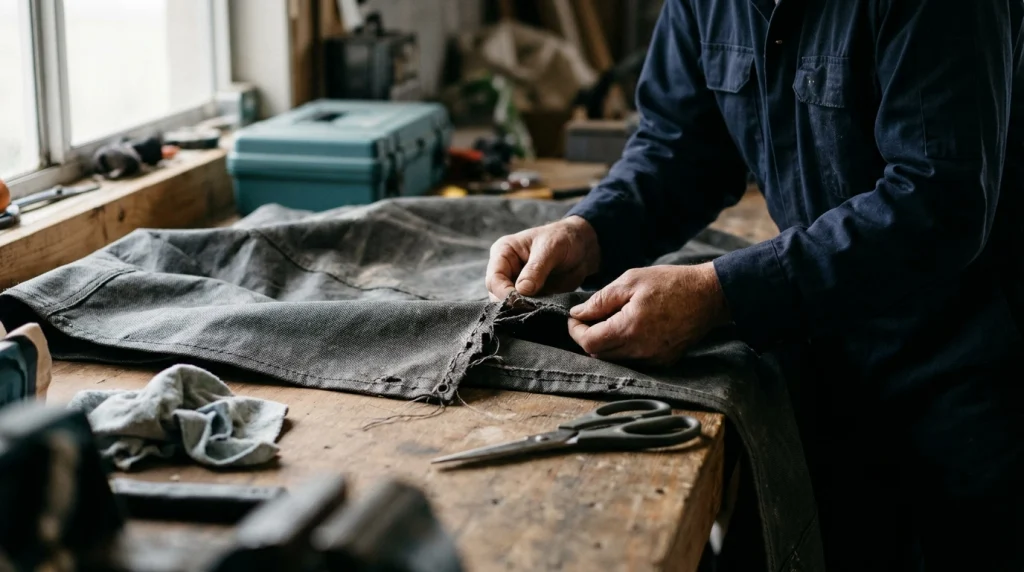
Car cover seams fail when the thread, fabric, or bond holding the panels together weakens. The right repair depends on which part has failed, so inspect the seam before choosing a product or picking up a needle.
What is a car cover seam?
A car cover seam is the joint where two pieces of cover material meet and are held together by stitching, adhesive, welding, or another manufacturing method. Some covers also have a seam-sealing layer that helps limit water penetration through needle holes.
Not every seam is constructed the same way. A lightweight indoor cover may use simple stitched fabric, while a multilayer outdoor cover may include a water-resistant coating or laminated backing.
What causes car cover seams to split?
Several problems can weaken a seam over time.
- Wind stress: Repeated flapping pulls on the seam and can enlarge existing stitch holes.
- Excessive tension: A cover that’s too small or pulled tightly over mirrors and bumpers places extra strain on its joints.
- UV exposure: Prolonged sunlight can degrade certain fabrics and threads.
- Age and wear: Repeated folding, stretching, and handling gradually weaken some materials.
- Moisture and contamination: Dirt, mildew, and unsuitable cleaning products can contribute to deterioration, depending on the material.
- Incorrect repairs: Incompatible glue, aggressive heat, or heavy stitching can damage coatings or create new weak points.
How can you identify the type of seam damage?
Lay the cover flat in a clean, dry workspace and examine both sides of the damaged area. Look closely at the stitching and fabric rather than assuming every opening needs sewing.
| Visible problem | Likely cause | Suitable approach |
|---|---|---|
| Thread is broken, fabric intact | Stitching failure | Restitch or have the seam resewn |
| Water passes through an otherwise closed seam | Open needle holes or failed seam seal | Use a compatible seam sealer |
| Fabric has split beside the stitching | Fabric weakness or excessive tension | Reinforce or patch the damaged area |
| Coating is peeling or crumbling | Material deterioration | Assess repairability or replacement |
Check whether the surrounding fabric feels thin, brittle, sticky, or unusually stretchy. If the material is deteriorating across a wide area, repairing one seam may only provide temporary relief.
Section Takeaway: Identify whether the failure involves thread, a leaking seam, or damaged fabric. Repairing the actual problem is more reliable than applying sealant to every type of damage.
What Tools and Materials Do You Need?
The best repair kit depends on the cover material and the type of damage. Gather only what the repair requires, and check the manufacturer’s instructions before using adhesive, thread, or sealant.
Materials for repairing car cover seams
- Soft cloth: Removes loose dirt without scratching or abrading the material.
- Mild cleaner: Cleans the damaged area when approved for the cover fabric.
- Polyester thread: May suit many synthetic fabric covers when its strength and construction match the original stitching.
- Hand-sewing needle: Useful for small repairs on material that can be sewn safely.
- Compatible seam sealer: Helps seal needle holes and intact seams when the product is approved for the cover material.
- Repair patch: Reinforces small fabric splits or holes when its adhesive or attachment method suits the cover.
- Scissors and measuring tape: Help trim loose threads and prepare a correctly sized patch.
- Clips: Hold fabric layers in position without making unnecessary holes.
How do you choose the right thread or adhesive?
Match the repair material to the cover’s construction rather than choosing it by color alone. A coated polyester cover, an uncoated woven cover, and a vinyl cover can respond differently to the same adhesive or repair tape.
Check the sewn-in label, packaging, or manufacturer’s website for the material and care instructions. If the cover uses a waterproof membrane, laminated layers, or a special coating, confirm that the repair product works with that construction.
Avoid ordinary household glue, random silicone sealants, and iron-on patches unless the manufacturer confirms compatibility. These products can create stiff spots, peel away, or damage a heat-sensitive coating.
Practical tip: Test the selected repair product on a hidden scrap of matching material, if available. Check adhesion and flexibility after curing before treating a visible or highly stressed seam.
Section Takeaway: Use materials designed for the cover’s fabric and coating. Compatibility matters more than choosing the strongest-looking adhesive or thickest thread.
How Do You Repair Loose or Split Stitching?
Loose stitching is often repairable when the fabric around the seam remains strong. The goal is to reconnect the original seam without creating oversized needle holes or pulling the material so tightly that it puckers.
Step 1: Remove, clean, and dry the cover
Take the cover off the vehicle and spread it over a clean, flat surface. Brush away loose dirt, then clean the affected section using the manufacturer’s recommended method.
Let the material dry fully before sewing. Damp fabric can be harder to handle, and dirt trapped inside a repair can interfere with adhesion if you later need a sealant.
Step 2: Inspect the original seam
Turn the cover over and examine both sides of the damaged joint. Identify where the thread has broken, where the original seam remains secure, and whether the fabric itself has started to tear.
- Trim only loose thread ends that interfere with the repair.
- Keep intact stitching wherever possible.
- Mark the beginning and end of the damaged section with removable clips.
- Stop if the fabric tears when handled gently.
Step 3: Restitch the damaged section
For a sewable fabric cover, use a needle and compatible thread to reconnect the separated seam along its original path. Keep the fabric edges aligned and use small, even stitches rather than pulling each stitch as tight as possible.
- Begin in a section where the original seam remains secure.
- Overlap the new stitching with sound stitching to help anchor the repair.
- Follow the original seam allowance, which is the fabric width between the edge and stitch line.
- Secure the thread without bunching or distorting the fabric.
- Inspect the seam from both sides before trimming the thread.
For a machine-sewn repair, use an appropriate needle and settings for the fabric thickness. Practice on a matching scrap first, because an unsuitable needle or tight stitch pattern can perforate lightweight material.
Hand sewing may be more practical for a short opening. However, it isn’t suitable for every coated or multilayer cover, especially when sewing would compromise a waterproof barrier.
Step 4: Restore seam water resistance if needed
New stitching can introduce additional needle holes, so a structurally repaired seam may still allow water through. If the cover manufacturer permits it, apply a compatible seam sealer according to its instructions.
Don’t assume every cover needs sealing. Some materials rely on breathability or a specific factory seam treatment, and an incompatible product can make the repair worse.
Section Takeaway: Restitch only when the fabric can support new stitches. If the seam is structurally sound but leaks, investigate seam sealing instead of adding unnecessary stitching.
How Do You Seal a Leaking Car Cover Seam?
If a seam allows water through but its stitching remains intact, a compatible seam sealer may solve the problem. First establish that water is passing through the seam itself rather than through worn fabric, an open tear, or an unsecured edge.
Step 1: Confirm the leak location
Dry the cover completely and inspect the seam under good lighting. Look for gaps between panels, damaged seam tape, worn stitching, and signs of peeling or delamination.
If the cover manufacturer allows water testing, apply a gentle flow to a small section while the cover is positioned appropriately. Avoid pressure washers, which can damage fabric and force water through places that would not normally leak.
Step 2: Prepare the seam
Clean the area using the recommended cleaner, then allow it to dry completely. Remove loose debris without scraping the coating or pulling at existing stitches.
Read the sealer label carefully. Some products are intended for woven synthetic fabric, while others are designed for vinyl or particular coated materials.
Step 3: Apply the compatible sealer
Lay the seam flat and apply a thin, even layer where the product instructions specify. Use the supplied applicator or a suitable small brush, and avoid creating thick ridges that could crack or peel as the cover flexes.
Some fabric seam sealers can be applied directly over stitching, while certain vinyl products have different application requirements. Follow the exact instructions for the product and material rather than copying a procedure designed for another cover type.
For a useful technical reference, Sailrite’s guide to waterproof seams explains why seam-sealing methods vary with fabric and cover construction.
Step 4: Allow the repair to cure
Keep the cover flat and undisturbed for the full curing period specified on the packaging. Dry-to-the-touch doesn’t always mean a repair is ready for stretching, rain, or repeated folding.
Once cured, check whether the sealer remains flexible and firmly attached. If it cracks, bubbles, or peels, stop using the same product until you’ve confirmed compatibility.
Important distinction: Seam sealer is not a substitute for repairing a seam that has pulled apart. Close the structural gap first, using an appropriate repair method, before considering any permitted sealing treatment.
Section Takeaway: Seal only a confirmed leaking seam with a compatible product. Correct preparation and full curing are essential for a flexible repair.
How Do You Repair Torn Seams and Fabric?
A torn seam needs more than a surface coating if the fabric has split beside the stitching. Repair the weakened area and reinforce it when possible, or replace the cover if the surrounding material can no longer support a reliable repair.
How to patch a small tear near a seam
A compatible patch can reinforce a small tear when the surrounding fabric remains strong. Choose a flexible repair material approved for the cover’s construction, and check whether the manufacturer permits adhesive patches.
- Clean and dry the damaged section completely.
- Lay the cover flat without stretching the fabric.
- Trim loose fibers carefully without enlarging the tear.
- Cut a rounded patch that extends beyond the damaged area on every side.
- Apply the patch using the manufacturer’s recommended adhesive or attachment method.
- Press the patch evenly and allow it to cure for the specified time.
Rounded corners can reduce the tendency of a patch to catch and peel at sharp edges. The necessary overlap depends on the damage, material, and repair product, so follow the patch manufacturer’s guidance instead of relying on one universal measurement.
Should you patch the inside or outside of the cover?
An inside patch can protect the exposed area while keeping the outer surface relatively smooth. However, the best position depends on how the cover is constructed and where the damaged seam sits.
- Inside patch: Useful when it can bond securely without interfering with the vehicle-facing surface.
- Outside patch: May suit a compatible repair system that requires external coverage or protection.
- Two-sided reinforcement: May work for certain materials, but extra layers can make the repair stiff and uncomfortable to fold.
Before choosing a patch, inspect the inside surface for a lining, membrane, or coating that could affect adhesion. Never assume an iron-on patch is safe for a coated cover, since heat can distort or damage some synthetic materials.
When should you avoid a DIY patch?
Skip a basic patch when the seam is under heavy tension or the fabric has become brittle across a broad area. A patch cannot restore the strength of material that has deteriorated around the repair.
Professional upholstery or canvas repair may be appropriate for long splits, complex curved seams, and multilayer covers. If the cover is relatively new, contact the seller or manufacturer before altering it because a DIY repair may affect warranty coverage.
Section Takeaway: Patch isolated tears only when the surrounding fabric remains sound. Extensive deterioration or a highly stressed seam may need professional repair or replacement.
Which Car Cover Seam Repair Method Should You Choose?
The best repair method depends on whether the failure affects the stitching, water resistance, or fabric strength. Match the method to the damage and the manufacturer’s material requirements rather than treating every seam with the same product.
| Repair method | Best suited to | Main limitation |
|---|---|---|
| Hand sewing | Short openings in sewable fabric | May introduce needle holes and weaken delicate coatings |
| Machine sewing | Accessible seams requiring consistent stitching | Requires suitable equipment and fabric settings |
| Seam sealer | Minor leakage through an intact, compatible seam | Doesn’t restore a separated structural seam |
| Adhesive repair patch | Small tears with sound surrounding material | Adhesion varies by coating, fabric, and weather exposure |
| Professional resewing | Long splits, stressed joints, or complex construction | Requires a suitable repair service |
| Replacement cover | Widespread fabric or seam deterioration | Requires purchasing a replacement |
How do you decide whether repair is worthwhile?
Compare the size and location of the damage with the condition of the rest of the cover. A short opening in otherwise sound fabric is a different problem from multiple failed seams and a peeling outer layer.
I would assess three things before spending money on repair materials:
- Damage extent: Is the problem confined to one seam, or are several areas failing?
- Material condition: Does the surrounding fabric remain flexible and intact?
- Repair compatibility: Can you obtain a product or service suitable for this specific cover?
For additional care guidance, consult the cover manufacturer’s instructions or a specialist such as CarCovers.org’s cover-care guide. Its advice reinforces the importance of identifying the material before cleaning or treating it.
As of 2026, the same practical rule applies: choose the least invasive repair that restores the seam’s intended function without compromising the cover’s coating or fit.
Section Takeaway: Sewing, sealing, patching, and replacing solve different problems. Select the option that addresses the actual failure while preserving the cover’s protective function.
How Do You Test the Repair and Prevent Future Damage?
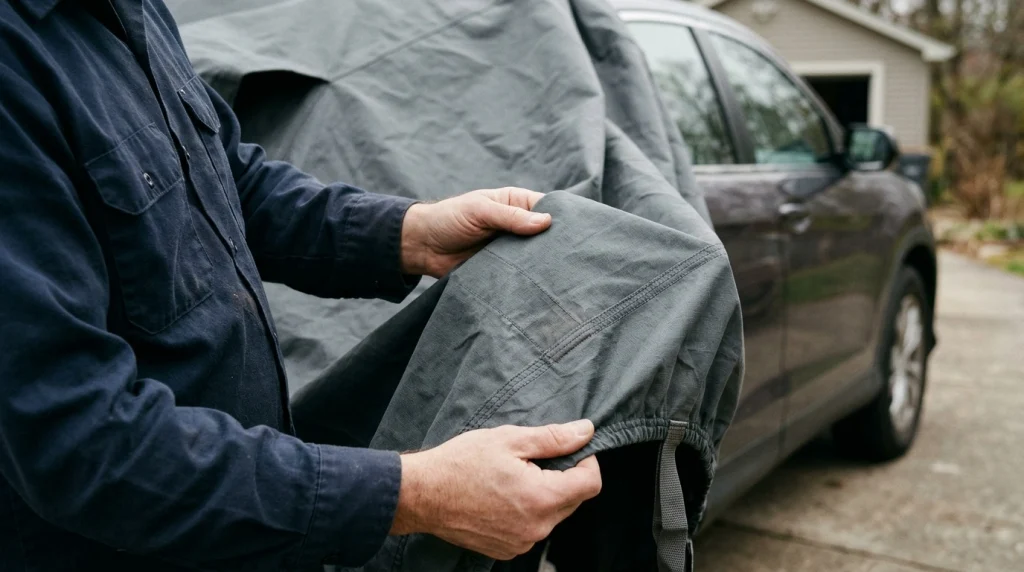
A repair isn’t finished until the seam remains secure and the cover works as intended. Inspect the finished area, check water resistance where appropriate, and correct the conditions that caused the original damage.
How to check the repaired seam
Wait until all thread work, adhesive, or seam sealer is complete and any required curing time has passed. Then inspect the seam from both sides without pulling hard on the repaired section.
- Check for loose thread ends and visible gaps.
- Look for patch edges that lift or adhesive that remains tacky.
- Confirm the material lies flat without excessive bunching.
- Check that nearby fabric hasn’t started splitting.
If the cover is intended to resist rain, test the repair gently according to the product instructions. Keep the cover off the vehicle during testing when practical, and let it dry fully afterward.
Remember that water resistance and waterproofing are not identical. Some car covers are designed to breathe, so moisture beneath the cover doesn’t automatically prove that a seam has failed.
How to prevent seams from splitting again
Correct installation and routine care can reduce unnecessary strain on repaired seams. Focus on the conditions that caused the damage rather than repeatedly treating the same area.
- Check the fit: Use a cover designed for your vehicle’s size and shape.
- Secure the cover: Use the supplied straps or tie-downs as directed to limit wind movement.
- Install carefully: Avoid pulling sharply on mirror pockets, hems, and stitched corners.
- Keep surfaces clean: Remove dirt and debris using the manufacturer’s approved cleaning method.
- Dry before storage: Avoid folding and storing a damp cover unless its instructions specify otherwise.
- Inspect regularly: Check seams and high-stress areas before small openings become larger tears.
Never use an unapproved heat source to dry a synthetic cover or force a patch to bond. Heat can damage coatings, and unsuitable adhesives can leave residue or create hard edges.
For general vehicle-care information, Consumer Reports’ automotive resource is a useful starting point, but the instructions supplied with your specific cover should take priority for material care and repairs.
Section Takeaway: Check the repaired seam before returning the cover to regular use. Correct fit, careful handling, and proper storage help reduce repeat failures.
Frequently Asked Questions
Can I fix a car cover seam without sewing?
Yes, if the problem is minor leakage through an intact seam or a small tear that accepts a compatible adhesive patch. Choose a repair product approved for the cover’s fabric and coating. A structurally separated seam may still need sewing or professional repair.
What thread should I use to repair a car cover?
Compatible polyester thread may suit many synthetic fabric covers, but the correct choice depends on the original material, thread strength, and exposure conditions. Match the original seam as closely as possible, and confirm that sewing won’t compromise a waterproof coating or membrane.
Will seam sealer make my car cover waterproof?
Not necessarily. A compatible seam sealer can reduce water penetration through certain stitched joints, but it won’t restore deteriorated fabric or repair a large opening. Some covers are breathable by design, so follow the manufacturer’s stated protection level rather than expecting complete waterproofing.
Can I use duct tape on a torn car cover seam?
Duct tape may provide a temporary hold in some situations, but its adhesive can leave residue, soften with heat, or peel during repeated folding. A compatible repair patch is generally a better long-term option when the manufacturer permits it.
Should I repair a seam if the surrounding fabric is brittle?
Usually, a simple seam repair won’t last if the surrounding material has deteriorated. Brittle fabric may tear again beside new stitching or lose adhesion around a patch. Assess the overall condition and compare professional repair with replacement.
How long should I wait before using a repaired car cover?
Wait until the thread repair is complete and any adhesive or seam sealer has cured according to its instructions. Curing times vary by product, application thickness, temperature, and humidity. Don’t expose the repaired area to rain or tension before the manufacturer permits use.
Can I repair a waterproof car cover with an iron-on patch?
Only if the cover manufacturer confirms that the material can tolerate the patch’s required heat. Some waterproof coatings and laminated fabrics can distort, melt, or delaminate when heated. A compatible adhesive patch or professional repair may be safer for heat-sensitive covers.
Final Takeaway: Fix the Seam Before the Damage Spreads
Fixing car cover seams starts with identifying whether the stitching has failed, water is passing through an intact joint, or the fabric itself has torn. Each problem requires a different approach.
For a small opening, carefully matched thread may restore a sewable seam. For minor leakage, a compatible seam sealer may help, while a patch can reinforce an isolated tear in otherwise healthy material.
Don’t overlook the cause. A poorly fitted cover, persistent wind movement, or widespread fabric deterioration can undo even a careful repair.
Inspect the finished seam, follow the cover manufacturer’s care instructions, and replace the cover when its material can no longer provide reliable protection.