
How to Remove Snow From a Car Cover Without Damage

Quick Answer
To remove snow from a car cover safely, use a soft automotive snow brush to sweep loose snow from the roof downward. Clear the hood, trunk, and attachment points before gently lifting the cover. Never scrape hard ice, pull frozen fabric, or drag a snow-loaded cover across the paint. Follow winter vehicle safety guidance before driving.
Five quick steps
- Check for ice: Look for frozen patches or fabric stuck to the vehicle.
- Clear the roof: Gently push loose snow toward the sides using a soft snow brush.
- Clean lower sections: Remove snow around the hood, trunk, mirrors, and straps.
- Lift carefully: Release the fasteners and fold the loose cover inward without dragging it.
- Dry before storage: Shake away remaining snow and let the cover dry completely.
Important safety warning
- If the cover is frozen: Stop pulling and allow the ice to thaw before attempting removal.
Snow looks harmless until it piles onto a car cover overnight. Removing it carelessly can tear the fabric, strain the straps, or drag gritty material across your vehicle’s paint.
My approach is to clear the weight first and handle the cover second. This guide explains the safest tools, removal steps, frozen-cover solutions, and winter maintenance habits.
In This Guide
Why Should You Remove Snow From a Car Cover?
Removing accumulated snow protects the cover from unnecessary weight and makes later removal easier. Heavy snow, ice, and repeated freezing can place stress on fabric, seams, and fasteners.
A car cover is a protective fabric barrier placed over a parked vehicle. Outdoor versions help shield the exterior from precipitation, dust, sunlight, and airborne debris.
However, a cover isn’t a structural shield. It cannot guarantee protection against every winter condition.
Snow weight can strain the fabric
Dry, fluffy snow behaves differently from wet, compacted snow. Wet snow contains more water per unit of volume and generally places greater weight on the cover.
Pay attention to these warning signs:
- Sagging material: Snow is pulling the cover into unsupported areas.
- Stretched fasteners: Elastic hems or straps are visibly under tension.
- Deep accumulation: Snow is piling around mirrors, roof rails, or other raised features.
- Frozen folds: Meltwater has hardened around creases and attachment points.
There’s no universal safe snow-depth limit for every car cover. The manufacturer’s guidance and the actual snow conditions matter more than a single measurement.
Ice can make removal dangerous for the finish
Snow may partially melt during the day and freeze again overnight. This can create a rigid layer on the fabric or bond wet areas to vehicle surfaces.
Pulling frozen material can damage stitching or scratch paint if grit is trapped underneath. The safest response is to let firmly attached ice thaw.
Trapped moisture can create problems
Snowmelt may collect beneath a poorly fitted or unsuitable cover. If moisture cannot escape, repeated dampness and freezing become concerns.
Choose an outdoor-rated cover with suitable moisture management. Keep the vehicle reasonably clean and dry before installation.
What Tools Should You Use to Remove Snow From a Car Cover?
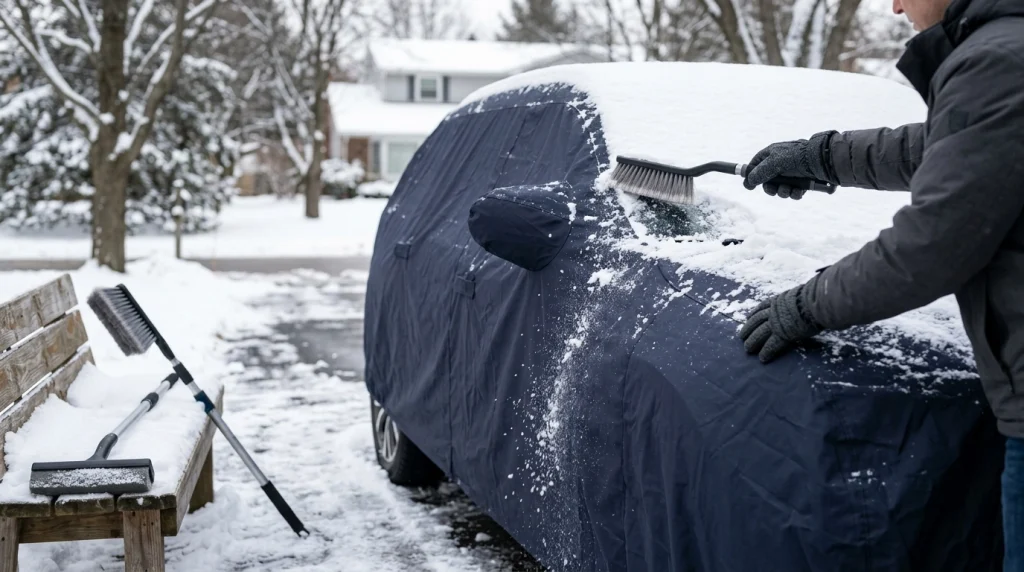
A soft automotive snow brush is the most practical tool for loose accumulation. It removes snow without the hard edges found on shovels and traditional scraping tools.
You don’t need specialized equipment for ordinary snowfall. A few clean, gentle tools are enough.
Recommended snow-removal tools
- Soft automotive snow brush: Best for light snow and small areas.
- Foam snow broom: Useful for sweeping loose accumulation across larger surfaces.
- Telescoping snow brush: Helps reach the roof of taller SUVs and trucks.
- Clean waterproof gloves: Make it easier to clear seams and operate buckles.
- Drying rack or clothesline: Provides a convenient place to dry a removed cover.
Look for smooth tool edges and clean contact surfaces. Embedded dirt can become abrasive even when a tool feels soft.
Snow-removal tools compared
| Tool | Best use | Recommendation |
|---|---|---|
| Soft snow brush | Loose snow | Recommended with light pressure |
| Foam snow broom | Wide roof areas | Recommended for soft snow |
| Gloved hands | Small loose deposits | Suitable if gloves are clean |
| Plastic ice scraper | Exposed automotive glass | Not for scraping the cover |
| Metal shovel | Ground snow | Avoid on covered vehicles |
| Stiff household broom | Outdoor ground cleanup | Not recommended |
Use the lightest effective pressure, regardless of the tool. The goal is to move snow without rubbing the tool against the cover repeatedly.
Should you use a leaf blower?
A leaf blower may move light, dry powder without direct contact. However, it offers little help with wet, packed, or icy snow.
Keep the nozzle away from the fabric and avoid lifting unsecured edges. Follow the equipment manufacturer’s operating instructions.
I wouldn’t choose a leaf blower for a loosely fitted cover in strong wind. Moving fabric can rub against dirty body panels.
How Do You Remove Snow From a Car Cover Safely?
The safest method is to remove snow while the cover remains secured, then release the clean, unloaded fabric. Work from the roof downward and avoid forcing frozen sections.
Here’s the sequence I’d use for an ordinary parked sedan or SUV.
Step 1: Inspect the cover before touching it
Start by checking the snow’s texture and the cover’s condition. Look for solid ice, stretched straps, and areas where the fabric appears frozen.
- Identify loose powder that can be brushed away.
- Check for heavy wet snow or hardened crusts.
- Inspect the lower hems for frozen attachments.
- Make sure there’s safe footing around the vehicle.
If you’re dealing with a significant ice layer, don’t begin by pulling the cover. Wait until the frozen sections can release safely.
Step 2: Remove loose snow from the roof
Begin at the highest accessible part of the roof. Move loose snow toward the sides with controlled, gentle strokes.
Work in small sections rather than pushing one large pile. This reduces sudden pulling on the cover.
- Keep the brush face flat against the snow, not pressed into the fabric.
- Move snow away from mirrors and exposed trim.
- Avoid grinding compacted snow against the surface.
- Use a properly sized telescoping tool for taller vehicles.
Don’t climb onto slippery tires or vehicle panels to reach the center. Use a stable position on the ground.
Step 3: Clear the hood and trunk
After clearing the roof, work across the hood and trunk. Push snow outward rather than concentrating weight around the edges.
Pay attention to fabric stretched over windshield corners and mirror pockets. These areas may catch snow or hold frozen folds.
For an SUV, clear the rear hatch area as well. Snow trapped near the lower edge can interfere with cover removal.
Step 4: Expose the straps and elastic edges
Remove accumulated snow from the attachment points before releasing them. Don’t pull a strap through solid ice.
- Clear loose snow around the front and rear hems.
- Locate buckles, cables, and attachment straps.
- Remove surrounding snow without striking painted surfaces.
- Release fasteners only when they’re free to move.
If a buckle is frozen, allow it to thaw instead of forcing the mechanism. Damaged hardware can make the cover less secure later.
Step 5: Lift and fold the cover carefully
Once the snow is removed and the fabric is free, release all remaining attachments. Lift the cover away from the vehicle rather than dragging it across the paint.
Gather it gradually, keeping the potentially dirty exterior folded inward when practical. Avoid rubbing the lower edges over the hood or fenders.
If another person is available, they can help lift a large SUV or truck cover. Both people should move together without pulling the fabric tight against the body.
Step 6: Inspect and dry the cover
Carry the cover away from the vehicle before shaking off remaining snow. Inspect the lining for road grit, frozen debris, or damaged stitching.
Dry the fabric according to its care instructions before long-term storage. Packing a soaked cover into a sealed bag encourages lingering dampness.
Step 7: Check the vehicle before driving
Removing the cover doesn’t guarantee the car is ready for the road. Clear remaining snow and ice from every critical exterior area.
- Windshield and all windows
- Roof, hood, and trunk
- Headlights, brake lights, and turn signals
- Side mirrors and license plates
- Cameras, forward-facing sensors, and radar areas
- Windshield wipers and surrounding channels
- Exhaust outlet and nearby snow accumulation
The National Weather Service’s winter-driving guidance emphasizes clearing windows, lights, cameras, and sensors before traveling.
Never drive with the car cover still attached. Even partial coverage can obstruct visibility or interfere with vehicle operation.
Section Takeaway: Clear snow first, release attachments second, and lift the cover without dragging it. Complete a separate vehicle safety check before driving.
What Should You Do if the Car Cover Is Frozen to the Vehicle?
If the cover is frozen to your vehicle, stop pulling immediately. Allow the frozen bond to soften before lifting the material.
Frozen fabric may be attached to the paint, glass, trim, or weather seals. Forcing it can tear the cover or damage surfaces underneath.
Determine where the cover is stuck
Inspect the edges without applying significant pressure. An ice crust on the outside is different from fabric frozen directly to the vehicle.
- Ice on top: The fabric may still move freely underneath.
- Frozen hem: Lower edges or straps may be attached to surrounding ice.
- Frozen mirror pocket: Fabric may grip the mirror housing.
- Frozen body contact: Moisture between the cover and vehicle has solidified.
Gently test only a loose section. If you feel resistance, stop and allow additional thawing.
Let the ice thaw gradually
Natural warming is the least aggressive approach. Temperatures above 32°F (0°C), sunlight, and a sheltered environment may gradually loosen ice.
Don’t assume thawing is complete because one corner releases. Check each remaining contact point separately.
If the fabric releases, lift it slowly and inspect the underlying surface. Don’t slide frozen material sideways across the finish.
Can you use hot water or a heat gun?
Avoid pouring hot water onto frozen glass or the cover. Rapid heating can stress cold glass, and runoff can freeze again.
Heat guns, open flames, and close-range heaters are also unsuitable. Concentrated heat can damage coatings, synthetic fabric, plastic trim, and seals.
Use only the vehicle’s normal defrosting functions where appropriate, after the cover is fully removed and the vehicle can be operated safely. Never start a covered vehicle to speed up thawing.
If you cannot remove the cover safely, postpone driving or seek professional assistance. Don’t attempt to operate a vehicle while frozen fabric obstructs critical components.
Mechanic Alert: If frozen fabric has damaged sensors, wiring, mirrors, glass, or powered components, have a qualified technician inspect the affected area.
Section Takeaway: A frozen cover needs time, not force. Gradual thawing is safer than scraping, heating aggressively, or pulling against ice.
How Can You Prevent Snow and Ice Damage to a Car Cover?
Prevention starts with a correctly fitted outdoor cover and a clean vehicle. Winter maintenance reduces the chance of trapped moisture, excessive fabric movement, and frozen attachments.
Choose an outdoor-rated winter cover
A winter-appropriate cover should handle precipitation while managing moisture and fitting securely. Indoor dust covers aren’t suitable substitutes for harsh outdoor weather.
When comparing covers in 2026, I’d focus on practical construction rather than marketing claims.
- Weather suitability: The manufacturer approves outdoor winter use.
- Proper fit: Material follows the vehicle’s shape without excessive slack.
- Moisture management: The construction helps limit trapped dampness.
- Secure attachments: Fasteners reduce movement during gusts.
- Paint-friendly lining: The inner surface is clean and suitable for finished panels.
- Durable seams: Stitching and reinforced areas can withstand normal handling.
Remember that water resistance and breathability serve different purposes. Keeping precipitation out doesn’t eliminate moisture that originates beneath the fabric.
Install the cover on a clean, dry vehicle
Dirt trapped beneath moving fabric can create fine scratches. Clean the bodywork and let it dry when conditions permit.
Remove snow or frost before installing the cover. Don’t seal a wet, contaminated surface beneath fabric overnight if freezing temperatures are expected.
Remove snow before it becomes compacted
Fresh powder generally clears more easily than snow that has partly melted and refrozen. Inspect the cover during extended winter weather when conditions are safe.
Clear significant wet accumulation before the fabric begins sagging. Follow any snow-load limits specified by the cover manufacturer.
Maintain the cover throughout winter
Inspect fasteners, seams, and the inner lining regularly. Replace or repair damaged components according to the manufacturer’s guidance.
- Remove loose dirt and road salt residue.
- Wash only using approved care methods.
- Allow the cover to dry before prolonged storage.
- Check elastic edges for stretching or deterioration.
- Inspect the fabric after severe wind or freezing rain.
A damaged cover may no longer provide reliable protection. Continued use can introduce unnecessary rubbing or moisture problems.
What Snow-Removal Mistakes Should You Avoid?
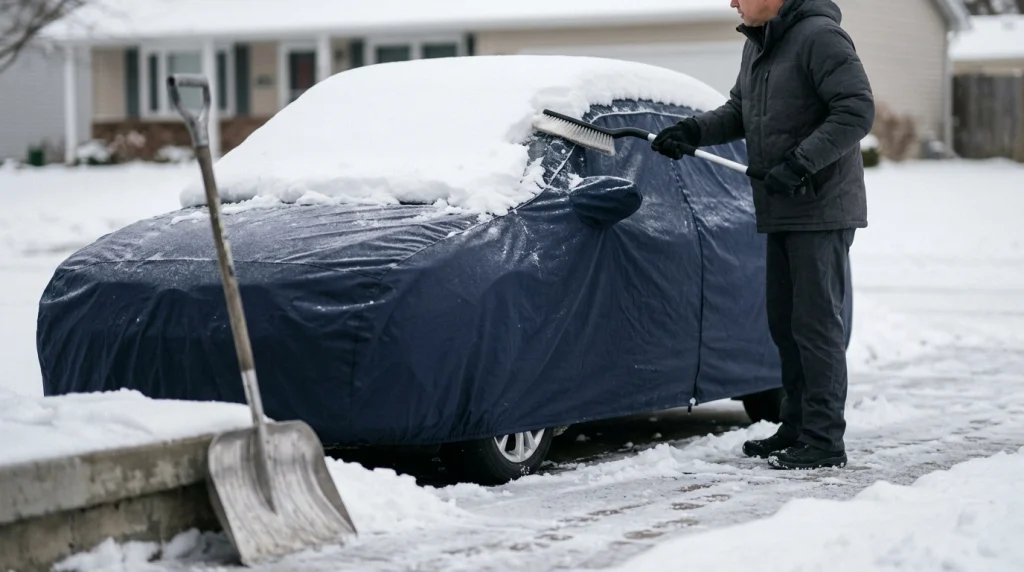
The most damaging mistakes involve excessive force, unsuitable tools, and removing the cover before clearing snow. Each can turn a manageable winter cleanup into an expensive problem.
Using a metal shovel
Metal edges can cut cover material or strike the paint beneath. Use a soft automotive snow-removal tool instead.
Scraping a frozen cover
A rigid ice crust shouldn’t be chipped while the fabric rests against the car. Let the ice soften naturally.
Pulling the cover with snow still on top
Heavy accumulation increases the weight you must move. Remove as much loose snow as practical before lifting the fabric.
Dragging dirty fabric across paint
Road dust, salt, and grit may collect inside lower folds. Lift the material away from painted panels instead of sliding it sideways.
Leaving a wet cover packed away
Trapped moisture can create unpleasant odors and material deterioration. Dry the cover according to its care instructions.
Running the engine beneath the cover
Never operate a vehicle while a full cover is installed. Remove the cover and check the exhaust before starting the engine.
The NHTSA winter safety resource warns about carbon monoxide risks from blocked exhaust outlets and running vehicles in enclosed spaces.
For additional winter preparation, the National Weather Service offers guidance on emergency supplies and vehicle readiness.
Section Takeaway: Gentle brushing, careful lifting, and proper drying prevent most avoidable cover-handling problems. Never trade vehicle safety for a faster cleanup.
Frequently Asked Questions
Can you use a regular broom to remove snow from a car cover?
A regular household broom isn’t ideal because stiff or dirty bristles may damage the fabric. Use a clean, soft automotive snow brush or foam snow broom instead.
Apply light pressure and avoid pushing the tool into frozen material.
Should you remove a car cover before a snowstorm?
Not necessarily. A properly fitted, outdoor-rated cover can help shield a parked vehicle from direct snowfall.
Follow the manufacturer’s winter-use instructions and secure the cover correctly. Remove it if severe conditions exceed its intended use.
Can you leave snow on a car cover overnight?
Light, dry snow can often remain temporarily on a suitable outdoor cover. However, heavy wet snow and freezing rain deserve closer attention.
Clear accumulation when it begins straining the cover, and follow the manufacturer’s specific limitations.
Will brushing snow off a car cover scratch the paint?
Gentle brushing of loose snow is unlikely to affect the paint directly when the cover remains stable. The greater risk comes from dirt or grit trapped beneath moving fabric.
Keep the cover clean, avoid unnecessary rubbing, and use light pressure.
How do you remove thick ice from a car cover?
Allow the ice to soften naturally rather than striking or scraping it. Do not yank frozen fabric away from the vehicle.
Once the material moves freely, remove the cover slowly and inspect the surfaces underneath.
Can a waterproof car cover freeze to a vehicle?
Yes. Moisture from condensation, snowmelt, or incomplete drying may freeze between the cover and the vehicle.
Even an outdoor waterproof cover can develop frozen contact points. Proper ventilation, installation, and drying help reduce the risk.
Should you dry a car cover after removing snow?
Yes, especially when the cover becomes wet from melting snow. Remove loose debris and let the fabric dry according to its care label.
Avoid storing damp material in a sealed bag for extended periods.
Final Takeaway: Keep Snow Removal Gentle and Controlled
Removing snow from a car cover doesn’t require aggressive tools or complicated techniques. A soft snow brush, careful top-down clearing, and controlled lifting are usually enough for loose accumulation.
The biggest rule is simple: never force a frozen cover away from your vehicle. Let the ice thaw before attempting removal.
Keep the cover clean, inspect it throughout winter, and dry it before storing. Before every winter drive, remove the cover completely and clear all remaining snow and ice from the vehicle.
