
How to Stop Cover Damage on Ceramic Coating: Complete Prevention Guide

Quick Answer
To stop car cover damage on ceramic coating, keep the vehicle and cover clean, let both dry, use a soft, properly fitted cover, and prevent fabric from moving across the paint. Never drag a cover over dust or grit. Ceramic coating improves paint protection, but it cannot prevent every scratch. Covercraft’s scratch-prevention guidance confirms the importance of cleanliness and proper fit.
Six Steps to Prevent Damage
- Check coating cure: Wait until the coating manufacturer approves fabric contact.
- Wash the vehicle: Remove abrasive dirt before installing the cover.
- Inspect the lining: Remove contamination and check for damaged fabric.
- Choose proper fit: Minimize loose material that could flap in wind.
- Lift, don’t drag: Install and remove the cover with controlled movements.
- Inspect regularly: Check mirrors, corners, and other common rubbing points.
If Damage Already Exists
- Stop using the cover: Clean and inspect the affected paint before considering polishing or coating repair.
A ceramic coating should make your car easier to maintain, not leave you worrying about scratches whenever you remove its cover. Unfortunately, even a soft cover can damage a coated finish when dirt and movement work together.
As of 2026, the safest approach remains surprisingly simple: prevent abrasive contact before it happens. I’ll explain how cover damage develops, how to prevent it, and what to do when the paint already shows marks.
In This Guide
Why Do Car Covers Damage Ceramic Coating?
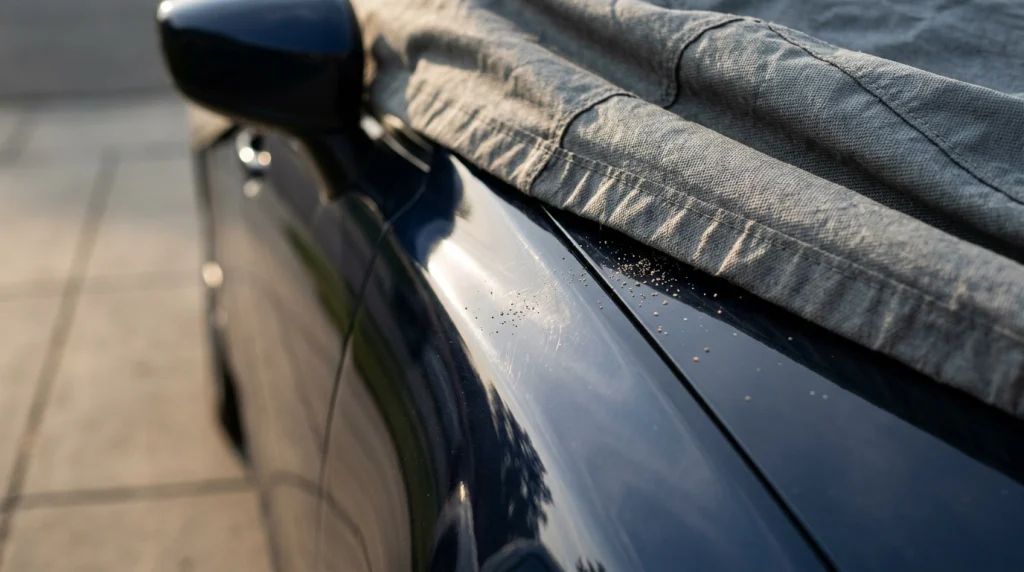
Car covers can damage ceramic coatings because dirt and repeated fabric movement create friction against the protected finish. The ceramic layer offers some resistance, but it isn’t a substitute for careful handling.
A ceramic coating is a liquid-applied protective treatment that bonds to the vehicle’s finish. It helps with water repellency, cleaning, gloss, and resistance to certain contaminants.
However, a ceramic coating isn’t a thick physical barrier like paint protection film (PPF). Abrasive particles can still leave visible marks.
Trapped dirt acts like sandpaper
Fine road dust, sand, and dried mud can settle on your vehicle before the cover goes on. Those particles become a problem whenever the cover shifts.
Imagine a small grain of sand trapped between fabric and a painted hood. Repeated movement can drag that grain across the same surface.
- Sand and road grit: Can create fine scratches during contact.
- Dust accumulation: Can increase contamination beneath the cover.
- Dirty lining: May transfer trapped particles onto clean paint.
- Dried debris: Can create concentrated rubbing points.
This explains why soft material alone doesn’t guarantee safety. Even premium fabric becomes risky when contaminated.
Wind creates repeated friction
A loose outdoor cover can shift repeatedly during windy conditions. That movement becomes especially noticeable near mirrors, fenders, and roof edges.
Repeated contact may produce micro-marring, which means tiny scratches or surface marks that reduce paint clarity. Dark-colored paint often makes these defects easier to see.
Incorrect fit concentrates pressure
An oversized cover may flap across broad panels. An excessively tight cover can require unnecessary pulling during installation.
Neither situation is ideal. I prefer a cover that follows the vehicle’s shape without placing excessive pressure on accessories or sharp edges.
Moisture introduces another problem
Moisture doesn’t automatically scratch ceramic coating, but trapped water can contribute to spotting and contamination. Damp material may also remain against the finish longer than intended.
For vehicles stored outdoors, suitable breathability and weather protection matter. Avoid sealing a wet vehicle beneath an inappropriate cover.
What does cover damage look like?
The location and appearance of a mark provide useful clues. However, appearance alone cannot confirm whether damage affects the ceramic layer or underlying clear coat.
| Visible Symptom | Possible Cause | Recommended Action |
|---|---|---|
| Fine swirl marks | Grit and repeated movement | Clean, inspect, and correct the contact problem |
| Straight scratches | Dragging during removal | Use a controlled lifting method |
| Marks around mirrors | Fabric pressure or wind movement | Check fit and fastening |
| Dull or hazy patches | Residue, contamination, or abrasion | Wash before assessing the defect |
| Water spotting | Mineral deposits from trapped moisture | Use coating-compatible cleaning methods |
Section Takeaway: Most cover-related problems begin with contamination, uncontrolled movement, or unsuitable fit. Identify the cause before changing products or attempting repairs.
How Can You Prevent Car Cover Damage on Ceramic Coating?
The most effective prevention method combines careful cleaning, complete drying, proper fit, and controlled fabric contact. Each step removes a common source of abrasion.
Step 1: Confirm that the coating has cured
Fresh ceramic coatings need time to cure after application. The required period depends on the coating formula and installation conditions.
Always follow the coating manufacturer’s aftercare instructions. Don’t place a cover directly onto freshly coated paint without approval.
Step 2: Wash the car before covering it
Never assume that glossy paint is free from abrasive particles. A vehicle can appear clean while carrying fine road dust.
Use a washing method compatible with your ceramic coating.
- Rinse loose debris from the vehicle.
- Apply an approved automotive shampoo.
- Wash gently with a clean microfiber wash mitt.
- Rinse thoroughly to remove residue.
- Dry using clean, soft drying materials or suitable filtered air.
Keep wash tools free from grit throughout the process. Replace contaminated towels or mitts rather than rubbing particles against the finish.
For additional washing information, consult Consumer Reports and your coating manufacturer’s maintenance guidance.
Step 3: Clean the cover’s inner surface
A clean vehicle can still suffer damage beneath a dirty cover. The lining deserves just as much attention as the paint.
- Check the inside for sand, grit, and leaves.
- Inspect seams, straps, and exposed hardware.
- Follow the cover manufacturer’s washing instructions.
- Avoid placing the clean lining on the ground.
- Allow the cover to dry before storing it.
Don’t apply fabric conditioners or household chemicals unless the cover manufacturer approves them. Some products may leave residue or affect protective materials.
Step 4: Keep the car and cover dry
After washing, inspect areas that commonly retain water. Mirrors, door handles, badges, and trim gaps deserve extra attention.
Choose a cover appropriate for the storage environment. A breathable outdoor cover may help manage moisture, but it cannot compensate for covering a wet vehicle.
Step 5: Eliminate unnecessary fabric movement
Proper fit reduces the chance of repeated rubbing. The cover should remain reasonably stable without excessive tension.
- Choose a cover designed for your vehicle’s dimensions.
- Secure the manufacturer’s intended fastening points.
- Keep straps and buckles away from painted panels.
- Check the cover after windy weather.
- Remove it when conditions cause persistent flapping.
I wouldn’t continue using a cover that repeatedly balloons in strong wind. Protection against rain or dust isn’t worthwhile if the fabric constantly rubs the paint.
Section Takeaway: A clean cover on clean, dry paint creates a safer starting point. Proper fit and careful handling help maintain that protection.
What Type of Car Cover Is Safest for Ceramic Coating?
The safest cover is one that suits your storage conditions, fits correctly, and has a smooth, clean paint-contact surface. Material quality matters, but no fabric is completely scratch-proof.
Indoor versus outdoor covers
Indoor covers mainly protect against dust and occasional incidental contact. Outdoor covers must also handle weather exposure, wind, and environmental contamination.
| Feature | Indoor Cover | Outdoor Cover |
|---|---|---|
| Primary purpose | Dust protection | Weather protection |
| Typical material | Soft, lightweight fabric | Weather-resistant layers |
| Wind exposure | Generally limited | Potentially significant |
| Important concern | Dust contamination | Movement and moisture |
| Best setting | Dry, enclosed garage | Exposed outdoor parking |
Should you choose a soft-lined cover?
A smooth, soft inner surface may reduce direct fabric abrasion during careful handling. However, softness alone cannot stop scratches caused by trapped particles.
Look for a cover with suitable construction, secure seams, and proper sizing. Examine the lining rather than relying only on marketing terms such as paint-safe.
Custom-fit versus universal covers
Custom-fit covers generally follow the specific vehicle’s shape more closely. Universal covers may leave extra material around mirrors, bumpers, and rooflines.
That difference matters outdoors. Excess fabric can move more easily under wind pressure.
Before buying, check whether the cover accommodates your vehicle’s spoiler, roof rack, antennas, and mirror design.
Does a more expensive cover guarantee protection?
No. A costly cover can still cause scratches if used incorrectly.
I’d prioritize fit, appropriate materials, reliable fastening, and maintenance requirements over price alone. You can review cover construction options through Covercraft’s vehicle cover range.
How Should You Install and Remove a Cover Without Scratching?
Lift the cover into position rather than sliding it across the paint. The same principle applies during removal: controlled lifting minimizes friction.
Safe installation procedure
- Inspect the vehicle: Confirm that the paint is clean and dry.
- Check the cover: Make sure the lining contains no visible debris.
- Identify orientation: Find the front, rear, and mirror pockets.
- Position gently: Begin near the roof or the manufacturer’s recommended starting point.
- Lower carefully: Work toward the ends without dragging excess material across panels.
- Fit accessories: Avoid forcing fabric around mirrors, spoilers, or antennas.
- Secure fasteners: Follow the cover manufacturer’s installation instructions.
For larger vehicles, a second person can make installation easier. This helps prevent uncontrolled pulling across the hood and roof.
Safe removal procedure
Release all securing straps before moving the cover. Avoid pulling the entire cover toward one end of the vehicle.
- Check for leaves or debris on the cover.
- Release straps and fitted pockets carefully.
- Lift the lower edges away from the body.
- Fold sections progressively toward the center.
- Lift the folded cover off without dragging it.
- Store the clean lining protected from contamination.
Keep the dirtier exterior surface away from the clean inner fabric while folding. Never drop the cover onto a dusty driveway before reinstalling it.
When should you stop using the cover?
Some circumstances make covering the vehicle unnecessarily risky. Leaving the car uncovered temporarily may be the better choice.
- The vehicle is visibly dusty or muddy.
- The lining contains grit that cannot be removed safely.
- Strong wind causes persistent fabric movement.
- The cover has rough, damaged, or exposed hardware.
- The ceramic coating hasn’t completed its required cure period.
Section Takeaway: Safe installation isn’t about speed. Controlled lifting and clean contact surfaces reduce unnecessary abrasion.
What Should You Do if the Ceramic Coating Is Already Damaged?
Start by cleaning and inspecting the affected area. Don’t immediately use scratch removers, rubbing compounds, or abrasive polishing pads.
What appears to be coating damage might instead be surface contamination, residue, mineral spotting, or a defect in the underlying clear coat.
Step 1: Clean and inspect the damage
Wash the affected panel with a coating-compatible automotive shampoo. Dry it carefully before examining the surface.
Use a bright inspection light from different angles. Compare the marked area with neighboring paint.
- Cloudy appearance: Could indicate contamination, residue, or abrasion.
- Fine visible lines: May indicate micro-scratches.
- White or mineral-like spots: May indicate water deposits.
- Deep visible grooves: May involve the underlying paint system.
A reduction in water beading doesn’t automatically prove the coating has failed. Contamination can temporarily change the surface’s water behavior.
Step 2: Try the least aggressive correction
If the problem appears to be residue, use the cleaning product recommended by your coating manufacturer. Avoid mixing unknown chemicals or applying strong household cleaners.
For mineral deposits, a coating-compatible water-spot remover may be appropriate. Follow its label carefully and test as directed.
If cleaning restores clarity, abrasive correction may be unnecessary.
Step 3: Decide whether polishing is necessary
Polishing uses abrasives to correct surface imperfections. Unfortunately, that same process may reduce or remove ceramic protection in the treated area.
The correct response depends on the defect’s depth and the coating system. A professional detailer can inspect the panel before recommending correction.
For broader explanations of ceramic coating limitations and paint-care products, visit Car and Driver.
Mechanic Alert: Deep scratches, exposed primer, damaged clear coat, or repairs involving machine polishing and sanding should be assessed by a qualified paint-correction or body-repair professional.
Step 4: Restore protection after correction
If abrasive correction removes the coating, the affected area may need coating reapplication. Simply adding a maintenance spray may not replace the original ceramic layer.
Follow the installed coating system’s preparation and reapplication instructions. Then correct the cover problem before placing fabric against the repaired finish again.
Section Takeaway: Cleaning comes before correction. Confirm the actual defect, avoid unnecessary abrasion, and restore ceramic protection if polishing removes it.
What Maintenance Routine Prevents Long-Term Cover Damage?
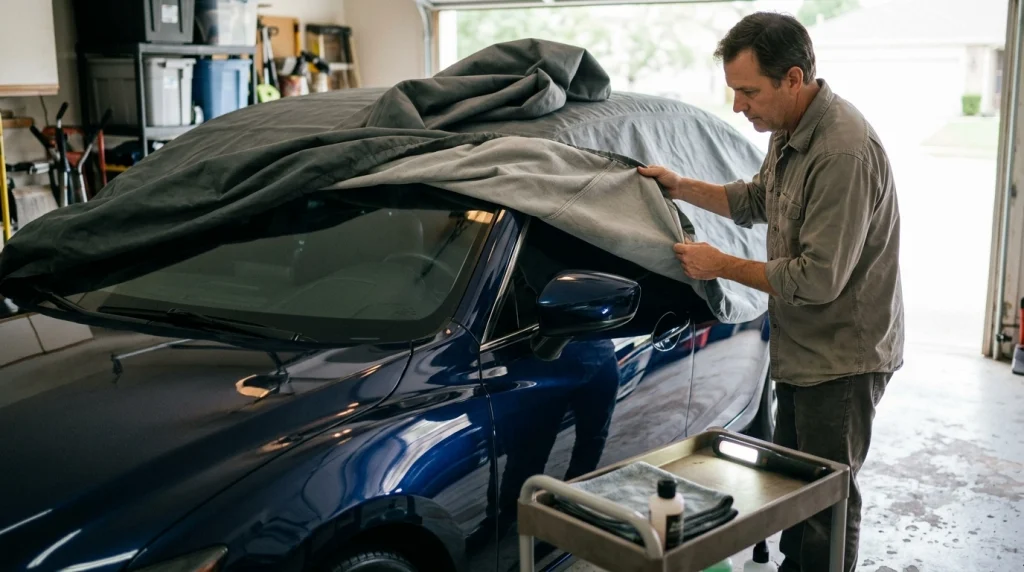
A practical maintenance routine checks both the vehicle and the cover. The ideal frequency depends on driving conditions, storage location, weather, and how often the cover is used.
Before every installation
- Check the paint for dirt and grit.
- Confirm that the vehicle is dry.
- Inspect the cover lining.
- Check for damaged straps or exposed fasteners.
- Make sure conditions allow safe installation.
After storms or windy conditions
Inspect whether the cover has shifted or loosened. Pay attention to the mirrors, hood corners, roof edges, and rear bumper.
Look for debris entering beneath the fabric. Don’t repeatedly reposition a dirty cover directly against the paint.
During extended vehicle storage
Remove the cover periodically to inspect the car, condensation, and accumulated debris. Covercraft recommends regular removal and cleaning during longer storage periods.
Its published guidance suggests checking and cleaning approximately every one to two weeks during extended coverage. Shorter intervals may be appropriate in dusty or windy environments.
See the manufacturer’s extended cover storage recommendations for more details.
When is leaving the car uncovered safer?
A car cover isn’t automatically the best choice for every daily driver. Frequent installation on dusty paint can create more contact than occasional uncovered parking.
Covered garages, carports, and sheltered parking may reduce the need for direct fabric contact. The best option depends on your environment and available storage.
For example, a daily commuter parked outside near construction dust faces a different situation from a weekend car stored in a clean garage. I’d choose the method that creates the least abrasive contact overall.
Section Takeaway: Recheck cleanliness, fit, and conditions every time you cover the vehicle. Regular inspections help catch small problems before repeated friction causes more damage.
Frequently Asked Questions
Can a car cover scratch a ceramic-coated car?
Yes. A car cover can scratch a ceramic-coated car if dirt becomes trapped underneath or the cover repeatedly moves across the surface. Ceramic coating adds protection but doesn’t make paint scratch-proof. Keeping both the cover and vehicle clean helps reduce the risk.
Does ceramic coating protect against car cover scratches?
Ceramic coating may resist some minor surface wear, but it cannot reliably prevent scratches from trapped grit or repeated abrasion. Proper washing, careful cover handling, and secure fit are still necessary. Don’t rely on ceramic coating as a replacement for good maintenance.
Should you put a cover on a freshly ceramic-coated car?
Only after the coating manufacturer or installer confirms that fabric contact is allowed. Different ceramic coatings have different curing requirements. Covering too early may interfere with the intended aftercare process, so follow the instructions for your specific product.
Can polishing remove car cover scratches?
Some shallow surface marks can be improved through professional paint correction. However, polishing may also remove ceramic protection from the treated area. Deep scratches may require more extensive repairs. Have the defect assessed before choosing an abrasive treatment.
Is a microfiber-lined car cover safe for ceramic coating?
A clean, smooth microfiber-lined cover can be suitable for a fully cured ceramic-coated finish. However, the lining isn’t guaranteed to prevent scratches. Sand, dust, incorrect sizing, and wind movement can still damage the finish regardless of fabric softness.
Can a wet car cover damage ceramic coating?
Wet covers can contribute to trapped moisture, mineral deposits, and contamination problems. While moisture doesn’t automatically scratch the coating, keeping the vehicle covered while damp may create other finish concerns. Dry the vehicle and follow the cover manufacturer’s weather and storage guidance.
Should you use a car cover every day?
Daily cover use is reasonable only when the car and lining remain clean, and installation doesn’t introduce significant friction. If daily driving leaves the paint dusty, repeated covering may increase scratching risk. Sheltered parking may offer a safer alternative in those conditions.
Final Takeaway: Protect the Coating Before Covering the Car
Preventing cover damage on ceramic coating comes down to managing dirt, moisture, fabric contact, and movement. Even a high-quality coating needs careful maintenance.
My preferred routine is straightforward: inspect the paint, clean the cover, dry both surfaces, and install it without dragging. If fresh scratches appear, stop covering the vehicle until you identify the cause.
Remember that a car cover should protect your finish, not become another source of wear. A few careful habits can help preserve the appearance of your ceramic-coated vehicle for the long term.
