
How to Turn Off the Maintenance Light on a Toyota Rav4 with Push Button Start
Contents
- 1 Key Takeaways
- 2 📑 Table of Contents
- 3 Understanding Your RAV4’s Maintenance Required Light
- 4 Essential Pre-Reset Checklist: Don’t Skip This!
- 5 The Step-by-Step Reset Procedure for Push-Button Start RAV4s
- 6 What To Do If the Light Won’t Reset or Re-Illuminates Quickly
- 7 The Critical Importance of Actual Maintenance Over Reset
- 8 Common Pitfalls and Mistakes to Avoid
- 9 Conclusion: A Simple Task with a Big Responsibility
- 10 Frequently Asked Questions
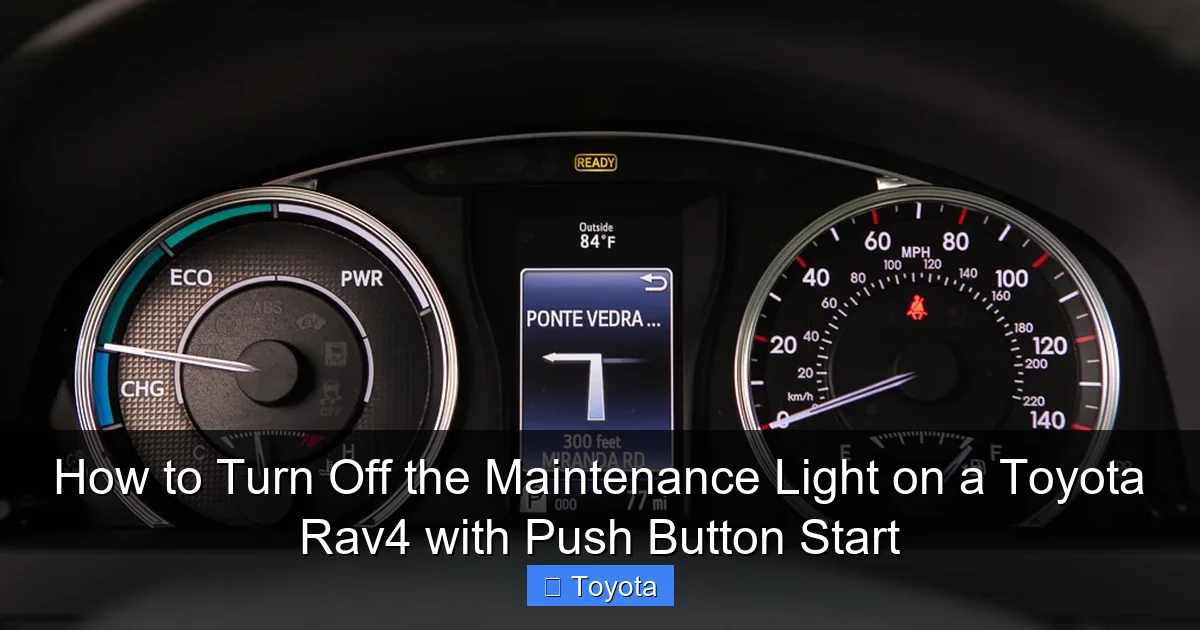
The maintenance light on your Toyota RAV4 with push-button start is a simple reminder that scheduled service is due, not an emergency. It typically illuminates after a set mileage or time interval, often signaling an oil change is needed. Resetting it is a straightforward process you can do yourself in under a minute using the vehicle’s odometer button and trip meter display. However, you should only perform the reset after the required maintenance has been completed by a professional. If the light persists or other warning lights appear, consult your owner’s manual or a certified technician.
You’re cruising along in your trusty Toyota RAV4, enjoying the smooth ride and confident handling, when suddenly a small yellow wrench icon lights up on your dashboard. If your RAV4 is equipped with the convenient push-button start system, you might wonder how to silence this reminder. First, take a breath. This little light, often labeled “MAINTENANCE REQUIRED,” is your car’s polite way of saying it’s time for its scheduled check-up, much like a calendar alert on your phone. It’s not an emergency siren, but it is a crucial notification you shouldn’t ignore. Turning it off is a simple manual process, but it’s one that must be done responsibly. This comprehensive guide will walk you through exactly how to reset that maintenance light on your push-button start Toyota RAV4, explain why it appears, and outline the vital steps you must take before you hit those buttons.
Key Takeaways
- The light is a reminder, not a diagnosis: The maintenance required light simply tells you it’s time for scheduled service based on mileage/time, not that something is immediately broken.
- Reset only after service: Always complete the necessary maintenance (like an oil change) before following the reset procedure to avoid engine damage.
- The process uses the odometer button: You’ll use the “ODO/TRIP” button on the instrument cluster to navigate the service menu and reset the light.
- Model year matters: The exact button sequence can vary slightly between older and newer RAV4 generations with push-start.
- Ignoring it has consequences: Prolonged driving with the light on without servicing can lead to premature engine wear and void warranty coverage.
- It’s different from the check engine light: A solid yellow wrench icon is the maintenance light; a blinking engine icon is a serious fault requiring immediate attention.
📑 Table of Contents
- Understanding Your RAV4’s Maintenance Required Light
- Essential Pre-Reset Checklist: Don’t Skip This!
- The Step-by-Step Reset Procedure for Push-Button Start RAV4s
- What To Do If the Light Won’t Reset or Re-Illuminates Quickly
- The Critical Importance of Actual Maintenance Over Reset
- Common Pitfalls and Mistakes to Avoid
- Conclusion: A Simple Task with a Big Responsibility
Understanding Your RAV4’s Maintenance Required Light
Before we dive into the “how,” let’s clarify the “why.” The maintenance required light is part of Toyota’s sophisticated onboard diagnostic system. It’s not triggered by a sensor detecting a problem like low oil pressure. Instead, it’s a pre-programmed timer and mileage counter built into the vehicle’s computer, often called the Engine Control Unit (ECU). This system tracks your driving habits, engine run time, and mileage to calculate when various maintenance items, most commonly an oil and filter change, are due based on Toyota’s recommended service intervals.
The Science Behind the Reminder
Think of it as your car’s service scheduler. For modern RAV4s, the interval is typically every 5,000 miles or 6 months, whichever comes first, but this can vary based on your driving conditions (severe vs. normal). The system uses algorithms that account for things like frequent short trips, extreme temperatures, and dusty conditions, which are harder on the engine and may shorten the oil life. When the preset threshold is reached, the ECU sends a signal to illuminate the yellow wrench icon on the instrument panel. Its sole purpose is to get your attention so you can plan for maintenance. Resetting the light without performing the actual service is like erasing a to-do list without doing the tasks—it might clear the alert, but the work still needs to be done.
Essential Pre-Reset Checklist: Don’t Skip This!
You might be eager to make that light disappear right now. But pressing buttons without proper preparation is the #1 mistake owners make. The reset procedure tells the car’s computer, “The maintenance has been performed.” If you haven’t actually changed the oil or completed the required service, you are now driving with a false sense of security and an engine that may be operating with degraded lubricant. This can cause significant and expensive internal engine damage over time. Therefore, before you touch any buttons, ensure the following:
Visual guide about How to Turn Off the Maintenance Light on a Toyota Rav4 with Push Button Start
Image source: cars-care.net
1. The Maintenance is Actually Complete
This is non-negotiable. Have a certified mechanic, a dealership service department, or if you’re a skilled DIYer, perform the full recommended service for your RAV4’s current mileage. This almost always includes:
- Oil and Oil Filter Change: The most common trigger. Use the correct oil grade and viscosity (e.g., 0W-16 for many recent models) as specified in your owner’s manual.
- Tire Rotation and Pressure Check: Ensures even tire wear and optimal fuel economy.
- Multi-Point Inspection: Checks brakes, fluid levels, belts, hoses, and other critical components.
- Other Model-Specific Items: Your service advisor will reference the maintenance schedule for your specific year and trim.
Only after the technician has completed the work (or you have, if DIY) and topped off all fluids should you proceed to the reset step. If you’re unsure what service is due, consult your owner’s manual’s maintenance schedule section or contact your dealer.
2. Gather Your Tools (Spoiler: You Need None)
The beauty of this reset is its simplicity. You do not need any special tools, scan devices, or diagnostic computers. You only need your RAV4’s key fob (or key) and your own finger to press the button on the steering column stalk. The entire process is done through the vehicle’s existing instrument cluster interface.
3. Ensure Safe Conditions
Park your RAV4 on a level surface, engage the parking brake, and ensure the transmission is in “Park” (P). For safety, it’s best to perform the reset with the engine off and the key fob inside the vehicle. You will be turning the ignition to the “ON” or “ACC” position, but you will not be starting the engine. Make sure all doors are closed and you are in a well-lit area so you can clearly see the instrument panel display.
The Step-by-Step Reset Procedure for Push-Button Start RAV4s
Now for the main event. The process is remarkably consistent across most push-button start RAV4 model years (roughly 2013-present), but there are minor variations. The core method always involves using the “ODO/TRIP” button on the end of the turn signal stalk to navigate the multi-information display. We’ll cover the most common method first, then note variations.
Visual guide about How to Turn Off the Maintenance Light on a Toyota Rav4 with Push Button Start
Image source: geargan.com
Standard Procedure (Most Models: ~2016-2023)
Follow these steps precisely:
- Do NOT press the brake pedal. Get into the driver’s seat with your key fob.
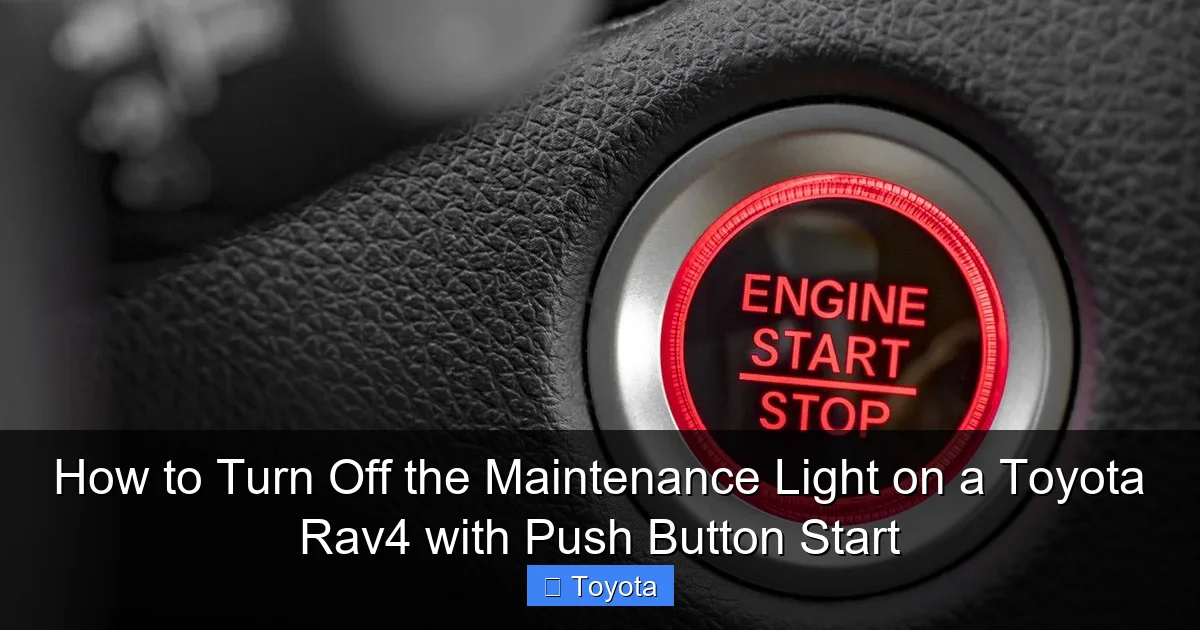
- Press the “ENGINE START/STOP” button once without touching the brake pedal. This will turn the ignition to the “ON” or “ACC” position. You should see all dashboard warning lights illuminate, including the maintenance required light (yellow wrench). The engine will NOT start.
- Locate the “ODO/TRIP” button. This is the small button on the end of the turn signal lever on the left side of the steering column. It’s used to toggle between the odometer and trip meter readings.
- Press and release the “ODO/TRIP” button repeatedly until the multi-information display on your dashboard shows the “SETTING” menu. This might take several presses. You are cycling through the display modes (Odometer -> Trip A -> Trip B -> Setting).
- Once in the “SETTING” menu, press and hold the “ODO/TRIP” button for about 3-5 seconds. The display will change, and you should see a menu item related to maintenance or settings, often labeled “MAINTENANCE” or “MAINT RESET.”
- Use the “ODO/TRIP” button to scroll through the settings menu. Look for an option that says “MAINTENANCE RESET” or “MAINTENANCE.” Select it by pressing the button.
- The display will likely ask for confirmation (e.g., “RESET MAINTENANCE DATA?” or “MAINTENANCE RESET?”).
- Press and hold the “ODO/TRIP” button again to confirm the reset. You should see a confirmation message like “MAINTENANCE RESET COMPLETE” or a checkmark appear on the screen.
- Turn the ignition off by pressing the “ENGINE START/STOP” button once more. Wait a few seconds, then restart the engine normally by pressing the brake pedal and the start button.
- Check your dashboard. The maintenance required light (yellow wrench) should be extinguished. If it’s still on, repeat the procedure carefully, ensuring you complete all steps and hold the button for confirmation.
Variations for Specific Model Years
While the above works for the vast majority, some earlier (2013-2015) or specific-market RAV4s might have a slightly different sequence. For instance, on some models, after entering the “SETTING” menu, you might need to press the “ODO/TRIP” button twice to get to the maintenance reset option. The key is patience: cycle slowly through the display modes until you find a settings or maintenance submenu. If you get stuck, your vehicle’s owner’s manual is the ultimate authority. You can often find a digital version online by searching for your specific year and model.
What If My RAV4 Has a Different Button?
Some RAV4 trims, particularly certain hybrids or models with a more advanced multi-information display, might use a different stalk button or require navigation with steering wheel controls. If your vehicle has a “DISP” or “MENU” button on the steering wheel, the reset might involve using that to navigate menus instead of the ODO/TRIP button. The principle remains the same: ignition ON, navigate to settings/menu, find maintenance reset, confirm. Always refer to your owner’s manual for the definitive procedure for your exact VIN.
What To Do If the Light Won’t Reset or Re-Illuminates Quickly
You followed every step perfectly, but that stubborn wrench icon is still glowing. Or worse, it went away for a day or two and then came right back on. Don’t panic, but do take methodical action.
Visual guide about How to Turn Off the Maintenance Light on a Toyota Rav4 with Push Button Start
Image source: carmechan.com
Troubleshooting a Failed Reset
First, try the reset procedure again from the very beginning. It’s easy to miss a hold or not wait for the correct menu to appear. Ensure you are holding the button long enough for the confirmation prompt. If it still fails, consider these possibilities:
- The service interval hasn’t been met: Some systems are designed to not allow a reset until a minimum mileage or time has passed since the last reset, even if you did the work early. Double-check your mileage against the service schedule.
- A different service item is due: The maintenance system tracks multiple items (oil, tire rotation, etc.). If, for example, your tire rotation is due but the oil change is not, the light may still illuminate. Your service center should reset all applicable items.
- Electrical glitch: A weak car battery or a temporary glitch in the instrument cluster can sometimes interfere. A safe drive cycle (normal driving for 20-30 minutes) and a second attempt may resolve it.
When the Light Returns Too Soon
If the light comes back on after just a few hundred or a thousand miles, it’s a strong indicator that the underlying maintenance was not performed correctly or that there is an underlying issue. Possible causes include:
- Incorrect oil type or filter: Using the wrong oil can cause it to degrade much faster, triggering the light prematurely.
- Poor oil change quality: A loose drain plug, incorrect filter installation, or failure to properly prime the new filter can cause low oil pressure or rapid oil consumption.
- An active fault code: While rare for the maintenance light itself, another underlying issue might be causing the system to behave erratically. A check engine light or other warning would be a bigger clue here.
In these cases, the solution is not another reset. You need to take your RAV4 back to the service center that performed the work and explain the issue. They should diagnose why the system is flagging maintenance so early. For persistent problems, a dealership service department has the proprietary diagnostic tools to communicate directly with your RAV4’s ECU and verify the service history and sensor data.
The Critical Importance of Actual Maintenance Over Reset
This bears repeating until it’s second nature: resetting the light does not equal performing maintenance. The light is a communication tool from your car’s sophisticated computer. It’s based on algorithms and data, but it doesn’t know if you actually changed the oil. It only knows that 5,000 miles have been driven since the last time someone told it the service was done (by resetting it).
What’s at Stake? Engine Longevity and Warranty
Engine oil is the lifeblood of your RAV4’s engine. It lubricates thousands of moving parts, reduces friction, cools components, and suspends harmful contaminants. Over time, oil breaks down, loses viscosity, and becomes contaminated with metal shavings and combustion byproducts. Running an engine on degraded oil is like running a marathon without water—it will cause excessive wear, increased heat, and eventually catastrophic failure. The cost of a new engine or a major rebuild is orders of magnitude higher than the cost of a regular oil change.
Furthermore, if your RAV4 is still under its powertrain warranty (often 5 years/60,000 miles for Toyota), failing to adhere to the prescribed maintenance schedule can be grounds for denying a warranty claim. The dealer will ask for service records. If you can’t prove you performed the required maintenance at the specified intervals, they may refuse to cover a related repair. Keeping your maintenance light accurately reset at the proper intervals is part of that proof.
What a “Full” Service Typically Includes for a RAV4
To understand what you’re paying for, here’s a breakdown of what a standard maintenance service (often called “A” or “B” service in Toyota’s schedule) usually entails for a RAV4:
- Oil & Filter Change: Using Toyota Genuine Motor Oil or a certified equivalent.
- Tire Rotation: Promotes even tread wear.
- Brake Inspection: Checking pad thickness, rotor condition, and brake fluid level.
- Fluid Top-Off: Engine coolant, windshield washer fluid, power steering fluid (if applicable), and differential fluid (on AWD models).
- Belt & Hose Inspection: Looking for cracks, wear, or leaks.
- Air Filter Inspection/Replacement: The engine air filter and cabin air filter. You might consider a DIY cabin filter change between services to save money.
- Multi-Point Vehicle Inspection: A checklist covering lights, wipers, suspension components, and more.
This is not an exhaustive list, and your specific service may include more based on your vehicle’s mileage and the “severe” or “normal” driving conditions you fall under.
Common Pitfalls and Mistakes to Avoid
Even with the best instructions, it’s easy to slip up. Here are the most frequent errors owners make when dealing with their RAV4’s maintenance light:
Mistake 1: Resetting Without Servicing
This is the cardinal sin. You’re not fooling the car; you’re fooling yourself and setting the stage for future damage. The light is a helpful reminder, not a nuisance to be silenced. Always complete the service first.
Mistake 2: Confusing It With Other Warning Lights
The maintenance required light is a steady, yellow wrench icon. It is NOT the check engine light (usually an outline of an engine), which indicates an immediate emissions or engine fault. It is also different from the tire pressure monitor light (an exclamation point in a tire cross-section) or oil pressure warning light (a red oil can). If a red light or a blinking yellow light comes on, pull over safely and address that issue immediately—do not worry about the maintenance reset.
Mistake 3: Using the Wrong Reset Procedure for Your Year
While the ODO/TRIP method is standard, a 2013 RAV4 might differ slightly from a 2023 RAV4. Using a generic guide for the wrong generation can lead to frustration. When in doubt, your model-specific owner’s manual is your best friend. You can also look for model-year-specific guides, like one for a 2021 Toyota RAV4, which may have subtle differences.
Mistake 4: Forgetting to Turn the Ignition Fully Off
After a successful reset, some people leave the car in the “ON” position. Always turn the ignition completely off by pressing the start button (without brake) and wait a few seconds before restarting. This ensures the ECU fully registers the reset command and clears the light from memory upon the next startup cycle.
Mistake 5: Ignoring Persistent or Recurring Lights
If the light is on, you service the car. If it comes back on within 500 miles, that’s a red flag. Don’t just keep resetting it. Have a professional diagnose why the system thinks maintenance is due so soon. It points to a potential problem with the service performed or a sensor issue.
Conclusion: A Simple Task with a Big Responsibility
Turning off the maintenance light on your Toyota RAV4 with push-button start is one of the easiest DIY tasks you can master. It takes less than a minute and requires no tools, just a clear understanding of the steps: ignition ON, navigate with the ODO/TRIP button to the settings menu, find the maintenance reset option, and hold to confirm. The satisfaction of doing it yourself is a small bonus.
However, this simplicity comes with a weighty responsibility. That light is your car’s way of asking for care. Resetting it without providing the required service is a false economy that risks your engine’s health and your wallet. Think of the reset as the final, ceremonial handshake after the work is done—a signal to your RAV4 that its needs have been met and it can continue serving you reliably for another 5,000 miles. By respecting the process—servicing first, resetting second—you honor the engineering of your vehicle and ensure it remains a dependable companion for years to come. If you ever have doubt about what service is needed or if the light behaves abnormally, your certified Toyota dealer or a trusted independent mechanic is always the best resource.
Frequently Asked Questions
Is the maintenance required light urgent?
No, it is not an urgent warning like a red oil pressure or check engine light. It is a scheduled service reminder. However, you should plan to have the service completed within the next 1,000 miles or so to maintain your engine’s health and warranty coverage.
Can I reset the maintenance light myself if I haven’t changed the oil?
Technically yes, but you should never do this. Resetting the light without performing the actual maintenance, especially an oil change, means you will be driving with potentially degraded oil, which can cause serious engine damage. Always complete the service first.
How often does the maintenance light come on?
For most modern Toyota RAV4s, it illuminates every 5,000 miles or 6 months, whichever comes first, following an oil change. The exact interval is programmed into the vehicle’s computer based on Toyota’s recommended maintenance schedule for your model year.
What if the reset procedure doesn’t work?
First, carefully repeat the steps, ensuring you hold the button long enough for the confirmation prompt. If it still fails, your service center may not have reset all necessary items, or there could be an electrical issue. Consult your owner’s manual for your specific model year’s procedure or contact a Toyota dealer for assistance.
Do I need any special tools or a scan tool to reset it?
No. The reset is done manually through the instrument cluster using the “ODO/TRIP” button on the turn signal stalk. You do not need any OBD-II scanners, diagnostic tools, or software. It’s designed to be a user-friendly process.
Will the light turn off by itself after I get the oil changed?
No. The light will remain illuminated until someone manually resets it through the procedure outlined in your owner’s manual. The service technician at the dealership or shop should reset it for you after completing the work. If they don’t, you’ll need to do it yourself.


