
How to Restore a Car Cover: Clean, Repair, and Protect It
Quick Answer
To restore a car cover, inspect its material, remove loose dirt, wash it with a compatible cleaner, and let it dry according to the manufacturer’s instructions. If water no longer beads on a clean outdoor cover, an approved water-repellent treatment may help restore its protection. Permanent sun fading, brittle fabric, and failed seams require a different solution, and severely damaged covers may need replacement.
Restoration steps
- Check the material: Identify whether your cover uses woven fabric, multiple layers, or a coated surface.
- Inspect for damage: Look for holes, brittle areas, peeling coatings, mold, and loose seams.
- Clean gently: Follow the manufacturer’s washing instructions and avoid unapproved chemicals.
- Dry completely: Prevent trapped moisture, mildew, and unpleasant odors.
- Restore repellency: Apply a compatible treatment only when the cover manufacturer permits it.
- Check the result: Inspect the material again and test water behavior after any treatment has cured.
Before you begin
- Never assume that a faded cover needs dye or that every water-resistant cover needs additional waterproofing.
- Test any approved cleaning or treatment product on an inconspicuous area first.
A car cover protects your vehicle from dust, bird droppings, tree sap, and weather exposure, but the cover itself needs care. Over time, it can become dirty, faded, less water-resistant, or damaged around the seams.
In this guide, I’ll explain how to restore a car cover without compromising its protective qualities. We’ll cover cleaning, waterproofing, fading, minor repairs, and the signs that indicate replacement is the better option.
In This Guide
- What Does Restoring a Car Cover Actually Mean?
- How Do You Inspect a Car Cover Before Restoration?
- How Do You Clean and Restore a Car Cover?
- How Do You Restore Water Resistance?
- Can You Fix Fading, Tears, and Damaged Seams?
- What Should You Avoid When Restoring a Car Cover?
- When Should You Replace a Car Cover?
- Frequently Asked Questions
What Does Restoring a Car Cover Actually Mean?
Restoring a car cover means improving its cleanliness, appearance, water repellency, or usable condition without damaging the material. The correct method depends on what’s wrong with the cover and how its fabric was manufactured.
A car cover is a protective outer layer designed to shield a vehicle from selected environmental hazards. Depending on its construction, it may use woven fabric, nonwoven layers, soft indoor material, or a coated surface.
Identify the problem before choosing a treatment
A cover that looks worn doesn’t necessarily need the same treatment as one that leaks during rain. Identify the symptoms first.
- Dirty or dull material: Dust, pollen, road grime, and other contamination may be hiding the original appearance.
- Faded color: Ultraviolet (UV) radiation may have degraded the colorants or surface material.
- Reduced water repellency: The original water-repellent finish may have worn away, or contamination may be interfering with its performance.
- Musty odor or mildew: Moisture may have remained trapped during use or storage.
- Tears or loose seams: Physical wear may have weakened the cover’s ability to protect the vehicle.
These symptoms can overlap. For example, an outdoor cover may look faded and absorb water because its material has aged through years of sunlight and weather exposure.
Cleaning is a sensible first step when the cover remains structurally sound. However, it won’t replace lost dye, rebuild weakened fibers, or repair separated layers.
Does every cover need waterproofing?
No. Some covers are designed primarily for indoor dust protection, while outdoor models may balance water resistance with breathability.
Adding a waterproofing product without checking compatibility can change the fabric’s feel, appearance, or ability to release trapped moisture. Restore only the properties that the original design is intended to provide.
Section takeaway: Diagnose the problem before spending money on restoration products. A dirty cover needs cleaning, a compatible outdoor cover may need reproofing, and deteriorated material may need replacement.
How Do You Inspect a Car Cover Before Restoration?
Inspect the cover while it’s off the vehicle and spread across a clean surface. Check the exterior, the paint-contact side, the seams, and the areas that receive the most sunlight and rain.
Follow this pre-restoration checklist
- Read the care label. Find the manufacturer’s washing, drying, and treatment instructions before using water or chemicals.
- Identify the material. Determine whether the cover is woven polyester, a multilayer fabric, acrylic, or a coated material.
- Check the inside surface. Look for embedded grit, debris, mildew, and rough patches that could contact the paint.
- Inspect the seams and hems. Look for loose stitching, stretched elastic, torn edges, and separated layers.
- Check the fabric’s strength. Gently examine questionable areas for brittleness, thinning, cracking, or powdery deterioration.
- Assess water behavior. If the cover is designed for outdoor water resistance, observe whether a small amount of water beads or immediately soaks into the material.
Don’t perform a water test on a cover before checking its instructions. Some materials are not intended to resist rain, and a water test alone cannot establish whether a cover is fully waterproof.
Compare the symptoms with the appropriate response
| What you notice | Possible cause | Recommended response |
|---|---|---|
| Dusty, gray appearance | Accumulated dirt | Gentle cleaning |
| Even fading across exposed panels | Sunlight and weather exposure | Protect remaining material; assess whether appearance matters enough to replace it |
| Water soaking into a clean outdoor cover | Contamination or reduced repellency | Clean, then consider compatible reproofing |
| Small, isolated tear | Abrasion or accidental damage | Use a manufacturer-approved repair method |
| Brittle fabric or peeling layers | Advanced material deterioration | Consider replacement |
This comparison is a diagnostic guide, not a guarantee that one symptom has only one cause. Follow the manufacturer’s advice if the material’s condition is uncertain.
Section takeaway: Inspect the whole cover before treating it. A quick check can prevent wasted effort on material that has already lost its structural integrity.
How Do You Clean and Restore a Car Cover?
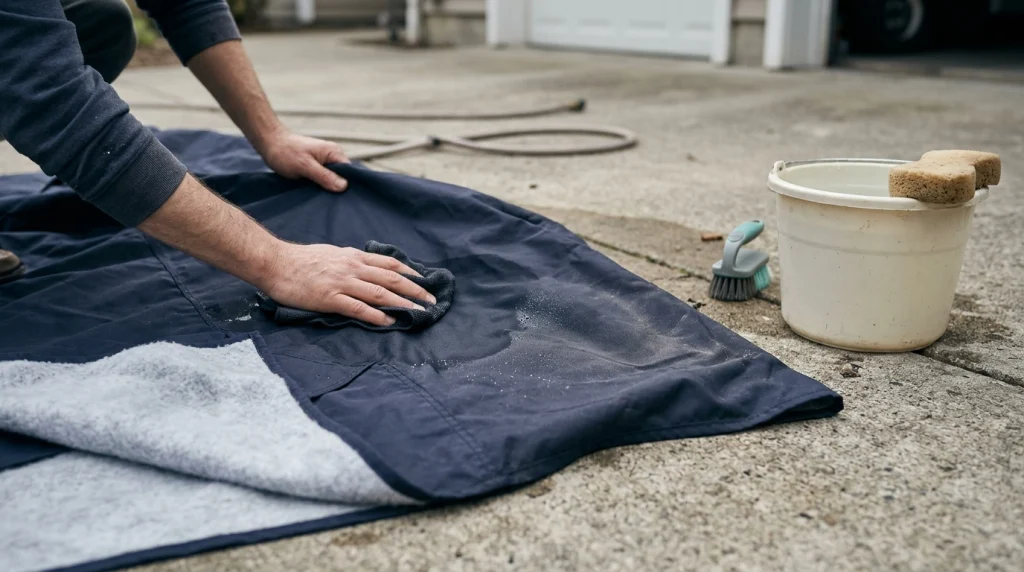
To restore a dirty car cover, remove loose debris, wash it using a compatible cleaning method, rinse away residue, and dry it completely. Cleaning is often the most useful first step because contamination can affect both appearance and water behavior.
Step 1: Prepare the cover and work area
Choose a clean driveway, patio, or other suitable washing area. Avoid placing the cover on gravel, sharp concrete edges, or dirty ground that could transfer grit back onto the material.
Shake the cover gently to remove loose leaves and dust. Use a soft brush only if the care instructions permit brushing.
Keep the cover away from the vehicle during cleaning. This prevents loosened grit and cleaning residue from transferring onto the paint.
Step 2: Choose the correct cleaning method
Some covers can be washed in a suitable washing machine, while others require hand washing or spot cleaning. Large SUV and truck covers may also exceed the capacity of a typical household machine.
Check the label before choosing a method. Manufacturer-specific guidance is available in resources such as CarCover’s car-cover cleaning guide.
For hand washing, use this general process only when compatible with the manufacturer’s instructions:
- Rinse away loose dirt with a gentle flow of cool water.
- Apply an approved cleaner at the recommended concentration.
- Work on dirty areas with a soft sponge or cloth if permitted.
- Rinse thoroughly until cleaning residue is removed.
- Repeat spot cleaning only when necessary and safe for the material.
Don’t assume ordinary laundry detergent is suitable for every cover. Some cleaning products can affect coatings, while residue may interfere with water repellency.
Step 3: Remove stains and mildew carefully
Bird droppings, tree sap, and stubborn grime may require targeted cleaning rather than a full wash. Use a cleaner approved for the material and follow its instructions for contact time and rinsing.
Mildew requires extra care. Avoid aggressive scrubbing or applying bleach automatically, because these methods can discolor or weaken some fabrics.
If mildew has penetrated the material, created persistent odors, or damaged the coating, contact the manufacturer for advice. Cleaning visible spots doesn’t necessarily restore the cover’s original strength.
Step 4: Dry the cover completely
Allow the cover to dry using the method specified by its manufacturer. Air drying is appropriate for many covers, but some materials have different requirements.
Never assume a dryer, iron, or direct high heat is safe. Heat can distort coatings, damage bonded layers, or affect fitted components.
Pay attention to thicker areas that retain moisture, including hems, seams, mirror pockets, and reinforced sections. Don’t fold or store the cover until it is completely dry.
Step 5: Reassess the material after cleaning
Inspect the cover in natural light once it has dried. Cleaning may improve its appearance if accumulated grime caused the dullness.
If the color remains lighter, the material may have suffered permanent UV fading. If the fabric is clean but still absorbs water, assess whether the manufacturer permits a compatible water-repellent treatment.
Section takeaway: Clean first, dry thoroughly, and reassess. Don’t use increasingly aggressive chemicals just because ordinary cleaning hasn’t reversed permanent fading.
How Do You Restore Water Resistance?
You may be able to restore some water repellency by applying a treatment designed for the cover’s specific material. First clean the cover, allow it to reach the moisture condition required by the treatment, and follow the product’s application and curing instructions.
Water-resistant and waterproof are not interchangeable terms. Water resistance helps limit water penetration, while complete waterproof performance depends on the material, construction, seams, closures, and conditions of use.
Step 1: Confirm that treatment is appropriate
Check the cover’s care instructions before purchasing a waterproofing spray. Some manufacturers recommend a specific treatment, while others advise against aftermarket coatings.
Don’t apply clothing waterproofing products, marine treatments, or household protectants simply because their labels mention water resistance. Compatibility with the cover’s material matters more than a broad product claim.
Step 2: Prepare the clean cover
Remove dirt and cleaning residue before applying the treatment. Follow the product label to determine whether the cover must be completely dry or slightly damp.
Test an inconspicuous area first. Stop if the treatment causes unexpected discoloration, stiffness, stickiness, or changes to the inner surface.
Step 3: Apply the treatment evenly
Use the manufacturer’s recommended application method and coverage. Avoid soaking the material or creating thick, uneven patches that could affect its appearance and performance.
Give particular attention to weather-exposed panels when the product instructions call for full-surface treatment. Treat seams only if the manufacturer and product directions allow it.
Step 4: Allow the treatment to cure
Keep the cover off the vehicle until the product has dried or cured for the required period. Follow the specified temperature, ventilation, and handling instructions.
Don’t rush the process by placing the cover on the car while the surface remains wet or tacky. An uncured treatment may transfer onto the paint or interfere with the cover’s normal function.
Step 5: Test the result
After curing, apply a gentle spray of water to a small section of an outdoor cover intended to repel rain. Observe whether water beads and runs off or immediately saturates the surface.
Repeat the check in a few representative areas if appropriate. This simple test helps assess surface repellency, but it doesn’t certify the cover as waterproof during prolonged rain or standing water.
If water still penetrates, don’t keep adding product without investigating the cause. Damaged coatings, worn seams, and deteriorated fabric may require professional advice or replacement.
Section takeaway: Compatible reproofing may improve water repellency, but it isn’t a universal fix. Follow the product label and preserve the material’s intended breathability.
Can You Fix Fading, Tears, and Damaged Seams?
Some minor car-cover problems can be addressed, but cosmetic restoration and structural repair are different tasks. Choose a repair based on the material’s condition rather than its appearance alone.
How can you restore a faded car cover?
Start by determining whether the dullness comes from dirt or permanent color loss. If the cover becomes brighter after cleaning, contamination was probably contributing to the appearance.
UV-related fading is harder to reverse. Sunlight can gradually change dyes and degrade exposed materials, so a cleaning product or protectant cannot reliably return an aged cover to its original color.
Don’t use fabric dye unless the cover manufacturer specifically approves a compatible process. Dyeing may stain the vehicle, affect coatings, or change the cover’s ability to shed water and release moisture.
How do you repair a small tear?
A small, isolated tear may be repairable if the surrounding fabric remains strong. Use a patch or repair kit specifically approved for the cover’s material and follow the instructions carefully.
Before attempting a repair, check the following:
- The damage is limited to a small area.
- The surrounding material isn’t brittle or crumbling.
- The repair method won’t damage a waterproof coating or bonded layers.
- The repaired area won’t create rough edges against the vehicle’s paint.
A patch may restore coverage, but it won’t necessarily restore the original water resistance or strength. Avoid stitching or applying adhesive without checking whether the method is suitable.
What if the seams or elastic have failed?
Seam damage can allow water and debris to enter areas the cover should protect. Loose elastic may also prevent the cover from staying securely fitted.
Use a manufacturer-approved repair service when possible. If several seams have separated or the fabric around them has weakened, replacing the cover may be more reliable than repairing one section after another.
Remember that a poorly fitted or loose cover can move against the paint in windy conditions. The cover should fit securely without excessive tension or abrasion.
Section takeaway: Minor damage may be repairable when the surrounding material is sound. Permanent fading, widespread deterioration, and repeated seam failure are not problems that surface treatments can solve.
What Should You Avoid When Restoring a Car Cover?
The wrong restoration method can damage a cover that otherwise had plenty of useful life remaining. Use the manufacturer’s care instructions as your main reference rather than relying on generic cleaning advice.
Avoid these common mistakes
- Bleach without approval: It can discolor fabrics and damage fibers or coatings.
- Fabric softener: It may leave residues that affect water repellency or material performance.
- Harsh solvents: Strong chemicals can damage certain synthetic fabrics, coated surfaces, and bonded layers.
- Pressure washing: High-pressure water can stress seams, coatings, and multilayer construction.
- Uncontrolled heat: Hot water, ironing, and unsuitable dryer settings may distort the material.
- Unapproved silicone or oily dressings: These products may leave residue, attract dirt, or interfere with later treatments.
- Storing the cover wet: Trapped moisture encourages musty odors and mildew.
- Covering a dirty vehicle: Dirt trapped between the fabric and paint can cause abrasion as the cover shifts.
Protect the vehicle while restoring the cover
Always keep the cover’s paint-contact surface clean. Even a soft cover can scratch paint if grit becomes trapped underneath it.
Allow the vehicle and cover to dry appropriately before installation. If the car has recently been repainted, consult the body shop about when it is safe to cover the finish.
For additional care advice, consult the manufacturer’s instructions or a specialist resource such as CarCovers.org’s car-cover care guidance.
Section takeaway: Gentle, compatible cleaning is safer than aggressive restoration. Protect both the cover and the vehicle by avoiding unapproved chemicals, excessive heat, and abrasive dirt.
When Should You Replace a Car Cover?
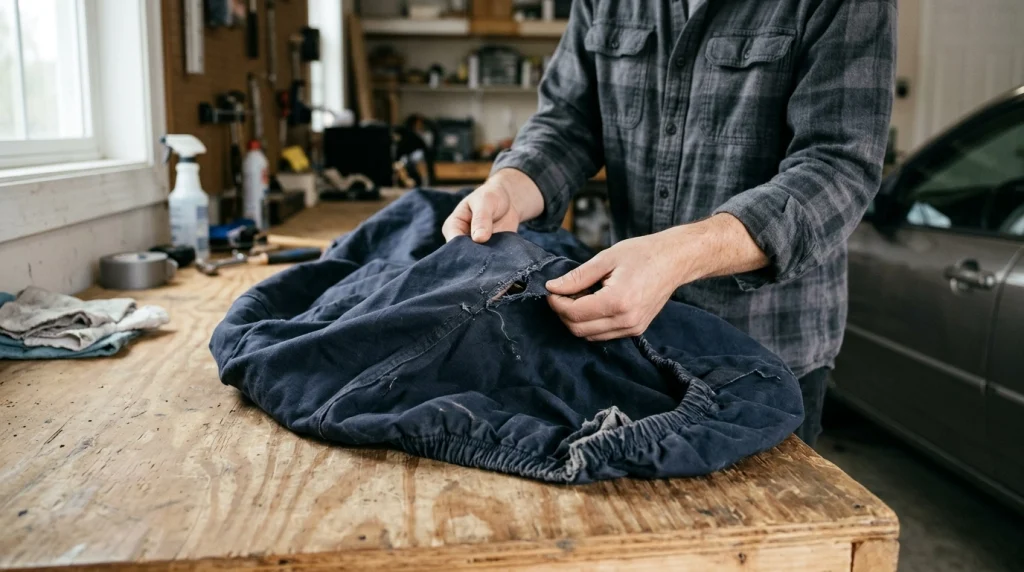
Replace a car cover when deterioration prevents it from providing reliable protection or when safe restoration is no longer practical. Fading alone doesn’t automatically mean the cover has reached the end of its useful life.
Signs that replacement may be the better choice
- Brittle or crumbling fabric: The material has lost flexibility or breaks apart when handled gently.
- Widespread thinning: Several areas appear worn enough to compromise coverage.
- Extensive tears: Large or numerous openings expose the vehicle to dirt and weather.
- Peeling or separated layers: A multilayer cover is coming apart and cannot be restored using an approved method.
- Failed fit: Stretched elastic or extensive seam damage prevents secure installation.
- Persistent contamination: Mold, embedded grime, or odors remain after appropriate cleaning.
- Unreliable protection: The cover no longer performs as intended despite compatible maintenance.
These are practical warning signs rather than universal replacement thresholds. The material, manufacturer, climate, and intended use all influence how long a cover remains suitable.
How can you extend the life of your next cover?
Choose a cover designed for your parking conditions and vehicle. An indoor dust cover and an outdoor weather-resistant cover serve different purposes.
Follow these habits to reduce avoidable wear:
- Clean the cover when contamination builds up, following its care instructions.
- Keep the paint-contact side free of grit and debris.
- Allow the cover to dry fully before folding and storing it.
- Use a secure fit to limit wind-driven movement against the paint.
- Reduce prolonged direct sun exposure when practical and permitted by the cover’s intended use.
- Inspect seams, hems, and exposed panels periodically.
There is no single cleaning schedule that suits every cover. Indoor covers used in clean garages generally face different conditions from outdoor covers exposed to rain, pollen, dust, and strong sunlight.
Section takeaway: Judge a cover by its condition and protective performance, not color alone. A sound but faded cover may remain useful, while a brittle or badly damaged cover is often better replaced.
Frequently Asked Questions
Can you restore a car cover to look new again?
Sometimes, cleaning can improve a cover’s appearance when dirt causes the dullness. However, cleaning cannot reliably reverse permanent UV fading, rebuild weakened fibers, or repair damaged coatings. The final result depends on the material’s condition and the manufacturer’s approved care methods.
How do I make my car cover waterproof again?
First, check whether the cover is designed for outdoor water resistance and permits additional treatment. Clean it properly, follow the reproofing product’s moisture and application requirements, and allow it to cure fully. Damaged seams or deteriorated fabric may not respond to waterproofing treatments.
Can I use regular laundry detergent on a car cover?
Only if the cover manufacturer permits it. Some detergents leave residues or affect specialized coatings, so a compatible cleaner may be preferable. Avoid fabric softener, bleach, and other harsh products unless the specific care instructions explicitly allow their use.
Can I dye a faded car cover?
Dyeing is not a reliable universal restoration method. Different cover materials accept dyes differently, and the process may damage coatings, alter water repellency, or transfer color onto vehicle paint. Consider dyeing only if the manufacturer approves a suitable process for that exact material.
How often should I clean my car cover?
Clean it when dirt accumulates or contamination affects its condition, following the manufacturer’s instructions. Outdoor covers may need attention more often than indoor covers because they face more environmental debris. Avoid unnecessary aggressive washing, which can wear some materials and finishes.
Is it safe to use a pressure washer on a car cover?
Generally, avoid pressure washing unless the manufacturer specifically permits it. High-pressure water may damage seams, coatings, or bonded layers. A gentle rinse and an approved cleaning method are usually safer for routine maintenance.
Should I replace a faded car cover or keep using it?
You can often continue using a faded cover if its material remains strong, its fit is secure, and it still provides the intended protection. Replace it if the fabric becomes brittle, seams fail extensively, layers separate, or damage compromises its usefulness.
Final Takeaway: Restore What You Can, Replace What You Must
Restoring a car cover starts with understanding what’s wrong. Gentle cleaning can improve appearance, compatible reproofing may help restore water repellency, and approved repairs may address limited damage.
Permanent UV fading and weakened fabric are different problems. Avoid harsh chemicals and unapproved coatings, keep the cover clean and dry, and replace it when deterioration makes it unreliable.
My recommendation is simple: prioritize the cover’s protective performance over its appearance. A clean, structurally sound cover is more useful than one that looks darker after treatment but no longer protects your vehicle properly.