
How to Reset the Brake System Light on a Honda Civic
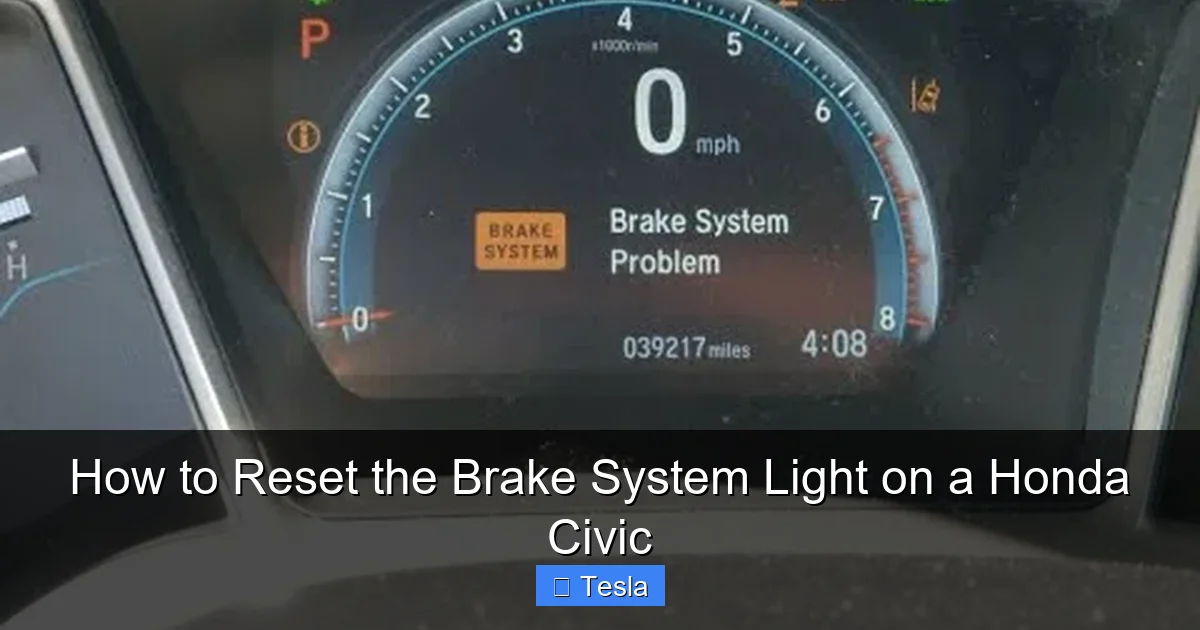
The brake system light on your Honda Civic is a critical safety warning that should never be ignored. It typically illuminates due to issues like low brake fluid, worn pads, or an engaged parking brake. While you can often reset the light after addressing the underlying problem using dashboard controls or an OBD-II scanner, the light will return if the issue persists. Always prioritize a thorough inspection before resetting to ensure your braking system is fully functional and safe.
Key Takeaways
- Safety First: The brake warning light indicates a potential safety issue. Do not simply reset it without diagnosing and fixing the root cause.
- Light Meaning: A brake system light (often red) is different from the ABS light (usually yellow/orange). The former signals a serious brake system fault.
- Common Causes: Low brake fluid, worn brake pads, a faulty parking brake switch, or an issue within the ABS module are frequent triggers.
- Reset Methods: Resetting typically involves turning the ignition on/off, pressing the brake pedal, or using an OBD-II scanner to clear codes.
- Persistent Light: If the light returns immediately after a reset, it means the problem hasn’t been resolved and requires professional diagnosis.
- Model Variations: Reset procedures can differ between older Civics (pre-2016) and newer models with more complex electronic systems.
- Preventive Maintenance: Regularly check brake fluid levels, inspect brake pads, and service the system to avoid unexpected warning lights.
📑 Table of Contents
- Understanding Your Honda Civic’s Brake System Light
- Common Reasons Your Brake Light Comes On
- Before You Reset: Essential Safety Checks & Diagnostics
- How to Reset the Brake System Light on a Honda Civic
- What to Do If the Light Returns Immediately or Persists
- Pro Tips for Maintaining Your Brake System and Avoiding Future Lights
Understanding Your Honda Civic’s Brake System Light
That little red or amber icon on your Honda Civic’s dashboard, shaped like an exclamation point inside a circle or a “BRAKE” symbol, is not something you should casually dismiss. It’s your car’s primary way of communicating a potential issue with its most critical safety system: the brakes. When this light illuminates, it’s sending a clear signal that something requires your immediate attention. Unlike a service reminder for an oil change, the brake system light warns of a condition that could compromise your ability to stop the vehicle safely. Its appearance is a non-negotiable prompt to investigate, not just a suggestion. Ignoring it can lead to progressively worse brake performance, costly damage to components, and, most importantly, a dramatically increased risk of an accident.
The brake system light is part of a complex network of sensors and modules. In modern Honda Civics, this light is often tied directly to the brake fluid level sensor in the master cylinder reservoir, the parking brake switch, and the Anti-lock Braking System (ABS) module. When any of these components detect a fault outside of normal parameters, they command the light to turn on. It’s crucial to understand that this light is a *symptom*, not the disease itself. The reset procedure is merely the final step in a process that must begin with accurate diagnosis. Simply clearing the warning without repairing the underlying problem is like turning off a fire alarm without extinguishing the fire—it creates a false sense of security while danger remains.
Brake Light vs. ABS Light: Don’t Confuse Them
Many drivers mistakenly lump all brake-related warnings together. It’s vital to distinguish between the brake system light and the ABS light. The brake system light (usually red and says “BRAKE”) indicates a fundamental problem with the hydraulic braking system—low fluid, a leak, or a major component failure. This is a severe warning. The ABS light (usually amber/yellow with “ABS” or an ABS icon) indicates a fault in the Anti-lock Braking System module or its wheel speed sensors. When the ABS light is on, your basic brakes will still work, but the anti-lock functionality (preventing wheel lockup during hard stops) is disabled. While you should still drive cautiously and get it checked, a lit brake system light demands more urgent action. Both lights can sometimes illuminate together if there’s a shared issue, like a severe fluid leak.
Common Reasons Your Brake Light Comes On
Before you even think about resetting the light, you must understand why it illuminated in the first place. Attempting a reset on an unresolved issue is futile and dangerous. Here are the most frequent culprits behind a lit brake system warning on a Honda Civic, ranging from simple fixes to serious mechanical failures.

Visual guide about How to Reset the Brake System Light on a Honda Civic
Image source: carmechan.com
Low Brake Fluid Level
This is the most common and often the simplest cause. Brake fluid is the lifeblood of your hydraulic brake system. It transfers the force from your foot on the pedal to the brake calipers or wheel cylinders. The fluid level in the master cylinder reservoir drops naturally as your brake pads wear because the caliper pistons extend to compensate, pulling more fluid from the reservoir. A low fluid level can also indicate a leak in the system—a serious safety hazard. The reservoir has a float sensor that triggers the warning light when the fluid dips below the minimum line. Always check the fluid level first. It should be between the “MIN” and “MAX” lines on the reservoir. If it’s low, top it up with the correct DOT specification fluid (usually DOT 3 or DOT 4, check your owner’s manual) and inspect for leaks.
Worn Brake Pads
As your brake pads wear down, the caliper pistons move outward to maintain contact with the rotor. This action consumes more brake fluid from the master cylinder reservoir, causing the fluid level to drop and potentially triggering the low-fluid sensor. In some Honda Civic models, a separate wear sensor on the pad itself will also illuminate a dedicated warning light (often a brake pad symbol). If your pads are very thin (less than 3mm), they must be replaced immediately. Continuing to drive on worn pads can damage the rotors and lead to a complete loss of braking power. Replacing the pads and topping the fluid often resolves the light, but you must also reset the system.
Engaged Parking Brake
This might seem obvious, but it’s a frequent oversight. The brake system light is designed to remind you that the parking brake is engaged while you’re driving. If you forget to fully release the parking brake lever or pedal, the light will stay on. Driving with the parking brake even partially engaged causes excessive wear on the brake shoes/drums (on rear drum brakes) or pads (on rear disc brakes) and can generate significant heat and smell. Always ensure the parking brake is completely disengaged before moving. If the light stays on despite the lever being down, the parking brake switch itself might be faulty or misadjusted.
Faulty Brake Fluid Level Sensor
The sensor in the master cylinder reservoir can fail electronically. A short circuit or broken wire can tell the car’s computer that the fluid is low even when the reservoir is full. You might notice the light flickering on and off, especially when going over bumps, which can indicate a loose electrical connection. Diagnosing this requires checking the sensor’s resistance with a multimeter or using a scan tool to see if it’s reporting incorrect values. Replacing the sensor or repairing its wiring will be necessary before the light will stay off after a reset.
ABS Module or Wheel Speed Sensor Issues
While a dedicated ABS light is more common for these faults, a severe problem within the ABS system can sometimes trigger the main brake warning. A failed wheel speed sensor, damaged ABS tone ring, or internal ABS module failure can disrupt communication. The car’s primary computer (PCM) may interpret this as a critical brake system fault. You’ll often have both lights illuminated. A mechanic will need to scan for ABS-specific trouble codes (like C0200, C0201, etc.) to pinpoint the issue.
Air in the Brake Lines
Air bubbles in the brake hydraulic system compress under pedal pressure, leading to a spongy brake pedal and reduced stopping power. This can happen after brake fluid service, a leak repair, or if the system is inadvertently opened. Air in the lines can sometimes trigger the fluid level sensor if it causes a significant pressure drop or fluid displacement. The only cure is a thorough brake fluid bleed, which must be done correctly to remove all air from the system.
Before You Reset: Essential Safety Checks & Diagnostics
Resetting the brake light without addressing the cause is not only pointless but also dangerously irresponsible. The reset procedure simply tells the car’s computer, “Okay, the fault is cleared,” but it does not fix mechanical problems. You must perform a series of checks to ensure your braking system is sound. Think of this as a pre-flight checklist for your safety.
Visual guide about How to Reset the Brake System Light on a Honda Civic
Image source: carglassadvisor.com
Step 1: Physical Inspection
Start with a visual and tactile check. With the car parked on level ground and the engine off, open the hood and locate the brake fluid reservoir (usually a small, translucent plastic tank near the firewall on the driver’s side). Check the fluid level against the MIN and MAX marks. Note the fluid’s color: it should be clear to amber. Dark, cloudy, or burnt-smelling fluid indicates contamination and needs a system flush. While you’re there, look for any signs of leaks around the reservoir, the brake lines running to each wheel, and the calipers/wheel cylinders. Leaks appear as wet spots, drips, or a low fluid level that drops quickly after topping up.
Next, inspect your brake pads. You can often see the pad material through the wheel spokes on disc brake systems. If the pad looks very thin (less than 1/4 inch) or you hear a metallic squeal (a wear indicator contacting the rotor), replacement is needed. For rear drum brakes (found on some base-model Civics), you’d need to remove the drum to inspect, which is more involved. Also, check the thickness of your brake rotors. Deep grooves, warping (causing pedal pulsation), or rust can affect performance. Finally, ensure your parking brake is fully released and that the brake pedal feels firm when pressed, not spongy or sinking to the floor.
Step 2: Check for Other Warning Lights
Is the ABS light also on? Is there a “BRAKE FLUID” or “PARKING BRAKE” message on your multi-information display? These additional clues help narrow down the problem. If multiple brake-related lights are illuminated, the issue is more complex and likely requires professional scanning tools. For instance, a simultaneous brake and ABS light could point to a severe fluid leak or a major communication failure between modules.
Step 3: Scan for Trouble Codes
This is the most definitive diagnostic step. You need an OBD-II scanner that can access the Honda-specific systems, not just generic engine codes. A basic code reader might only see engine (P-codes) and generic ABS (C-codes). For the brake system light, you need to read codes from the Brake System or ABS Module. Common codes include:
- B0020-B002F: Various wheel speed sensor circuits.
- B0130-B013F: Brake fluid level sensor circuit.
- B1540: Parking brake switch circuit.
- C0200-C020F: ABS motor/pump or solenoid issues.
If you don’t have a scanner, many auto parts stores offer free code reading, but their scanners may not access the brake system module. A dedicated Honda diagnostic tool or a high-end universal scanner (like Autel, Launch, or Snap-on) is required. Reading these codes tells you exactly which circuit or component is malfunctioning, saving hours of guesswork. Never reset a light without first retrieving and addressing the stored codes. For other dashboard warnings, such as the maintenance light, you can follow a separate procedure as outlined in our guide on how to reset the maintenance light on a Honda Civic, which is a different, non-critical system.
How to Reset the Brake System Light on a Honda Civic
Once you have diagnosed the problem, repaired or replaced the faulty component (e.g., added fluid, replaced pads, fixed a leak), and ensured the system is full of fluid and bled of air, you can proceed to reset the warning light. The method varies significantly depending on your Civic’s model year and trim level. Newer Civics (2016 and later) with more advanced electronic systems often require a scan tool, while older models might have a manual reset procedure. Below are the most common methods, broken down by generation.

Visual guide about How to Reset the Brake System Light on a Honda Civic
Image source: i.pinimg.com
Method 1: The Manual Reset (For Older Civics, ~2006-2015)
On many Honda Civics from the eighth and ninth generations, a specific sequence using the dashboard controls can clear the brake warning if the fault is resolved. This method often works for a parking brake switch fault or a one-time low-fluid event that has been corrected.
- Ensure the parking brake is fully disengaged and the brake fluid level is correct.
- Turn the ignition to the “ON” (II) position but do not start the engine. All dashboard lights should illuminate.
- Press and release the brake pedal firmly three times within about 5 seconds. This can sometimes reset the pedal position sensor or acknowledge the brake system check.
- Turn the ignition off and wait 10 seconds.
- Start the engine and see if the light comes back on.
If this doesn’t work, some models require a different sequence involving the trip odometer reset button. Consult your owner’s manual under “Warning Lights” or “Brake System” for the exact procedure for your specific year and trim. If the manual is unavailable, online owner’s forums for your specific model year (e.g., “2012 Honda Civic brake light reset”) are invaluable resources where owners share proven methods.
Method 2: Using an OBD-II Scanner (Required for 2016+ Civics)
Starting with the tenth generation (2016), Honda integrated more complex brake system controls. The brake system light is often managed by the Vehicle Stability Assist (VSA) module or a dedicated brake control module. A simple ignition cycle or pedal press is almost never sufficient to clear a stored fault. You must use an advanced OBD-II scanner.
- Connect your scanner to the OBD-II port, located under the dashboard near the steering column.
- Turn the ignition to the “ON” (II) position (do not start the engine).
- Follow the scanner’s prompts to establish a connection with your Civic’s computer.
- Select “Brake System” or “ABS” from the module menu. (Some scanners may have it under “VSA” or “Safety Systems”).
- Read the trouble codes. If any are present, note them down. If the light was on due to a resolved issue, there may be no active codes, but there could be pending or stored codes.
- Choose the “Clear Codes” or “Reset” function. The scanner will communicate with the brake control module and command it to turn off the light and clear its memory.
- Turn the ignition off and on again, or start the car, to see if the light has gone out and stays off.
Critical Warning: Do not clear codes without understanding them. Clearing a code for a “wheel speed sensor circuit” without fixing the broken wire or faulty sensor will cause the light to return within minutes of driving. The scanner is a diagnostic and reset tool, not a fix. For other common resets, like the tire pressure monitoring system (TPMS) light after rotating tires, you can follow the procedure in our article on how to reset the tire pressure light on a Honda Civic.
Model-Specific Variations & Special Cases
There are nuances. For example, on some 2018-2022 Civics with the Honda Sensing® suite, the brake system light might be intertwined with the pre-collision system. A misaligned front camera or obstructed radar can sometimes cause a cascade of warnings, including the brake light. In these cases, a simple reset won’t work; you may need to recalibrate the sensors, which requires specialized equipment and a dealer or advanced shop.
Additionally, if your Civic has a manual transmission, ensure the clutch is fully depressed when performing any reset sequence, as some procedures require the brake and clutch pedals to be in a specific state. Always refer to the factory service manual for your exact VIN for the definitive procedure. If you don’t have access to a proper scanner and the manual method fails, your only safe option is to visit a mechanic.
What to Do If the Light Returns Immediately or Persists
You’ve followed the steps, cleared the codes, and the light went out. You feel a moment of relief. Then, you start driving, and within a block, the ominous red icon blazes back to life. What does this mean? It means the fault is still present or has reappeared. The reset did not “fix” anything; it only temporarily silenced the alarm. A returning light is your car’s way of saying, “The problem is still here, and it’s serious.”
Intermittent vs. Constant Illumination
An intermittent light (flickering on and off, or coming on only during certain driving conditions like hard braking or going over bumps) can be particularly tricky. This often points to a wiring issue—a loose connector, a chafed wire, or a corroded ground strap. The vibration of driving momentarily breaks the circuit, causing the light. You’ll need to meticulously inspect all wiring harnesses related to the brake system, especially near the wheel wells where suspension movement can stress wires. A constant, solidly lit light is more straightforward and usually indicates a persistent fault like a failed sensor, a significant fluid leak, or a switch that is stuck in the “on” position.
When to Immediately Stop Driving and Call for Help
If the brake system light comes on while you are driving, you must take it seriously. First, ensure your parking brake is not engaged. Then, gently test your brakes at low speed in a safe area. Do they feel normal? Is the pedal firm and responsive, or does it feel soft, spongy, or sink to the floor? Do you hear any grinding, squealing, or clicking noises? If the pedal feels abnormal, or if you notice a loss of braking power, pull over safely and call for a tow. Driving with compromised brakes is an extreme danger to you and others. Even if the pedal feels okay, the light indicates a system fault. Drive cautiously to the nearest safe location or mechanic, avoiding heavy traffic and high speeds. Do not assume it’s safe to continue driving long distances.
Seeking Professional Diagnosis
At this point, professional help is not optional; it’s mandatory. A qualified mechanic, especially one familiar with Honda systems, will use an advanced scan tool to read the specific brake system codes. They will perform a comprehensive inspection: checking fluid for contamination, pressure-testing the system for internal leaks, inspecting all sensors and wiring, and verifying the operation of the ABS pump and valves. They have the tools to perform a brake fluid pressure test and can diagnose issues that are invisible to a visual inspection. Attempting to DIY complex hydraulic or electronic brake faults without the proper knowledge and tools can lead to catastrophic brake failure.
Pro Tips for Maintaining Your Brake System and Avoiding Future Lights
Prevention is always better than cure. A well-maintained brake system is the best way to keep that warning light off for good. Here are actionable tips for every Honda Civic owner.
Regular Brake Fluid Service
Brake fluid is hygroscopic, meaning it absorbs moisture from the air over time. This moisture lowers the fluid’s boiling point, which can lead to brake fade or failure under hard use. It also promotes internal corrosion of the brake system’s metal components. Honda typically recommends replacing brake fluid every 3 years. A professional fluid flush (not just a top-up) uses a machine to push new fluid through the system, completely replacing the old, contaminated fluid. This simple service prevents many sensor issues and maintains optimal brake performance. While you’re thinking about maintenance, don’t forget other routine items like the engine air filter. You can learn to change the air filter on a Honda Civic yourself to keep your engine breathing easy.
Inspect Brake Pads and Rotors Regularly
Don’t wait for the squealer tab to make noise. During oil changes or tire rotations, ask your technician to check the pad thickness. On a Civic with front disc brakes, the front pads wear faster than the rears. Knowing your pad life helps you plan for replacement before they damage the rotors. If you do the work yourself, always replace pads in axle sets (both front or both rear) and either resurface or replace rotors if they are below minimum thickness or have deep grooves. Installing new pads on worn rotors leads to poor braking and noise.
Mind Your Driving Habits
Aggressive driving—hard acceleration followed by sudden, hard braking—drastically increases brake wear. It also generates more heat, which can warp rotors and degrade fluid faster. Practice smooth, anticipatory driving. Use engine braking on long descents to give your brakes a rest. Avoid “riding” the brakes, which keeps them partially applied and causes unnecessary wear and heat buildup.
Address Other Dashboard Lights Holistically
Your Civic’s dashboard is an information center. A neglected issue in one system can sometimes trigger warnings in another. For example, a severely under-inflated tire can sometimes affect ABS sensor readings. Stay on top of all maintenance reminders. If your oil change light is on, service it. If the TPMS light is on, check your tires. A well-cared-for car is less likely to develop complex, interconnected faults. For other common Civic resets, you might encounter the wrench/maintenance light, which you can learn to reset the wrench light on a Honda Civic after an oil change.
Use Quality Parts and Fluids
When replacing brake components, use parts that meet or exceed Honda’s specifications. Cheap brake pads can create more dust, noise, and uneven wear. Use only the brake fluid type specified by Honda (DOT 3 or DOT 4). Mixing or using the wrong fluid can damage seals and cause system failure.
Frequently Asked Questions
Can I reset the brake system light without fixing the problem?
No. Resetting the light without addressing the underlying issue is dangerous and will result in the light returning, often immediately. The light is a critical safety warning; you must diagnose and repair the fault first.
Why does my brake light keep coming back after I reset it?
This indicates the original problem was not properly fixed. Common reasons include an unresolved fluid leak, a faulty sensor that wasn’t replaced, air still in the lines after a repair, or a wiring issue. The car’s computer detects the same fault condition and reactivates the warning.
Do I need a special tool to reset the brake light on a newer Honda Civic?
Yes, for most 2016 and newer Civics, a basic code reader is insufficient. You need an advanced OBD-II scanner that can access the ABS/Brake control module and perform module-specific resets. Simple manual methods are rarely effective on these models.
Is it safe to drive with the brake system light on?
It depends. If the pedal feels firm and your braking seems normal, you may have a minor issue like a faulty switch, but you should drive cautiously and get it checked immediately. If the pedal is soft, spongy, sinks, or you hear grinding noises, do not drive. Have the car towed, as your brakes could fail at any moment.
How much does it cost to diagnose a persistent brake light?
Diagnostic fees vary by shop but typically range from $80 to $130 for an hour of labor. This includes using a professional scan tool to read brake system codes and performing a visual inspection. This fee is often waived if you proceed with the recommended repair at the same shop.
Can low brake fluid cause the ABS light to come on too?
Yes. Severe low fluid can affect both the primary brake system and the ABS pump, which also uses hydraulic pressure. It’s common to see both the main brake light and the ABS light illuminated together when fluid is critically low or there’s a major leak affecting the entire system.


