
How to Reset Maintenance Light on 2019 Toyota Corolla
Contents
- 1 Key Takeaways
- 2 📑 Table of Contents
- 3 Understanding Your Corolla’s Maintenance Required System
- 4 Essential Preparation Before You Begin
- 5 The Step-by-Step Reset Procedure for a 2019 Toyota Corolla
- 6 Verifying Success and Troubleshooting
- 7 Important Warnings and Best Practices
- 8 Frequently Asked Questions (FAQs)
- 9 Frequently Asked Questions


That little wrench icon on your 2019 Toyota Corolla’s dashboard is just a friendly reminder, not a cause for panic. It’s designed to illuminate after a set mileage to prompt for routine maintenance like an oil and filter change. The good news is that once you’ve completed the required service, you can manually reset this light yourself in under 30 seconds using just your ignition and odometer controls. No special tools or a trip to the dealership are necessary. This guide walks you through the exact, foolproof process for your specific model year.
You’re cruising down the road in your reliable 2019 Toyota Corolla, and suddenly, a small yellow wrench icon appears on your dashboard, next to your odometer reading. Your heart might skip a beat for a second. “What does that mean? Is something broken? How much is this going to cost?” Take a deep breath. That little symbol is your car’s way of giving you a gentle nudge, not a scream of alarm. It’s the Maintenance Required Light, a smart feature designed to keep your Corolla running smoothly by reminding you it’s time for routine, scheduled service—most commonly an oil and filter change. The best part? Once you’ve had that service performed, whether you did it yourself or at a shop, you are fully equipped to turn that light off yourself. No fancy diagnostic scanner is needed. This comprehensive guide will walk you through every single step to confidently reset maintenance light on 2019 Toyota Corolla, explaining not just the “how” but also the “why” behind this simple yet crucial system.
Understanding this light is the first step to conquering it. In your 2019 Corolla, this system is an electronic, mileage-based counter. Toyota’s engineering team programs it to illuminate after a predetermined interval—usually 5,000 miles—from the last time it was reset. It’s a proactive maintenance scheduler. It does not monitor oil life quality, pressure, or engine health directly. It’s a simple clock. Therefore, if you get your oil changed at 4,800 miles and forget to reset the light, it will still come on at the 5,000-mile mark from your *last reset*, not from the actual oil change. This is why the manual reset is a critical final step after any scheduled maintenance. It synchronizes the car’s internal reminder clock with your service history. We’ll get to the exact button presses soon, but first, let’s make sure you’re fully prepared.
Key Takeaways
- The maintenance light is a mileage-based reminder: It is not an emergency warning but a scheduled alert for services like oil changes, typically triggered every 5,000 miles.
- You must perform the maintenance first: Always complete the required service (e.g., oil change, tire rotation) before resetting the light. Resetting without servicing defeats the system’s purpose.
- The reset uses the odometer “trip” button: The process involves turning the ignition on and using the button on your instrument cluster, usually labeled “ODO/TRIP,” to navigate the display.
- Confirmation is a blinking dash: A successful reset is confirmed when the maintenance light blinks a few times and then goes out, and the odometer displays “C” or “—” temporarily.
- It’s a simple, DIY procedure: This is a user-serviceable function designed by Toyota for owner convenience, saving you time and a dealership fee.
- A persistent light may indicate a problem: If the light returns immediately after a proper reset or illuminates along with other warnings, have the vehicle scanned for underlying issues.
- The process is similar across many Toyota models: While button names and menu structures can vary slightly, the core method of using the odometer button in accessory mode is consistent for many modern Toyotas.
📑 Table of Contents
Understanding Your Corolla’s Maintenance Required System
Before we dive into the button-pressing ritual, it helps to understand what you’re communicating with. The system in your 2019 Corolla is part of Toyota’s broader vehicle maintenance reminder technology. It’s designed to be a helpful assistant, not a source of anxiety. The light you see—that unmistakable wrench icon—is specifically for the “Maintenance Required” schedule. It’s different from the “Check Engine” light (which is usually an engine-shaped icon and indicates a problem) or other service warnings like tire pressure. This wrench is purely for preventative care intervals: oil changes, tire rotations, cabin air filter replacements, and other items listed in your owner’s manual maintenance schedule.
What Exactly Triggers the Light?
The trigger is a preset mileage counter stored in your car’s computer, the Engine Control Unit (ECU). When you last reset it (likely at the dealership after your previous oil change), that counter was set to zero. The ECU then silently counts every mile you drive. Once you approach the programmed threshold—5,000 miles for normal driving conditions, or potentially 3,000 miles for “severe” conditions like frequent short trips, extreme temperatures, or heavy loads—the system commands the wrench icon to illuminate on your instrument panel. It will stay on steadily until you manually reset it, even if you change your oil three times in that interval. It’s a里程 counter, not a sensor.
Why Resetting is Not Optional
Resetting the light is the final, official step in closing the maintenance loop. If you don’t do it, two things happen. First, you’ll have a constant, nagging light on your dash, which eventually leads to “dash blindness” where you ignore all warnings, including serious ones. Second, and more importantly from the car’s perspective, the reminder system is now out of sync. Your next oil change reminder will come 5,000 miles from the *last reset*, not from when you actually last changed the oil. This could mean you go 7,000 or 8,000 miles between changes if you forget to reset after an early service, potentially harming your engine. Always reset immediately after the service is complete. For procedures on other Toyota models, the core concept is identical, though the steps can differ slightly; you can see how it’s done on a 2019 Toyota Highlander for comparison.
Essential Preparation Before You Begin
You’re ready to make that wrench disappear. But before you touch anything, a few moments of preparation ensure the process is smooth and, most importantly, that you’re resetting for the right reason. This isn’t a trick to avoid maintenance; it’s the final step *after* responsible ownership.
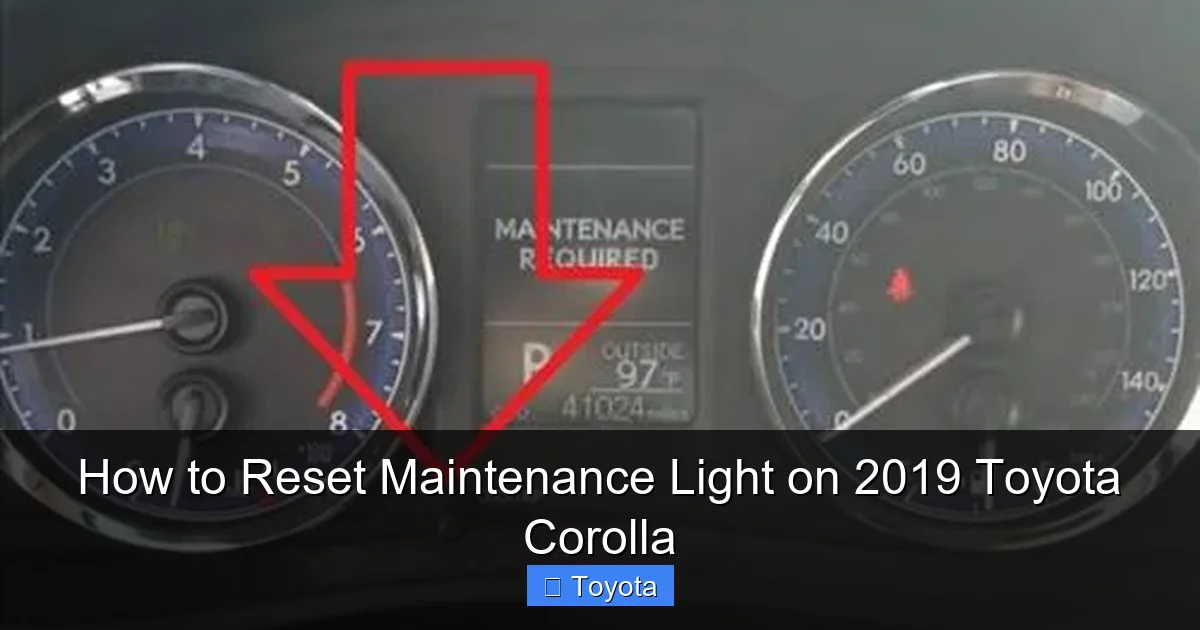
Visual guide about How to Reset Maintenance Light on 2019 Toyota Corolla
Image source: autovehicleparts.com
1. Complete the Required Service
This is non-negotiable. Have you just changed the oil and filter? Rotated the tires? Replaced the cabin air filter? The maintenance required light is tied to a schedule. If you’re not sure what service is due, consult your owner’s manual’s maintenance schedule. It outlines what should be done at 5,000, 10,000, 15,000 miles, etc. If you’re a DIY enthusiast, ensure the job is done correctly. If you visited a quick-lube shop, they should have reset it for you, but mistakes happen. If you can’t recall the last time you had a major service, it’s wise to have a professional inspect the car first before simply turning the light off.
2. Gather Nothing (Seriously)
The beauty of this procedure is its simplicity. You do not need any tools. No wrenches, no screwdrivers, no OBD-II scanners. You only need your car’s key (or key fob) and your fingers. The entire process is performed through the vehicle’s existing controls on the steering column or dash. This design philosophy is common across many Toyota products, from the compact Yaris to the full-size Avalon. If you own another Toyota, the steps you learn here will likely transfer, though button labels might differ slightly.
3. Understand Your Instrument Cluster
Locate the button used to toggle between your odometer and trip meter readings. On the 2019 Corolla, this is almost always a small black button, sometimes with a knob, mounted on the instrument cluster itself, to the right of the speedometer. It is frequently labeled “ODO/TRIP” or simply has a car and a mileage icon. You will press and release this button repeatedly during the reset procedure. Familiarize yourself with its location and feel now so you’re not fumbling in the middle of the sequence.
The Step-by-Step Reset Procedure for a 2019 Toyota Corolla
Now, for the main event. The following method is the standard, manufacturer-approved procedure for the 2019 model year Corolla. It’s a sequence of ignition positions and button presses. Do it slowly and deliberately. If you mess up, just start over from the beginning—it’s very forgiving.
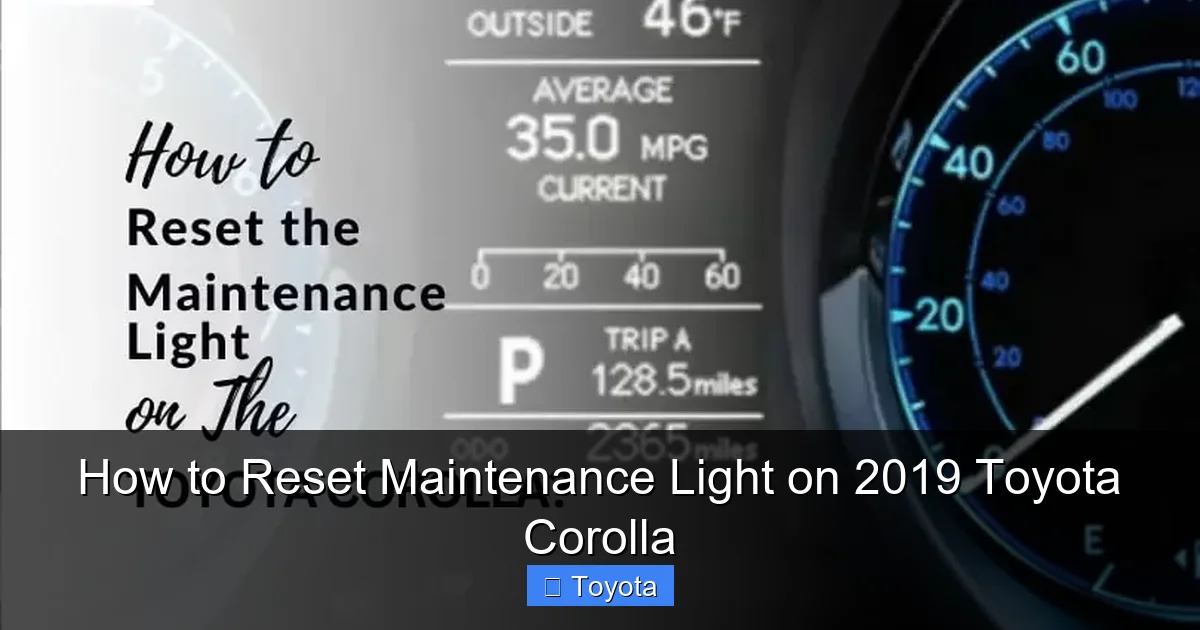
Visual guide about How to Reset Maintenance Light on 2019 Toyota Corolla
Image source: i.redd.it
Step 1: Turn the Ignition to the “ON” Position (Not Start)
Insert your key into the ignition or, if you have a keyless entry system, press the “START/STOP” button without touching the brake pedal. You want to turn the car’s electronics on so the dashboard lights up fully, but you do NOT want to start the engine. All the warning lights, including your Maintenance Required wrench, should illuminate. This is the “Accessory” or “ON” position. If your car has a traditional key, turn it clockwise from the “LOCK” position to “ACC” or “ON.” If it has a push-button, press it once without your foot on the brake. The engine should remain off. You should see the dash lights activate and probably hear a few chimes.
Step 2: Access the Odometer Display
Using the button on your instrument cluster (the “ODO/TRIP” button), press it one or more times. You are cycling through the display modes. You need to see the *total* odometer reading, not the Trip A or Trip B mileage counter. The display will typically show a number like “12345.6” with no “A” or “B” next to it. Keep pressing the button until you get the plain, full odometer reading. This is a critical step. If you are on a trip meter display, the subsequent steps will not work.
Step 3: Turn the Ignition “OFF”
Now, turn the ignition completely off. If you have a key, turn it back to the “LOCK” position. If you have a push-button, press it again to turn all the electronics off. The dash lights and the maintenance light will go dark. Wait a full second. This pause is important as it signals to the computer that you are ending the current “session.”
Step 4: The Critical Sequence – Turn “ON” and Press
Here is the core of the reset. You must perform these actions in quick succession:
- Turn the ignition back to the “ON” position (again, do not start the engine). The dash lights come back on.
- Immediately after the lights come on (within about one second), press and release the “ODO/TRIP” button.
You must time the button press to happen while the system is booting up in the “ON” position. If you press too early or too late, nothing will happen, and you’ll need to repeat Steps 3 and 4. It might take a couple of tries to get the timing right. Think “lights on, *click*, lights stay on.”
Step 5: Watch for the Confirmation
If you performed Step 4 correctly, the odometer display will change. Instead of showing the mileage, it will likely show a series of dashes “—–” or the letter “C” for a few seconds. Simultaneously, your Maintenance Required wrench icon will begin to BLINK. It will blink several times (usually 5-6 times) and then go completely OFF. The odometer display will then revert to showing your total mileage. This blinking is your confirmation that the reset was successful. The system’s internal counter has been zeroed out. If the light does not blink and simply stays on, or the display does nothing, you likely missed the timing. Turn the car off and try the sequence again from Step 3.
Step 6: Final Check
Turn the ignition off completely and then start the engine normally. Drive for a short distance. The maintenance light should remain off. Check your dashboard to ensure no other warning lights are on. If the wrench icon reappears after a few drive cycles, the reset may not have been successful, or there could be an underlying electrical issue. Try the procedure one more time, being extra careful with the timing in Step 4.
Verifying Success and Troubleshooting
So you followed the steps, saw the blinking, and the light went out. Excellent! But what if it didn’t work? Or what if it comes back on too soon? Let’s cover what a successful reset looks like and how to handle common hiccups.
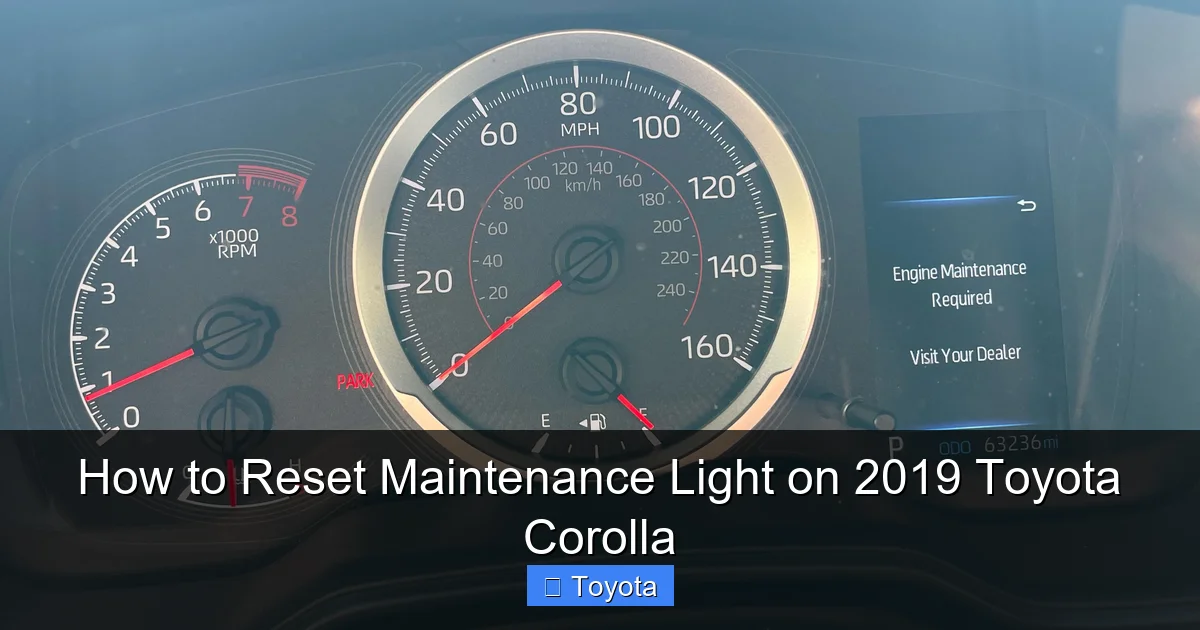
Visual guide about How to Reset Maintenance Light on 2019 Toyota Corolla
Image source: i.ytimg.com
What a Successful Reset Looks Like
Success is defined by two clear, observable events happening in sequence: First, the maintenance light (wrench icon) must blink. Second, after blinking, it must turn off and stay off. The temporary odometer display change (to “C” or “—“) is part of the process but the blinking light is the definitive signal. After you start the car and drive, the light should remain dark. The next time it illuminates should be approximately 5,000 miles from the date of your successful reset, assuming you drive under normal conditions.
Common Issues & Solutions
Problem: The light does not blink after pressing the button in Step 4.
Solution: This is almost always a timing issue. You are pressing the button too early (before the dash lights fully initialize) or too late. Ensure you turn the key to “ON” and wait for all dash lights to be steady (about 1-2 seconds), then press the button firmly once and release. Start over from the OFF position if needed.
Problem: The light blinks but then comes back on after driving a short distance.
Solution: This suggests the reset was not properly stored in the ECU. Repeat the entire procedure carefully. Ensure you are in the correct odometer mode (total miles, not trip A/B) in Step 2. If it persists, a weak battery or a glitch in the instrument cluster might be interfering. A brief disconnection of the negative battery terminal for 5 minutes can sometimes clear volatile memory, but this may also reset radio presets.
Problem: The wrench icon is on, but so is the Check Engine light.
Solution: This is a different issue. The Maintenance Required light is separate. If the Check Engine light (engine symbol) is also illuminated, you have an active diagnostic trouble code. You must diagnose and repair that issue first. Resetting the maintenance light will not turn off a Check Engine light. For Corolla-specific check engine issues, refer to a dedicated guide on resetting a Toyota Corolla’s check engine light, but remember that resetting the light does not fix the problem—it only clears the warning until the code re-triggers.
Important Warnings and Best Practices
While the reset is simple, a few golden rules will protect your vehicle and your peace of mind. Treat this knowledge as a responsibility, not just a convenience trick.
Never Reset Without Servicing
This bears repeating. Do not use this procedure as a way to avoid oil changes or other maintenance. Driving with degraded oil or worn parts will cause catastrophic engine damage, costing thousands in repairs—far more than any oil change. The light is your car’s way of asking for care. Ignoring the request and just turning off the light is like ignoring a fever and taking a painkiller; the underlying problem remains and will worsen. Always perform the manufacturer-recommended service first.
Know When to Seek Professional Help
If you have completed the full service (oil, filter, rotation) and the light still will not reset after multiple careful attempts, there may be a deeper issue. It could be a faulty odometer button, a blown fuse related to the instrument cluster, or a software glitch in the ECU. At this point, a trip to a trusted mechanic or dealership is warranted. They can use their professional scan tools to command a reset and check for any related fault codes. This is also the time to address if other dashboard lights are on, like the battery light or tire pressure warning, which require their own specific attention and possibly reset procedures.
Keep a Maintenance Log
Even though your car has a digital reminder, keeping a physical or digital logbook is a best practice. Note the date, mileage, and service performed (e.g., “5,250 mi – Oil & Filter Change, Rotate Tires”). When you reset the light, jot down that date and mileage too. This creates an unbroken record that is invaluable for your own knowledge and for future buyers if you sell the car. It proves you’ve cared for the vehicle.
Frequently Asked Questions (FAQs)
Will resetting the maintenance light clear any error codes?
No. The Maintenance Required Light is a separate, non-emissions system reminder. Resetting it does not affect or clear any Check Engine Light (MIL) codes stored in the ECU. Those codes must be addressed and cleared separately with a scan tool after the underlying repair is made.
What if the maintenance light comes back on immediately after resetting it?
This usually means the reset procedure was not completed correctly. Double-check that you were in the total odometer mode (not trip A/B) before starting the sequence, and that you pressed the button at the exact moment the dash lights came on in the final “ON” step. Try the process again slowly. If it continues, there may be an electrical fault.
Is there a way to reset the light if my odometer button is broken?
If the physical “ODO/TRIP” button is inoperative, the standard user reset method will not work. You will need to visit a mechanic or dealership who can use a professional OBD-II scan tool to access the vehicle’s maintenance reset function through the ECU’s software.
Does the reset process differ for a Toyota Corolla with a traditional key vs. a push-button start?
The core sequence is identical. The only difference is how you achieve the “ON” and “OFF” positions. With a key, you turn it. With a push-button, you press it once (without brake) for “ON” and again for “OFF.” Ensure you are not pressing the brake pedal during the process, as that would engage the starter and start the engine.
My 2019 Corolla has a multi-information display. Does that change anything?
No. The reset procedure for the 2019 Corolla, even with the digital multi-information display (the larger screen between the gauges), is still performed using the physical “ODO/TRIP” button on the steering column stalk or instrument cluster. You are not navigating through the touchscreen menus for this reset.
Can I reset the light at any mileage, or does it have to be right at 5,000 miles?
You can and should reset it immediately *after* performing the required service, regardless of the current mileage. If you change your oil at 4,200 miles, reset it then. If you forget and it comes on at 5,100 miles, reset it right after you change the oil. The goal is to synchronize the reminder clock with your actual service date.
Frequently Asked Questions
What is How to Reset Maintenance Light on 2019 Toyota Corolla?
How to Reset Maintenance Light on 2019 Toyota Corolla is an important topic with many practical applications.


