How to Replace Ignition Coil on 2007 Ford F150
Contents
- 1 Key Takeaways
- 2 📑 Table of Contents
- 3 Understanding Your 2007 Ford F150’s Ignition System
- 4 Gathering Your Tools and Parts
- 5 Step-by-Step: Replacing Coils on the 4.6L V8 Engine
- 6 The More Involved Job: Replacing Rear Coils on the 5.4L V8 (3-Valve)
- 7 Post-Replacement: Testing and Common Pitfalls
- 8 Cost Analysis: DIY vs. Professional Repair
- 9 Conclusion: Empowering Your F150 Maintenance
- 10 Frequently Asked Questions

Engine Flush Cleaner
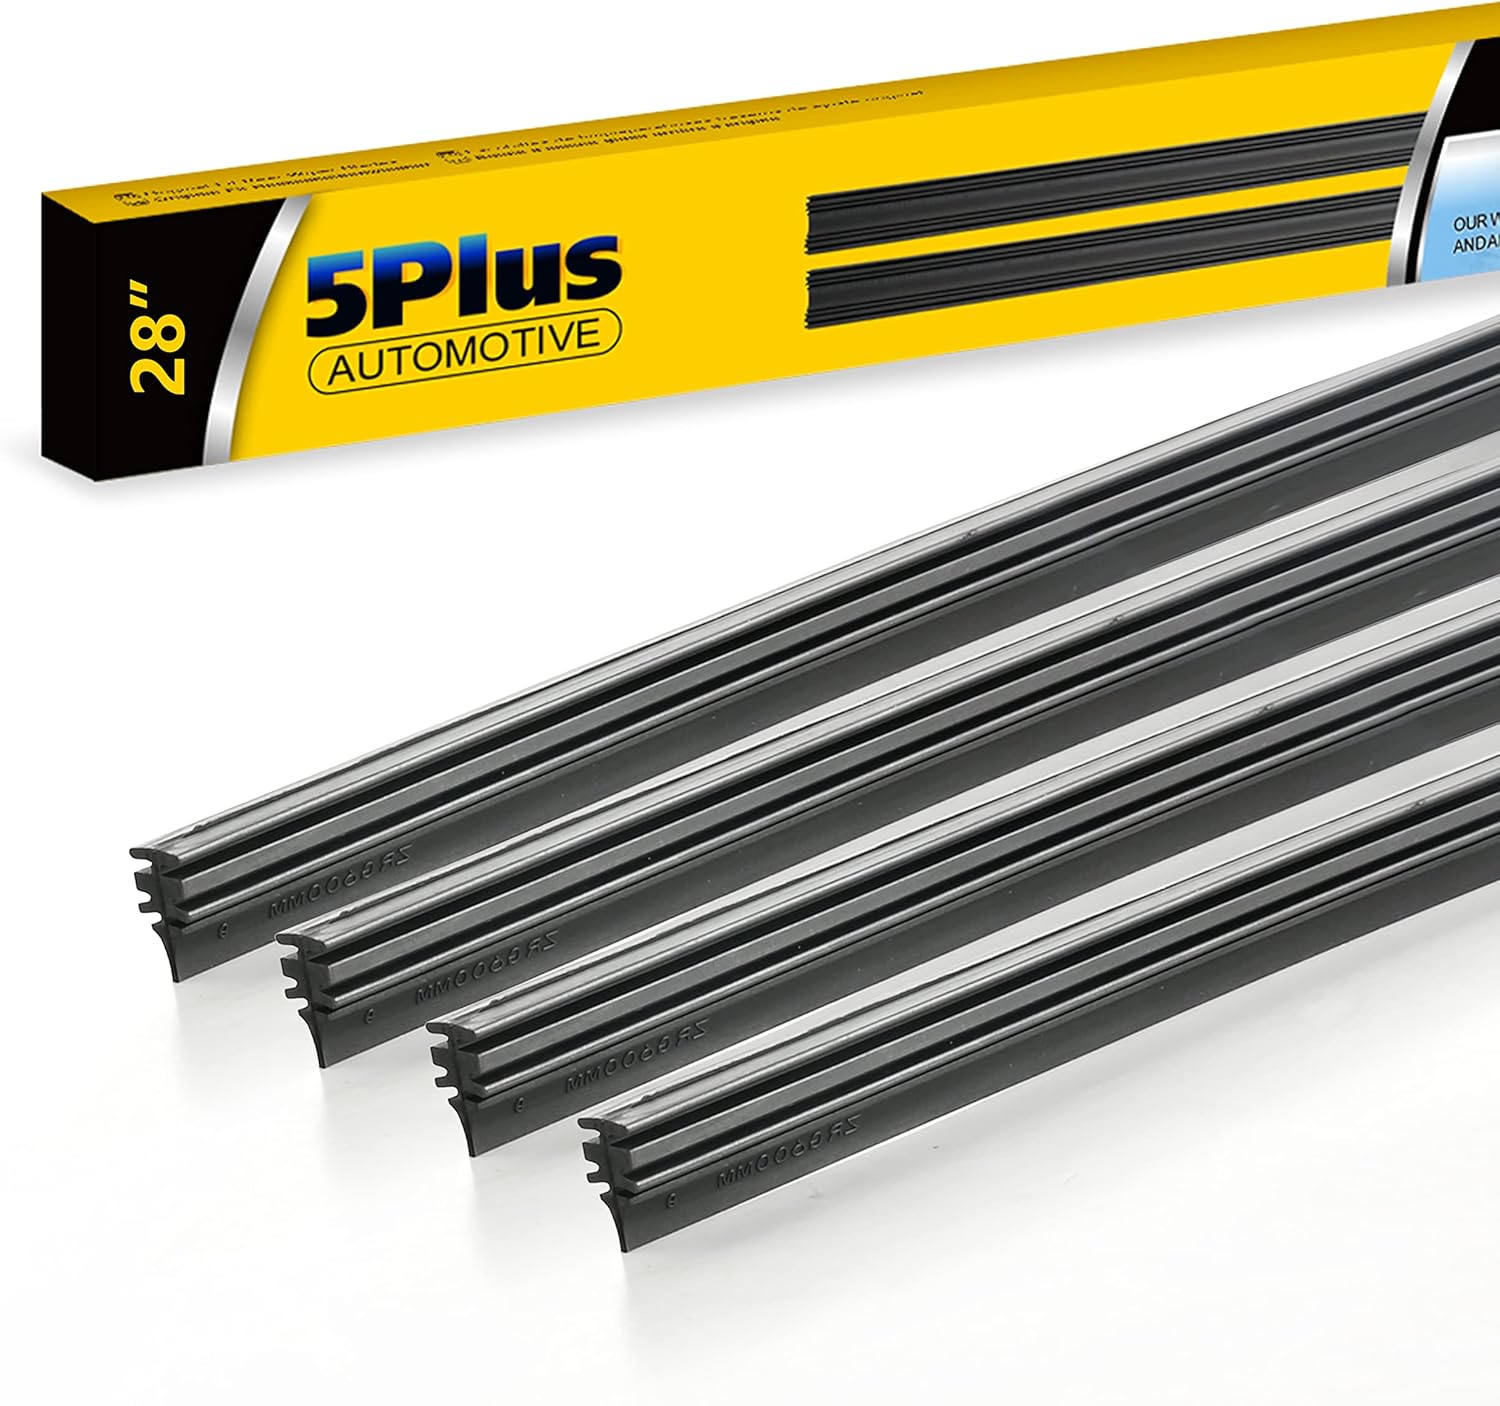
Wiper Blade Refills

Car Vacuum Cleaner (Portable)

Car Tool Kit Set
Replacing the ignition coil on your 2007 Ford F150 is a straightforward DIY task that can resolve engine misfires and restore performance. You’ll need basic tools like a socket set and screwdrivers, and the process involves removing the coil covers and disconnecting the old coils. This guide covers both the 4.6L and 5.4L V8 engines, with clear steps to get the job done safely and efficiently.
Key Takeaways
- Symptoms of a Bad Coil: A failing ignition coil in your 2007 F150 typically causes random misfires, a rough idle, and a noticeable loss of power, especially under load. You’ll likely see a check engine light with codes like P0300-P0308.
- Engine Layout Matters: The 4.6L V8 has coils mounted on the side of the engine with easy access, while the 5.4L 3-valve V8 requires removing the intake plenum to reach the rear coils, making it a more involved job.
- Tools You’ll Need: Essential tools include a 7mm or 8mm socket for coil bolts, a 10mm socket for battery terminals, a ratchet, extensions, a flathead screwdriver, and dielectric grease for spark plug boots.
- Always Disconnect the Battery: Before starting, disconnect the negative battery terminal to prevent any accidental engine starts or electrical shorts while working on the ignition system.
- Consider Replacing All Coils: Since coils age similarly, replacing all eight at once is often cost-effective and prevents future misfires, saving you from repeating the labor in the near future.
- Spark Plug Opportunity: With the coils off, it’s the perfect time to inspect and, if needed, replace your spark plugs. On the 5.4L, this is highly recommended as the intake removal is the bulk of the work.
- Clear Codes and Test: After installation, reconnect the battery, clear any stored diagnostic trouble codes (DTCs) with a scanner, and take the truck for a test drive to confirm the misfire is resolved.
📑 Table of Contents
- Understanding Your 2007 Ford F150’s Ignition System
- Gathering Your Tools and Parts
- Step-by-Step: Replacing Coils on the 4.6L V8 Engine
- The More Involved Job: Replacing Rear Coils on the 5.4L V8 (3-Valve)
- Post-Replacement: Testing and Common Pitfalls
- Cost Analysis: DIY vs. Professional Repair
- Conclusion: Empowering Your F150 Maintenance
Understanding Your 2007 Ford F150’s Ignition System
Your 2007 Ford F150’s engine, whether it’s the reliable 4.6L Triton V8 or the more powerful 5.4L Triton V8, relies on a precise spark to ignite the air-fuel mixture in each cylinder. That spark is generated by the ignition coil, a component that transforms the battery’s low voltage into the thousands of volts needed by the spark plugs. In your F150, Ford uses a coil-on-plug (COP) design, meaning there is one individual ignition coil mounted directly on top of each spark plug. This design is efficient but puts the coils in a location where they are exposed to high heat and vibration, which are their primary enemies. Over time, the internal windings or seals can fail, leading to a weak or absent spark.
When an ignition coil fails, the affected cylinder will misfire. You might feel a pronounced shake or vibration, especially at idle or low RPMs. The truck’s computer will detect this misfire, illuminate the check engine light, and store a diagnostic trouble code (DTC) pointing to the specific cylinder (e.g., P0305 for cylinder 5 misfire). Replacing the faulty coil is a common and necessary repair. The good news is that for the 4.6L engine, it’s a very accessible job. The 5.4L 3-valve engine, however, presents a significant challenge because its rear bank of cylinders is tucked under the intake manifold. This guide will walk you through both procedures clearly.
Gathering Your Tools and Parts
Before you crawl under the hood, a quick inventory of your tools and parts will save you time and frustration. The last thing you want is to be halfway through the job and realize you’re missing a critical tool. For this task, you don’t need a massive toolbox, but you do need the right specific items.
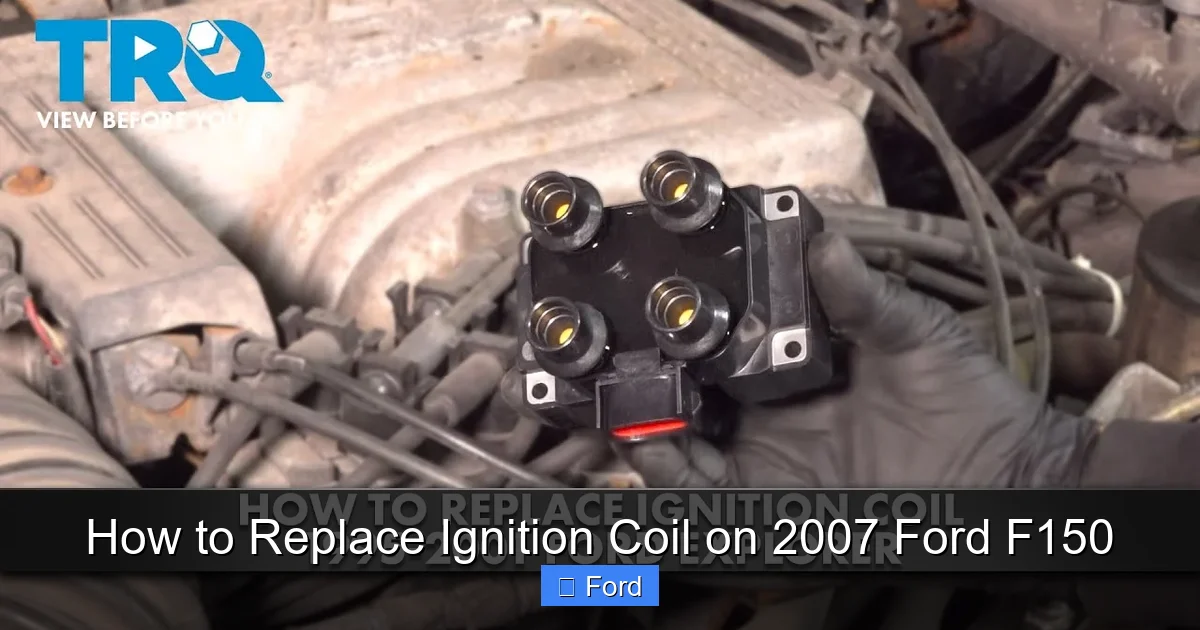
Visual guide about How to Replace Ignition Coil on 2007 Ford F150
Image source: i.ytimg.com
Essential Tools
- Socket Set & Ratchet: A standard 1/4″ or 3/8″ drive ratchet with a 7mm or 8mm deep socket (for the coil hold-down bolts) and a 10mm socket (for the battery terminals) is crucial. The 5.4L will also require 8mm, 10mm, and 13mm sockets for intake manifold bolts.
- Extensions and Swivels: These are invaluable for reaching bolts in tight engine bay spaces, especially on the 5.4L’s rear cylinders.
- Flathead Screwdriver: Useful for prying plastic wiring connector locks and gently releasing coil electrical connectors.
- Torque Wrench: Critical for properly tightening the intake manifold bolts on the 5.4L to the manufacturer’s specification in the correct sequence.
- Spark Plug Socket (Optional but Recommended): A 5/8″ or 16mm spark plug socket with a rubber insert to hold the plug. If you’re replacing plugs, this is a must.
- Dielectric Grease: A small tube of this non-conductive grease should be applied to the inside of each spark plug boot before reinstalling. It prevents moisture intrusion and makes future removal easier.
- Funnel: For safely disconnecting the intake air duct without spilling debris.
Parts and Safety
Obviously, you’ll need the new ignition coil(s). It’s wise to purchase from a reputable brand like Motorcraft (OEM), Bosch, or Delphi. While aftermarket coils can work, some cheaper brands are known to fail prematurely in Ford trucks. If you’re doing the 5.4L, you’ll also need a new intake manifold gasket set. For safety, always wear gloves and safety glasses. Have a container for bolts and a parts organizer to keep small pieces from getting lost. If your truck has over 100,000 miles, it’s a smart move to buy a new set of eight spark plugs at the same time. The labor is the hard part; the parts cost is relatively low. Before you start, ensure your truck is parked on a level surface, the parking brake is set, and the engine is cool.
Step-by-Step: Replacing Coils on the 4.6L V8 Engine
The 4.6L 2-valve V8 in your 2007 F150 is a mechanic’s dream for this job. All eight coils are mounted on the sides of the engine, easily visible and accessible. This entire process can be completed in under an hour by a competent DIYer. Let’s get started.
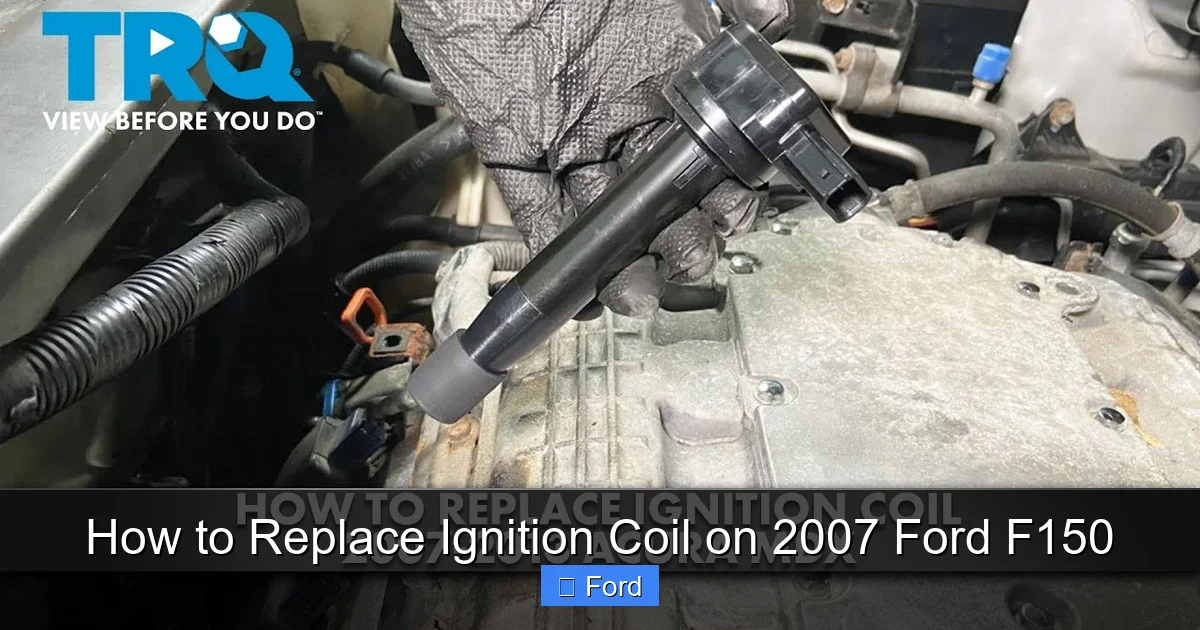
Visual guide about How to Replace Ignition Coil on 2007 Ford F150
Image source: i.ytimg.com
1. Disconnect the Battery and Locate the Coils
First, open the hood and locate the battery. Using your 10mm socket, loosen and remove the negative (black) battery cable. Tuck it safely away from the terminal so it cannot accidentally arc against it. This is a non-negotiable safety step. Now, look at the top of your engine. You’ll see eight black, rectangular plastic coils, each with a wiring harness plug attached. They are held down by a single 7mm or 8mm bolt each, depending on the coil manufacturer.
2. Remove the Coil Electrical Connectors
Starting with any cylinder, gently pry back the small plastic locking tab on the coil’s electrical connector. Press the release tab and pull the connector straight off. Be firm but gentle—these connectors can be stiff. It helps to use a flathead screwdriver wrapped in a shop towel to avoid scratching the plastic. As you remove each connector, give it a quick visual inspection for any signs of heat damage or corrosion. A quick tip: take a photo of each connector’s position before unplugging it. While they are keyed, it eliminates any doubt during reassembly.
3. Remove the Coil Hold-Down Bolt and Coil
Using your 7mm or 8mm socket, remove the single bolt securing the coil. Be careful, as the bolt can fall into the engine valley. Keep your hand over the bolt as you unscrew it the final turn. Once the bolt is out, grasp the coil firmly and pull it straight up. It may require a slight wiggle. If it’s stuck, do not use excessive force; instead, gently twist it side-to-side while pulling. The coil’s rubber boot seals onto the spark plug and can create a slight vacuum seal. Once free, carefully pull the coil away, noting any oil or debris that might be on the boot.
4. Inspect, Grease, and Install the New Coil
Before installing the new coil, inspect the spark plug hole. If you see excessive oil, it could indicate a failing valve cover gasket, a common issue on these engines. If you’re also replacing spark plugs, now is the time. Use your spark plug socket to remove the old plug. Check the gap on the new plug (usually pre-gapped for your application) and install it with a dab of anti-seize compound on the threads. Torque it to spec (about 13-15 ft-lbs for a 4.6L). Now, take your tube of dielectric grease and apply a thin, even coat to the inside of the new coil’s rubber boot. This is a small step that prevents future boot sticking and moisture problems. Seat the new coil squarely onto the spark plug and press down firmly until it’s fully seated. Reinstall the hold-down bolt and torque it snugly—you don’t need massive force, just enough to hold it in place (about 70-80 inch-pounds).
5. Reconnect and Repeat
Reconnect the electrical connector to the new coil until you hear it click and feel it lock. Ensure the locking tab is fully engaged. Repeat steps 2-5 for all eight coils. Take your time. It’s easy to miss a connector or bolt if you rush. Once all are installed, double-check that all connectors are secure and all bolts are present.
The More Involved Job: Replacing Rear Coils on the 5.4L V8 (3-Valve)
If your 2007 F150 is equipped with the 5.4L Triton 3-valve V8, you have a more substantial project ahead. The rear four cylinders (cylinders 5, 6, 7, 8) are located under the intake manifold. To access them, you must remove the entire plastic intake plenum. This adds significant time and complexity but is still very doable with patience and organization. The front four coils (cylinders 1-4) are accessed the same way as on the 4.6L described above. This section focuses on the rear bank.
Visual guide about How to Replace Ignition Coil on 2007 Ford F150
Image source: i.ytimg.com
1. Preparation and Intake Duct Removal
Begin by disconnecting the negative battery cable, as always. Then, you need to remove the air intake duct leading to the throttle body. There are usually two clamps: one on the air filter box side and one on the throttle body. Loosen the clamps with a screwdriver or socket. Also, disconnect the Mass Air Flow (MAF) sensor electrical connector on the duct. You can then carefully remove the entire duct assembly and set it aside. This gives you the working room needed to remove the intake plenum bolts.
2. Removing the Intake Plenum
This is the critical step. The plastic upper intake manifold (plenum) is held on by multiple bolts and has several electrical connectors and vacuum lines attached. First, locate and disconnect all electrical connectors from the plenum. These include the PCV valve heater, EGR valve (if equipped), and various sensors. Label them with tape if needed. Next, carefully trace and disconnect any vacuum hoses. They are usually clipped on. Now, locate the bolts. There are typically 10mm and 13mm bolts around the perimeter and some under the plenum lip. Using your extensions and swivels, remove all of them. Crucially, the 5.4L intake manifold bolts must be tightened in a specific sequence and to a specific torque (often around 10-15 ft-lbs) to prevent warping and leaks. Since you’re removing them, just get them all out. As you remove the last few bolts, support the plenum with one hand—it’s light but has wiring harnesses attached. Once all bolts are out, carefully lift the plenum straight up and off. It may require a slight wiggle. Be mindful of the delicate wiring harnesses still attached to components on the lower intake. Set the plenum aside in a safe, clean place.
3. Accessing and Replacing the Rear Coils
With the plenum removed, the rear four ignition coils are now exposed, just like the front ones on the 4.6L. The removal and installation process is identical to the steps in the previous section: disconnect the electrical connector, remove the 7mm/8mm hold-down bolt, pull the coil straight up, inspect, apply dielectric grease to the new coil’s boot, install it, and reconnect the connector. If you are also replacing the rear spark plugs (highly recommended), now is your only chance. Use your spark plug socket and extensions to reach them. The process is the same as described before. Take extra care not to drop any tools or debris into the open intake ports. Stuffing a clean rag into each port is a good practice, but be absolutely certain to remove all rags before reinstalling the plenum.
4. Reinstalling the Intake Plenum
This step is the most critical for long-term engine health. Before placing the plenum back, ensure all old gasket material is cleaned from the lower intake mating surface and that the new intake gasket is correctly positioned on the lower intake or plenum (some kits use a rubber gasket on the plenum, others on the lower intake—follow your gasket kit instructions). Carefully lower the plenum back onto the engine, guiding it over the dowel pins if present. Hand-start all the bolts to avoid cross-threading. Then, using your torque wrench, tighten the bolts in the factory-specified sequence (usually a criss-cross pattern from the center outwards) to the specified torque. This sequence is vital to create an even seal and prevent a major vacuum leak. Reconnect all the electrical connectors and vacuum hoses you disconnected earlier. Reinstall the air intake duct and MAF sensor connector.
Post-Replacement: Testing and Common Pitfalls
You’ve got all the new coils installed and the engine reassembled. You’re not quite done yet. Proper testing is essential to confirm a successful repair and avoid a return visit to the engine bay.
Initial Start-Up and Code Clearing
Before reconnecting the negative battery cable, take a moment to ensure everything is secure. Double-check that all electrical connectors are locked, all bolts are tightened (especially the intake manifold bolts on the 5.4L!), and no tools are left in the engine compartment. Now, reconnect the negative battery terminal and tighten it. Turn the key to the “ON” position (but do not start) for a few seconds. This allows the fuel pump to pressurize and any electronic modules to initialize. Then, start the engine. It should run smoothly. If you get a prolonged crank or rough start, don’t panic—it may just need a few cycles to clear fuel from the cylinders. Let it idle and listen. It should be smooth and steady. If a misfire persists, you may have a misrouted connector, a loose coil bolt, or a more serious issue like a bad spark plug or fuel injector.
Using a Scan Tool
The definitive test is to use an OBD-II scan tool. If your check engine light was on, it will likely still be illuminated until you clear the codes. Connect your scanner, read the codes, and clear them. If the misfire code returns immediately, you have an ongoing problem. If it clears, take the truck for a drive under varying conditions—idle, acceleration, and steady cruising. After the drive, re-check for codes. If none return, your repair was successful. If a new code appears, diagnose accordingly. For those who have worked on their F150’s electrical system before, you might also want to check out our guide on how to reset the anti-theft system on a Ford F150, as some electrical work can sometimes trigger the passive anti-theft system, though this is rare for a coil job.
Common Mistakes to Avoid
- Forgetting the Intake Torque Sequence (5.4L): This is the #1 mistake. An unevenly tightened intake manifold will warp, cause a vacuum leak, and lead to poor performance, stalling, and lean codes. Always use a torque wrench and follow the sequence.
- Damaging the Coil Boots: Pulling a coil at an extreme angle or using excessive force can tear the delicate rubber boot. A torn boot will cause a spark leak and a misfire. Always pull straight up.
- Neglecting Dielectric Grease: Skipping this cheap step makes future coil removal much harder and invites moisture that can cause tracking and coil failure.
- Cross-Threading Intake Bolts: Hand-start every single bolt. Forcing a bolt can strip the threads in the plastic plenum, a very expensive error.
- Not Replacing All Coils on a High-Mileage Truck: If you’re replacing one coil on a truck with 150,000+ miles, the others are likely not far behind. Replacing just one often leads to another failure within weeks, meaning you’ll be doing the hard part (intake removal) all over again.
Cost Analysis: DIY vs. Professional Repair
Understanding the financial incentive for a DIY repair is a great motivator. Let’s break down the costs.
Parts Cost
A single OEM Motorcraft ignition coil for a 2007 F150 typically costs between $40 and $70. A set of eight quality aftermarket coils (like from Bosch or Delphi) can be found for $250-$350. A set of eight OEM spark plugs runs about $60-$100. For the 5.4L, an intake manifold gasket set is an additional $30-$50. So, total parts for a full coil-and-plug job on a 5.4L might be $350-$500 if you go with premium parts.
Labor Cost Savings
This is where the savings are staggering. A professional shop will charge anywhere from $800 to over $1,500 for this job, depending on the engine and your location. The labor time on a 5.4L can be 3-5 hours at $100-$150/hour. By doing it yourself, you save that entire labor cost. Even factoring in the cost of tools (which you own forever), the DIY saving is often $1,000 or more. This makes it one of the most cost-effective major repairs you can perform on your F150.
When to Consider a Professional
While this is a great DIY project, there are times to call a pro. If you are uncomfortable working with tools, lack a safe workspace, or your truck has other underlying issues (like the common 5.4L 3-valve cam phaser or VCT solenoid problems that also cause rough idle), a professional diagnosis first is wise. Also, if you discover your 5.4L’s intake manifold is stuck due to age and plastic deformation, forcing it can cause cracks—a pro might have special techniques or tools. But for the mechanically inclined, this is a rewarding project that builds confidence and deepens your knowledge of your truck.
Conclusion: Empowering Your F150 Maintenance
Replacing the ignition coils on your 2007 Ford F150 is more than just a repair; it’s an investment in your understanding of your vehicle. For the 4.6L owner, you’ve learned how to perform a simple, high-value maintenance task that will keep your truck running smoothly for years. For the 5.4L owner, you’ve tackled a more complex job that demystifies the top end of your engine. The sense of accomplishment you feel when you start that engine and it purrs is unmatched. You’ve saved a significant amount of money, avoided the shop wait, and gained practical skills. Remember the key principles: safety first with the battery disconnect, organization with parts and connectors, precise torque on the 5.4L intake, and the liberal use of dielectric grease. By following this guide, you’ve not only fixed a misfire but also taken a powerful step toward becoming more self-reliant in maintaining your Ford F150. Now, go enjoy that smooth-running truck!
Frequently Asked Questions
What are the most common symptoms of a bad ignition coil on a 2007 Ford F150?
The most common symptom is a random or constant engine misfire, felt as a shake or vibration at idle or under acceleration. This is usually accompanied by a check engine light with codes P0300-P0308. You may also notice a loss of power, reduced fuel economy, and a noticeable fuel smell from the exhaust.
How long does it take to replace ignition coils on a 2007 Ford F150?
On the 4.6L V8, an experienced DIYer can complete the job in 45 minutes to 1.5 hours. On the 5.4L 3-valve V8, due to the need to remove the intake manifold, the job typically takes 2.5 to 4 hours for a first-timer. Having a helper and being well-organized can significantly reduce the time on the 5.4L.
Should I replace all 8 ignition coils at once on my 2007 F150?
Yes, it is highly recommended. Ignition coils on the same vehicle often have similar wear and tear. If one fails, the others are likely not far behind. Replacing all eight at once, especially on a high-mileage truck, saves you from repeating the labor-intensive job (particularly on the 5.4L) in the near future and ensures consistent performance.
Can I use aftermarket ignition coils on my 2007 Ford F150?
You can, but quality varies widely. Stick with reputable brands like Bosch, Delphi, or Standard Motor Products. Avoid the cheapest no-name coils, as they often fail prematurely. For best results and longevity, OEM Motorcraft coils are the gold standard, though they come at a higher price.
Do I need to replace the spark plugs when changing the ignition coils?
It’s not strictly required, but it is a fantastic opportunity. Since the coils are off, the labor to replace the plugs is minimal (except on the 5.4L’s rear plugs, where the intake is already off). Given that spark plugs on a 2007 model may be original, replacing them ensures optimal performance and prevents a future misfire that could be misdiagnosed as a coil problem.
My 2007 F150 still has a misfire code after replacing the coils. What could be wrong?
First, double-check that the correct coil was connected to the correct cylinder. A misrouted connector will cause a misfire on a different cylinder. Next, inspect the spark plug—it could be fouled, have an incorrect gap, or be cracked. Also, consider a clogged or faulty fuel injector, a vacuum leak, or a compression issue. A thorough diagnosis with a scan tool to monitor misfire counts and fuel trims is necessary.