
How to Remove Maintenance Required on Toyota Corolla 2013?
Contents
- 1 Key Takeaways
- 2 📑 Table of Contents
- 3 Understanding Your 2013 Toyota Corolla’s “Maintenance Required” Light
- 4 When to Reset vs. When to Service: The Golden Rule
- 5 Essential Preparation Before You Begin
- 6 The Step-by-Step Reset Procedure for a 2013 Toyota Corolla
- 7 Verifying Success and What to Expect Next
- 8 Troubleshooting: What If the Light Won’t Reset?
- 9 Maintaining Your Corolla Beyond the Reset Button
- 10 Frequently Asked Questions
The “maintenance required” light on your 2013 Toyota Corolla is a friendly reminder for scheduled service, not an emergency. You can reset it yourself in under 30 seconds after completing the necessary maintenance like an oil change. This guide provides the exact, model-specific steps to safely turn off that light. Always perform the actual maintenance first—resetting without service is unsafe and defeats the purpose of the system.
Key Takeaways
- The light is a reminder, not a diagnosis: It illuminates based on mileage/time intervals for oil changes, tire rotations, and other scheduled services. It does not indicate a fault.
- Reset only after completing maintenance: You must perform the required service (e.g., oil and filter change) before resetting the light. Resetting it without service is dangerous and misleading.
- No tools are required: The 2013 Corolla reset is done entirely through the instrument cluster using the odometer/trip meter button. You do not need to open the hood or use any tools.
- The process is universal for 2011-2013 models: The procedure is identical for the 10th generation Corolla (2009-2013). If you have a 2014+ model, the steps differ slightly.
- If the light returns quickly, investigate: A properly reset light should stay off for the full service interval (e.g., 5,000 miles). If it comes back soon, a sensor or other issue may be present.
- Consult your owner’s manual first: Your manual has the definitive procedure and service schedule for your specific vehicle. Use this guide as a supplemental reference.
- Safety comes first: If you are unsure about performing the maintenance yourself, take your Corolla to a trusted mechanic. Do not simply reset the light and continue driving with overdue service.
📑 Table of Contents
- Understanding Your 2013 Toyota Corolla’s “Maintenance Required” Light
- When to Reset vs. When to Service: The Golden Rule
- Essential Preparation Before You Begin
- The Step-by-Step Reset Procedure for a 2013 Toyota Corolla
- Verifying Success and What to Expect Next
- Troubleshooting: What If the Light Won’t Reset?
- Maintaining Your Corolla Beyond the Reset Button
Understanding Your 2013 Toyota Corolla’s “Maintenance Required” Light
That small wrench icon glowing on your dashboard isn’t trying to trick you. It’s your 2013 Toyota Corolla’s built-in service scheduler, working exactly as designed. Unlike the ominous check engine light, this indicator is a proactive reminder from your car’s computer. It calculates when you’re due for routine, preventative maintenance based on your driving habits, mileage, and time since the last reset. Understanding this distinction is the first and most crucial step in properly managing your vehicle’s health.
The system is elegantly simple. After you complete a service like an oil change, the technician (or you) resets the counter. The car’s computer then begins counting down to the next interval, which for most 2013 Corollas is typically every 5,000 miles or 6 months. When you hit that threshold, the wrench icon illuminates steadily. If you ignore it for another 1,000 miles or so, it will begin to blink, serving as a more urgent warning. This system is Toyota’s way of ensuring your engine receives fresh oil and other critical services on time, which is fundamental to the Corolla’s legendary reliability. Ignoring it can lead to accelerated engine wear, poor performance, and costly repairs down the line.
What Triggers the Light?
The primary trigger for the maintenance required light is the engine oil change interval. The car’s Engine Control Module (ECM) tracks engine runtime, vehicle speed, and ambient temperature to estimate oil degradation. However, the reminder is often bundled. On the 2013 Corolla, the standard service interval typically includes:
- Oil and filter change (the primary trigger)
- Tire rotation and pressure check
- Comprehensive vehicle inspection (brakes, fluids, belts, hoses, etc.)
Because the system is integrated, resetting it tells the computer you’ve addressed all these items. You should never reset it if you’ve only changed the oil but haven’t rotated the tires or performed the full inspection. Doing so masks the reminder for other critical services. For a deeper dive into Toyota’s maintenance reminder systems across different models, you can explore our general guide on how to reset the maintenance required light on Toyota.
When to Reset vs. When to Service: The Golden Rule
This is the most important concept to grasp. The light is a consequence of elapsed time or mileage, not a signal that something is currently broken. Therefore, the sequence must always be:
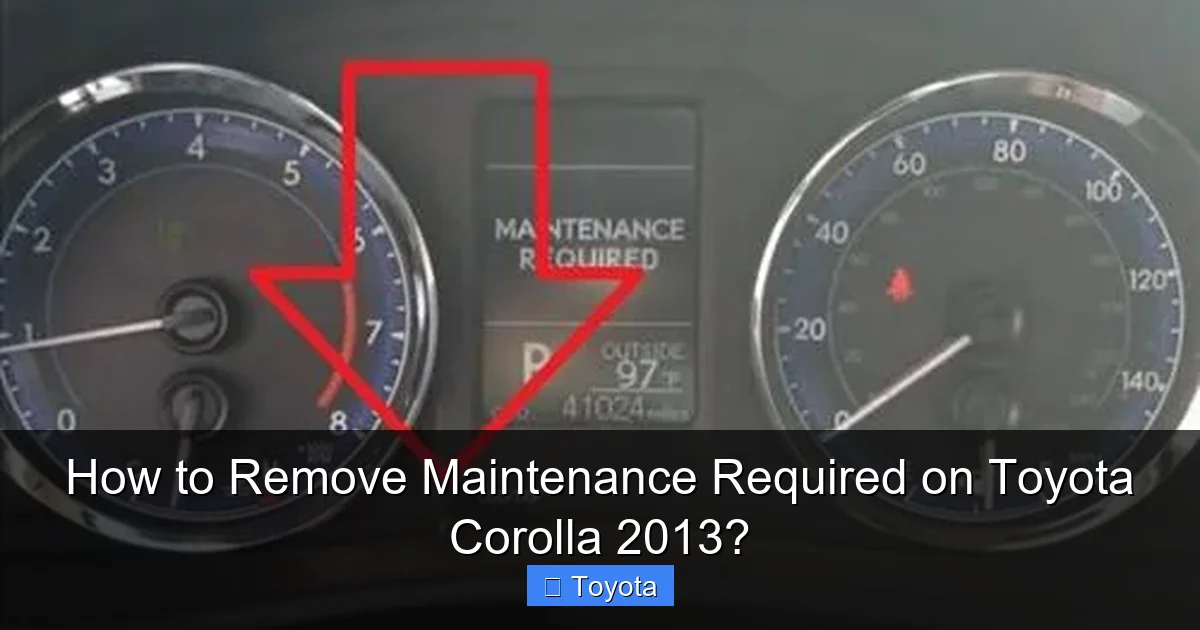
Visual guide about How to Remove Maintenance Required on Toyota Corolla 2013?
Image source: backyardmechanic.org
- SERVICE: Perform the required maintenance (oil change, tire rotation, etc.).
- RESET: Turn off the maintenance required light to restart the service interval counter.
Reversing this order—resetting the light before doing the work—is a serious mistake. It’s like erasing a to-do list without doing the tasks. Your engine will continue to run on degraded oil, your tires will wear unevenly without rotation, and potential problems in the inspection will go unnoticed until they become major, expensive failures. The light exists to protect your investment. Respecting its purpose is key to your Corolla’s longevity.
Signs That Service is Immediately Needed
While the maintenance light itself is a reminder, there are other, more urgent symptoms that require immediate professional attention before you even think about resetting anything. If you experience any of these, do not reset the light. Have your car inspected:
- Unusual engine noises (knocking, ticking)
- Visible smoke from the exhaust (blue = burning oil, white = coolant leak)
- Severe loss of oil pressure (oil pressure warning light on)
- Major leaks under the car
- Significant, sudden drop in fuel economy
These indicate active problems that a simple reset will not fix. The maintenance light is for scheduled, preventative care. Active symptoms are for diagnostics and repair.
Essential Preparation Before You Begin
Before you touch any buttons, a little preparation ensures the process goes smoothly and safely. This entire reset takes less than a minute, but skipping these steps can lead to confusion or an incomplete reset.
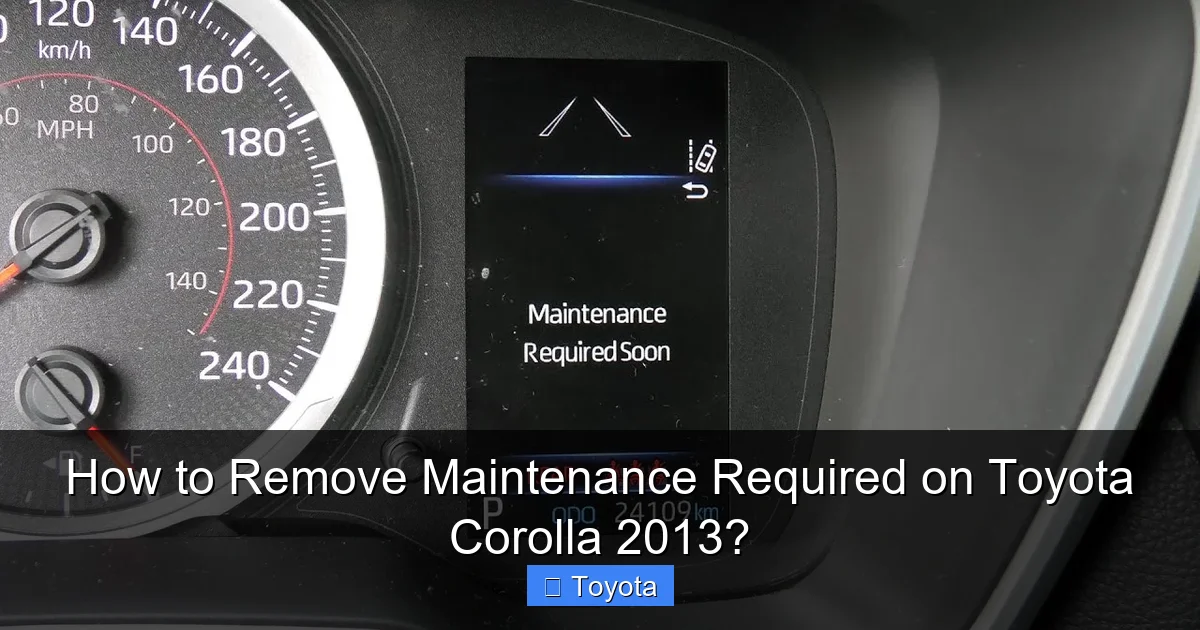
Visual guide about How to Remove Maintenance Required on Toyota Corolla 2013?
Image source: i.ytimg.com
1. Complete the Required Service
This cannot be stressed enough. Have you just changed the engine oil and filter? Have the tires been rotated? Have you checked all fluid levels (coolant, brake, windshield washer)? If the answer to any of these is “no,” complete those tasks first. The reset is the final administrative step, not a shortcut around actual work.
2. Gather Your Information
Have your owner’s manual handy. While this guide is specific to the 2013 Corolla, your manual is the ultimate authority. Also, note your current odometer reading. You’ll use the trip meter “A” or “B” function during the reset. The process uses the odometer display, so make sure your car’s display is set to show the total mileage (odometer), not a trip meter, when you start. If it’s on a trip meter, you’ll need to toggle it first.
3. Ensure a Safe Environment
Park your Corolla on a level surface, engage the parking brake, and turn off all accessories (radio, AC, lights). The ignition must be in the “ON” position (dashboard lights on, engine off) for the reset. Make sure the key fob is with you if you have a push-button start. For push-start models, you do not need to press the brake pedal to get to “ON” mode; just press the button once without touching the brake.
The Step-by-Step Reset Procedure for a 2013 Toyota Corolla
Now, for the main event. The process for the 10th-generation Corolla (2009-2013) is consistent and straightforward. It involves using the odometer/trip meter button on the instrument cluster to navigate a hidden menu. Follow these steps precisely.
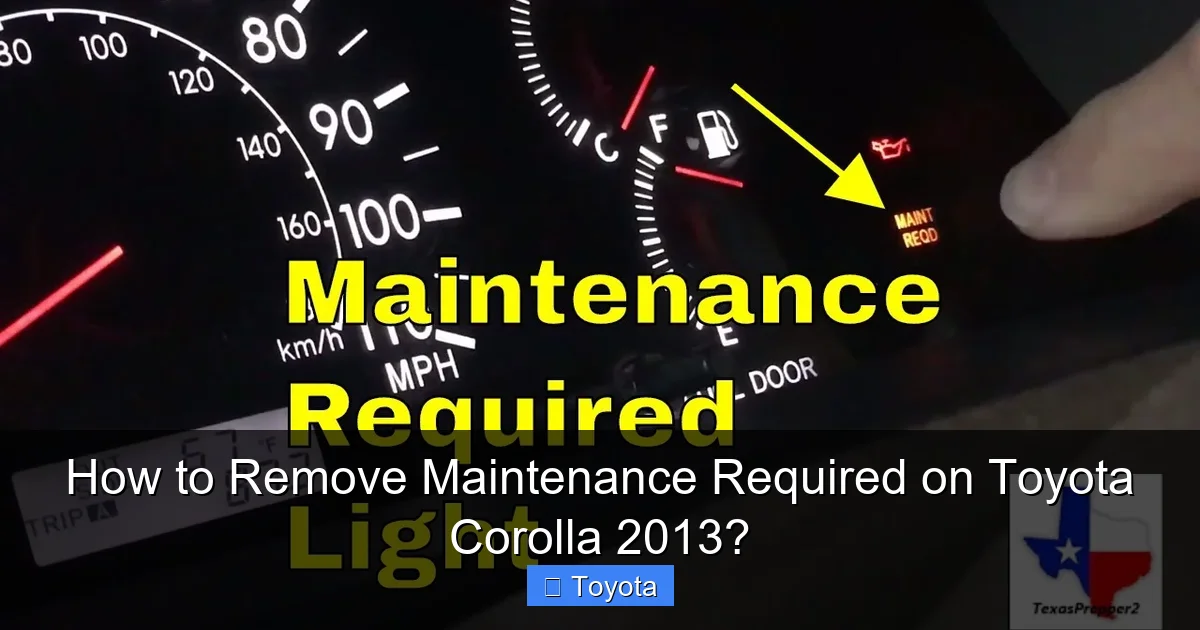
Visual guide about How to Remove Maintenance Required on Toyota Corolla 2013?
Image source: i.ytimg.com
Step 1: Turn the Ignition to the “ON” Position
Insert your key into the ignition and turn it to the “ON” position. This is the position right before you would crank the engine. All your dashboard warning lights, including the maintenance required wrench icon, should illuminate. Do not start the engine. If you have a push-button start, press the button twice without touching the brake pedal. The dashboard lights will come on, and you’ll see the odometer reading.
Step 2: Display the Odometer (Not a Trip Meter)
Using the button on your instrument cluster (often labeled “ODO/TRIP” or just a small toggle button), cycle through the display until you see the total vehicle mileage (odometer). You must see the actual odometer reading, not “Trip A” or “Trip B.” If you see a trip meter reading, press the button repeatedly until the full odometer appears. This is a common point of failure—if you’re on a trip meter display, the reset will not work.
Step 3: Turn the Key “OFF”
Once the odometer is clearly displayed, turn the ignition key back to the “OFF” position. The dashboard lights and odometer display will go dark. For push-start, press the button once to turn the car completely off.
Step 4: Initiate the Reset Mode
This is the critical sequence. While the key is in the “OFF” position, press and hold down the same odometer/trip meter button. Keep it held down firmly. While still holding the button, turn the key back to the “ON” position (or press the start button twice for push-start). The display will remain blank for a second, then the odometer will reappear, but now you will see a series of dashes “—–” or the text “SET” or “MAINT REQ” appear. Continue holding the button. After a few seconds, the display will change to show “00000” or a series of zeros, and the maintenance required light will begin to blink. This confirms you are in reset mode.
Step 5: Complete the Reset and Verify
Once you see the zeros and the blinking light, you can release the button. The system will automatically exit the reset mode after a moment. The maintenance required light should now be extinguished. Turn the ignition “OFF” and then back “ON” one more time to verify. The wrench icon should be dark. The odometer should return to showing your normal mileage. If the light is still on, repeat the process from Step 1, ensuring you hold the button long enough to see the dashes/zeros.
Verifying Success and What to Expect Next
A successful reset is confirmed by the absence of the wrench icon when you turn the car to the “ON” position. The light should remain off until the next service interval is reached—typically 5,000 miles or 6 months from the date of your last service, whichever comes first. The system does not know you changed the oil; it only knows you reset the counter. Therefore, it’s your responsibility to track your mileage and perform the next service on schedule.
You might also see a small “A” or “B” appear on your odometer display briefly when you first turn the car on after a reset. This is normal. It’s the service code indicating which maintenance items are due at the next interval. “A” usually means oil change and inspection, “B” means that plus additional items like cabin air filter. These codes are informational and will disappear after a few seconds. If they persist, it may indicate an issue.
For owners of other Toyota models, the reset procedure can vary. For instance, resetting the light on a 2013 Toyota Highlander often involves a different button combination on the steering wheel. Always refer to the model-specific guide.
Troubleshooting: What If the Light Won’t Reset?
If you’ve followed the steps carefully and the maintenance required light remains illuminated, don’t panic. There are a few common reasons and solutions.
Most Common Issue: Display Not on Odometer
This accounts for 90% of failed resets. You must start with the total odometer reading on the display. If you are on “Trip A” or “Trip B,” the reset will fail. Use the instrument cluster button to toggle until you see the full mileage number before turning the key “OFF.”
Button Timing
The sequence of holding the button while turning the key “ON” must be precise. Try doing it slowly. Press and hold the button, then slowly turn the key. Watch for the dashes “—–” to appear. If you release the button too early, you’ll exit the menu. If you don’t hold it long enough, you won’t enter the reset mode.
Underlying Electrical or Sensor Issue
In rare cases, a faulty sensor or an electrical gremlin can prevent the reset. If the light comes back on immediately after a successful reset, or if it’s flashing erratically, there may be a deeper problem with the vehicle’s computer system. At this point, a diagnostic scan with a professional OBD2 tool is necessary. Sometimes, a simple battery disconnect can clear a stuck processor, but this will also reset your radio presets and clock. If you’re comfortable, you can look into how to jumper OBD2 on a Toyota for specific diagnostic modes, but this is advanced.
The Light is Actually the Tire Pressure Monitoring System (TPMS)
On some model years, the warning light might be misinterpreted. The TPMS light is a cross-section of a tire with an exclamation point, not a wrench. However, if your Corolla has a combined warning or you’re unsure, check your manual. Resetting a TPMS light is a different process, often requiring a drive cycle or a scan tool after adjusting tire pressures. You can learn more about checking pressures on your Toyota Corolla to rule this out.
Maintaining Your Corolla Beyond the Reset Button
Resetting the light is a tiny part of car ownership. Using the reminder system as intended is part of a holistic maintenance strategy that keeps your 2013 Corolla running reliably for years.
Adhere to the Schedule, Not Just the Light
Your owner’s manual outlines a detailed maintenance schedule. For a 2013 Corolla with a 1.8L engine, this typically includes:
- Every 5,000 miles/6 months: Oil & filter, tire rotation, safety inspection.
- Every 15,000 miles/2 years: Replace engine air filter.
- Every 30,000 miles: Replace cabin air filter, inspect spark plugs, check drive belts.
- Every 60,000 miles: Replace spark plugs (if not iridium), inspect and possibly replace timing belt/chain (depending on engine), change transmission fluid (if manual).
The maintenance light primarily tracks the 5,000-mile oil change interval. You must manually track the longer-interval items. Keep a service log in your manual or a notebook.
Perform Basic Checks Yourself
Between professional services, you can easily check:
- Oil Level: Once a month, with the engine cold, pull the dipstick, wipe it, reinsert, and check the level. Top up with the correct oil if low.
- Tire Pressure: Check monthly with a handheld gauge. Inflate to the PSI listed on the driver’s door jamb sticker, not the tire sidewall. Proper inflation is critical for safety, fuel economy, and tire life.
- Fluid Levels: Check coolant, brake fluid, and windshield washer reservoirs monthly. Top up as needed.
- Lights: Ensure all headlights, taillights, and turn signals are working.
These simple habits catch small issues before they become big problems and help you understand your car’s normal state.
Frequently Asked Questions
Can I reset the maintenance required light without changing the oil?
Technically, yes, the steps will turn the light off. However, you should never do this. The light is a reminder that your engine oil is likely degraded. Resetting it without changing the oil means your engine will continue to run on old, ineffective oil, leading to increased wear and potential engine damage. Always perform the required service first.
How many miles can I drive after the maintenance light comes on?
You should schedule service as soon as possible. The light illuminates at your predetermined service interval (usually 5,000 miles). It then begins blinking after you’ve driven approximately another 1,000 miles. Driving beyond that point with overdue oil changes risks engine damage. Treat it as a “service soon” warning, not a “service when convenient” reminder.
Will disconnecting the battery reset the maintenance light?
Disconnecting the battery will reset many electronic systems, including the clock and radio presets, but it will not reset the maintenance required light on a 2013 Corolla. The maintenance counter is stored in non-volatile memory that retains the setting even when battery power is lost. You must use the specific odometer button procedure described above.
What’s the difference between the maintenance required light and the check engine light?
The maintenance required light (wrench icon) is a preventative reminder for scheduled service like oil changes. It is not an emissions or safety-related fault. The check engine light (engine-shaped icon) indicates a problem with the engine, transmission, or emissions system that needs immediate diagnosis. You can reset the maintenance light yourself after service, but a check engine light requires a professional scan to identify and fix the underlying issue before it can be cleared.
My light is blinking. Is that more urgent?
Yes. A steadily illuminated maintenance light means you’ve reached your service interval. A blinking light means you have significantly exceeded it—typically by about 1,000 miles. It’s the car’s way of saying “service is overdue.” You should schedule an appointment immediately. Continuing to drive with a blinking maintenance light is risking serious engine wear.
Do I need any special tools or a scan tool to reset it?
No. The reset procedure for your 2013 Corolla is designed to be performed by the owner with no tools. You only need the ignition key (or push-button start) and the odometer/trip meter button on your dashboard. A professional scan tool is used for diagnosing check engine lights or for resetting other systems, but it is unnecessary for this simple maintenance reminder reset.


