
How to Fix a Tesla Wall Charger
Contents
- 1 Key Takeaways
- 2 📑 Table of Contents
- 3 Introduction: When Your Tesla Wall Charger Won’t Charge
- 4 Understanding Your Tesla Wall Charger: The Basics
- 5 Common Issues and Their Symptoms
- 6 Step-by-Step Troubleshooting Guide
- 7 When to Call a Professional: Don’t Gamble with Electricity
- 8 Essential Maintenance for Long-Term Reliability
- 9 Conclusion: Empowering the EV Owner
- 10 Frequently Asked Questions


A malfunctioning Tesla Wall Charger can leave you stranded, but many common issues are fixable with basic troubleshooting. This guide walks you through identifying problems like power failures, error codes, and connectivity issues, with step-by-step solutions for each. Always prioritize safety and know when to call a pro for electrical work.
Key Takeaways
- Safety First: Always disconnect power before inspecting or repairing your Tesla Wall Charger to avoid electric shock or damage.
- Check the Basics: Many charging issues stem from simple problems like a tripped breaker, loose connections, or a faulty outlet.
- Decode Error Lights: Understanding your charger’s LED patterns (green, red, amber) is key to diagnosing specific faults quickly.
- Reset Before Replacing: A full power cycle reset often resolves temporary glitches in both the charger and your Tesla vehicle.
- Inspect for Physical Damage: Regularly examine the cable and connector for fraying, cracks, or corrosion, which are common culprits of charging failures.
- Know Your Limits: Complex electrical issues or internal charger faults require a qualified electrician or Tesla-certified technician.
- Maintenance Prevents Problems: Keeping your charger clean, protected from weather, and firmware-updated extends its lifespan and reliability.
📑 Table of Contents
- Introduction: When Your Tesla Wall Charger Won’t Charge
- Understanding Your Tesla Wall Charger: The Basics
- Common Issues and Their Symptoms
- Step-by-Step Troubleshooting Guide
- When to Call a Professional: Don’t Gamble with Electricity
- Essential Maintenance for Long-Term Reliability
- Conclusion: Empowering the EV Owner
Introduction: When Your Tesla Wall Charger Won’t Charge
You pull into your garage, ready to plug in your Tesla for a night of charging. You connect the cable, but the familiar startup chime doesn’t sound. The charging port light stays dark, or maybe it’s flashing a mysterious pattern. Your heart sinks. A broken wall charger feels like a betrayal—it’s supposed to be the reliable, always-there solution for your EV’s fuel. But don’t panic. While a Tesla Wall Charger is a sophisticated piece of equipment, many common problems are surprisingly straightforward to diagnose and fix yourself. This guide is your friendly, step-by-step manual to getting that juice flowing again. We’ll break down everything from simple power checks to interpreting error codes, all in plain language. Think of it as a conversation with a knowledgeable neighbor who happens to know a lot about EV chargers.
The key is to approach the problem methodically. Rushing to call a professional for every little hiccup can be costly. But ignoring serious electrical issues is dangerous. We’ll help you tell the difference. By the end of this article, you’ll have the confidence to tackle the most frequent Tesla Wall Charger headaches, saving you time, money, and the frustration of a dead battery. Remember, your safety is the top priority. If at any point you smell burning, see sparks, or feel unsure, stop and call an expert.
Understanding Your Tesla Wall Charger: The Basics
Before we start fixing things, it helps to know what you’re working with. Tesla’s wall-mounted charging stations, often called Wall Connectors, come in a few generations, but they all share the same core job: safely converting your home’s AC power into the DC power your Tesla battery needs. The main components are the wall-mounted unit itself, the charging cable with the proprietary Tesla connector, and the wiring that connects it to your home’s electrical panel.
Visual guide about How to Fix a Tesla Wall Charger
Image source: carstale.com
The Different Generations
Tesla has primarily sold the Gen 2 Wall Connector and the newer Gen 3. The differences are mostly in aesthetics and some internal features like Wi-Fi connectivity for scheduling and energy monitoring. For troubleshooting, the fundamental operations are similar. Both have a single LED light on the front that communicates status through color and blinking patterns. Knowing what these patterns mean is your first diagnostic tool. A solid green usually means all is well, while a solid red indicates a hard fault. Blinking patterns often point to connectivity or communication issues with your vehicle.
How It’s Supposed to Work
When you plug the connector into your Tesla, a “handshake” occurs. The charger tells the car how much power it can provide (its maximum amperage). The car then requests the amount it needs, based on its settings and battery state. This communication happens over a small data line in the connector. If this conversation gets interrupted, charging won’t start. This is why issues can be electrical (power to the unit) or communicative (between charger and car). Keeping this simple model in mind will guide your troubleshooting steps.
Common Issues and Their Symptoms
Let’s identify the problem by its symptoms. What exactly is happening (or not happening)? Categorizing the issue narrows down the potential fixes dramatically.
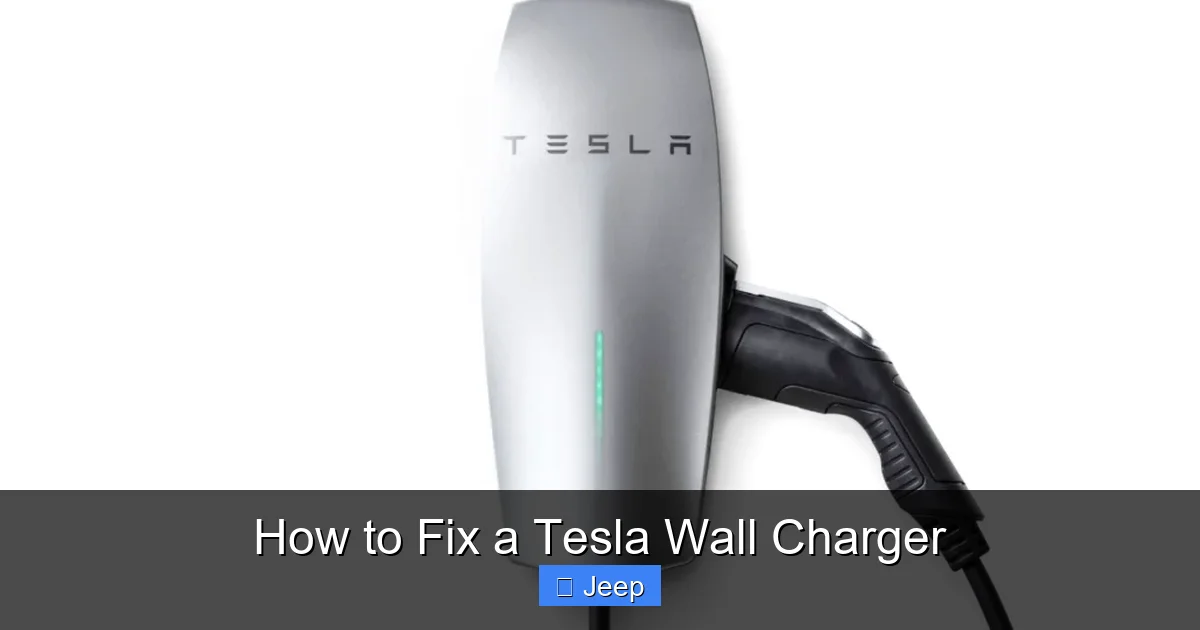
Visual guide about How to Fix a Tesla Wall Charger
Image source: carstale.com
Symptom 1: The Charger Has No Power (Dead Unit)
The wall unit is completely dark. No lights at all. This is the most basic issue and usually points to a problem upstream from the charger itself.
- Possible Causes: Tripped circuit breaker, blown fuse, loose wire connections at the breaker panel or the charger’s junction box, a failed outlet (if using a mobile connector), or a completely dead internal power supply in the charger.
Symptom 2: The Charger Powers On But The Car Won’t Charge
The charger’s LED is lit (maybe solid green or another color), you plug in, but your Tesla doesn’t show charging starting. The port light might not illuminate, or it might flash.
- Possible Causes: Vehicle charging settings are limiting power (e.g., set to a low amperage or scheduled charging), a communication fault between charger and car, an incompatible charge cable adapter, a vehicle fault that prevents charging, or the charger’s amperage limit is set too low for the vehicle’s request.
Symptom 3: Error Lights or Blinking Patterns
The charger’s LED is blinking a specific pattern (e.g., 4 blinks red, 2 blinks green). This is the charger talking to you in code.
- Possible Causes: Each pattern corresponds to a specific fault code. Common ones include thermal overload (charger too hot), ground fault, communication loss, or internal component failure. You’ll need to decode the blink pattern from your manual.
Symptom 4: Intermittent or Stopped Charging
Charging starts but stops after a few minutes or hours. The charge rate might drop dramatically before stopping.
- Possible Causes: Overheating (charger or vehicle), a loose connection at the plug or wall, voltage fluctuations from the grid, a failing cable with broken internal wires, or a vehicle battery management system (BMS) halting charge due to temperature.
Symptom 5: Physical Damage to Cable or Connector
This is obvious: the cable is frayed, the connector is cracked, or there’s corrosion on the pins.
- Possible Causes: Physical abuse, bending the cable too tightly, dragging it on the ground, or exposure to elements causing corrosion. This is a safety hazard and must be addressed immediately.
Step-by-Step Troubleshooting Guide
Now, let’s get our hands dirty (safely). Follow this flowchart of diagnostics. Start at the top and move down only if the previous step checks out.

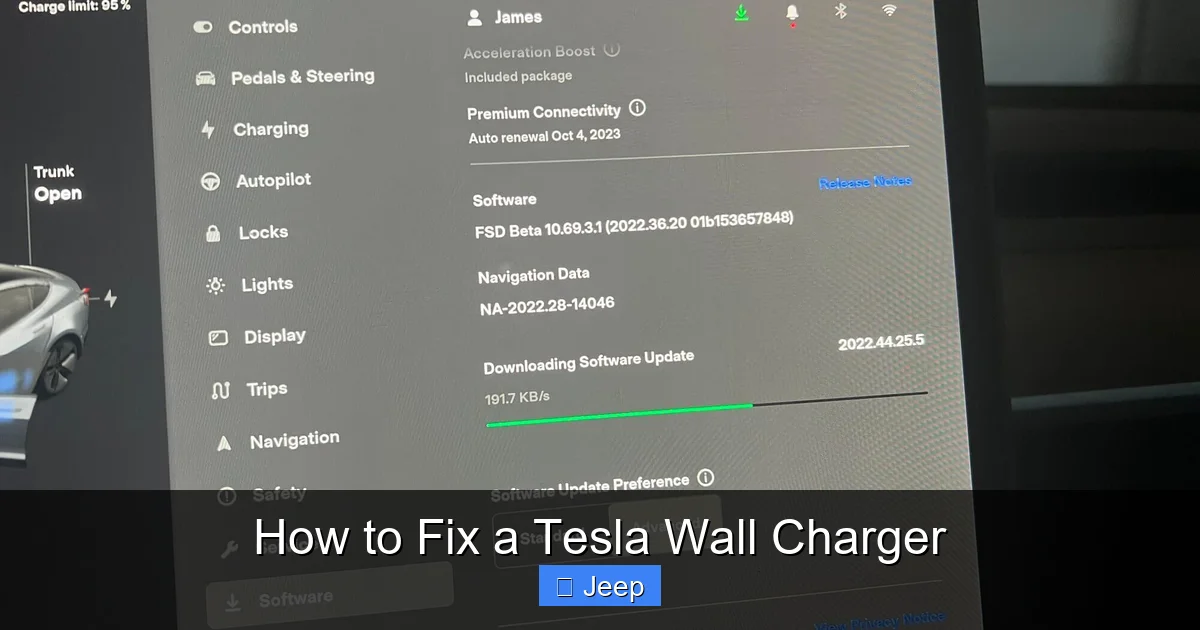
Visual guide about How to Fix a Tesla Wall Charger
Image source: weldingtroop.com
Step 1: The Absolute Safety Check
Before touching anything, ensure the charger is off at the breaker. Locate the dedicated circuit in your electrical panel and flip it to OFF. This eliminates all risk of electric shock while you inspect connections. If you ever smell burning plastic, see blackening around the unit, or hear arcing sounds from the panel, do not proceed. Call an electrician immediately.
Step 2: Check Your Home’s Power Supply
This addresses the “dead unit” symptom. Go to your electrical panel. Is the breaker for the charger tripped? It will be in the OFF or middle position. Flip it fully OFF, then back to ON. Sometimes a breaker trips and looks like it’s ON but is actually halfway. If it trips again immediately after resetting, there’s a short circuit. Do not keep trying. This requires a pro. Next, check for a fuse if your system uses them. Finally, ensure the breaker is correctly sized for your charger (usually 50A for Gen 2/3). An undersized breaker can nuisance-trip.
While you’re at the panel, check that all wire connections are tight. Loose connections at the breaker or in the junction box can cause power loss. If you’re comfortable, turn the breaker OFF and verify the wire terminals are snug. If not, this is electrician work.
Step 3: Inspect the Charger and Cable Visually
With power still off at the breaker, do a full visual inspection. Look for:
- Cable Damage: Any cuts, abrasions, or areas where the outer sheath is worn down. Feel along the entire length for kinks or soft spots indicating internal wire breakage.
- Connector Damage: Check the Tesla connector tip. Are the metal pins bent, corroded, or dirty? Is the plastic housing cracked? Clean pins gently with electrical contact cleaner and a soft brush. Never use anything metallic.
- Wall Unit: Look for cracks, water intrusion, or signs of overheating (discoloration, warping). Ensure the mounting is secure.
If you find any significant damage, especially to the cable or connector, stop. These components are not user-repairable. You must order a replacement cable assembly from Tesla or an authorized distributor. Using a damaged charger is a fire risk.
Step 4: Perform a Full Power Cycle Reset
This fixes many communication glitches and temporary faults. It’s like rebooting your computer. Here’s the proper sequence:
- Unplug the charger from your Tesla.
- Turn OFF the dedicated breaker in your panel.
- Wait a full 60 seconds. This ensures all residual power drains from the charger’s capacitors.
- Turn the breaker back ON.
- Wait for the charger’s LED to go through its startup sequence (usually a series of blinks then solid green). This can take 30-60 seconds.
- Plug the connector firmly into your Tesla.
If charging starts, great! The issue was a temporary glitch. If not, move to the next step. The principle of resetting electronic systems applies widely in automotive troubleshooting. For instance, resetting the Uconnect system on a Dodge Charger follows a similar process of disconnecting power to clear fault codes. You can learn more about that specific procedure here.
Step 5: Check Vehicle Settings and Limits
The problem might be on the car side, not the charger. Get in your Tesla and:
- Check Charging Amperage: Go to Charging > Max Amperage. Is it set to “Standard” or a low number like 5A? Raise it to the maximum your circuit allows (usually 40-48A for a 50A circuit). If it’s already maxed, try lowering it slightly (e.g., to 32A). Sometimes the car and charger negotiate poorly at the absolute max limit.
- Check Scheduled Charging: Is a schedule active? It might be set for a future time or off-peak hours. Temporarily disable it.
- Check for Vehicle Faults: Look at your car’s touchscreen for any warning messages. A fault in the vehicle’s charging system (like a battery thermal issue) will prevent charging regardless of the wall unit. If your car shows a fault, you need to diagnose that separately.
Step 6: Interpret and Act on Error Blink Codes
If your charger is blinking a pattern, it’s telling you what’s wrong. Consult your Tesla Wall Connector manual for the exact blink code definitions. Common patterns include:
- Solid Red: Internal charger fault or over-temperature. Let it cool down for an hour, then reset. If it returns, it’s likely a failed component.
- 4 Red Blinks: Ground fault or earth leakage. This is serious. It means the charger detected an abnormal current path to ground, possibly from moisture or damage. Do not use. Requires service.
- Alternating Red/Green: Communication fault with the vehicle. Check the connector for dirt/damage, try a different vehicle if possible, or reset both car and charger.
- 3 Amber Blinks: High temperature warning. Ensure the charger is in a well-ventilated area, not in direct sunlight or enclosed space. It may reduce power or stop until cool.
Diagnostic lights are universal in automotive systems. For example, the ESP/BAS light on a Dodge Charger illuminates for specific electronic stability and brake assist issues. Understanding these indicator lights is a fundamental skill for any vehicle owner. You can read about interpreting the ESP/BAS light in this detailed guide.
Step 7: Test with Another Vehicle or Charger
Isolation testing is the gold standard for diagnosis.
- Try Another Car: If possible, plug your charger into a different Tesla or compatible EV (using an adapter). If it works, the problem is likely with your original Tesla’s charge port or settings.
- Try Another Charger: If you have access to a different charger (like a public J1772 station with a Tesla adapter), try charging your car with it. If your car charges fine, the problem is definitely with your Wall Connector.
This step tells you exactly which component is faulty: the charger, the car, or the circuit.
Step 8: Firmware and Software Updates
Both your Tesla vehicle and the Wall Connector (if it has Wi-Fi) can receive firmware updates. An outdated version can sometimes cause communication bugs.
- Update Your Tesla: Ensure your car is connected to Wi-Fi and check for software updates in Settings > Software.
- Update the Wall Connector: If your Gen 3 is Wi-Fi connected, updates usually install automatically. You can check status in the Tesla app. Do not interrupt an update once it starts.
After any update, perform a full power cycle reset on the charger.
When to Call a Professional: Don’t Gamble with Electricity
You’ve run through the steps above, and the charger still doesn’t work or shows a serious error code (like a solid red or 4 red blinks). Now it’s time to call in the experts. But beyond persistent faults, there are clear situations where DIY is dangerous and illegal.
Signs You Need an Electrician
- No Power to the Unit: If the breaker is on, but there’s zero power at the charger (confirmed with a non-contact voltage tester by someone who knows how to use it), the fault is in the wiring between the panel and the charger. This requires a licensed electrician.
- Breaker Trips Repeatedly: If the dedicated breaker trips during or immediately after a reset, there’s a short circuit or overload in the wiring or the charger itself. An electrician can safely diagnose this.
- Burning Smell or Visible Damage: Any sign of overheating at the breaker panel, wall unit, or outlet means components have failed. This is a fire hazard.
- You’re Not Comfortable: Working inside an electrical panel is risky. If you don’t know how to safely verify a circuit is dead, call a pro. The cost of a service call is cheap compared to an injury or a house fire.
Signs You Need Tesla Service
- Solid Red Light After Reset: This typically indicates an internal component failure in the charger, like a failed power supply or communication board. Tesla or an authorized service provider must replace these parts.
- Persistent Communication Faults: If the charger works with other cars but not yours, after verifying your car’s port is clean and functional, the fault may be in your car’s charge port electronics. Your Tesla service center can diagnose this.
- Charger Under Warranty: If your Wall Connector is still under warranty, contact Tesla first. They may ship you a replacement or guide you through advanced steps. Opening the unit yourself likely voids the warranty.
Regarding cost, professional installation or repair of a high-amperage EV charger isn’t cheap. A full replacement installation, including any necessary electrical panel upgrades, can vary widely. For a general idea of how much it costs to install a Tesla charger, you can research typical ranges, but always get a local quote based on your home’s specific electrical infrastructure.
Essential Maintenance for Long-Term Reliability
Prevention is the best cure. A few simple habits will keep your Tesla Wall Charger happy for years.
Regular Cleaning and Inspection
Every few months, give your charger a once-over. Wipe down the wall unit with a dry, soft cloth. Use a soft brush to remove dust and debris from vents. Inspect the entire cable for any wear. Clean the connector pins if they look dirty, using a dedicated electrical contact spray and a microfiber cloth. Never insert anything into the pin holes.
Protect It From the Elements
While the Wall Connector is rated for outdoor use, prolonged exposure to harsh sun, snow, or rain can shorten its life. If installed outdoors, consider a small weatherproof cover. Ensure the cable is not lying in a puddle or on hot asphalt. The connector should never be left plugged into the car while not in use if it’s exposed to rain; Tesla connectors are weatherproof when mated, but it’s best practice to store them dry.
Mind Your Cable Management
Never yank the cable by the connector to unplug it. Always grasp the connector handle. When coiling the cable for storage, use the large “over-under” loop method or a purpose-made cable hook to avoid sharp bends. Don’t wrap it so tightly that it kinks. A common failure point is where the cable meets the connector due to constant flexing.
Update Firmware Promptly
If your Gen 3 is Wi-Fi connected, allow it to update automatically. These updates often improve communication protocols and stability. Keep your Tesla vehicle’s software updated as well for the same reason.
Load Management
If you have multiple high-draw appliances on the same circuit (e.g., dryer, oven), be mindful. The charger should be on a dedicated circuit, but heavy loads elsewhere in the house can cause voltage sags that may affect charging. If you notice charging speeds dropping when other appliances run, it might be a sign of an undersized service or need for a voltage stabilizer.
Conclusion: Empowering the EV Owner
Fixing your Tesla Wall Charger isn’t about becoming an electrician; it’s about being a proactive, informed owner. You now have a clear roadmap: start with the simplest checks (power, resets), learn to read your charger’s LED language, and understand when a problem is within your safe DIY scope and when it’s time to call a professional. Remember, the most common fixes—resetting breakers, tightening connections, updating software—cost nothing but a few minutes of your time. By performing regular maintenance and early diagnostics, you ensure your charging solution remains reliable, safe, and ready whenever your Tesla needs it. The freedom of electric driving starts at home, and a working wall charger is the key. Treat it with care, diagnose wisely, and you’ll enjoy countless trouble-free charging sessions. If you ever doubt a step, especially involving direct electrical work, the safest and smartest choice is to consult a licensed expert. Your safety and your home’s safety are worth far more than the cost of a service call.
Frequently Asked Questions
Why is my Tesla Wall Charger blinking green but not charging my car?
A blinking green light typically means the charger is in “standby” or “idle” mode, waiting for a vehicle connection. If it’s blinking after you plug in, it usually indicates a communication issue. Ensure the connector is fully seated, try resetting both the charger (power cycle at breaker) and your Tesla’s touchscreen (reboot the car), and check your vehicle’s charging settings for any limits or schedules that might be preventing charge.
How do I reset my Tesla Wall Charger?
The proper reset is a full power cycle: 1) Unplug the charger from the car. 2) Turn OFF the dedicated circuit breaker in your electrical panel. 3) Wait 60 seconds. 4) Turn the breaker back ON. 5) Wait for the charger to complete its startup sequence (LED will blink then turn solid green). 6) Plug back into the vehicle. This clears most temporary faults.
What does a solid red light on my Tesla Wall Charger mean?
A solid red light indicates a serious internal fault or an over-temperature condition. First, ensure the charger is in a well-ventilated, shaded area and not covered. Let it cool for an hour, then perform a full power cycle reset. If the solid red returns immediately, the charger has likely failed and needs to be serviced or replaced by Tesla or a qualified technician.
Can I fix a broken Tesla Wall Charger cable myself?
No. The charging cable is a specialized, high-amperage component with integrated safety features and communication wires. Any damage to the outer sheath or connector housing compromises its safety and function. Attempting a DIY repair is extremely dangerous and will void certifications. You must purchase a genuine Tesla replacement cable assembly and have it installed by a qualified professional if you’re not comfortable with the connector plug.
How much does it typically cost to replace or repair a Tesla Wall Charger?
Costs vary widely. If under warranty, replacement may be free. Out of warranty, a new Wall Connector unit costs between $500-$700. Installation by a licensed electrician adds $300-$800+ depending on complexity and local rates. Simple fixes like a breaker replacement or terminal tightening are much cheaper ($100-$300). Major internal component repairs often approach the cost of a new unit.
Is it safe to use my Tesla Wall Charger if the plastic casing is cracked?
No. A cracked casing exposes internal components and wiring to moisture, dust, and physical contact, creating a serious risk of electric shock, short circuit, or fire. Immediately power off the dedicated breaker and discontinue use. The unit must be replaced. Do not attempt to tape or seal the crack; the safety integrity is compromised.


