

How to Close Tesla Front Trunk
Contents
- 1 Key Takeaways
- 2 📑 Table of Contents
- 3 How the Tesla Front Trunk Works
- 4 Step-by-Step: Closing the Front Trunk the Right Way
- 5 Why Your Front Trunk Might Not Close (And How to Fix It)
- 6 Manual Override: What to Do When the Latch Won’t Budge
- 7 Safety First: Features That Prevent Accidental Closure
- 8 Maintenance Tips to Keep Your Front Trunk Operating Smoothly
- 9 Conclusion
- 10 Frequently Asked Questions

Car Door Edge Guard

Portable Work Light

Liquid Car Polish

Car Hydraulic Jack
Closing your Tesla’s front trunk is simple but crucial for safety and aerodynamics. Always push down firmly until you hear the latch click, and never force it if resistance occurs. Understanding the manual override can save you when the electronic latch fails.
Closing the front trunk, or “frunk,” of your Tesla might seem like a no-brainer—just push it down, right? Well, yes and no. While the action itself is straightforward, doing it correctly is vital for your safety, your car’s aerodynamics, and the long-term health of the latch mechanism. Many new Tesla owners aren’t aware that the front trunk requires a firm, deliberate push to fully engage the latch, and that ignoring resistance can lead to frustrating malfunctions. In this complete guide, we’ll walk through everything you need to know about closing your Tesla front trunk properly, from the standard method to troubleshooting when things go wrong, and even how to use the manual override. Whether you own a Model 3, Model Y, Model S, or Model X, these principles apply across the lineup.
Key Takeaways
- Always ensure the area is clear before closing to avoid pinching. Check for obstacles like snow, ice, or loose items inside the frunk.
- The latch must click into place; listen for the sound. A proper seal ensures aerodynamic efficiency and prevents unexpected opening while driving.
- If it won’t close, check for obstructions first. Common issues include debris in the latch or misaligned panels.
- The manual release cord is inside the frunk for emergencies. Located near the latch, it allows you to open the frunk if power or electronics fail.
- Electrical issues can affect the locking mechanism. A drained 12V battery may prevent the latch from engaging, similar to problems in other vehicles like a Nissan Altima.
- Never attempt to close with excessive force. Forcing it can damage the latch, sensors, or body panels, leading to costly repairs.
- Regular maintenance prevents most problems. Keep the latch area clean and inspect for wear periodically.
📑 Table of Contents
- How the Tesla Front Trunk Works
- Step-by-Step: Closing the Front Trunk the Right Way
- Why Your Front Trunk Might Not Close (And How to Fix It)
- Manual Override: What to Do When the Latch Won’t Budge
- Safety First: Features That Prevent Accidental Closure
- Maintenance Tips to Keep Your Front Trunk Operating Smoothly
- Conclusion
How the Tesla Front Trunk Works
Before we dive into the “how-to,” it helps to understand what’s happening behind the scenes. Tesla’s front trunk is a clever use of space made possible by the electric powertrain’s compact design. Unlike a traditional car hood or a rear power liftgate, the frunk operates with a unique combination of manual closure and powered opening.
The Latch Mechanism
At the heart of the frunk is a sturdy latch system. When you push the hood down, a primary latch catches first, holding the trunk loosely. You must then apply additional pressure—usually a firm push down on the center or sides—until a secondary lock engages with an audible click. This two-stage process ensures a tight, secure seal. The latch is electrically controlled for opening (via the touchscreen, app, or key fob) but relies on mechanical force for closing. This design means you’re in full control of the seal, but it also means you must complete the action fully.
Sensors and Safety Features
Your Tesla frunk is equipped with a pinch sensor, similar to those in power windows. If the sensor detects an obstruction—like your hand or a grocery bag—during the closing motion, it will automatically reverse the latch to prevent injury or damage. Additionally, the car’s software monitors the latch status. If the frunk isn’t fully closed, a warning will appear on your touchscreen and, in some cases, you may hear a chime. The car will also refuse to accelerate at high speeds if the frunk is ajar, a critical safety feature.
Step-by-Step: Closing the Front Trunk the Right Way
Now for the main event. Closing your Tesla front trunk correctly takes just a few seconds but requires a specific technique. Follow these steps every time to ensure a proper seal.
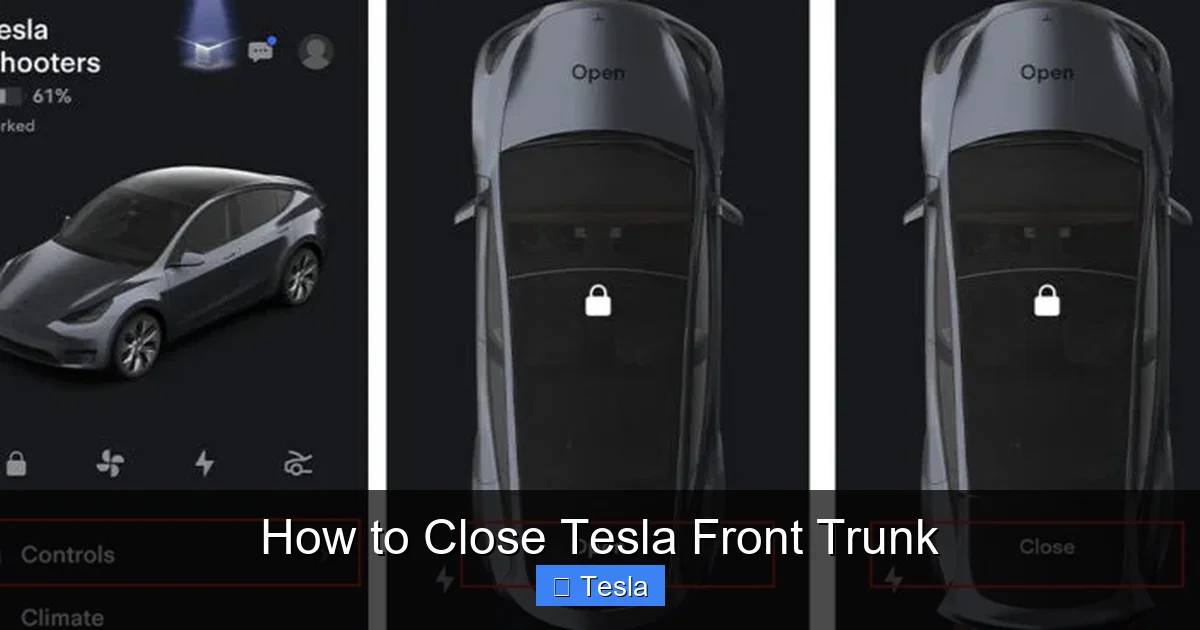
Visual guide about How to Close Tesla Front Trunk
Image source: teslashooters.com
The Standard Push-Down Method
1. Clear the area: Before closing, visually inspect the frunk cavity and the surrounding edges. Remove any tools, charging cables, or loose items that could obstruct the latch or fall out. Also, check that the hood itself is free of snow, ice, or debris that might prevent a smooth seal.
2. Lower the hood gently: Lift the front trunk release (via touchscreen, app, or key fob) and allow the hood to rise fully. Support it with your hand if needed; don’t let it slam down.
3. Guide it into place: Slowly lower the hood until it makes contact with the latch. You’ll feel a slight resistance as the primary latch catches. At this point, the hood is loosely closed but not secure.
4. Apply firm, even pressure: Place the palm of your hand on the center of the hood (or use both hands on the sides) and push down firmly and evenly. You should hear a distinct click as the secondary lock engages. This is the sound of a properly closed frunk.
5. Verify the seal: Visually check that the gap between the hood and the front fenders is uniform all around. Try to gently lift the edge; it should not move. The touchscreen should no longer show a frunk-open warning.
Pro Tip: If the weather is cold, the latch components may be slightly stiff. A little extra force is normal, but if you encounter extreme resistance, stop and investigate—don’t brute-force it.
Why Your Front Trunk Might Not Close (And How to Fix It)
Even with the correct technique, sometimes the frunk refuses to latch. This can be annoying, but it’s usually fixable with some basic troubleshooting. Here are the most common culprits.

Visual guide about How to Close Tesla Front Trunk
Image source: i0.wp.com
Common Obstructions and How to Spot Them
The simplest explanation is often the right one. Something is physically blocking the latch from engaging. Check:
– Debris in the latch: Leaves, dirt, or small stones can accumulate in the latch housing, especially after driving on unpaved roads. Use a flashlight to inspect the metal strike plate on the car’s frame and the latch claw on the hood. Clean out any debris with a soft brush or compressed air.
– Items inside the frunk: A charging cable, suitcase, or even a small bag might be pushed against the inside of the hood, preventing it from lowering fully. Remove everything and try again.
– Ice or snow: In cold climates, ice can form on the latch or seal. Warm the area with a hairdryer on low heat or pour lukewarm water (not hot) over the seal to melt ice. Dry thoroughly before closing.
– Damaged weatherstripping: The rubber seal around the frunk opening can tear, swell, or become misaligned. Inspect it for cracks or gaps. A damaged seal can create uneven pressure and stop the hood from seating correctly.
Alignment Issues with the Latch
Over time, the hood or the latch components can shift slightly due to wear, minor impacts, or temperature changes. If the latch claw doesn’t line up with the strike plate, it won’t catch.
– Visual inspection: Look at the gap between the hood and the car’s body. Is it even on both sides and the center? A gap that’s wider on one side indicates misalignment.
– Gentle adjustment: Sometimes, gently wiggling the hood side-to-side while pressing down can help it find the latch. If misalignment is persistent, it may require a technician to adjust the latch or hood hinges—this is not a typical DIY fix.
Electrical Problems Affecting the Lock
While closing is manual, the latch has an electronic actuator that disengages for opening. If this actuator is stuck in the “open” position due to a fault, it can physically block the secondary lock from engaging.
– Symptoms: The hood seems to catch initially but then pops back up slightly, or you can’t get that final click.
– Solution: Try opening and closing the frunk several times via the touchscreen to cycle the actuator. If that fails, a reboot of the car’s systems (holding both scroll wheels on the steering wheel) may reset it. Persistent issues likely require a service visit to diagnose the latch motor or wiring. Electrical gremlins can also stem from a low 12V battery, which powers the latch actuator. If your car has been sitting unused or you’ve had other electrical quirks, check the 12V battery voltage. A severely drained battery can cause latch anomalies, much like how a dead battery can prevent the trunk from opening in a Nissan Altima—see our guide on that issue here.
Manual Override: What to Do When the Latch Won’t Budge
If the electronic latch is stuck open and the hood won’t close at all, Tesla includes a manual release mechanism. This is your ultimate fallback, but it’s only accessible from inside the frunk—so you’ll need to get the hood open first if it’s stuck closed. (If it’s stuck open, you can access the release easily.)

Visual guide about How to Close Tesla Front Trunk
Image source: i0.wp.com
Locating the Emergency Release Cord
The manual release is a red pull cord with a T-handle, mounted on the inside of the frunk, typically on the right side ( passenger side in left-hand drive markets) near the front of the trunk cavity, close to where the hood meets the car’s nose. It’s usually tucked behind a small plastic cover or in a recessed area. You may need to use a flashlight to see it clearly.
Releasing the Latch Manually
1. Access the cord: Reach into the frunk and locate the red cord. Pull the cover if necessary.
2. Pull firmly: Grasp the T-handle and pull it steadily toward you. You should feel a strong resistance as it mechanically disengages the primary latch. Continue pulling until the hood pops up slightly.
3. Open the hood: Once the latch releases, you can lift the hood manually. It may be heavy, so use both hands.
4. Reset and close: With the hood open, you can now inspect and fix the underlying issue (obstruction, misalignment). To close, first ensure the manual release cord is fully pushed back into its housing (it should retract automatically). Then close the hood using the standard push-down method described earlier. The manual release is only for emergencies; it does not affect normal operation once reset.
Note: This manual release is for the primary latch only. If the secondary lock is engaged, you still need to push down firmly. The manual release helps you open the hood when the electronic actuator is stuck, not to close it. For similar manual release procedures in other vehicles, such as the Subaru Outback, learn how to use it here.
Safety First: Features That Prevent Accidental Closure
Tesla designed the frunk with multiple safeguards to protect you and your cargo.
The Pinch Sensor in Action
As mentioned, a pressure-sensitive strip runs along the rear edge of the hood (the part that closes last). If it encounters resistance—like a finger, a child’s toy, or a pet’s tail—during the final inches of travel, the latch will automatically reverse and reopen. This is a critical feature, especially with children around. Always keep hands and objects clear of the closing path. Test it occasionally by placing a soft object (like a rolled-up towel) in the seal and closing; it should bounce back.
Warning Systems
If the frunk is not fully latched, you’ll see a red icon on the touchscreen’s top bar (looks like an open hood). At low speeds, you might also hear a chime. The car will limit acceleration if you try to drive with the frunk open, typically capping speed around 50 mph. This is non-negotiable for safety—never ignore these warnings.
Child Safety Considerations
While the frunk doesn’t have a dedicated child lock like some rear trunks (e.g., certain Nissan Rogue models have an interior release disable—details here), the manual release cord inside the frunk is not easily accessible to small children. Still, it’s wise to educate kids that the front trunk is not a play area. Always supervise children near the vehicle, especially when operating the frunk.
Maintenance Tips to Keep Your Front Trunk Operating Smoothly
A little preventive care goes a long way in avoiding frunk headaches.
Regular Cleaning of the Latch Area
Every few months, open the frunk and inspect the latch mechanism. Use a soft brush or vacuum to remove dirt and grit from the strike plate on the car body and the latch claw on the hood. Wipe the rubber seal with a mild cleaner (like soapy water) to keep it pliable and free of debris that could impede sealing. Avoid petroleum-based products, as they can degrade the rubber.
Checking for Wear and Tear
Look for signs of wear on the latch components. The metal strike plate should be secure, not loose. The latch claw should move freely when you operate the release. If you hear grinding or scraping noises when opening/closing, or if the hood feels loose, have a Tesla technician inspect it. The cables that connect the manual release can also fray over time; ensure the cord pulls smoothly and retracts completely.
Lubrication (When Necessary)
In most cases, Tesla’s latch is designed to be maintenance-free. However, if you live in a very dry or salty environment, a tiny amount of silicone-based lubricant on the latch pivot points (not the sealing surfaces) can prevent sticking. Apply sparingly with a cotton swab. Never use oil or grease, as they attract dust.
Conclusion
Closing your Tesla front trunk is a small but significant part of owning an electric vehicle. By using the proper push-down technique, listening for that satisfying click, and performing regular visual checks, you’ll ensure your frunk operates reliably for years. Remember the cardinal rules: never force a stuck hood, always clear obstructions first, and know where the manual release cord is for emergencies. If problems persist after basic troubleshooting, don’t hesitate to schedule a service appointment—a malfunctioning frunk is more than a nuisance; it’s a safety issue. With these tips, you’ll master your Tesla’s front trunk operation and enjoy the convenience it offers without the frustration.
Frequently Asked Questions
Why won’t my Tesla front trunk close even after pushing down firmly?
This is usually caused by an obstruction in the latch, misalignment, or a stuck electronic actuator. Check for debris inside the latch and ensure nothing is pressing against the inside of the hood. If the issue persists, a service visit may be needed.
Where exactly is the manual release cord for the front trunk?
It’s a red cord with a T-handle located inside the frunk, typically on the right side near the front. It’s behind a small plastic cover. You can only access it when the hood is open.
What does it mean when I hear a clicking sound but the trunk won’t latch?
That sound is the primary latch engaging. The secondary lock isn’t catching, often due to misalignment or a weak spring. Try pushing down harder and evenly. If it continues, the latch mechanism may need adjustment or replacement.
Can I close the front trunk using the touchscreen or mobile app?
No. Tesla front trunks are powered open but must be manually closed. There is no remote or touchscreen function to close it; you must physically push the hood down until it clicks.
How do I fix a front trunk that seems misaligned and won’t seal evenly?
Minor misalignment can sometimes be corrected by gently wiggling the hood side-to-side while pressing down. For significant gaps, the latch or hinge bolts may need professional adjustment. Do not attempt to bend the hood or latch yourself.
Does a dead 12V battery affect the front trunk’s ability to close?
Indirectly, yes. A severely drained 12V battery can cause the latch actuator to malfunction, potentially leaving it in a position that blocks the secondary lock. Jump-starting or replacing the 12V battery often resolves this, similar to trunk issues in other cars like a Nissan Altima.


