How to Change a 2018 Hyundai Elantra Brake Light
Contents
- 1 Key Takeaways
- 2 📑 Table of Contents
- 3 Why Your Brake Light Matters and Common Failure Signs
- 4 Gathering Your Tools and Preparing Your Elantra
- 5 Step-by-Step: Accessing and Removing the Old Assembly
- 6 Opening the Assembly and Replacing the Bulb
- 7 Reassembly, Testing, and Final Installation
- 8 Troubleshooting: What If the Light Still Doesn’t Work?
- 9 When to Consider Professional Help
- 10 Conclusion: A Simple Fix for Big Peace of Mind
- 11 Frequently Asked Questions
Changing the brake light on your 2018 Hyundai Elantra is a simple, cost-effective DIY task. With basic tools and about 30 minutes, you can replace a burnt-out bulb, ensuring your safety and avoiding expensive dealership fees. This guide walks you through every step, from accessing the assembly to testing the new light, plus key tips to prevent common mistakes. Always disconnect the battery first and handle new bulbs with care to maintain optimal performance.
Let’s be honest: a burnt-out brake light is more than just a minor annoyance. It’s a critical safety issue that puts you and others at risk, and it can even get you a ticket. For owners of a 2018 Hyundai Elantra, fixing this yourself is one of the easiest and most rewarding DIY car repairs you can do. You don’t need to be a mechanic. With a few simple tools and about 20-30 minutes of your time, you can save $80 or more in labor fees at a dealership or shop. This guide will walk you through the entire process, clearly and patiently, just like a helpful friend showing you the ropes. We’ll cover everything from gathering your tools to troubleshooting if the new bulb doesn’t work right away. By the end, you’ll have the confidence and knowledge to tackle this job and keep your Elantra’s lighting system in top shape.
Key Takeaways
- Safety First: Always disconnect the car battery before starting to prevent electrical shorts or shock.
- Correct Bulb Type: Your 2018 Elantra typically uses a 7443 or 7440 dual-filament bulb; verify in your owner’s manual.
- Gentle Handling: Avoid touching the glass of a new halogen bulb with bare fingers; oil residue can cause premature failure.
- Inspect for Moisture: Water inside the light housing indicates a seal failure that must be fixed to prevent repeat bulb failures.
- Test Before Reassembly: Connect the wiring and test the new bulb with the battery before fully reinstalling the assembly.
📑 Table of Contents
- Why Your Brake Light Matters and Common Failure Signs
- Gathering Your Tools and Preparing Your Elantra
- Step-by-Step: Accessing and Removing the Old Assembly
- Opening the Assembly and Replacing the Bulb
- Reassembly, Testing, and Final Installation
- Troubleshooting: What If the Light Still Doesn’t Work?
- When to Consider Professional Help
- Conclusion: A Simple Fix for Big Peace of Mind
Why Your Brake Light Matters and Common Failure Signs
Your brake lights are your car’s way of communicating with drivers behind you. When you press the pedal, those red lights flash, shouting “SLOW DOWN!” to everyone following. If they’re out, you lose that vital line of communication, dramatically increasing the risk of a rear-end collision. Beyond the obvious “bulb is out” warning on your dashboard, you might notice a noticeably dimmer light, a flickering signal, or a friend or family member pointing it out. Sometimes, the entire assembly can become cloudy or cracked from UV exposure, further reducing brightness. Addressing the issue promptly is non-negotiable for safe driving. While this guide focuses on the bulb itself, remember that a persistent brake light warning after a bulb change could indicate a deeper electrical issue, similar to what you might find when you learn how to reset the brake system light on a Honda Civic—a process that often involves checking circuit integrity.
The Most Common Culprit: A Burnt-Out Bulb
For a 2018 model year Elantra, the most frequent cause of a non-functional brake light is simply an old filament. Halogen bulbs, like the standard 7443 dual-filament type used in the Elantra, have a limited lifespan. They endure constant vibration, heat cycles, and electrical current, which eventually causes the thin tungsten filament to break. You’ll typically get 1-2 years of service from a quality bulb, but heavy brake use (like in stop-and-go traffic) can shorten that. The good news? The bulb is the easiest and cheapest part to replace. We’ll get to that soon.
Gathering Your Tools and Preparing Your Elantra
Before you dive under the trunk lid, a little prep work makes the job smooth and prevents frustration. You don’t need a fancy toolbox, just a few common items. Rushing this step can lead to scratched paint, lost screws, or a damaged bulb.
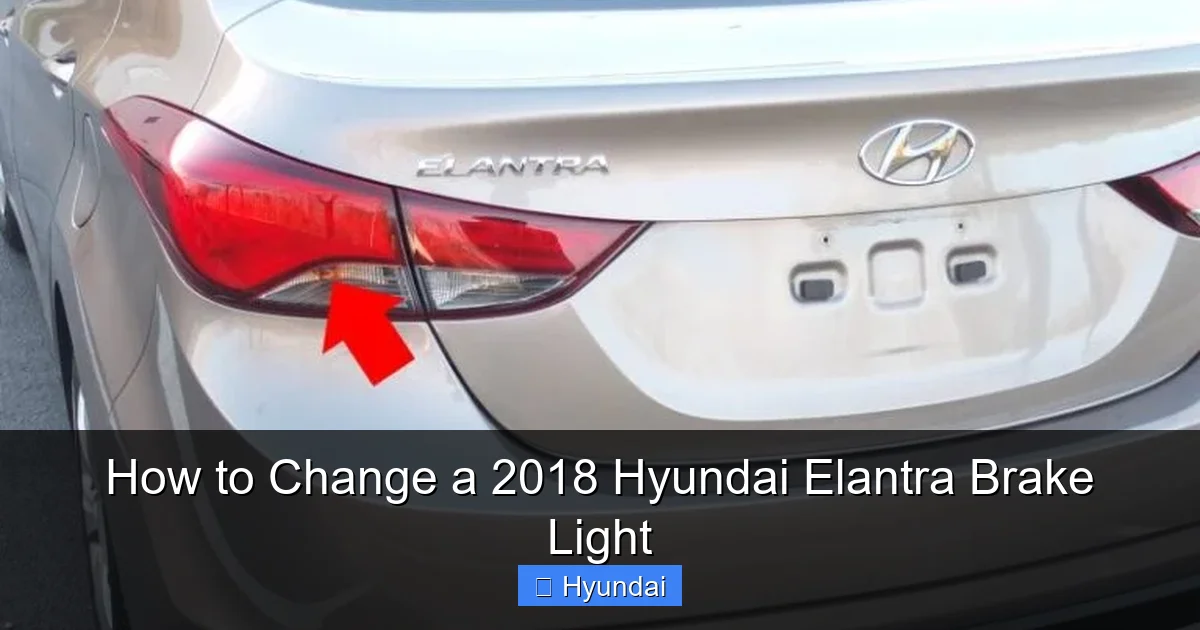
Visual guide about How to Change a 2018 Hyundai Elantra Brake Light
Image source: youcanic.com
Essential Tools You’ll Need
- Socket Wrench or Ratchet Set: A 10mm socket is most common for the trunk liner fasteners, but a Phillips-head screwdriver often works too.
- Flat-Head Screwdriver or Plastic Trim Removal Tool: Crucial for prying plastic clips without breaking them. A dedicated trim tool is ideal and inexpensive.
- Gloves (Nitrile or Latex): To keep oils from your skin off the new bulb glass.
- New Brake Light Bulb: A 7443 (or sometimes 7440) dual-filament bulb. Confirm your exact type by checking the old bulb’s base or your owner’s manual. LED upgrades are popular but may require load resistors to prevent hyper-flashing.
- Flashlight or Headlamp: The trunk cavity can be dark, making a hands-free light very helpful.
- Clean Cloth: For wiping away any dust or moisture.
Safety and Preparation: The Non-Negotiable First Step
Disconnect the negative terminal of your car battery. This is the single most important safety step. It eliminates any risk of electrical shock or a short circuit that could blow a fuse or damage the car’s computer. Locate the battery in the engine bay, loosen the nut on the black (-) negative cable with a wrench, and tuck the cable away so it can’t accidentally touch the terminal. Wait a full minute after disconnecting to allow any residual charge to dissipate. While you’re under the hood, this is a great time to check other fluid levels. For instance, knowing how much oil a 2018 Hyundai Elantra takes is essential for overall maintenance, and you can quickly top up if needed before closing the hood.
Next, pop the trunk and clear out any cargo. You need full access to the trunk liner behind the brake light assembly. If your Elantra is equipped with a rear spoiler or has aftermarket modifications, the process might differ slightly, but for most base and mid-trim models, the steps are identical.
Step-by-Step: Accessing and Removing the Old Assembly
Now for the hands-on part. The brake light assembly on the Elantra is secured from inside the trunk with plastic fasteners and sometimes a wiring harness connector. Patience is key here to avoid breaking the plastic trim pieces.
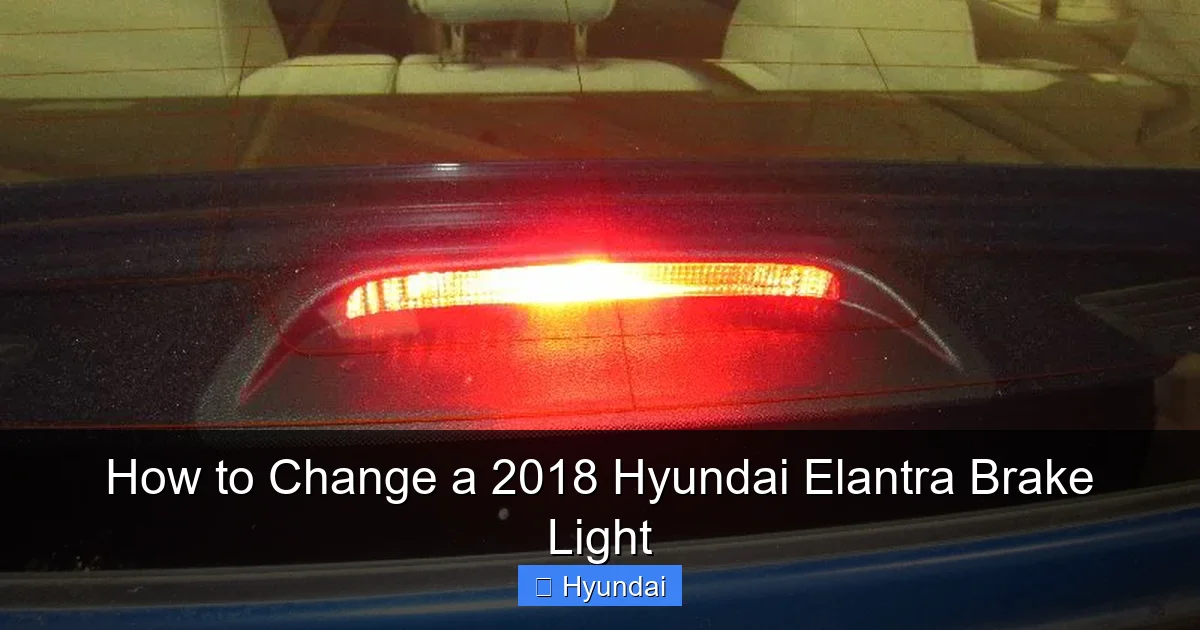
Visual guide about How to Change a 2018 Hyundai Elantra Brake Light
Image source: paulstravelpictures.com
Removing the Trunk Liner
Your goal is to see the back of the plastic brake light housing. To get there, you must remove the section of trunk liner (the fabric or plastic covering) directly behind the light. This liner is held in place by a series of plastic push pins or clips. Using your flat-head screwdriver or trim tool, gently pry around the edges of the liner section. Start at a corner and work your way around. The clips will pop free with a bit of pressure. Be careful not to crack the plastic around the clip holes. Once all clips are removed, carefully pull the liner away and set it aside. You should now see the back of the brake light assembly—a black plastic unit with a wiring harness plugged into it.
Disconnecting the Wiring Harness
Locate the plastic connector plug attached to the back of the assembly. There is usually a small locking tab or release lever. Press or slide this tab with your fingernail or a small tool, then gently pull the connector straight off. Do not yank on the wires. If it’s stuck, wiggle it slightly while holding the tab. Once disconnected, set the wiring harness aside, making sure it doesn’t fall back into the trunk cavity.
Unbolting and Removing the Assembly
The assembly is typically held to the car’s body by two or three nuts or bolts, often 10mm in size. Use your socket wrench to remove them. As you remove the last fastener, support the assembly with one hand—it will drop slightly. Carefully maneuver it out through the hole in the trunk lid. You may need to angle it to clear the trunk opening. Once it’s free, place it on a clean surface, ideally a soft cloth to prevent scratches.
Opening the Assembly and Replacing the Bulb
With the assembly in hand, you’re at the heart of the repair. The housing is usually a two-piece plastic shell clipped together. Your job is to open it, swap the bulb, and close it back up.
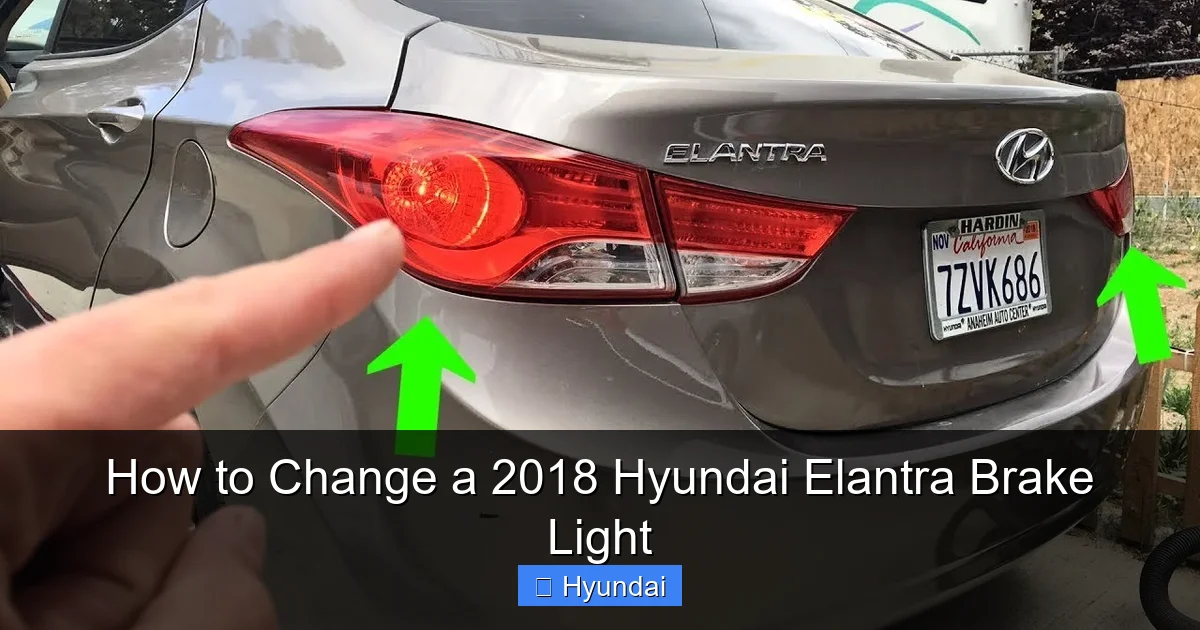
Visual guide about How to Change a 2018 Hyundai Elantra Brake Light
Image source: i.ytimg.com
Separating the Lens from the Housing
Turn the assembly over so you see the clear or red plastic lens. Around the perimeter, you’ll find a series of plastic retaining clips or, in some cases, a rubber seal and a retaining ring. Using your trim tools, carefully pry around the seam between the lens and the black housing. Start at one corner and work your way around. The clips will pop with a snapping sound. Be methodical; forcing one area can crack the plastic. Once all clips are released, the lens should lift away, revealing the bulb socket inside. If your model uses a rubber seal and a metal ring, unscrew the ring counter-clockwise to release it.
Removing the Old Bulb
Inside, you’ll see a plastic socket with wires attached. The bulb is held in by a twist-lock mechanism (a bayonet mount). Turn the socket counter-clockwise (usually about a quarter turn) to release it from the assembly. Gently pull the socket out. Now, to remove the bulb itself, press the small plastic tab on the socket and pull the bulb straight out. Some bulbs have pins that align with slots; note the orientation before removal. Do not twist or force the bulb. If it’s stuck, wiggle it gently. Once out, inspect the old bulb—you’ll see a broken filament, confirming the diagnosis.
Installing the New Bulb: Handle with Care
This is the most critical step for longevity. Halogen bulbs are extremely sensitive to oils and moisture from your skin. Even a tiny fingerprint on the glass envelope will cause that spot to heat unevenly and fail prematurely, often within weeks. Put on your nitrile gloves. If you accidentally touch the glass, clean it immediately with isopropyl alcohol and a lint-free cloth, then let it air dry.
Take your new 7443 bulb. Align the pins on the bulb base with the slots in the socket. Push it in firmly until it seats. You should feel a slight click. Give it a gentle tug to ensure it’s secure. Now, reinsert the socket into the assembly housing, aligning any tabs, and twist it clockwise until it locks into place. It should not spin freely. Give the socket a light tug to confirm it’s locked.
Reassembly, Testing, and Final Installation
Don’t reassemble everything only to find the light doesn’t work. A quick test now saves a major disassembly later.
Testing Before Full Reassembly
Before snapping the lens back on, reconnect the wiring harness to the socket. Reconnect your car battery. Have a partner press the brake pedal while you watch the bulb. It should glow brightly and steadily. If it doesn’t work, first check that the bulb is inserted correctly. If it’s still dark, the new bulb might be defective (rare, but possible), or there could be an issue with the socket or wiring. If it works, disconnect the battery again before proceeding.
Sealing the Housing
With a working bulb confirmed, carefully align the lens with the housing. Start by pressing the clips into place around the perimeter. You should hear/feel them snap. Work your way around the entire circle to ensure an even, watertight seal. If your model uses a rubber seal and retaining ring, position the seal correctly in the groove, place the lens, and hand-tighten the ring clockwise until snug. Do not over-tighten, as it can crack the plastic.
Reinstalling the Assembly in the Trunk Lid
Now, take the sealed assembly and carefully feed it back through the hole in the trunk lid. Align the bolt holes with the threaded studs on the car. Hand-start each nut or bolt to avoid cross-threading, then tighten them securely with your socket wrench—snug is fine, don’t overtighten and crack the plastic. Reconnect the wiring harness until it clicks into place. Give the connector a light tug to ensure it’s locked.
Final Checks and Trunk Liner Reinstallation
Before putting the trunk liner back, do a final visual check. Ensure no wires are pinched and the assembly is flush with the trunk lid. Now, reattach the trunk liner by pressing the plastic clips back into their holes. Start at the center and work outward to get an even fit. Ensure all clips are fully seated. Close the trunk and have an assistant press the brake pedal again from outside the car to confirm the light is visible and bright. If you have a reflective surface or a wall behind you, you can also check the reverse light function, as they often share the same bulb filament.
Troubleshooting: What If the Light Still Doesn’t Work?
Sometimes, a bulb swap doesn’t solve the problem. Don’t panic. There are logical next steps to diagnose the issue.
Verify the Bulb and Socket
Double-check that you installed the correct bulb type (7443 vs. 7440). The 7443 has a higher wattage for the brake function. Also, ensure the bulb is fully seated in the socket. Remove it and reinstall it. Inspect the socket for signs of corrosion, melting, or broken plastic tabs. A damaged socket will need to be replaced, which is a slightly more involved job but still DIY-friendly for many.
Check the Fuse
Your Elantra has a fuse box under the hood and another inside the cabin (usually on the driver’s side end of the dashboard). Consult your owner’s manual for the exact fuse location and amperage for the “Stop Lamp” or “Brake Light” circuit. Use a fuse puller or needle-nose pliers to remove the fuse and inspect the metal strip inside. If it’s broken or melted, replace it with a new fuse of the same amperage. A blown fuse indicates a short circuit, which you’ll need to trace, but sometimes a faulty bulb can cause a transient short that blows the fuse.
Investigate for Moisture or Corrosion
If you found water droplets or fogging inside the assembly when you opened it, that’s the real problem. Water causes corrosion on the bulb socket and filament failure. The cause is usually a failed rubber seal around the assembly or a crack in the plastic housing. You’ll need to replace the seal or, in some cases, the entire assembly. Make sure the seal is clean and pliable when you reassemble. Persistent moisture might also point to a clogged trunk drainage system, so check that area as well.
When to Consider Professional Help
While this repair is straightforward, some situations warrant a call to a professional. If you’ve replaced the bulb, checked the fuse, and the light still doesn’t work, the issue could be deeper. A wiring harness problem, a faulty brake light switch (the pedal-mounted switch that activates the lights), or a problem with the car’s body control module could be to blame. Diagnosing these requires electrical testing equipment and knowledge of the Elantra’s wiring diagram. Similarly, if the plastic housing is cracked or severely degraded, replacing the entire assembly might be best done by a shop to ensure proper alignment and sealing. Your safety is paramount; if you’re ever unsure, seek qualified assistance. For other dashboard warnings, such as a persistent brake system light on a Honda Civic, the diagnostic process often starts with a similar bulb and fuse check before moving to more complex electronics.
Conclusion: A Simple Fix for Big Peace of Mind
Congratulations! You’ve now mastered the art of changing a brake light on your 2018 Hyundai Elantra. This is a perfect example of a “do-it-yourself” repair that saves you money, builds your confidence as a car owner, and directly contributes to safer roads. The process is the same for both driver and passenger side lights, so you’re fully equipped to handle either. Remember the golden rules: disconnect the battery, wear gloves, handle the bulb carefully, and test before final assembly. Make it a habit to periodically check all your exterior lights—headlights, taillights, turn signals, and brake lights—perhaps during your regular oil changes. Knowing how much oil a 2018 Hyundai Elantra takes is part of good maintenance, but so is ensuring every light on your vehicle functions perfectly. A few minutes of your time now prevents a dangerous situation and a costly ticket later. So next time that brake light goes out, roll up your sleeves—you’ve got this.
Frequently Asked Questions
How often should I change the brake light bulb on my 2018 Hyundai Elantra?
Halogen brake light bulbs typically last 1-2 years under normal use. However, if you notice any dimming, flickering, or if the bulb has been in place for over 18 months, it’s wise to proactively replace it. Always keep a spare bulb in your trunk.
What specific bulb type does a 2018 Hyundai Elantra use for the brake light?
The 2018 Elantra uses a dual-filament 7443 bulb for the brake light and taillight functions (some earlier models may use a 7440). The best way to confirm is to remove the old bulb and check the number printed on its base, or consult your owner’s manual’s light bulb specification chart.
Do I need any special tools beyond a basic socket set?
No special tools are required. A basic toolkit with a 10mm socket or a Phillips screwdriver, a flat-head screwdriver or plastic trim tool for prying clips, and gloves is sufficient. A flashlight is highly recommended for better visibility inside the trunk cavity.
My brake light is still not working after installing a new bulb. What should I check next?
First, recheck that the bulb is fully seated and the correct type. Then, inspect the fuse for the stop lamp circuit in your under-hood or interior fuse box. If the fuse is good, examine the socket for corrosion or damage. Finally, the brake light switch on the pedal or a wiring issue could be the culprit, which may require professional diagnosis.
Can I get moisture inside the brake light housing? Is that a problem?
Yes, moisture is a serious problem. It indicates a failed seal around the light assembly or a crack in the housing. Condensation causes corrosion on the socket and bulb, leading to premature failure. You must dry the interior thoroughly, replace any damaged seals, and ensure the trunk drain holes are clear to prevent recurrence.
Should I replace both brake lights at the same time?
It’s a smart practice. Since both bulbs have the same lifespan and exposure, the other side will likely fail soon. Replacing both at once saves you another trip under the trunk lid, ensures matching brightness (new bulbs are brighter than aged ones), and maintains symmetrical safety. It’s a small additional cost for significant convenience.