
Does the Check Engine Light Come on for an Oil Change on a Toyota
Contents
- 1 Key Takeaways
- 2 📑 Table of Contents
- 3 Understanding the Check Engine Light: More Than Just a Warning
- 4 Oil Change Reminders: The Maintenance Required System in Toyotas
- 5 Can an Oil Change Cause the Check Engine Light to Come On?
- 6 Common Causes of Check Engine Light Activation in Toyotas
- 7 What to Do When the Check Engine Light Comes On
- 8 Proactive Maintenance: Preventing Check Engine Light Surprises
- 9 Conclusion: Empowered with Knowledge
- 10 Frequently Asked Questions
The check engine light on a Toyota does not come on simply for an oil change. It indicates engine or emissions problems, while oil change reminders are handled by a separate maintenance required light. However, skipping oil changes can lead to engine damage that eventually triggers the check engine light. Always differentiate between these lights for proper vehicle care.
Does the Check Engine Light Come on for an Oil Change on a Toyota
Picture this: you’re cruising in your Toyota Camry, the sun is shining, and then—a flash of yellow. The check engine light has illuminated on your dashboard. Instantly, your mind jumps to the worst. Did I skip an oil change? Is my engine on its last legs? It’s a universal fear among car owners, but the reality is often different. In this comprehensive guide, we’ll unravel the mystery of the check engine light, specifically in Toyota vehicles, and clarify its relationship—or lack thereof—with oil changes.
Toyota has built a reputation for reliability, but even the most dependable cars need proper care. The check engine light is a key part of your vehicle’s health monitoring system. Understanding what it means—and what it doesn’t mean—can save you time, money, and unnecessary stress. So, let’s dive in and separate fact from fiction.
Key Takeaways
- Check Engine Light vs. Maintenance Light: The check engine light indicates engine or emissions issues, while the maintenance light reminds you of scheduled service like oil changes.
- Oil Change Directly: An oil change itself does not trigger the check engine light; it’s a separate system.
- Indirect Link: Neglecting oil changes can lead to engine problems that cause the check engine light to come on.
- Common Triggers: Faulty sensors, loose gas cap, or catalytic converter issues are frequent causes of check engine light activation.
- Diagnosis is Key: Use an OBD-II scanner to read error codes when the light comes on to identify the exact problem.
- Reset Carefully: After fixing the issue, the check engine light may reset itself or require manual resetting; don’t ignore it.
- Professional Help: If the light persists or you’re unsure, consult a mechanic to prevent costly repairs.
📑 Table of Contents
- Understanding the Check Engine Light: More Than Just a Warning
- Oil Change Reminders: The Maintenance Required System in Toyotas
- Can an Oil Change Cause the Check Engine Light to Come On?
- Common Causes of Check Engine Light Activation in Toyotas
- What to Do When the Check Engine Light Comes On
- Proactive Maintenance: Preventing Check Engine Light Surprises
- Conclusion: Empowered with Knowledge
Understanding the Check Engine Light: More Than Just a Warning
The check engine light, formally known as the malfunction indicator lamp (MIL), is a standard feature in all cars since the 1996 model year in the United States, thanks to OBD-II regulations. It’s part of a complex network of sensors and computers that constantly monitor your engine’s performance and emissions.
How the OBD-II System Works
OBD-II stands for On-Board Diagnostics, Second Generation. It’s a standardized system that allows technicians and DIYers to access diagnostic information. The engine control unit (ECU) collects data from dozens of sensors, such as oxygen sensors, mass airflow sensors, coolant temperature sensors, and throttle position sensors. The ECU processes this data to optimize fuel injection, ignition timing, and emissions controls.
When a sensor reading falls outside the acceptable range—say, the oxygen sensor detects too much oxygen in the exhaust—the ECU may try to compensate. If it can’t correct the issue after a few attempts, it stores a diagnostic trouble code (DTC) in its memory and illuminates the check engine light. This light is your car’s way of saying, “Something’s not right; please check me.”
The DTCs are alphanumeric codes. For example, P0300 means random/multiple cylinder misfire detected, while P0420 indicates catalyst system efficiency below threshold. These codes help pinpoint the problem area but don’t always give the exact cause—further diagnosis is needed.
Check Engine Light vs. Other Dashboard Indicators
Toyota dashboards feature several lights, each with a specific purpose. Confusing them can lead to misdiagnosis. Here’s a quick guide:
- Check Engine Light: Typically yellow or amber, with an engine icon or “Check Engine” text. Indicates engine or emissions issues.
- Oil Pressure Light: Red oil can icon. Warns of low oil pressure—a severe issue. If this comes on, stop the engine immediately to prevent damage.
- Maintenance Required Light: Often a wrench icon or “MAINT REQD.” Reminds you of scheduled service like oil changes.
- Service Engine Soon Light: In some models, this is identical to the check engine light but may be used for maintenance reminders in older vehicles.
- ABS Light: Indicates anti-lock brake system issues.
- Airbag Light: Shows airbag system faults.
The key takeaway: the check engine light is for engine diagnostics, not routine maintenance. If you see a wrench icon, that’s your maintenance reminder. If you see an engine icon, that’s the check engine light.
Oil Change Reminders: The Maintenance Required System in Toyotas
Now, let’s talk about the light that actually reminds you of oil changes. Toyota calls it the Maintenance Required (MAINT REQD) system. It’s designed to help you keep up with factory-scheduled maintenance.
Visual guide about Does the Check Engine Light Come on for an Oil Change on a Toyota
Image source: autocornerd.com
How the Maintenance Required Light Functions
The system is based on mileage and sometimes driving conditions. In older Toyotas, it’s a simple counter. After you reset it following an oil change, it counts down from 5,000 miles (or the specified interval). When it reaches zero, the light blinks for a few seconds each time you start the car and then stays solid.
In newer models, Toyota uses an algorithm that factors in engine revolutions, vehicle speed, and operating temperature. This “oil life” monitoring system estimates oil degradation more accurately. For example, if you do a lot of short trips in cold weather, the oil may degrade faster, so the light comes on sooner.
The light might display as “MAINT REQD” on the instrument cluster or as a wrench icon. Some models show a message like “Oil Change Required” on the multi-information display.
Resetting the Maintenance Required Light
After an oil change, you must reset the maintenance required light. If you don’t, it will remain on, which can be distracting but doesn’t affect vehicle operation. Resetting is usually a manual process:
- Turn the ignition to the “ON” position (but don’t start the engine).
- Use the odometer button or trip meter button to navigate to the settings menu.
- Find the “Maintenance Required” or “Oil Reset” option.
- Hold the button or follow prompts to reset.
The exact steps vary by model year. For detailed guides, you can refer to resources like how to reset the oil light on Toyota, which covers procedures for Corolla, Camry, RAV4, and more.
Why It’s Separate from the Check Engine Light
The maintenance required system is completely separate from the OBD-II system. It doesn’t monitor oil quality, engine health, or emissions. It’s a simple timer or algorithm based on usage. That’s why it never triggers the check engine light. The check engine light is reserved for faults that could affect emissions or engine performance, as mandated by law.
This separation is intentional. It prevents you from ignoring a serious engine problem because you think it’s “just an oil change reminder.” Conversely, it ensures you don’t panic when the maintenance light comes on—it’s not an emergency.
Can an Oil Change Cause the Check Engine Light to Come On?
Here’s the straightforward answer: No, the act of changing your oil does not cause the check engine light to illuminate. The process involves draining old oil, replacing the filter, and adding new oil. None of these steps interact with the engine’s diagnostic systems in a way that would set a fault code.
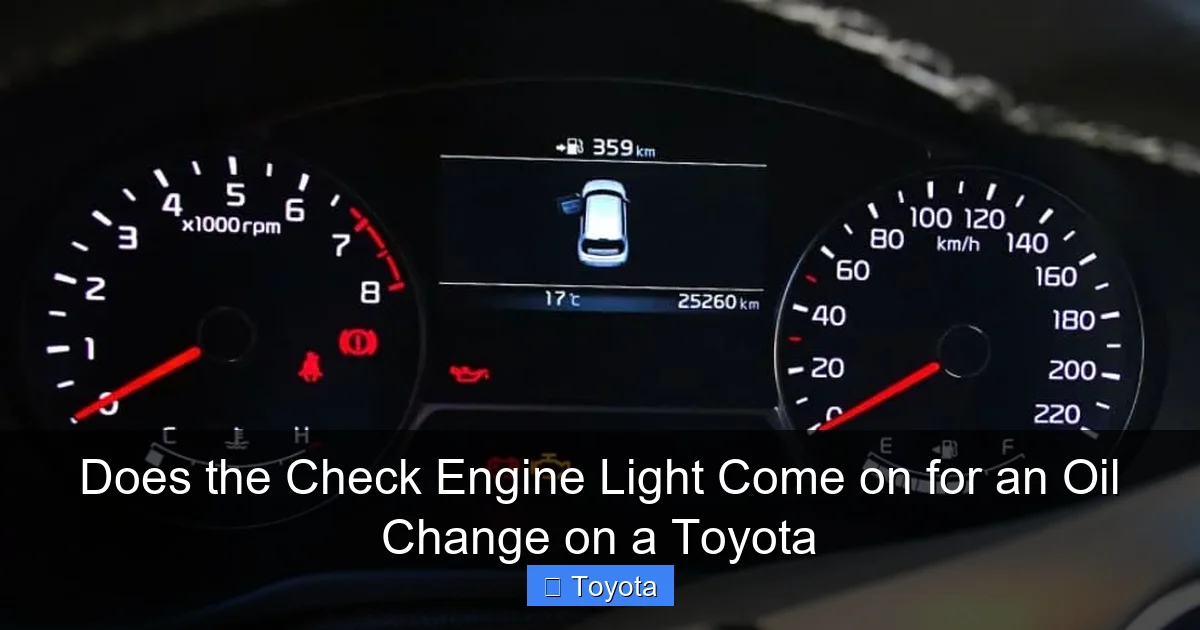
Visual guide about Does the Check Engine Light Come on for an Oil Change on a Toyota
Image source: autoemc.net
Why the Myth Persists
So, why do so many people believe that the check engine light comes on for oil changes? It’s likely due to coincidence. If you’re overdue for an oil change and the check engine light comes on, you might associate the two. But they’re independent. The check engine light is for engine problems; the oil change reminder is for maintenance.
Another reason: some vehicles have a “service engine soon” light that might be used for both maintenance and diagnostics in older models, but in modern Toyotas, they are distinct.
The Indirect Connection: How Neglected Oil Changes Lead to Check Engine Light Issues
While an oil change won’t trigger the light, failing to change your oil regularly can create engine conditions that do. Here’s how:
- Engine Sludge Formation: Over time, oil breaks down and turns into sludge. Sludge can clog oil passages, leading to insufficient lubrication. This increases friction and wear, potentially causing components like variable valve timing (VVT) systems to malfunction. The ECU might detect abnormal camshaft timing and set a code.
- Low Oil Level: If you never check or add oil, the level can drop dangerously low. Low oil can cause engine knocking, increased temperatures, and eventually, catastrophic failure. While low oil typically triggers the oil pressure light, severe cases might lead to misfires or sensor errors that illuminate the check engine light.
- Increased Engine Wear: Without proper lubrication, piston rings, cylinder walls, and bearings wear out. Worn rings can cause low compression, which oxygen sensors might interpret as a lean condition (code P0171). Worn bearings can cause noise and vibration that affect sensor readings.
- Oil Consumption: Some engines burn oil as they age. If oil consumption is high and you don’t top up, the engine runs low on oil, leading to the issues above.
In essence, the check engine light can be a downstream symptom of poor oil maintenance. It’s not a direct reminder, but a consequence of neglect.
Case Study: A neglected Toyota Highlander
Consider a 2010 Toyota Highlander with 200,000 miles that had oil changes only every 15,000 miles. The owner started noticing rough idling and poor fuel economy. The check engine light came on with codes P0301 (cylinder 1 misfire) and P0171 (system too lean). Diagnosis revealed carbon buildup on intake valves and worn spark plugs—both linked to oil blow-by from poor ring seal due to oil neglect. The repair involved decarbonizing the engine and replacing spark plugs, costing over $800. Had oil changes been regular, this might have been avoided.
This illustrates how oil maintenance ties into engine health and check engine light triggers.
Common Causes of Check Engine Light Activation in Toyotas
Since the check engine light isn’t for oil changes, what are the actual reasons it comes on? Here are the most frequent culprits in Toyota vehicles, based on repair data and owner reports.

Visual guide about Does the Check Engine Light Come on for an Oil Change on a Toyota
Image source: cdn6.slideserve.com
1. Faulty Oxygen Sensor (O2 Sensor)
The oxygen sensor monitors oxygen levels in the exhaust to help the ECU adjust the air-fuel mixture. Over time, O2 sensors can fail due to contamination or age. A bad O2 sensor leads to poor fuel economy, rough idling, and failed emissions tests. Common codes include P0130-P0134 (bank 1) and P0150-P0154 (bank 2).
On many Toyotas, the upstream O2 sensor (before the catalytic converter) is more critical. Replacement costs range from $150 to $300 for the part, plus labor.
2. Loose or Damaged Gas Cap
It sounds trivial, but a loose gas cap is a top cause of check engine lights. The EVAP (evaporative emissions) system seals fuel vapors. If the cap isn’t tightened, vapors escape, and the ECU detects a leak, setting codes like P0455 (large EVAP leak) or P0442 (small leak).
Always ensure the gas cap clicks into place after refueling. If the light persists, inspect the cap for cracks or replace it—it’s inexpensive.
3. Catalytic Converter Failure
The catalytic converter reduces harmful emissions by converting them into less harmful gases. It can fail due to age, contamination from oil or coolant, or unburned fuel from misfires. A failing catalytic converter triggers codes like P0420 (catalyst system efficiency below threshold) or P0430.
Replacement is costly—$1,000 to $2,500 or more—so address underlying issues like misfires promptly to avoid damaging the converter.
4. Mass Airflow Sensor (MAF) Issues
The MAF sensor measures the amount of air entering the engine. Dirt, debris, or damage can cause inaccurate readings, leading to poor performance and codes like P0100-P0103. Cleaning the MAF sensor with specialized cleaner can sometimes fix it; otherwise, replacement is needed.
MAF sensors are sensitive; avoid touching the sensing wires.
5. Ignition System Problems
Worn spark plugs, faulty ignition coils, or bad spark plug wires can cause engine misfires. Misfires are detected by the oxygen sensor as unburned oxygen in the exhaust, triggering codes like P0300 (random misfire) or P0301-P0304 (misfire on specific cylinders).
On Toyota V6 engines, ignition coil failures are common. Coils can crack and fail due to heat. Replacing all coils and spark plugs is often recommended.
For detailed insights on Toyota Camry-specific issues, see why is my Toyota Camry check engine light on.
6. Evaporative Emissions (EVAP) System Leaks
Beyond a loose gas cap, EVAP system leaks can occur in hoses, valves, or the charcoal canister. Codes like P0440 (EVAP system malfunction) or P0441 (EVAP incorrect purge flow) indicate issues. These can be tricky to diagnose but often involve smoke testing the system.
7. Exhaust Gas Recirculation (EGR) System
The EGR system reduces nitrogen oxide emissions by recirculating exhaust gases. A clogged EGR valve or failed EGR sensor can cause rough idling and codes like P0400 (EGR flow malfunction).
What to Do When the Check Engine Light Comes On
Seeing that light can be unsettling, but a calm, methodical approach is best. Here’s what to do.
Step 1: Evaluate the Light’s Behavior
First, note if the light is solid or flashing. A flashing check engine light indicates a severe misfire that could overheat the catalytic converter. If it’s flashing, stop driving as soon as safely possible and have the car towed to a mechanic.
A solid light means there’s a problem, but it’s not immediately catastrophic. You can drive cautiously but should get it diagnosed within a few days.
Step 2: Perform Basic Checks
Before spending money on diagnostics, do these simple checks:
- Gas cap: Remove it and reinstall, ensuring it clicks. Tighten it securely.
- Oil level: Check with the dipstick. Low oil won’t usually trigger the check engine light, but it’s good to verify. Top up if needed with the correct oil type.
- Air filter: A severely clogged air filter can cause lean conditions. Inspect and replace if dirty.
- Visual inspection: Look for obvious issues like disconnected hoses, damaged wiring, or leaks under the car.
After these checks, drive the car for a few cycles. Sometimes the light goes off on its own if the issue was transient, like a loose gas cap.
Step 3: Read the Diagnostic Codes
To know what’s wrong, you need the DTCs. You have several options:
- OBD-II scanner: Purchase a basic scanner ($20-$50) or a advanced one like BlueDriver ($100). Plug it into the OBD-II port (usually under the dashboard, near the steering column). Follow the scanner’s instructions to read codes. Note the codes and their descriptions.
- Auto parts store: Many stores like AutoZone or O’Reilly offer free code reading. They’ll plug in a scanner and print the codes for you.
- Mechanic: A professional can read codes and perform deeper diagnostics.
Once you have codes, research them online. For example, P0420 often means catalytic converter failure, but it could also be an O2 sensor or exhaust leak. Don’t assume the part needs replacement without verifying.
Step 4: Diagnose and Repair
Based on the code, diagnose the issue. This might involve:
- Visual inspection: Check for damaged components, loose connections, or leaks.
- Testing sensors: Use multimeters or scan tools to test sensor outputs.
- Monitoring live data: Advanced scanners show real-time sensor data, helping spot anomalies.
- Smoke test: For EVAP leaks, a smoke machine pinpoints leaks.
If you’re not comfortable, take it to a trusted mechanic. Explain the codes and any symptoms you’ve noticed.
Step 5: Reset the Check Engine Light
After repairing the issue, the check engine light should turn off automatically after the ECU completes successful drive cycles—usually a few days of driving under various conditions. If it stays on, you may need to reset it manually:
- OBD-II scanner: Use the “Clear Codes” function. This erases stored codes and turns off the light. But if the problem persists, it will return.
- Battery disconnect: Disconnect the negative battery terminal for 10-15 minutes. This resets the ECU but also resets radio presets, clock, and learned adaptations. Not recommended for modern cars with complex electronics without proper procedures.
- Fuse pull: Some cars have a “backup” fuse for the ECU; pulling it for a few minutes can reset. Check your manual.
For Toyota-specific reset procedures, guides like how to reset the check engine light on a Toyota Corolla provide step-by-step instructions for popular models. Remember: only reset after fixing the problem. Clearing codes without repair is unethical and may be illegal for emissions testing.
When to Seek Professional Help
If the light comes back after resetting, or if you’re unsure about the diagnosis, see a professional. Some issues, like catalytic converter replacement or internal engine problems, require specialized tools and expertise. Don’t delay, as minor issues can escalate into costly repairs.
Proactive Maintenance: Preventing Check Engine Light Surprises
The best strategy is to prevent the check engine light from coming on in the first place. Here’s how to keep your Toyota in top shape.
Stick to Oil Change Intervals
Regular oil changes are foundational. Toyota recommends:
- Conventional oil: Every 5,000 miles or 6 months.
- Synthetic oil: Every 7,500 to 10,000 miles or 12 months.
Use the oil viscosity specified in your owner’s manual—typically 0W-20 for newer models. Clean oil reduces engine wear, prevents sludge, and maintains proper lubrication. Sludge and wear can lead to the engine problems that trigger the check engine light.
If you’re curious about costs, how much is an oil change for a Toyota RAV4 breaks down DIY vs. professional service costs.
Follow the Full Maintenance Schedule
Toyota provides a detailed maintenance schedule in your owner’s manual. It includes:
- Oil and filter changes
- Tire rotations every 5,000-7,500 miles
- Air filter replacement every 15,000-30,000 miles
- Spark plug replacement every 120,000 miles (on many models)
- Transmission fluid changes every 60,000-100,000 miles
- Coolant flushes every 30,000-50,000 miles
- Brake inspections and fluid changes
Adhering to this schedule keeps all systems functioning and reduces the likelihood of check engine light triggers.
Use Quality Parts and Fluids
Don’t cut corners on oil filters, air filters, or spark plugs. Use OEM Toyota parts or high-quality aftermarket brands like Denso, NGK, or Mobil 1. Cheap parts can fail prematurely and cause codes.
Also, use the correct fuel octane. Most Toyotas run on regular unleaded, but some high-performance models require premium.
Drive Responsibly
Aggressive driving—hard acceleration, high RPMs, and abrupt braking—stresses the engine and other components. Drive smoothly to extend engine life. Also, avoid excessive idling, which can lead to carbon buildup.
Regular Inspections and Diagnostics
Have a trusted mechanic inspect your Toyota annually. They can catch potential issues early, like worn belts, leaking hoses, or failing sensors, before they trigger the check engine light. Consider periodic OBD-II scans even if the light is off; some problems store codes without illuminating the light.
Address Small Problems Immediately
Don’t ignore symptoms like rough idling, poor fuel economy, hesitation, or strange noises. These could be early warnings. For example, an intermittent misfire might set a pending code before the light comes on. Catching it early can prevent catalytic converter damage.
Conclusion: Empowered with Knowledge
After all this, the answer is clear: the check engine light on a Toyota does not come on for an oil change. It’s a diagnostic tool for engine and emissions issues. Oil change reminders are handled by the separate maintenance required light. However, neglecting oil changes can indirectly cause engine damage that triggers the check engine light, so maintenance is still crucial.
When the check engine light illuminates, don’t panic. Assess whether it’s solid or flashing, perform basic checks, and read the codes with an OBD-II scanner. Address the root cause, then reset the light if necessary. Avoid the temptation to simply clear the code without repair—it’s a temporary fix that can lead to bigger problems.
By understanding your Toyota’s dashboard lights and following a strict maintenance schedule, you can keep your vehicle reliable, efficient, and free from unexpected check engine light surprises. Remember, your car communicates with you through these lights. Listen, act wisely, and enjoy the peace of mind that comes with a well-maintained Toyota.
Frequently Asked Questions
Does the check engine light come on for an oil change on a Toyota?
No, the check engine light does not come on solely for an oil change. It indicates engine or emissions problems. Oil change reminders are handled by the maintenance required light.
What does the maintenance required light mean on a Toyota?
The maintenance required light reminds you of scheduled service, such as oil changes, tire rotations, or filter replacements. It’s based on mileage or driving conditions and should be reset after service.
How do I reset the check engine light after fixing the problem?
After repairing the issue, the check engine light may turn off automatically after a few drive cycles. If not, use an OBD-II scanner to clear the codes. Avoid disconnecting the battery on modern cars without proper procedure.
Can low oil cause the check engine light to come on?
Low oil typically triggers the oil pressure light, not the check engine light. However, severely low oil can cause engine damage that leads to check engine light codes, such as misfires or sensor errors.
Should I drive my Toyota if the check engine light is on?
If the light is solid, you can drive cautiously but get it diagnosed soon. If it’s flashing, stop driving immediately to prevent catalytic converter damage and have the car towed.
How often should I change the oil in my Toyota?
Follow Toyota’s recommendations: every 5,000 miles for conventional oil, or every 7,500-10,000 miles for synthetic oil. Check your owner’s manual for your specific model and driving conditions.


