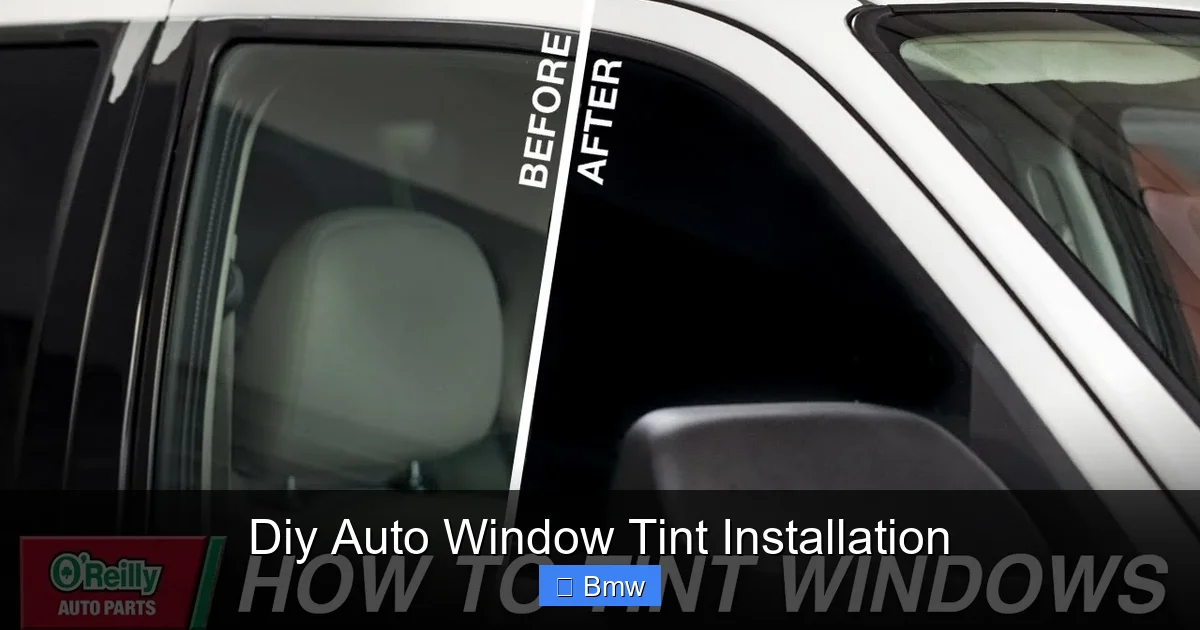
Diy Auto Window Tint Installation
Contents
- 1 Key Takeaways
- 2 📑 Table of Contents
- 3 Why DIY Tint Your BMW? The Allure and The Reality
- 4 Essential Tools and Materials: Your Tinting Arsenal
- 5 Pre-Installation Prep: The Foundation of Success
- 6 Step-by-Step Installation: From Shrinking to Squeegeeing
- 7 Troubleshooting Common DIY Tint Issues
- 8 Long-Term Care and Maintenance for Your Tinted BMW
- 9 Conclusion: The Satisfaction of a Job Well Done
- 10 Frequently Asked Questions


DIY auto window tint installation on your BMW can save you hundreds while offering complete customization, but it’s a delicate skill that demands patience, the right tools, and meticulous attention to detail. Success hinges on proper preparation, a controlled environment, and mastering the “shrink and squeegee” technique, especially on BMW’s complex curved glass. While rewarding, a poor DIY job can lead to bubbles, peeling, and even legal trouble if you don’t check local tint laws first.
Key Takeaways
- Preparation is 80% of the Job: A spotless, dust-free workspace and immaculate glass are non-negotiable. Any contamination will cause instant failure.
- BMW Glass is Challenging: Expect significant work on the rear window and sometimes the front due to extreme curvature and defroster lines. Practice shrinking on a flat piece first.
- The Two-Tool Symphony: You must master using the heat gun (to shrink and conform the film) and the squeegee (to push out water/air without scratching the film).
- Application Solution is Your Friend: A proper slip solution (soapy water) allows you to position the film. Too much or the wrong soap can ruin adhesion later.
- Legal VLT Matters: Every state has different laws on Visible Light Transmission (VLT) for front, rear, and side windows. Know your local limits before buying film to avoid costly tickets.
- Patience Trumps Speed: Rushing causes bubbles, wrinkles, and scratches. Work methodically, in a cool, shaded area, and let the film settle between steps.
- Warranty Caveat: A DIY installation will void the manufacturer’s warranty on the film. Only professional installations come with a workmanship warranty from the dealer.
📑 Table of Contents
- Why DIY Tint Your BMW? The Allure and The Reality
- Essential Tools and Materials: Your Tinting Arsenal
- Pre-Installation Prep: The Foundation of Success
- Step-by-Step Installation: From Shrinking to Squeegeeing
- Troubleshooting Common DIY Tint Issues
- Long-Term Care and Maintenance for Your Tinted BMW
- Conclusion: The Satisfaction of a Job Well Done
Why DIY Tint Your BMW? The Allure and The Reality
So, you’re thinking about tinting your BMW’s windows. Maybe it’s for that sleek, aggressive look, or perhaps you want to beat the summer heat and protect your interior from UV rays. And then you see the price tag from a professional shop. It stings. This is where the siren song of DIY auto window tint installation starts calling. The idea of saving a few hundred dollars, choosing your exact film, and getting the satisfaction of a job done with your own two hands is powerful.
But let’s be clear: tinting is not “sticky sticker” work. It’s a nuanced craft that blends science (adhesives, heat) with art (conforming to curves). For a BMW, with its often complex, highly curved rear glass and integrated antenna/defroster lines, the challenge is amplified. This guide will walk you through every single step, from understanding if DIY is right for you to the final squeegee stroke, with a special focus on the quirks of BMW glass. We’re not here to sugarcoat it; we’re here to equip you for success.
The BMW-Specific Challenge
While the basic principles of window tinting are universal, BMWs present unique hurdles. The “Hofmeister kink” in the rear quarter glass? That’s a tight angle. The large, panoramic rear window on many modern 3, 5, and X Series models? It’s a single sheet with extreme compound curves. The factory antenna lines embedded in the glass? They create tiny ridges the film must perfectly adhere to without air pockets. Additionally, many BMWs have rain/light sensors near the rearview mirror, requiring precise cutting around them. Recognizing these challenges upfront is the first step to conquering them.
Is DIY Right for You? A Honest Assessment
Before you buy a single roll of film, ask yourself: Do you have a genuinely clean, dust-free, and shaded workspace? A garage is ideal. Can you spare 4-8 hours of focused, patient work? Do you have a steady hand and a tolerance for frustration? Your first attempt will not be perfect. Tinting a small, flat rear side window is a great practice run before you touch the massive, curved rear glass. If your answer to any of these is “no,” you might be better off saving your nerves and investing in a professional install. But if you’re a meticulous DIY enthusiast who loves a challenge, read on.
Essential Tools and Materials: Your Tinting Arsenal
You cannot do this job with a razor blade and a spray bottle of water. Professional results require professional tools. Skimping here is the #1 cause of DIY failures. Here’s your definitive shopping list, categorized for clarity.
Visual guide about Diy Auto Window Tint Installation
Image source: i.ytimg.com
The Film Itself: Quality is Non-Negotiable
Do not buy “cheap eBay tint.” You’ll get what you pay for: poor adhesion, rapid fading (turning purple), and bubbling. Look for reputable brands like 3M, LLumar, SunTek, or Madico. You’ll choose a VLT (Visible Light Transmission) percentage. For a BMW, common legal choices are 20% (very dark), 35% (sporty), or 50% (light tint). Crucially, you must verify your state’s legal limits for front side windows and the windshield—many states prohibit any tint on the front windshield except a strip at the top, and have specific VLT limits for front sides. Resources like our guide on Window Tint Laws By State are invaluable. For a classic BMW look with good visibility, 35% is a popular and often legal choice for all sides.
The Application Solution
This is not just dish soap and water. You need a dedicated automotive window tint application solution. These are specially formulated to provide slip during installation but then evaporate or break down to allow proper adhesive bonding. Brands like RTU (Ready To Use) or solutions from your film supplier are best. They prevent the film from sticking prematurely and help avoid “soap burns” (cloudiness from trapped soap).
Core Tools: The Big Three
- Heat Gun/Heat Shower: A must. A 1200-1500W heat gun with a focused nozzle (or a “heat shower” attachment) is perfect for shrinking the film to the glass’s curves. A hair dryer is insufficient.
- Squeegees: You need at least two. A firm, black rubber squeegee (like a 4″ or 6″ T-Lock) for the initial water removal and a softer, felt-edged or microfiber squeegee for the final passes to avoid scratching the soft film.
- Utility Knives & Blades: A brand new, sharp blade for every window. Dull blades drag and tear film. Have plenty of spares.
The Supporting Cast
A complete kit also includes: a spray bottle for the slip solution, a hard card (like a credit card wrapped in microfiber) for tight corners, a microfiber towel set (separate clean ones for wiping glass and drying film), a tape measure, a squeegee holder, and a low-lint glove. Many reputable film suppliers sell complete “DIY tint kits” with all this included, which is a great starting point.
Pre-Installation Prep: The Foundation of Success
This stage cannot be overstated. 90% of a perfect tint job happens before the film ever touches the glass. Rushing prep guarantees bubbles and debris. Plan for this to take as long as the actual installation.
Visual guide about Diy Auto Window Tint Installation
Image source: res.cloudinary.com
The Holy Sanctuary: Your Workspace
Find the cleanest, most dust-controlled area you can. An enclosed garage is best. If working outdoors, choose a perfectly calm, overcast day. Wind is your enemy. Sun is your enemy—it makes the film tacky and hard to handle. Lay down clean, lint-free drop cloths or sheets on the ground and any nearby surfaces. Remove all items from the car’s interior. Cover seats and the dashboard with clean towels.
Glass Purification: The Five-Step Process
Every single piece of dust, grease, or fingerprint will show. Use this ritual for every window:
- Initial Clean: Spray your glass cleaner (use an ammonia-free one like Invisible Glass or Sprayway) liberally. Wipe with a clean microfiber towel using vertical, then horizontal strokes. Never circular motions.
- Scrub the Edges: Use a soft-bristle brush (an old toothbrush works) dipped in cleaner to scrub the gasket and the very edge of the glass where it meets the frame. This is where dirt hides.
- Rinse & Wipe: Spray with plain water or your slip solution and wipe again with a fresh microfiber.
- Final Polish: Use a clean, dry microfiber for a final pass. The glass should be literally spotless and slightly damp from your last wipe.
- Inspection: Tilt the glass at an angle to the light. You should see zero particles or streaks. Repeat if necessary. This is your last chance to fix it.
Film Preparation: Trimming to Fit
Lay your film roll out on a clean surface. Carefully unroll enough to cover one window. Using your tape measure, determine the rough size needed. It’s better to have too much than too little. Many pros use a “spray-and-tack” method: lightly mist the *film’s adhesive side* (the shiny side) with your slip solution, then carefully apply it to the *outside* of the clean glass. This holds it in place for trimming. Using a sharp blade, carefully cut a generous outline around the window’s shape, leaving a 1/2″ to 1″ border all around. This is your “pattern.” Carefully peel the film off the glass and set it aside adhesive-side-up on your clean surface. This pattern piece can now be used to trace onto your final film pieces, ensuring a perfect fit for each window.
Step-by-Step Installation: From Shrinking to Squeegeeing
Now, the main event. We’ll focus on the most difficult window first: the rear. The process for sides is similar but less intensive. Always work from the top down.
Visual guide about Diy Auto Window Tint Installation
Image source: windowtintlaws.us
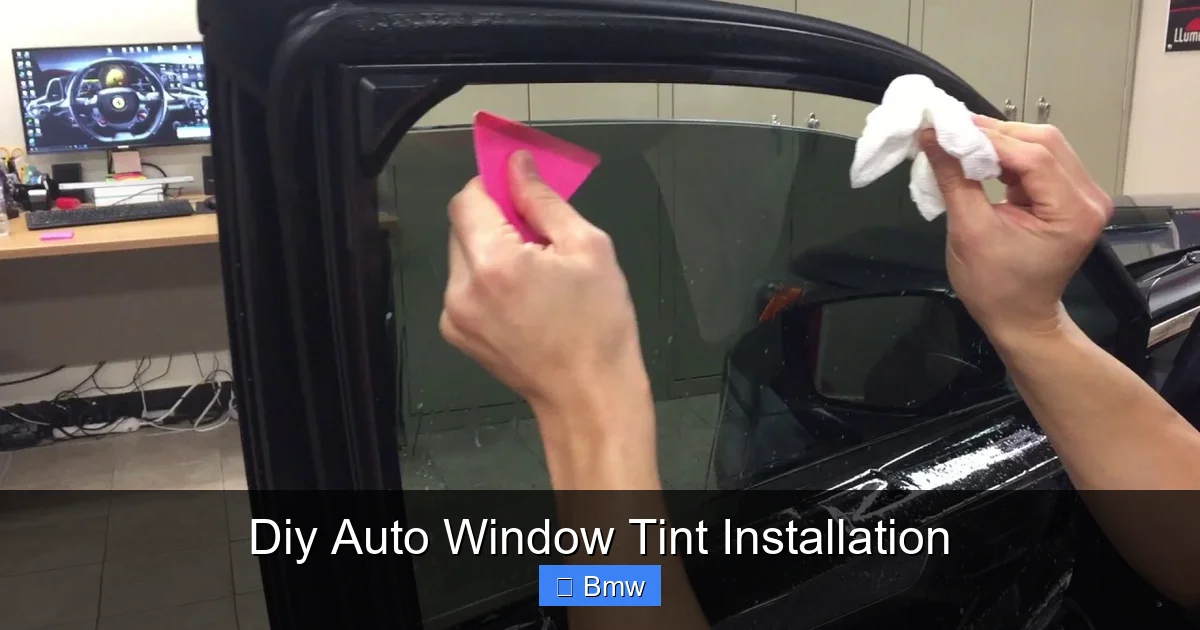
Step 1: Positioning and Initial Adhesion
Take your pre-cut film piece. Identify the adhesive side (it’s the side that was facing the roll’s core; it’s often slightly tackier and may have a faint protective liner feel). Liberally mist the *adhesive side* of the film with your slip solution. This prevents it from sticking instantly to the glass. Carefully carry the film to the *inside* of the window. Align the top edge first, letting the film drape down. The slip solution allows you to slide and adjust it until it’s perfectly positioned. Once happy, use your squeegee to make a firm, straight pass along the top edge. This “tacks” the film in place so it doesn’t shift.
Step 2: Conforming to Curves with Heat (The Magic Step)
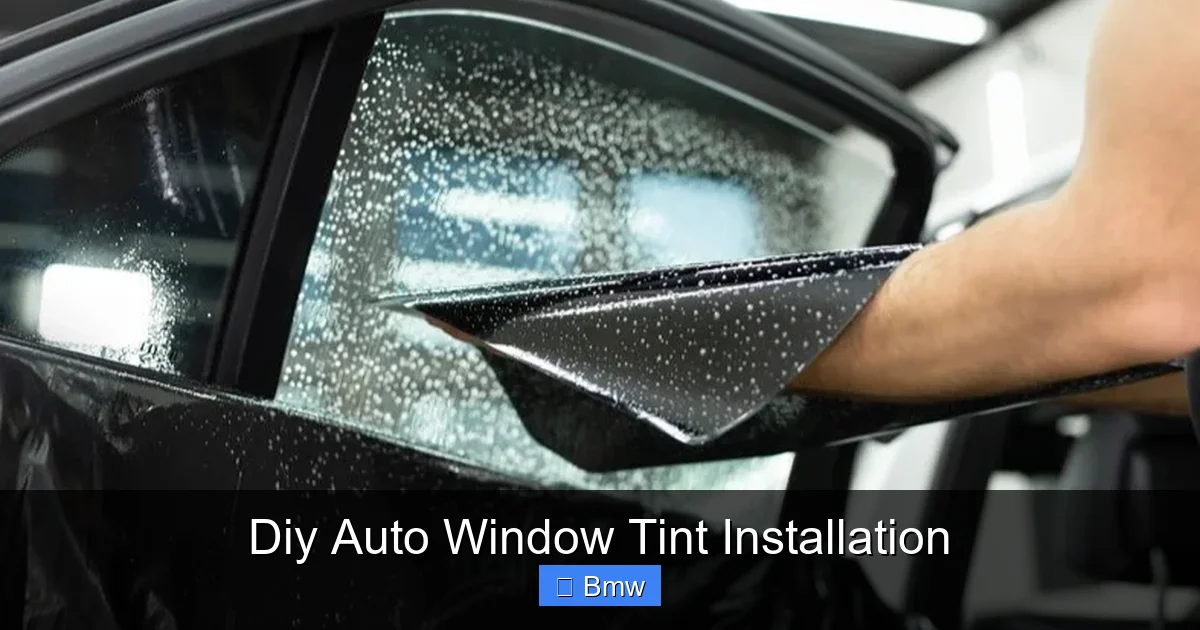
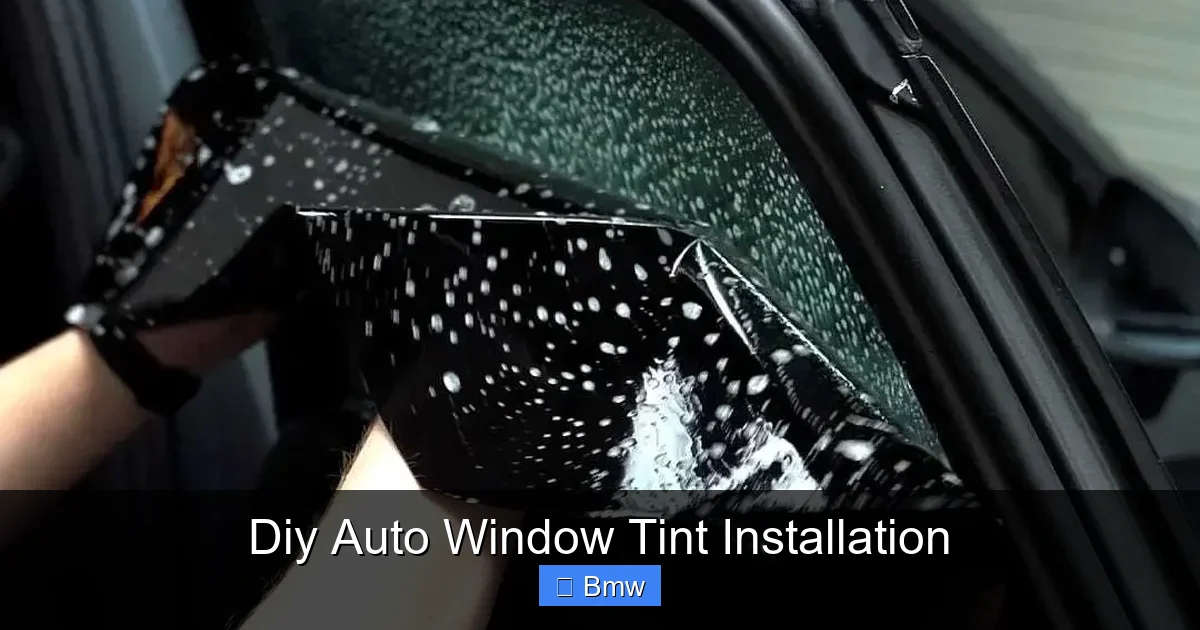
This is where BMWs test your skill. With the film now tacked at the top, you’ll see gaps and wrinkles where the glass curves away. Using your heat gun on a low-to-medium setting (keep it moving!), gently warm the film over these areas. You’ll see the film begin to relax and shrink. Do not overheat—you can melt the film or crack the glass if you linger. As the film softens, use your fingers or a soft squeegee to gently press it into the curve. Work from the center outwards. The goal is to eliminate all major wrinkles and get the film to lie flat against the glass. For extreme curves like a BMW rear window, you may need to work in small sections, heating and smoothing sequentially.
Step 3: The Squeegee Dance – Removing Water & Air
Now, with the film mostly conformed, it’s time to push out the water trapped between the film and glass. Fill your spray bottle with your slip solution. Starting at the top (where you tacked it), spray a generous amount of solution over the entire film surface. This re-lubricates it. Take your firm, black rubber squeegee. Place it at the top center and pull it down firmly in a straight, overlapping stroke (like mowing a lawn). Apply even pressure. Wipe the squeegee blade clean after each pass. Work your way down the window in 3-4 inch horizontal bands. The sound should change from a “squelch” (too much water) to a “shhick” (properly squeegeed). For the final passes, switch to your soft, felt-edged squeegee to get the last bits of water out without risking scratches.
Step 4: Trimming the Edges
Once the film is fully adhered and dry to the touch (you should not see any water movement under it), it’s time to trim. Use your sharp utility knife. The technique is to “slice and lift”: place the blade against the window frame, apply slight downward pressure, and gently pull the blade towards you. The film should cut cleanly and lift away from the glass. Go slowly around the entire perimeter. For the bottom edge, you may need to carefully roll down the window a tiny bit to access the seal, then roll it back up. Be extremely careful not to cut the window seal or the defroster lines.
Step 5: The Final Inspection and Curing
Wipe the entire window down with a clean, dry microfiber. Inspect it from every angle under bright light. Look for any remaining bubbles or debris. Tiny “bubble” spots are often just water pockets that will evaporate. Larger ones or ones with a speck inside are permanent. Now, the most critical part: do not roll down the windows for at least 48 hours, preferably 72. The adhesive needs this time to fully cure and bond to the glass. Park the car in the sun if possible; heat accelerates curing. Avoid touching or cleaning the inside of the window during this period.
Troubleshooting Common DIY Tint Issues
Even with perfect prep, things can go awry. Here’s how to handle the most common DIY mishaps.
Bubbles: The Nemesis
There are two types. Water pockets: These are large, clear, and mobile-looking. They are usually just trapped water. They should disappear within a few days of curing in the sun. Air bubbles: These are smaller, more numerous, and look like tiny dots or a “fish egg” pattern. They are air, not water, and will not go away. They are caused by insufficient squeegeeing or debris trapped under the film. The only fix is to carefully re-wet the area, lift the film with a razor, remove the debris, and re-squeegee. This is a high-risk repair that often makes it worse. Prevention is the only sure cure.
Fingers and Scratches
If you feel a rough spot on the film surface, it’s likely a particle or a scratch from your tool. If it’s on the surface, you might be able to buff it out with a very fine plastic polish and a soft cloth. If it’s embedded in the film, it’s permanent. This is why the “glove test” (lightly running a gloved finger over the film after squeegeeing) is important—it can catch loose debris before it’s locked in.
Wrinkles and “Memory”
If the film wrinkles during installation and you don’t heat and smooth it immediately, it can develop a “memory” and stay wrinkled even after squeegeeing. You must re-heat the wrinkled area, stretch it slightly, and re-squeegee while it’s warm. Sometimes, a slight wrinkle at the very bottom edge can be hidden by the window seal.
Peeling at the Edges
If the film starts lifting at the corners or edges after a few days, it’s usually an installation error. The film wasn’t properly tacked at the top, wasn’t trimmed closely enough to the gasket, or the adhesive was contaminated. This often requires a complete redo of that window. Ensuring a clean, dry edge and a firm initial tack is vital.
Long-Term Care and Maintenance for Your Tinted BMW
You’ve survived the install. Now, protect your investment. Proper care ensures your tint lasts for years, not months. The lifespan of a quality film is typically 10-15 years, but this depends heavily on care. For a deeper dive, see our article on How Long Does Car Window Tint Last.
The First Week: The Fragile Period
The adhesive is still curing. Avoid rolling down windows. Do not clean the inside of the windows. If you get water spots from rain, just let them dry naturally. Do not wipe vigorously.
Cleaning: Use the Right Tools
After the first month, you can clean the inside normally. Always use ammonia-free glass cleaner and a clean, soft microfiber towel. Ammonia (found in many Windex-type cleaners) will degrade the film’s adhesive and cause it to dry out, crack, and peel. Spray the cleaner on the towel, not directly on the glass, to avoid seeping into the edges. Use separate towels for the inside (tinted) and outside (dirty) to prevent transferring grit.
Sun and Heat: Friend and Foe
While the sun helps cure the adhesive initially, prolonged, extreme UV exposure is the primary cause of film degradation (fading to purple). Parking in a garage or using a car cover when possible will dramatically extend your tint’s life and color retention. This is especially important for darker films.
Dealing with Defrosters and Sensors
Your BMW’s rear defroster lines are fine. The heat from them will not damage properly installed film. However, if a line is not perfectly adhered (a “dead spot”), you might see fogging there during defrost cycles. This is usually an installation issue. Regarding the rain/light sensor behind the rearview mirror: ensure no film is covering its lens. Your pattern cut must account for this sensor’s location. Covering it will disable your automatic wipers and headlights.
Conclusion: The Satisfaction of a Job Well Done
DIY auto window tint installation on your BMW is a formidable but deeply rewarding project. It connects you to your car in a way few other mods do. You’ll gain a profound appreciation for the skill professional tinters possess. By following this guide—investing in quality materials, creating a perfect workspace, mastering the heat and squeegee, and respecting the curing process—you can achieve results that will have people asking, “Did you really do that yourself?”
Remember, practice makes perfect. If your first window isn’t showroom-ready, don’t be discouraged. Tint a friend’s car or a spare piece of glass. The skills will build. And when you finally pull your sleek, cool, private BMW out of the garage with your own handiwork on the windows, the pride will be worth every ounce of effort. Just be sure to double-check your state’s tint laws to keep your new look legal and ticket-free.
Frequently Asked Questions
Can I DIY tint my BMW’s windows without any prior experience?
Technically yes, but it’s not recommended for your first try on a valuable car. Start by practicing on a flat, cheap piece of glass or a less critical window like a rear side quarter glass. The rear window of most BMWs is very challenging and a poor first project.
How long will a DIY tint job last compared to a professional one?
A professionally installed, high-quality film can last 10-15 years. A DIY job with the same film, if done perfectly, can last just as long. However, most DIY jobs have minor imperfections (trapped debris, poor edge sealing) that can lead to premature peeling or bubbling, significantly reducing lifespan.
What’s the biggest mistake beginners make during DIY tint installation?
Rushing the prep phase. Not cleaning the glass perfectly is the #1 cause of failure. A single speck of dust or a fingerprint will create a permanent bubble. The second biggest mistake is using too much force with the squeegee, which can stretch and tear the film, especially on curves.
How do I legally ensure my BMW’s tint is compliant?
You must research your specific state’s window tint laws, which dictate the minimum VLT percentage allowed for front sides, rear sides, and the rear window. Many states also have rules about reflective properties. Use our resource on Window Tint Laws By State to find the exact limits for your location before purchasing film.
Can I use a regular hair dryer instead of a heat gun?
For very minor smoothing on flat windows, maybe. For properly shrinking film to the complex curves of a BMW’s rear window, a hair dryer lacks the consistent, focused heat and power needed. A proper 1200W+ heat gun is a necessary tool for a successful DIY on modern vehicles.
What should I do if I get a major bubble or tear in the film during installation?
If the film tears or a large, contaminated bubble forms, the only true fix is to remove that piece and start over with a new one. Small water pockets are normal and should disappear. Attempting to repair a major flaw usually makes it worse. Have extra film on hand for this reason.