How to Fix Ford F-150 Air Conditioning
Contents
- 1 Key Takeaways
- 2 📑 Table of Contents
- 3 Introduction: Beating the Heat in Your Blue Oval Truck
- 4 Understanding Your F-150’s Air Conditioning System
- 5 Most Common Ford F-150 Air Conditioning Problems
- 6 Logical Diagnostic Steps for Your F-150 AC
- 7 Common DIY Repairs You Can Tackle Yourself
- 8 When to Call a Professional: Major AC Repairs
- 9 Preventive Maintenance: Keep Your F-150 AC Cold
- 10 Conclusion: Your Path to Cold Air
- 11 Frequently Asked Questions
Is your Ford F-150’s air conditioning blowing warm air or making strange noises? This comprehensive guide walks you through the most common F-150 AC problems, from simple fixes like recharging refrigerant or replacing the cabin air filter to diagnosing complex issues like compressor failure or blend door malfunctions. We’ll help you determine what you can safely tackle yourself and when it’s time to seek professional help for your truck’s air conditioning system.
Key Takeaways
- The most common cause of warm air is low refrigerant, usually from a minor leak that needs sealing before a recharge.
- Always diagnose before you repair; throwing parts at the problem is expensive and often ineffective without proper testing.
- The cabin air filter is a frequent, easy fix that many owners overlook; a clogged filter severely restricts airflow.
- Electrical issues like fuses, relays, and pressure switches are simple checks that can solve many AC engagement problems.
- Compressor failure is a major repair requiring professional service, as it involves recovering refrigerant and system flushing.
- Regular maintenance, like running the AC weekly and cleaning the condenser, prevents many costly breakdowns.
- Safety is paramount; improper refrigerant handling is illegal and dangerous—certified recovery is required for major repairs.
📑 Table of Contents
- Introduction: Beating the Heat in Your Blue Oval Truck
- Understanding Your F-150’s Air Conditioning System
- Most Common Ford F-150 Air Conditioning Problems
- Logical Diagnostic Steps for Your F-150 AC
- Common DIY Repairs You Can Tackle Yourself
- When to Call a Professional: Major AC Repairs
- Preventive Maintenance: Keep Your F-150 AC Cold
- Conclusion: Your Path to Cold Air
Introduction: Beating the Heat in Your Blue Oval Truck
There’s nothing worse than hopping into your trusty Ford F-150 on a scorching summer day, only to be hit with a blast of warm, humid air. Your truck’s air conditioning isn’t just a comfort feature; it’s a vital tool for staying alert and safe on the road. When it fails, it turns your powerful workhorse into an unbearable sauna. The good news? Many Ford F-150 air conditioning problems have straightforward causes and fixes you can handle yourself. Others, however, require the skilled hands of a professional. This guide is your roadmap. We’ll break down the system in simple terms, walk through logical diagnostic steps, and detail the most common repairs for your F-150’s AC. By the end, you’ll know exactly what’s wrong and the best path to getting that cold air flowing again.
Understanding Your F-150’s Air Conditioning System
Before we start fixing things, you need a basic mental map of how your truck’s AC works. Think of it as a closed-loop system that moves and transforms refrigerant. The core principle is simple: absorb heat from the cab and dump it outside. Here’s the journey of the refrigerant, typically R-134a or the newer R-1234yf in later models.

Visual guide about How to Fix Ford F-150 Air Conditioning
Image source: tpa10.com
The Key Components and Their Jobs
The heart of the system is the compressor, driven by your engine’s serpentine belt. It sucks in low-pressure refrigerant gas and compresses it into a high-pressure, high-temperature gas. This hot gas then travels to the condenser, which sits in front of your radiator. Air flowing over the condenser’s fins cools the gas, turning it into a high-pressure liquid. This liquid moves to the orifice tube or expansion valve (most F-150s use an orifice tube), which dramatically restricts flow, causing a pressure drop and rapid cooling. The cold, low-pressure liquid enters the evaporator inside your dash. Cabin air is blown over the cold evaporator coils by the blower motor, and the heat from the air is absorbed by the refrigerant, turning it back into a gas. This cool, dry air enters your cabin. The refrigerant gas, now low-pressure again, returns to the compressor to start the cycle over.
This system also has critical support parts: the accumulator or receiver-drier (filters and stores refrigerant), various switches and sensors (like the low-pressure cut-off switch), and the blower motor resistor for fan speeds. The cabin air filter, while not part of the refrigerant loop, is absolutely crucial—it’s the gatekeeper for the air that gets cooled. If it’s clogged with leaves and dirt, you’ll get weak airflow no matter how cold the evaporator gets.
Most Common Ford F-150 Air Conditioning Problems
When your F-150’s AC misbehaves, the symptom points you toward the culprit. Let’s diagnose the most frequent complaints.
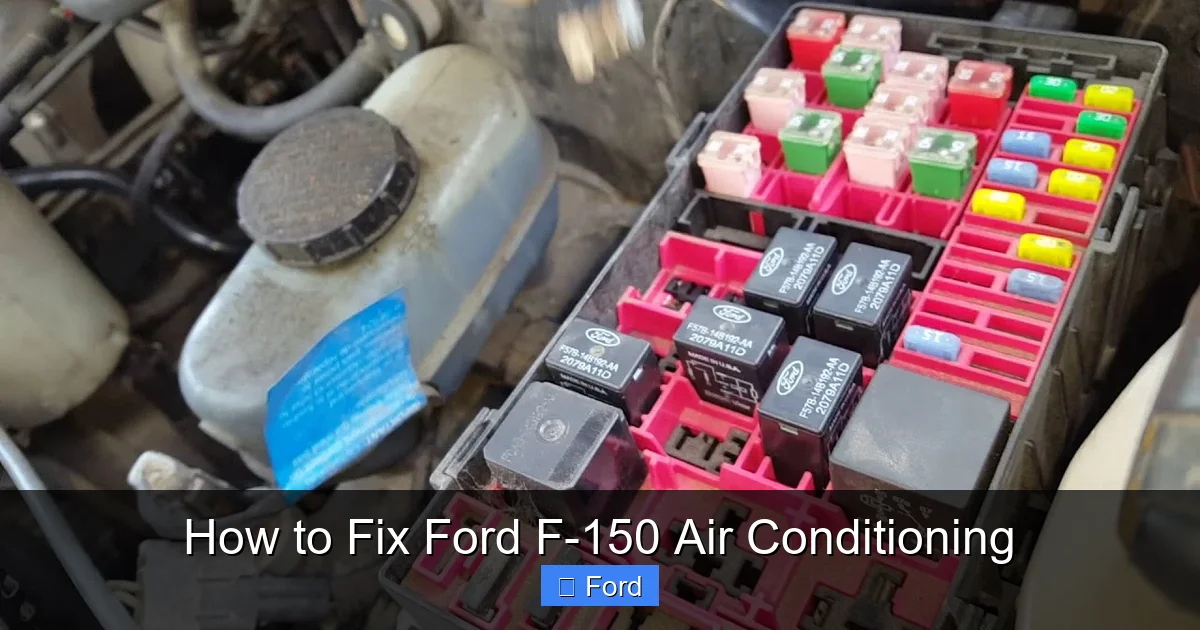
Visual guide about How to Fix Ford F-150 Air Conditioning
Image source: ic.carid.com
Problem: Warm Air from Vents (The #1 Complaint)
This is the classic issue. The system is running, but the air isn’t cold. The causes, in order of likelihood:
- Low Refrigerant Charge: The system is simply out of refrigerant. This is almost always due to a leak, not because refrigerant magically disappears. Small leaks are common at O-rings, hose connections, and the compressor shaft seal.
- Faulty Compressor Clutch: The compressor isn’t engaging. You can often check this by opening the hood and looking at the front of the compressor pulley. The center should be spinning with the pulley when the AC is on. If it’s stationary, the clutch isn’t engaging. This can be caused by low refrigerant (safety switch), a bad clutch coil, or electrical issues.
- Bad Orifice Tube/Expansion Valve: If it’s clogged, refrigerant can’t expand and cool properly. This often happens after a compressor failure sends metal debris through the system.
- Failed Blower Motor or Resistor: You might have cold air, but no airflow. A dead blower motor means no air. A failed resistor often kills the lower fan speeds.
- Clogged Condenser: Bugs, leaves, and dirt caked on the front of the condenser prevent heat rejection. The refrigerant can’t cool down enough.
- Faulty Blend Door/Actuator: Inside the dash, a blend door controls the mix of hot and cold air. If an electric actuator fails or the door sticks, you might get warm air even with a working system.
Problem: AC Only Cold at Higher Engine Speeds
This points to a low refrigerant charge. At idle, the compressor is turning slowly, and a low system can’t maintain pressure. When you rev the engine, the compressor spins faster and can build enough pressure to produce some cool air. This is a strong indicator of a leak that needs finding and repairing.
Problem: Strange Noises (Squealing, Grinding, Clattering)
- Squealing/Squeaking on Engagement: Usually a slipping compressor clutch due to low refrigerant (reducing clutch pressure) or oil on the clutch surfaces.
- Grinding/Rattling: A failing compressor bearing or internal compressor damage. This is serious and will lead to complete failure.
- Hissing: A large refrigerant leak. You might also see oil residue around a fitting.
- Banging/Clattering from Engine Bay: Could be a loose serpentine belt or tensioner, but if it only happens with AC on, it’s likely the compressor.
Problem: Intermittent Cooling
The AC works fine, then suddenly blows warm air, maybe after 20-30 minutes. Common causes:
- Failing Low-Pressure Switch: This safety switch can get hot and malfunction, thinking the system is low on refrigerant and shutting off the compressor.
- Intermittent Electrical Connection: Corroded plugs on the compressor clutch or pressure switches.
- Overheating Compressor: The compressor itself is dying and seizes up when hot, then cools and works again briefly.
Problem: Musty or Moldy Smell
This isn’t a refrigerant issue. It’s caused by mold and bacteria growing on the evaporator core and inside the air ducts. Moisture from the dehumidifying process collects on the cold evaporator, creating a perfect breeding ground. The solution is a professional evaporator cleaning with antimicrobial foaming agents. Regularly replacing your cabin air filter helps, but it won’t solve an already infected evaporator.
Logical Diagnostic Steps for Your F-150 AC
Don’t just guess. Follow this logical flowchart to pinpoint the problem before buying parts. This methodical approach saves you time and money.
Visual guide about How to Fix Ford F-150 Air Conditioning
Image source: i.ytimg.com
Step 1: The Visual and Physical Inspection
Start simple. Open the hood.
- Check Compressor Clutch Engagement: With the engine running, set AC to max cool and fans to high. Go look at the compressor. Does the center hub spin with the pulley? If not, the clutch isn’t engaging.
- Inspect for Obvious Leaks: Look for oily residue (refrigerant carries oil) around all hose connections, the compressor front seal, and the condenser. Use a flashlight. Check the condenser for damage from road debris.
- Check Serpentine Belt: Is it glazed, cracked, or loose? A slipping belt can’t drive the compressor properly.
- Inspect Electrical Connections: Unplug and reconnect the electrical connector on the compressor clutch and the low-pressure switch (usually on the accumulator or hose). Look for corrosion or bent pins.
Step 2: Check System Pressures (The Gold Standard)
This requires AC manifold gauges. You connect the blue hose to the low-side service port (larger diameter hose) and the red hose to the high-side port (smaller diameter). With the engine at ~2000 RPM and AC on max, you read the pressures.
Ideal readings for R-134a at 70-80°F ambient:
- Low-side: 25-40 PSI
- High-side: 200-250 PSI
What your readings mean:
- Both sides very low (e.g., 5/50): Severe undercharge (leak).
- Low-side normal, high-side too low (e.g., 30/100): Compressor not compressing properly (failed compressor or orifice tube).
- High-side too high (e.g., 30/350+): Condenser airflow problem (clogged, fan not working) or overcharge.
- Low-side too high, high-side too low: Compressor is inefficient or reversing valve issue (on heat pump models, rare in F-150).
If you don’t have gauges, a professional diagnosis at a shop is a smart investment. For a deeper dive into using gauges, you can reference a comprehensive troubleshooting guide for Ford F-150 air conditioning that covers gauge interpretation in detail.
Step 3: Scan for Electrical Faults
Modern F-150s have sophisticated climate control modules. Use an OBD2 scanner that can read HVAC/body module codes. Codes like P0530 (AC clutch circuit) or low-pressure switch codes will point you to electrical gremlins. Also, check fuses and relays for the AC clutch and blower motor. These are usually found in the under-hood fuse box and the interior fuse panel. A simple fuse replacement is often the fix.
Common DIY Repairs You Can Tackle Yourself
Armed with a diagnosis, you can now target the repair. Here are the most common fixes that are safe and practical for a diligent DIYer with basic tools.
Repair 1: Replacing the Cabin Air Filter
This is the easiest and most overlooked fix. A clogged cabin filter strangles airflow. Location varies by year:
- 2015-2020 (13th Gen): Behind the glovebox. You’ll need to remove the glovebox damper rod (a small plastic clip) and lower the glovebox to access the filter cover.
- 2009-2014 (12th Gen): Usually under the hood, behind the cowl panel (the plastic cover at the base of the windshield). Remove the wiper arms and cowl screws to access.
- 2004-2008 (11th Gen): Often under the dash on the passenger side, behind a small access panel.
Tip: Always check the filter orientation before removal. There’s an airflow arrow printed on it. Install the new one the same way. Use a premium filter with activated charcoal if available for odor control.
Repair 2: Recharging the Refrigerant (After Fixing the Leak!)
Critical Warning: You cannot simply “top off” the system. If it’s low, there is a leak. Sealing the leak is step one. For minor leaks at O-rings or hose connections, replacing the seal/O-ring may solve it. Once the leak is fixed, you evacuate the system with a vacuum pump to remove air and moisture, then recharge with the exact amount of refrigerant specified for your truck (found under the hood sticker, usually 24-32 oz for most F-150s).
You need a proper refrigerant recharge kit with a tap for the can, a pressure gauge, and a hose. Connect to the low-side port, start the engine, set AC to max, and slowly add refrigerant while watching the gauge. Do not overcharge! If the system was completely empty, you must first evacuate it, which requires more advanced equipment. If you’re not comfortable with this, finding a reliable car air conditioning repair service is the safest and often most cost-effective long-term solution, as they have the recovery machines required by law.
Repair 3: Cleaning the Condenser
A clogged condenser is like a clogged radiator—it can’t shed heat. Use a garden hose with a gentle spray nozzle. Spray from the engine side (back) of the condenser through the grille and bumper openings. This flushes bugs and debris out the front. For stubborn grime, use a dedicated condenser cleaner spray, let it sit per instructions, then rinse thoroughly. Be gentle; the fins are thin and bend easily.
Repair 4: Replacing Fuses, Relays, and Pressure Switches
If the compressor clutch isn’t engaging, check the low-pressure cut-off switch. It’s usually on the accumulator or the larger refrigerant line. Unplug it and jumper the two contacts with a piece of wire. If the clutch engages, the switch is bad. Replace it. Also, locate and swap the AC clutch relay with an identical one in your fuse box (like the horn relay) to test. Check all related fuses. These are cheap, easy parts that solve many “no AC” problems.
Repair 5: Replacing the Blower Motor or Resistor
If you have no air or only high speed, the blower motor or its resistor pack is likely dead. The blower motor is usually behind the glovebox or under the dash on the passenger side. Access can be tricky but is manageable. The resistor is often plug-mounted near the blower motor. For specific year-model instructions, a factory service manual or a trusted online tutorial for your specific generation is invaluable.
When to Call a Professional: Major AC Repairs
Some jobs are beyond the home mechanic due to equipment, expertise, or legal requirements. Here’s when to pick up the phone.
Compressor Replacement
This is the most common major repair. Signs: loud grinding, no clutch engagement even with correct refrigerant charge, or very low high-side pressure. A pro will:
- Recover the refrigerant (illegal to vent).
- Flush the system to remove metal debris from the failed compressor (critical to prevent new compressor failure).
- Replace the accumulator/receiver-drier (it traps moisture and debris).
- Replace the orifice tube (it’s cheap and often clogged by debris).
- Evacuate and recharge the system.
This is a $1,000-$2,500+ job at a shop. Using quality parts and ensuring a thorough flush is non-negotiable for a lasting repair.
Evaporator Core Replacement
This is a massive job. The evaporator is inside the HVAC housing behind the dash. Replacement requires full dash removal, which is labor-intensive (8-15 hours). It’s only done if the core is leaking (rare) or so corroded it blocks airflow. The musty smell is usually solved with cleaning, not replacement.
Major Leak Repair
If the leak is in the evaporator, condenser, or hard-to-reach lines, it requires professional welding, specialized fittings, or component replacement. They have electronic leak detectors and UV dye to find even tiny leaks.
System Contamination
If a compressor fails and sends shrapnel through the system, a simple part replacement won’t work. The entire system must be flushed with specialized solvent and equipment. This is a professional-only procedure.
Preventive Maintenance: Keep Your F-150 AC Cold
An ounce of prevention is worth a pound of cure. Follow these tips to extend your system’s life.
Run the AC Weekly, Even in Winter
Turn it on for 10-15 minutes once a week, on max cool with the fan on high. This circulates refrigerant and lubricant through the compressor, keeping seals moist and preventing them from drying out and leaking. It also helps dehumidify the cabin and defog windows.
Keep the Condenser Clean
Inspect it twice a year. Gently clean bugs and debris as described above. A clean condenser runs cooler and more efficiently, reducing wear on the compressor.
Replace the Cabin Air Filter Regularly
Every 15,000-30,000 miles, or yearly. A restricted filter makes the blower motor work harder and reduces evaporator efficiency, promoting mold growth.
Listen and Feel
Pay attention to new noises (squeals, clunks) or changes in airflow. Catching a failing clutch bearing or a small leak early can prevent a catastrophic compressor failure that contaminates the whole system.
Conclusion: Your Path to Cold Air
Fixing your Ford F-150’s air conditioning is a satisfying project that ranges from a 15-minute cabin filter swap to a multi-day compressor replacement. The key is systematic diagnosis. Start with the free and easy checks: fuse, cabin filter, compressor clutch engagement, and obvious leaks. Move on to pressure checks if you have the tools, or invest in a professional diagnosis. Remember, refrigerant is not something to handle casually—it’s a regulated substance. For simple fixes like filters, fuses, and condenser cleaning, you’re the perfect mechanic. For anything involving refrigerant recovery, compressor work, or internal leaks, the expertise and equipment of a certified AC technician is the wise, safe, and often economical choice. By understanding your system and performing regular maintenance, you can keep your F-150’s AC blowing cold for years to come, ensuring comfort and command from the driver’s seat no matter what the thermometer says outside.
Frequently Asked Questions
How much does it typically cost to fix the AC in a Ford F-150?
The cost varies wildly. A simple refrigerant recharge with a leak fix might be $150-$300. Replacing a cabin air filter is $20-$50 DIY. A compressor replacement, the most common major repair, typically runs $1,000 to $2,500 at a reputable shop, depending on the year and part quality. Always get a detailed diagnosis and estimate before authorizing work.
Can I just add more refrigerant to my F-150’s AC system myself?
Technically yes, but it’s a bad idea. If the system is low, there is a leak. Simply adding refrigerant without fixing the leak is illegal (venting refrigerant is prohibited) and a temporary fix at best. The refrigerant will leak out again, and the leak will likely worsen. You must locate and repair the leak first, then evacuate and recharge the system properly.
What are the signs of a failing AC compressor in my F-150?
Key signs include: warm air when AC is on, loud grinding or rattling noises from the compressor area, the compressor clutch not engaging (pulley spins but center doesn’t), and refrigerant leaks (oily residue) around the compressor front seal. A bad compressor often requires complete system flushing and multiple component replacements.
Why does my F-150’s AC blow cold for a while, then get warm?
This classic symptom usually points to a low refrigerant charge. At first, the system has enough pressure to cool, but as refrigerant circulates and pressure drops from a leak, the low-pressure safety switch shuts off the compressor. After a rest, it may cycle again. It can also indicate a failing low-pressure switch or an overheating compressor that seizes when hot.
How often should I replace the cabin air filter in my Ford F-150?
Ford typically recommends every 15,000 to 30,000 miles, or once a year. If you drive in dusty, dirty, or high-pollen areas, change it more often. A clogged cabin filter drastically reduces airflow from your vents, making your AC seem weak even if the refrigerant is full. It’s an easy, inexpensive DIY job that makes a huge difference.
Is it worth repairing the AC on an older F-150?
Often, yes. A functioning AC adds significant value to a used truck and is a major comfort and safety feature. For minor repairs like a leak fix, recharge, or cabin filter, it’s almost always worth it. For a major repair like a compressor on a high-mileage truck, consider the truck’s overall condition and your plans for it. If you plan to keep it for a few more years, the repair is usually justified. Get a clear diagnosis and estimate first.