
How to Customize Controls in the Tesla App

Unlock the full potential of your Tesla by learning to customize the app’s controls. This guide walks you through every menu, from climate presets and charging schedules to security alerts and driver profiles. Personalizing these settings makes your Tesla feel truly yours and can even improve efficiency. We provide step-by-step instructions for all models, ensuring you can tailor your vehicle’s behavior directly from your smartphone.
Welcome to the wonderful world of Tesla ownership! That sleek, silent machine in your driveway is more than just a car; it’s a rolling computer, and your smartphone is the ultimate command center. But are you using all the tools at your fingertips? The Tesla app is a powerhouse of customization, allowing you to tailor your vehicle’s behavior to your exact preferences, schedule, and lifestyle. Moving beyond simple lock/unlock, the true magic lies in the “Controls” menu. This comprehensive guide will dive deep into every nook and cranny of the Tesla app’s customization features, transforming you from a casual user into a power user who truly commands their machine. We’ll break it down step-by-step, model by model, with practical examples you can use today.
Key Takeaways
- Profile Syncing is Key: Your driver profile settings (seat, mirror, steering wheel) are automatically saved and applied via the app when you approach the car, linking phone location to vehicle preferences.
- Climate Control Goes Beyond Temperature: You can set preconditioning schedules, save ” cabin overheat protection” preferences, and independently control seat heaters and the steering wheel heater for personalized comfort.
- Charging is Highly Customizable: Set charging schedules to take advantage of off-peak electricity rates, establish daily charge limits to preserve battery health, and even schedule charging for specific days of the week.
- Notifications are Fully Tailorable: You decide which alerts you get—from charging complete and preconditioning ready to security events like Sentry Mode triggers or a door ajar—reducing unnecessary distractions.
- Vehicle Controls Offer Surprising Depth: Beyond locks and trunk, you can customize the “Honk” sound, enable/disable Speed Limit mode, set a PIN to drive, and control third-party accessories like aftermarket frunks.
- Sentry Mode & Dashcam are App-Controlled: You can manually enable Sentry Mode, review and save dashcam footage, and manage the “Sentry Mode exclusion zone” all from within the app’s Safety & Security menu.
- App Updates Unlock New Features: Tesla frequently adds new customization options via over-the-air updates. Regularly checking the app’s “Release Notes” ensures you don’t miss out on new ways to personalize your vehicle.
📑 Table of Contents
- Understanding the Tesla App Interface & Core Philosophy
- Mastering Climate & Comfort Customization
- Charging & Range Optimization: Your Power Settings
- Vehicle Controls: Beyond Locks and Trunks
- Security, Alerts, and Sentry Mode Mastery
- Integrating Third-Party Accessories & Advanced Features
- Troubleshooting & Syncing Issues
- Conclusion: Your Tesla, Your Rules
Understanding the Tesla App Interface & Core Philosophy
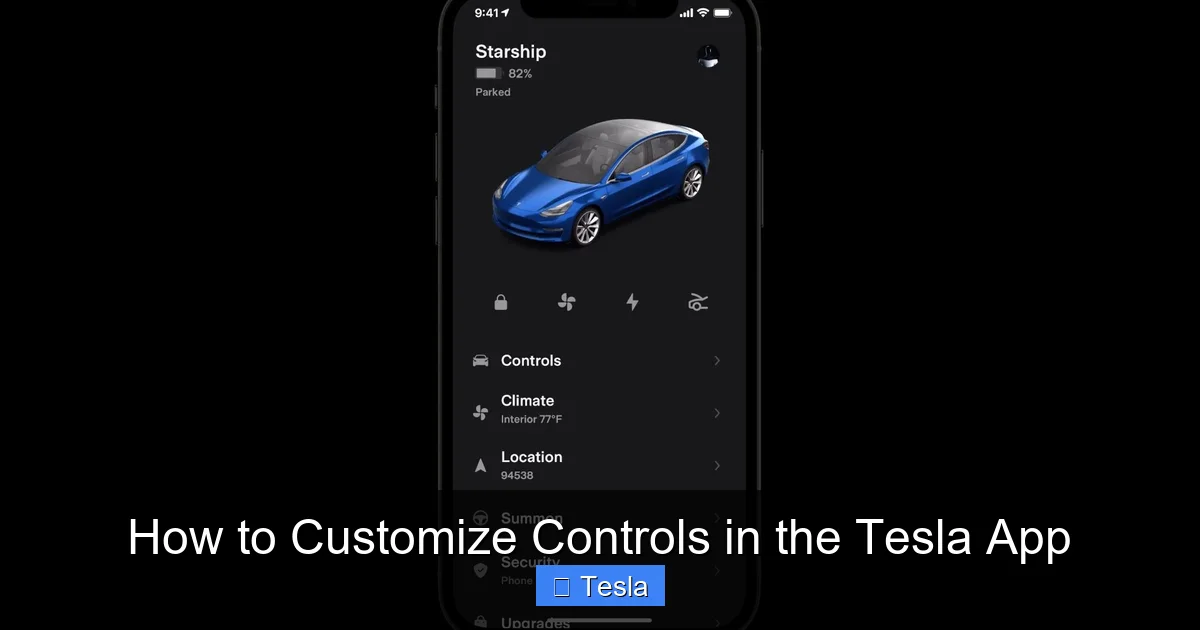
Before we click buttons, let’s understand the layout. The Tesla app is designed with a clean, intuitive interface. The bottom navigation bar typically features Home, Climate, Charge, Controls, and Schedule (or a version thereof). The Controls tab is our treasure map. It’s organized into logical categories like Locks, Climate, Lighting, Vehicle, and Safety & Security. Tesla’s philosophy is one of seamless integration and automation. Many customizations, like driver profiles, work in the background, triggered by your phone’s Bluetooth or location. Your goal is to set these preferences once so the car adapts to you automatically. Think of it as programming your personal automotive butler.
Navigating to the Controls Section
On both iOS and Android, open the Tesla app and ensure you’re connected to your vehicle (the car icon at the top should be solid green or blue, not gray). Tap the large “Controls” button in the bottom navigation bar. You’ll be greeted by a scrollable list of toggle switches and sliders. Don’t be overwhelmed; we’re going to categorize this list. The exact order can vary slightly by model year and software version (like the FSD v12 update), but the core functions remain consistent across Model S, 3, X, and Y.
Mastering Climate & Comfort Customization
The Climate section is where you turn your Tesla into a perfect, pre-conditioned sanctuary. This goes far beyond just setting the temperature.
Visual guide about How to Customize Controls in the Tesla App
Image source: i0.wp.com
Preconditioning & Scheduling
Preconditioning is the act of heating or cooling the cabin *before* you get in, using shore power instead of the battery. You can activate it manually with a tap, but the real power is in scheduling. Within the Climate controls, look for “Schedule” or navigate to the main app Schedule tab. Here, you can set a daily time for preconditioning. For example, set it to start at 7:30 AM on weekdays. The car will automatically begin heating or cooling to your last set temperature, ensuring you step into a perfect cabin at 8:00 AM. You can also set different schedules for weekends. This is crucial for battery preservation in extreme cold or heat.
Cabin Overheat Protection
This is a lifesaver. Located in Climate settings, Cabin Overheat Protection automatically keeps the interior temperature below a set threshold (you choose: 95°F, 100°F, or 105°F) when the car is parked and powered on. You can set it to Off, No A/C (uses only the fan, saving energy), or On (uses A/C). For those in sunny climates, setting this to “On” or “No A/C” prevents your cabin from becoming an oven and protects your interior materials. It’s a fantastic automated comfort and preservation feature.
Independent Heater Controls
Don’t forget the individual comfort controls! While in the Climate menu, tap the small fan icon or the temperature display to reveal sliders for Seat Heaters (level 1-3) and the Steering Wheel Heater. You can set these independently of the cabin temperature. For a cold morning, you might set the cabin to 68°F but crank the seat heater to level 3 for immediate lower-back warmth. These settings are saved per driver profile, so they activate automatically when you get in.
Charging & Range Optimization: Your Power Settings
The Charge tab is your command center for everything energy-related. Here, customization directly impacts your cost of ownership and battery health.
Visual guide about How to Customize Controls in the Tesla App
Image source: matthewcassinelli.com
Scheduled Charging & Charge Limit
This is arguably the most important cost-saving customization. Scheduled Charging lets you tell the car *when* to start charging. If your utility offers time-of-use rates (cheap electricity at night), set your Tesla to begin charging at 11:00 PM. It will wake up, plug in, and start drawing power at your designated time. Combine this with the Charge Limit slider. Set this to your daily needs—typically 80-90% for daily driving to maximize long-term battery health, or 100% for a long trip. You can even set a Maximum Charging Current (in amps) if you’re on a shared circuit and need to limit power draw. Pro tip: You can set a different charge limit for “Home” vs. “Work” if you save locations in your favorites.
Charging Location & Preferences
When you plug in at a new location, the app will ask if you want to save it as a “Home” or “Work” charging spot. This is critical for scheduled charging to work correctly. It also enables the “Charge at Home/Work” toggle in the Charge menu. Turn this off if you’re at a public charger and don’t want your scheduled charging to interfere. You can also customize the “Wake Up to Charge” setting, which ensures your car is ready to charge at your scheduled time even if it’s in a deep sleep.
Vehicle Controls: Beyond Locks and Trunks
The main Controls menu is packed with often-overlooked customizations. Let’s explore them category by category.
Visual guide about How to Customize Controls in the Tesla App
Image source: cdn.teslanorth.com
Locks, Windows, and Convenience
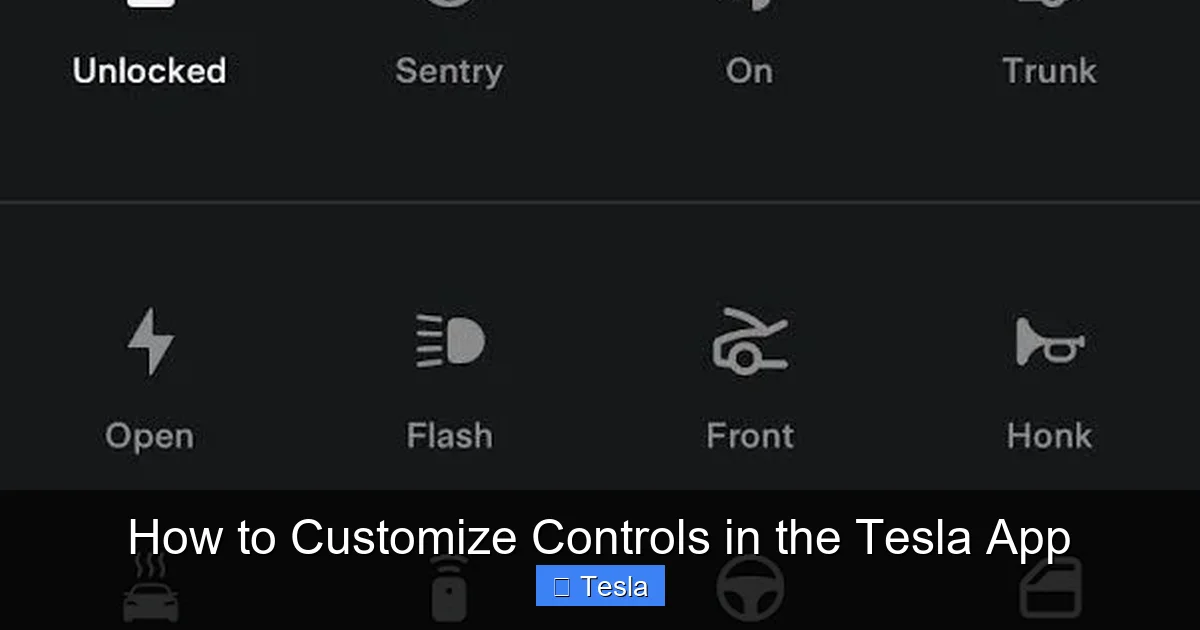
Here you’ll find the obvious: lock/unlock, frunk/trunk release, and window venting. But look closer. On some models, you can customize the “Honk” sound (choose between standard and a softer “courtesy” honk). You can also enable “Walk-Away Lock” (which locks the car when you walk away with your phone key) and “Passive Entry”. If you find the car locking too quickly or not quickly enough, adjusting these can solve frustration. The “Open All Windows” feature is great for quickly ventilating the cabin on a mild day.
Lighting Customization
Tap Lighting to control headlights, fog lights, and interior lights. You can set the “Headlight Auto High Beam” sensitivity, though this is often best left to the car’s AI. More useful is the “Headlights After Exit” setting. You can choose how long the headlights stay on after you park and exit (e.g., 30 seconds to illuminate your path). You can also manually control the Ambient Lighting color and brightness on supported models, creating a mood inside the car.
Vehicle Settings: The Deep Cuts
This is where the real power users play. Scroll down to the Vehicle section in the Controls menu.
- Speed Limit Mode: Set a maximum speed (in 5 mph increments) for the vehicle. Perfect for teen drivers, valets, or just to ensure you don’t accidentally speed on long highway cruises. It’s PIN-protected in the car, so only you can disable it.
- Driver Profile: Here you can create, delete, and manage driver profiles. Each profile saves seat, mirror, steering wheel, and climate preferences. The car automatically switches profiles based on which phone key or key card is detected. You can also set a Profile Password to prevent accidental switching.
- Access PIN: Enable a 4-digit PIN that must be entered on the touchscreen to drive the car. This adds a layer of security if you ever lend the car or leave it with a valet. It’s separate from the Speed Limit PIN.
- Service Mode: For advanced users only. This allows you to tow the car without triggering alarms, but misuse can cause damage. Only activate if instructed by Tesla service.
- Tire Pressure: While you can’t adjust pressure from the app, you can view the current PSI for each tire here. For accurate readings, ensure the car has been stationary for a few hours. This is a great quick-check tool. (See also: how to check tire pressure on the Toyota app for a comparative look at OEM app features).
Security, Alerts, and Sentry Mode Mastery
Your Tesla is one of the most secure cars on the road, and the app puts that security at your fingertips. The Safety & Security section in Controls is vital.
Sentry Mode & Dashcam Controls
Sentry Mode is your car’s always-watching security system. From the app, you can manually turn it on or off with a single tap. More importantly, you can review footage. Tap “View Dashcam” to see a live view or saved clips from the USB drive. You can save a 10-minute clip directly to your phone with the “Save” button. You can also manage the “Sentry Mode Exclusion Zone”. If you live in a gated community or park in a private lot where constant alerts are a nuisance, you can draw a geofence on the map. Sentry Mode will be automatically disabled when inside that zone and re-enabled when you leave.
Customizing Notifications
Go to your phone’s Settings > Notifications > Tesla. Here, you can granularly control which alerts buzz your phone. You can turn off “Charging Complete” notifications if you plug in overnight, but keep “Sentry Mode Alert” and “Door Ajar” notifications on high priority. This reduces notification fatigue while keeping you informed about critical security and safety events. Within the app’s Safety & Security menu, you can also toggle specific alerts like “Honk in Response to Threat” or “Flash Lights” for Sentry Mode warnings.
Speed Limit & PIN to Drive
As mentioned in Vehicle Controls, these are security features. The Speed Limit Mode is great for restricting vehicle performance. The PIN to Drive requires a 4-digit code on the touchscreen before the car can be driven. Both are set in the Vehicle section of Controls and require you to know the existing PIN (if set) or your Tesla account password to change. This is a powerful parental control or valet mode tool.
Integrating Third-Party Accessories & Advanced Features
Your Tesla’s app ecosystem doesn’t stop at Tesla’s own features. Many aftermarket accessories integrate directly into the Controls menu.
Aftermarket Frunks & Accessory Controls
If you’ve installed an aftermarket front trunk (frunk) release, a third-party app or Tesla’s own software may add a button to the main Controls screen. Look for a new icon or section labeled with the accessory brand. Similarly, if you have a third-party roof rack with lights, a bike rack, or a custom tow hitch, check if the manufacturer provides an integration. Some will add toggle switches or status indicators right inside the Tesla app, keeping all your vehicle controls in one place.
Speed Limit Mode & Valet Mode Deep Dive
Valet Mode is a specific profile that limits performance (reduced acceleration, top speed limited to 70 mph), locks the front trunk and glovebox, and disables some voice commands. You activate it from the Driver Profile menu. It’s perfect for handing your keys to a parking attendant. You set a separate 4-digit PIN for Valet Mode, which the valet must use to exit the mode and restore your full settings. This is a must-use feature for anyone who valets their car regularly.
Troubleshooting & Syncing Issues
Sometimes, customizations don’t seem to stick. Here’s your first-aid kit.
Common Sync Problems & Fixes
If your driver profile isn’t loading or a schedule didn’t run:
- Check Bluetooth & Location: Ensure your phone’s Bluetooth is on, and the Tesla app has permission to access your location “Always.” The car uses your phone’s proximity via Bluetooth to know which profile to load.
- Restart the App: Force-close the Tesla app and reopen it. This refreshes the connection.
- Reboot the Car: While parked, go to Controls > Safety > Power Off. Wait 2 minutes, then press the brake pedal or open a door to wake the car. This clears temporary software glitches.
- Check for Updates: Ensure both your car’s software and the Tesla mobile app are updated to the latest version. Tesla constantly refines syncing logic.
If a scheduled charge didn’t start, verify the “Charge at Home” toggle is ON for that saved location and that the car is plugged in and locked.
Resetting App Preferences
If you’ve made a mess of settings and want a fresh start, you can reset your app preferences. Go to Controls > Safety > Reset All Settings on the car’s touchscreen. Warning: This will reset *all* vehicle settings to factory defaults, including your driver profiles, radio presets, and all the customizations we’ve discussed. You’ll need to set everything up again. Use this as a last resort. A softer reset is simply logging out of the Tesla app on your phone and logging back in, which forces a re-sync of settings.
Conclusion: Your Tesla, Your Rules
Customizing the controls in your Tesla app isn’t just a technical exercise; it’s about crafting a seamless, personalized experience that fits your life. By taking 30 minutes to explore these menus and set up schedules, profiles, and notifications, you save yourself countless minutes of manual adjustment every week. You gain peace of mind through security alerts and battery preservation through smart charging. You transform your car from a generic vehicle into an extension of your digital life—a device that anticipates your needs. The Tesla app is your most powerful tool for this. Don’t just use it to start the car; master it. Dive into the Controls menu today, experiment with one new setting per week, and watch as your driving experience becomes uniquely, perfectly yours. The future of driving isn’t just about the car you own; it’s about how you command it.
Frequently Asked Questions
Can I customize controls for multiple drivers with different phones?
Yes. Each driver should have their own Tesla app login or use the same login but with their phone’s Bluetooth key set up. The car detects which phone is present and automatically loads that driver’s saved profile (seat, mirrors, climate preferences) from the Driver Profile settings. You can create up to 10 driver profiles in the car’s touchscreen menu.
Why aren’t my scheduled charging or preconditioning times running?
First, ensure the car is plugged in and locked for scheduled charging to activate. For preconditioning, verify the schedule is set in the app’s Schedule tab and that the “Start at” time is correct. Most importantly, check that the “Charge at Home” toggle is turned ON for your saved home location in the Charge menu. The car uses this location tag to know when to apply your home-specific schedule.
How do I reset my PIN for Speed Limit Mode or to Drive if I forget it?
If you forget your PIN, you must reset it from the car’s touchscreen. Go to Controls > Safety > Speed Limit Mode (or Driver Profile > PIN to Drive). You will be prompted to enter your Tesla account password to authenticate and then set a new PIN. You cannot reset it from the mobile app for security reasons.
Can I customize the sound the car makes when I lock/unlock or honk?
You can customize the “Honk” sound between “Standard” and “Courtesy” (a softer beep) in the Controls > Locks menu. The lock/unlock confirmation sound is not currently customizable via the app. Some third-party aftermarket accessories may add their own sound options within their integrated app sections.
Is there a way to turn off all app notifications except critical security alerts?
Yes. Go to your smartphone’s Settings > Notifications > Tesla. Turn off categories like “Charging” or “Scheduled Charge.” Keep “Alerts” or “Safety” notifications enabled. Within the Tesla app itself, you can also go to Safety & Security and toggle off specific alert types like “Honk in Response to Threat” if you find them too sensitive, while leaving others like “Sentry Mode Alert” on.
My climate preset isn’t saving. How do I fix it?
Climate preferences (temperature, fan speed, seat heaters) are saved per Driver Profile. First, ensure you have the correct driver profile selected on the car’s touchscreen (tap the driver name/icon in the top bar). Adjust all climate settings to your preference. Then, go to Controls > Driver Profile > Save and choose to save to the current profile. The next time that profile is active (via phone key detection), those climate settings should load automatically. If not, try rebooting the car’s touchscreen.
