How to Install a Tesla Wall Charger in a Garage
Contents
- 1 Key Takeaways
- 2 📑 Table of Contents
- 3 Why Choose a Tesla Wall Charger Over the Mobile Connector?
- 4 Before You Begin: The Critical Planning Phase
- 5 Understanding the Electrical Requirements Deep Dive
- 6 Step-by-Step Installation: From Panel to Parking Spot
- 7 Testing, Activation, and Troubleshooting
- 8 Safety First: Best Practices and Long-Term Care
- 9 Conclusion: Ready to Charge?
- 10 Frequently Asked Questions
Installing a Tesla Wall Charger transforms your garage into a high-speed charging station. This guide covers everything from assessing your electrical panel to final testing, emphasizing safety and code compliance. While DIY is feasible for experts, professional installation is recommended for most to protect your investment and ensure reliability. Proper setup delivers convenient, overnight charging for your Tesla.
So, you’ve joined the electric vehicle revolution and brought home a Tesla. Welcome to the future! One of the best upgrades you can make is installing a Tesla Wall Charger in your garage. It’s like swapping a trickle-charge garden hose for a firehose. Overnight, you’ll wake up to a full battery, ready to go without ever stopping at a public station. But how do you actually get one of these sleek chargers on your wall? Don’t worry. We’re breaking it down, step by friendly step.
This isn’t a simple plug-and-play project. Installing a Wall Charger involves high-voltage electrical work, careful planning, and strict adherence to local building codes. While Tesla designs the unit for relatively straightforward installation, the electrical heavy lifting is serious business. Mistakes can damage your car, your home, or worse. Our goal here is to give you a complete picture so you can decide: Should I tackle this myself, or should I call a pro? Either way, you’ll know exactly what’s involved.
Key Takeaways
- Permits are mandatory: Always check local building codes and obtain the necessary permits before starting any work to avoid fines and ensure safety.
- Electrical capacity must match: Your home’s electrical panel must support the charger’s amperage, typically requiring a dedicated 60-amp circuit for optimal charging speeds.
- Correct wire and conduit are critical: Using the proper wire gauge (like 6 AWG for 60 amps) and conduit type prevents overheating and ensures long-term reliability.
- Location matters for safety and convenience: Mount the charger on a sturdy wall, 4-5 feet high, away from water sources and within easy reach of your Tesla’s charging port.
- Testing is non-negotiable: Verify voltage and connections with a multimeter before first use, and complete the Wi-Fi setup via the Tesla app for full functionality.
- Professional help is often wise: If you lack electrical experience, hiring a licensed electrician protects your warranty, ensures code compliance, and guarantees a safe installation.
- Regular maintenance extends life: Periodically inspect the unit, clean debris, and install firmware updates to keep your Wall Charger performing optimally for years.
📑 Table of Contents
- Why Choose a Tesla Wall Charger Over the Mobile Connector?
- Before You Begin: The Critical Planning Phase
- Understanding the Electrical Requirements Deep Dive
- Step-by-Step Installation: From Panel to Parking Spot
- Testing, Activation, and Troubleshooting
- Safety First: Best Practices and Long-Term Care
- Conclusion: Ready to Charge?
Why Choose a Tesla Wall Charger Over the Mobile Connector?
Before we get our hands dirty, let’s talk about why you’d even want a Wall Charger. Tesla includes a Mobile Connector with every car. It’s a fantastic, flexible little unit that plugs into any standard outlet. But it’s slow. On a typical 120V household outlet (Level 1 charging), you’re looking at about 3-5 miles of range per hour. That’s fine for a weekend driver, but if you have a daily commute or use your Tesla for road trips, it’s not enough.
The Tesla Wall Charger (Level 2 charging) is a different beast. It hardwires directly into your home’s 240-volt electrical system, just like a dryer or oven. This allows it to deliver up to 11.5 kW of power, adding up to 44 miles of range per hour. That means a full charge from empty on a long-range Model 3 or Y can happen overnight—typically 6-10 hours. It’s a game-changer for convenience.
Key Benefits of the Wall Charger
The Wall Charger isn’t just about speed. It offers other significant advantages:
- Dedicated Circuit: It runs on its own breaker, so it won’t trip your microwave or dryer while charging.
- Weatherproof Design: Rated for indoor and outdoor use, so you can mount it outside your garage if needed.
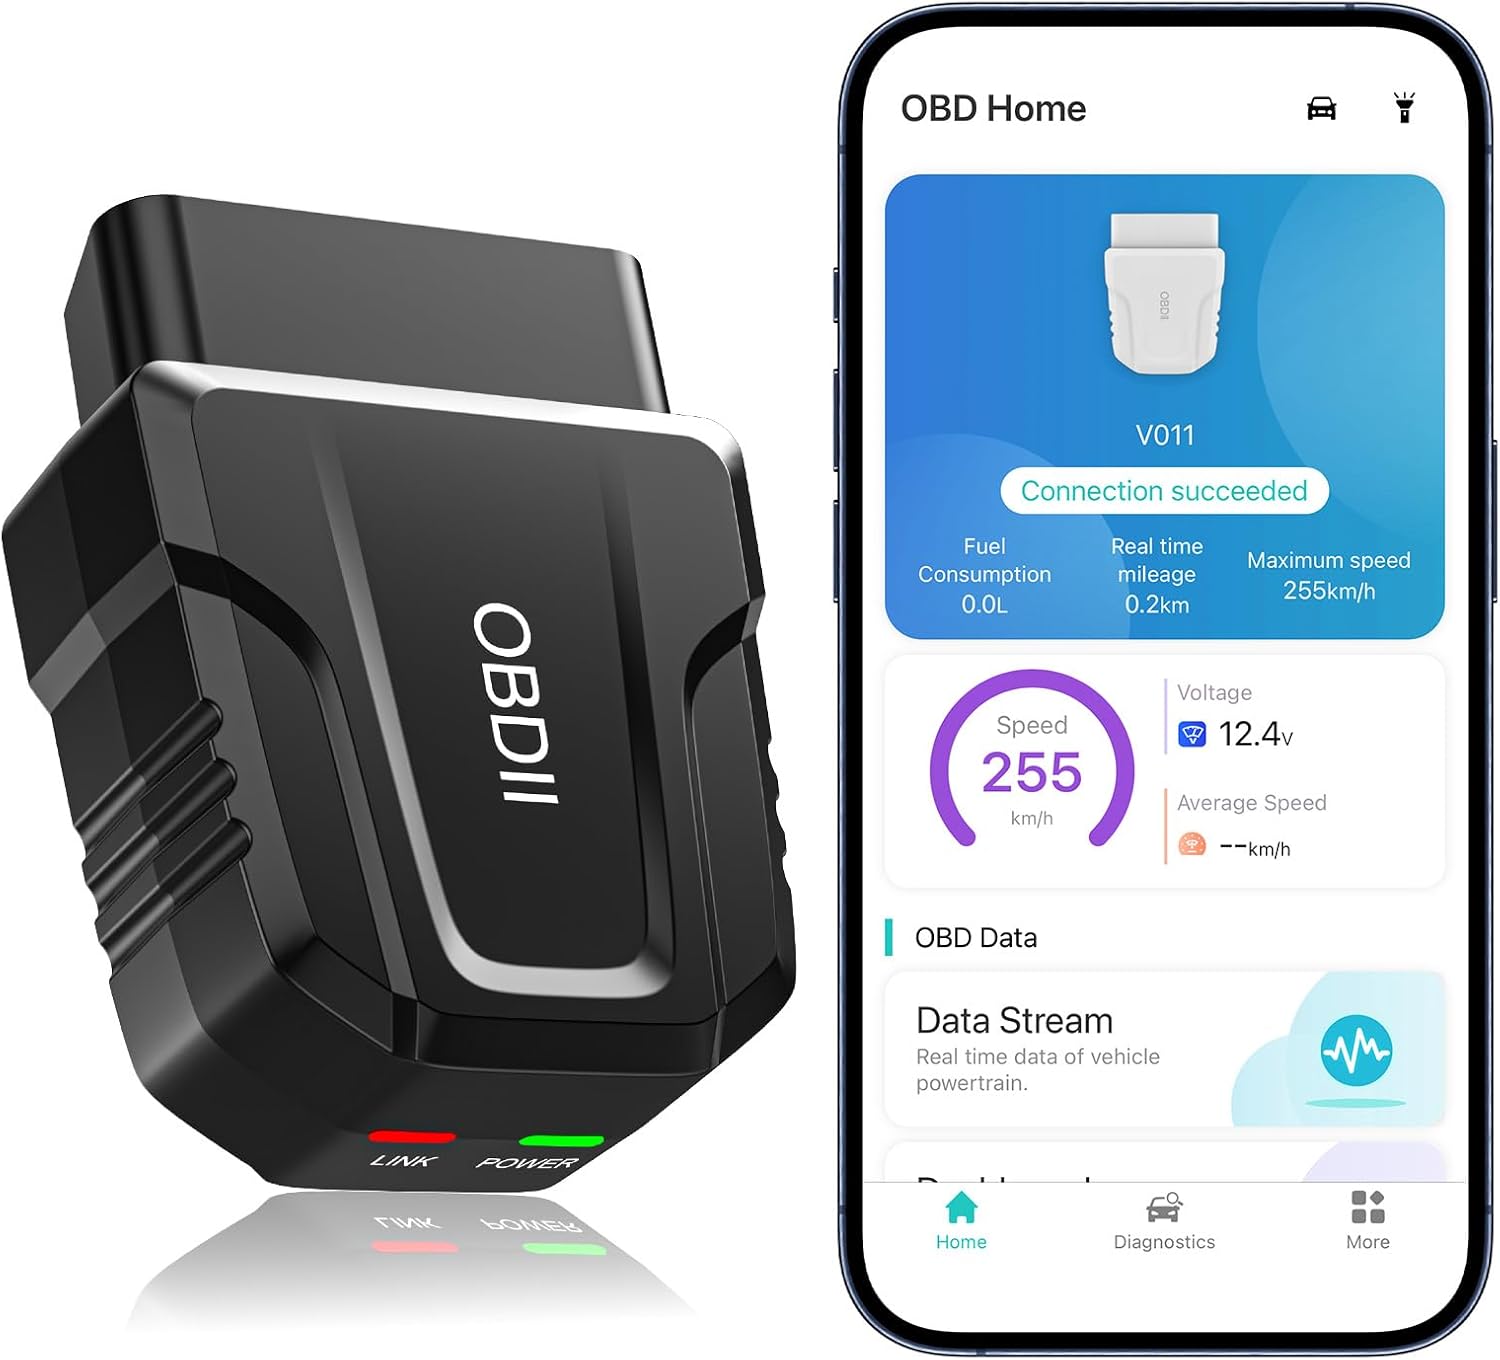
- Smart Features: Connects to your home Wi-Fi and the Tesla app. You can schedule charging for off-peak utility hours, monitor usage, and get notifications.
- Reliability: A hardwired connection is more stable and durable than a portable cord that gets coiled and uncoiled daily.
- Increased Home Value: A dedicated EV charger is a sought-after feature for future homebuyers.
In short, if you want the ultimate at-home charging experience, the Wall Charger is the way to go. Now, let’s get into the nitty-gritty of making it happen.
Before You Begin: The Critical Planning Phase
Rushing into installation is the fastest way to create a costly, dangerous mess. This phase is all about information gathering and decision-making. Skip it, and you might order the wrong parts, fail your electrical inspection, or worse.

Visual guide about How to Install a Tesla Wall Charger in a Garage
Image source: evi-usa.com
Assessing Your Electrical Panel
This is the single most important step. Your Wall Charger needs its own dedicated circuit, which means a dedicated spot in your main electrical panel and enough electrical “capacity” to handle it. Here’s what to check:
- Available Space: Open your panel door. Do you have two adjacent, empty breaker slots? The Wall Charger requires a double-pole breaker (it uses both hot legs of the 240V circuit). If your panel is crammed full, you might need a “subpanel” installed, which adds significant cost and complexity.
- Panel Capacity: Look for the main breaker amperage rating (e.g., 100A, 200A). A 60-amp Wall Charger circuit is common. If you have a 100-amp panel that’s already heavily loaded, adding a 60-amp circuit might exceed the panel’s total capacity. An electrician can perform a load calculation to determine this. This is a key reason many homeowners hire a pro—they have the tools to assess this accurately.
- Panel Age and Type: Is your panel a modern model or an old, outdated one (like a Federal Pacific or Zinsco)? Some older panels are known safety hazards and may need replacement before any new circuits are added.
Tools and Materials You’ll Need
If you’re a confident DIYer with electrical experience, gather these tools:
- Drill & drill bits (for masonry or wood, depending on wall)
- Conduit bender (if using rigid conduit)
- Wire strippers/cutters
- Voltage tester/multimeter
- Level, tape measure, pencil
- Screwdrivers, socket set
- Fish tape (for pulling wires through walls/conduit)
- Appropriate conduit (PVC, EMT, or flexible metal) and fittings
- Correct gauge THHN/THWN-2 wires (typically 6 AWG for a 60A circuit, but confirm based on distance and charger specs)
- Double-pole circuit breaker (Tesla recommends a 60A for Gen 3, but check your model’s manual)
- Grounding rod and clamp (if required by local code for outdoor installations)
You’ll also need the Tesla Wall Charger itself and the mounting hardware it comes with. Always purchase from Tesla or an authorized retailer to ensure warranty validity.
Permits and Codes: Don’t Skip This
This is not optional. Installing a permanent 240V circuit is permanent electrical work. You must obtain an electrical permit from your local building department. The process usually involves:
- Submitting a simple permit application (often online).
- Having the work inspected by a city/county electrical inspector after installation but before covering any walls.
- Paying a small fee.
The inspector’s job is to ensure your work meets the National Electrical Code (NEC) and any local amendments. Passing inspection is crucial for insurance and when you sell your home. Pro tip: Some areas require that only licensed electricians can pull permits for this type of work. Check your local rules first. If you’re unsure, a quick consultation with a local electrician can clarify the process. You can also find detailed cost breakdowns for similar projects, like installing a 220V outlet for a Tesla, which shares many of the same electrical requirements.
Understanding the Electrical Requirements Deep Dive
Now for the technical heart of the project. The Wall Charger doesn’t plug into an outlet; it’s hardwired. This means you’re running wires from your panel directly to the charger’s mounting location. Let’s break down the key specs.
Visual guide about How to Install a Tesla Wall Charger in a Garage
Image source: automotiveglory.com
Voltage, Amperage, and Wire Gauge
The Tesla Wall Charger (Gen 3) operates on a 240V circuit. The amperage (A) you configure determines charging speed. The unit is programmable, but it’s limited by your circuit’s breaker size and wire capacity.
- Common Setup: A 60-amp circuit is the sweet spot for most Teslas. It can fully utilize the charger’s maximum output.
- Wire Gauge is Everything: The wire must be thick enough to handle the continuous current without overheating. For a 60-amp circuit over a short run (under 50 feet), you typically need 6 AWG copper wire. For longer distances (say, 100+ feet from panel to garage), you might need to bump up to 4 AWG to prevent voltage drop, which can slow charging and strain equipment. Always consult the Tesla installation manual and the NEC tables, or better yet, an electrician.
- Conduit is Your Friend: You cannot just run loose wires through your walls. They must be protected inside electrical conduit from the panel to the charger. PVC conduit is common for underground or damp locations, while EMT (thin metal) is great for interior runs. The conduit must be sized correctly to hold the wires without exceeding “fill” limits.
The Importance of Voltage Drop
Voltage drop is the loss of voltage over distance. On a long wire run, even with the correct gauge, you might lose a few volts. For sensitive electronics like a charger, this can mean reduced efficiency or error codes. As a rule of thumb, try to keep the run under 75 feet. If your garage is far from the panel, a professional can calculate the exact wire size needed to keep drop under 3%, which is the NEC recommendation for branch circuits.
This electrical complexity is why many homeowners, even those handy with a hammer, opt for a pro. The cost of a mistake—frying a $700 charger, damaging your panel, or causing a fire—is immense. For a realistic look at the potential costs involved in this kind of electrical upgrade, including labor and materials, resources on how much it costs to install a Tesla charger can provide helpful benchmarks for your budget.
Step-by-Step Installation: From Panel to Parking Spot
Assuming you have your permit, tools, and materials ready, and you’ve confirmed your panel can handle the load, let’s install. Remember: The main breaker must be OFF during all wiring work. We’ll focus on a typical interior garage wall mount.
Visual guide about How to Install a Tesla Wall Charger in a Garage
Image source: automotiveglory.com
Step 1: Choose and Mark the Mounting Location
Pick a spot on a sturdy interior wall (or exterior, if needed). The ideal height is 4-5 feet from the floor, aligning with your Tesla’s charge port (usually driver’s side rear fender). Use the template that comes with the Wall Charger. Hold it level and mark the drill holes. Consider clearance—you need space to walk around it and for the cable to reach your car without sharp bends.
Step 2: Run the Conduit
This is often the trickiest part. You need to run conduit from your electrical panel to the charger location. Plan the most direct, code-compliant route. You may need to drill through walls, floors, or joists. Use conduit straps to secure it every few feet. If your run goes through a concrete wall, you might need a masonry bit. For bends, use a conduit bender for EMT or pre-formed PVC elbows. Leave a few extra feet of conduit and wire in the panel and at the charger end—this gives you slack for connections and future adjustments.
Step 3: Pull the Wires
With the conduit in place, it’s time to fish your wires through. You’ll need three conductors plus a ground:
- Two Hot Wires (typically black and red)
- One Neutral Wire (white) – *Note: The Wall Charger does not use neutral for 240V operation, but the NEC often requires it to be present in the conduit for future versatility. Check your local code and Tesla’s latest manual.*
- One Equipment Grounding Conductor (green or bare copper)
Tie the wires to your fish tape with electrical tape, feed them through, and pull gently from the other end. Don’t force it. If you hit a snag, check for sharp conduit bends or blockages.
Step 4: Make the Panel Connections
Ensure the main breaker is OFF and locked out if possible. Remove the panel cover. Connect the two hot wires to the terminals on your new double-pole 60-amp breaker. Connect the ground wire to the panel’s ground bus bar. Connect the neutral wire to the neutral bus bar. Ensure all connections are tight. Mount the breaker into the panel. Do not turn the power on yet.
Step 5: Mount the Wall Charger
Drill the holes you marked. If mounting on drywall, you must hit studs or use heavy-duty anchors rated for the charger’s weight (about 15 lbs). The included bracket usually screws directly into studs for maximum security. Use a level. Secure the bracket, then hang the charger unit onto it. Some models require you to screw the charger to the bracket as well.
Step 6: Final Wiring at the Charger
Remove the charger’s front cover. You’ll see terminals for the two hot wires (L1 and L2), ground, and sometimes neutral. Connect the wires from the conduit to these terminals, following the wiring diagram in your manual exactly. Typically, the red wire goes to L1, black to L2, green to ground, and white to neutral (if used). Tighten screws firmly. Tuck the wires neatly, replace the cover, and secure it.
Step 7: Power Up and Test
Double-check all connections. Turn the new breaker ON. The Wall Charger’s LED should light up. Use a multimeter at the charger’s terminal block (with the unit powered on) to verify you have ~240V between L1 and L2, ~120V between each hot and ground/neutral. If readings are good, grab your Tesla. Pull the charge port cover, align the connector, and plug in. The car should immediately begin charging. Check the Tesla app or car screen to confirm the rate (it should show up to 48A if set to 60A, due to vehicle limits).
Testing, Activation, and Troubleshooting
You’ve got power! But the job isn’t done until everything is configured and working flawlessly.
Wi-Fi Setup and App Configuration
The Wall Charger needs Wi-Fi for scheduling, data tracking, and remote control. Follow the Tesla app prompts: select “Add Product,” scan the charger’s QR code, and connect it to your home network. This usually involves putting the charger in pairing mode (hold the button until the LED flashes blue) and selecting your SSID. Once connected, you can set a charging schedule, adjust the amperage limit (if you want to be gentler on your electrical system), and view energy usage.
Common Installation Issues and Fixes
- No Power, No Lights: Check the breaker. Did it trip immediately? That indicates a short circuit. Turn it off and re-check all wiring connections, especially in the panel. Look for a wire touching the panel’s metal case.
- Charging at Very Low Amperage (e.g., 5A): The charger may have detected an error or be in a default “low power” mode. Check the LED pattern in the manual. Often, a reset (turn breaker off/on) or a firmware update via the app fixes it.
- Car Won’t Charge or Gives Error: Ensure the charger is set to an amperage your car accepts. Try lowering the amperage in the app. Also, check that your car’s charge port is clean and undamaged.
- Wi-Fi Won’t Connect: Make sure you’re using a 2.4 GHz network (the charger doesn’t support 5 GHz). Check your router’s settings. Move the charger closer to the router temporarily to rule out signal issues.
If problems persist, consult the Tesla troubleshooting guide or contact their support. Keep your permit and inspection report handy—they may ask for them.
Safety First: Best Practices and Long-Term Care
Electrical work is unforgiving. Here are non-negotiable safety rules:
- Always De-Energize: Never work on a live circuit. Use a voltage tester to confirm the power is off before touching any wires.
- Use Proper PPE: Safety glasses and insulated gloves are a must.
- Don’t Overcrowd the Panel: Forcing a breaker into a full panel can damage it. If you’re unsure, stop and call an electrician.
- Follow the Manual: Tesla’s installation guide is your bible. Deviating from it can void your warranty and cause failures.
- Get Inspected: Never cover up your work without a sign-off from the electrical inspector. This is your safety net and legal requirement.
Ongoing Maintenance
Your Wall Charger is built to last, but a little care goes a long way:
- Every few months, visually inspect the unit and cable for cracks, cuts, or wear.
- Keep the charging connector clean and dry. Wipe it down with a dry or slightly damp cloth.
- Ensure the area around the charger is clear of flammable materials (like cardboard or rags).
- Install firmware updates through the Tesla app as they become available. These often improve performance and security.
- If you ever smell burning, see smoke, or the charger feels excessively hot, stop using it immediately and call a professional.
Remember, your Tesla’s warranty is separate from the Wall Charger’s warranty. Improper installation can void the charger’s warranty, so documentation is key. If you’re ever in doubt about any aspect of the installation or maintenance, consulting a licensed electrician is the safest and often most cost-effective choice in the long run.
Conclusion: Ready to Charge?
You now have a comprehensive roadmap for how to install a Tesla Wall Charger in your garage. It’s a project that blends electrical precision with practical convenience. The steps are logical: plan meticulously, understand the electrical demands, execute the wiring with care, test thoroughly, and maintain proactively.
For the experienced DIY electrician, this is a rewarding weekend project that can save significant money. For everyone else, investing in a professional installer is money well spent. You’ll gain peace of mind, ensure your home and vehicle are protected, and have a system that works perfectly from day one. Either way, the result is the same: the unparalleled convenience of waking up to a fully charged Tesla, ready to embrace the electric future.
Once your charger is up and running, you might be inspired to tackle other car-related projects. For more hands-on vehicle maintenance guides, check out our article on how to change the air filter in a Honda Civic—a great starter DIY for any car owner.
Frequently Asked Questions
Can I install a Tesla Wall Charger myself if I’m not an electrician?
Technically yes, if you have significant electrical experience, understand local codes, and obtain the necessary permits. However, Tesla and most safety experts strongly recommend hiring a licensed electrician. Improper installation can void your warranty, cause fire hazards, and damage your vehicle or home.
How long does the entire installation process take?
For a professional, it typically takes 2-4 hours from start to finish, including the final inspection. A skilled DIYer might need a full day, especially if running long conduit or dealing with a complex panel. The permit process can add days or weeks depending on your locality.
What if my electrical panel is full or doesn’t have enough capacity?
This is a common issue. Solutions include installing a subpanel next to your main panel, upgrading your main service (a major, expensive job), or using a load-sharing device like a Tesla Wall Connector with power-sharing, which can manage multiple chargers on one circuit. An electrician can assess the best option.
Do I really need a permit? Can’t I just do it quietly?
You absolutely need a permit. It’s the law in virtually all jurisdictions. Skipping it risks fines, failed home inspections when you sell, voided insurance in case of a fire, and most importantly, compromised safety. The inspection ensures your work meets critical safety standards.
Is the Tesla Wall Charger weatherproof? Can I install it outside?
Yes, the Gen 3 Wall Charger is rated NEMA 4, meaning it’s dust-tight and water-resistant from any direction. It’s safe for outdoor installation in rain or snow. However, for maximum longevity, a covered location (like under an eve or in a carport) is recommended.
Will installing a Wall Charger affect my Tesla’s battery warranty?
No. Your Tesla’s battery and vehicle warranties are separate from the Wall Charger’s warranty. However, if a faulty installation damages the charger or causes a power surge that harms your car’s charging system, that could be grounds to deny a related warranty claim. Proper, code-compliant installation eliminates this risk.