
How to Repair a Car Cover: Easy DIY Fixes for Tears, Holes, and Seams
Quick Answer
To repair a car cover, remove it from the vehicle, clean and dry the damaged area, and choose a patch or repair tape compatible with its material. Reinforce small tears, address separated seams with an appropriate repair method, and check the finished repair before reinstalling the cover. If the fabric is brittle or damaged across several areas, replacing the cover may be more practical than repairing it.
Quick repair steps
- Inspect the damage: Check whether you have a small hole, a longer tear, failed stitching, or worn fabric.
- Prepare the cover: Lay it flat, remove dirt, and let the damaged section dry completely.
- Choose a compatible patch: Match the repair material to the cover’s fabric, coating, and lining.
- Reinforce the tear: Apply an appropriate patch with sufficient overlap on sound material.
- Repair seams carefully: Use compatible seam tape or sealant only when the cover manufacturer permits it.
- Test before reuse: Follow the product’s curing instructions and inspect the repair before putting the cover back on the car.
One important precaution
- Avoid ordinary household glue, uncontrolled heat, and incompatible waterproofing products that could damage the fabric or leave rough edges against your vehicle’s paint.
A torn car cover doesn’t always need replacing. A small puncture, loose seam, or localized split can often be repaired with basic supplies and careful preparation.
When I assess a damaged cover, I look beyond the visible hole first. The surrounding material matters just as much because a patch won’t hold reliably if the fabric has already become brittle or weak.
This guide explains how to repair different types of car cover damage, choose suitable materials, restore protection where possible, and recognize when replacement makes more sense.
In This Guide
- 1. How to inspect a damaged car cover
- 2. What tools and repair materials do you need?
- 3. How to repair a car cover tear or hole
- 4. How to repair seams, hems, and waterproofing problems
- 5. Which car cover repair method should you choose?
- 6. How to test your repair and prevent further damage
- 7. Frequently asked questions
1. How Do You Inspect a Damaged Car Cover?
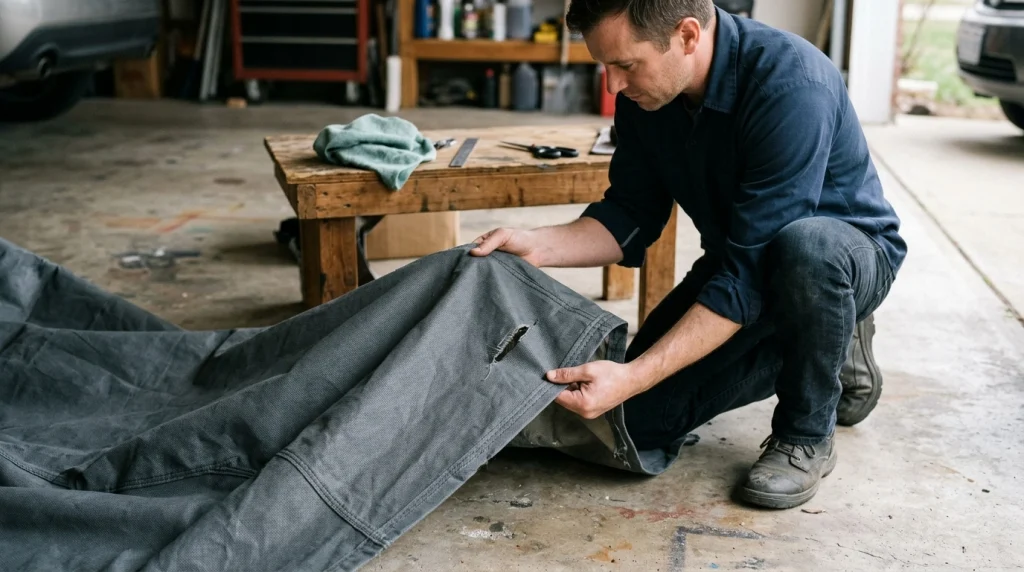
A car cover is a protective layer that shields a parked vehicle from selected environmental hazards, depending on its construction. Before repairing one, identify the damage and check whether the surrounding fabric can still support a patch.
The right repair depends on the material, the location of the damage, and how the cover is designed to protect your vehicle.
Identify the type of damage
Remove the cover and spread it over a clean, flat surface. Inspect both sides under good lighting so you can see the full extent of the problem.
Look for these common issues:
- Small punctures: Holes caused by branches, sharp edges, or accidental contact.
- Long tears: Splits that may spread when the cover stretches over mirrors, bumpers, or roof corners.
- Open seams: Areas where stitching has broken or adjoining fabric panels have separated.
- Loose hems or straps: Damaged edges, elastic, buckles, or attachment points that prevent a secure fit.
- Worn coatings: Peeling, cracking, or thinning material that no longer provides its intended weather protection.
These problems aren’t interchangeable. A patch can close a puncture, but it won’t restore stretched elastic or repair an attachment strap that has pulled away from the fabric.
Check whether the fabric is still strong
Gently flex the material around the damaged area without pulling the tear wider. Healthy fabric should bend without cracking, flaking, or developing new splits.
Inspect nearby sections too. Sun exposure, repeated folding, abrasion, and weather can weaken material well beyond the first visible hole.
If the fabric feels brittle or breaks apart with light handling, a patch may only move the next failure a few inches away. That is a warning sign to consider replacement.
Check the cover’s material and care instructions
Car covers can use woven polyester, nylon, vinyl-coated fabric, nonwoven multilayer material, or soft lined constructions. Each may respond differently to adhesives, sewing, cleaning products, and heat.
Look for a sewn label, packaging, order information, or the manufacturer’s care guide. Confirm whether the cover is water-resistant, waterproof, or designed to breathe rather than assuming every cover needs the same treatment.
For example, a soft indoor cover may accept a flexible fabric patch, while a coated outdoor cover may require a specific repair tape. An unsuitable adhesive can damage the coating or leave a stiff patch that rubs against the vehicle.
Section takeaway: Identify the damage before buying repair supplies. If the material around the tear is deteriorating, replacement is usually a more dependable long-term option.
2. What Tools and Repair Materials Do You Need?
Most small car cover repairs require only a few supplies. The most important choice is a repair product that is compatible with the cover’s material and intended use.
Gather everything before starting so you can complete the repair without repeatedly moving or stretching the damaged fabric.
Basic repair supplies
- Compatible patch or repair tape: Choose a product specifically suitable for the cover’s fabric or coating.
- Soft cloth and mild cleaner: Use only cleaning products permitted by the cover manufacturer.
- Scissors: Trim loose fibers and shape a patch with rounded corners where appropriate.
- Measuring tape or ruler: Measure the tear and check that the patch extends onto sound material.
- Flat work surface: A clean table or floor makes it easier to align the damaged edges.
- Compatible seam sealant: Useful for certain seam repairs when the cover manufacturer approves the product.
- Needle and thread: Appropriate only for materials and seam constructions that can be safely sewn.
You won’t necessarily need every item. A small, clean puncture may require only a compatible adhesive-backed patch, while a failed sewn seam can call for a different approach.
Choose a patch that won’t damage the paint
A good repair should remain secure without creating hard, rough, or abrasive edges on the vehicle-facing side. This matters around the hood, roof, mirrors, and other areas where the cover moves against the bodywork.
When possible, place the reinforcement on the underside, provided the repair product is suitable for that application. Check that the patch’s edges sit flat and won’t catch when you fold or unfold the cover.
A patch that is too small can concentrate stress around the tear. Choose enough overlap to bond with undamaged material, following the repair product’s instructions rather than relying on one universal patch size.
Should you use duct tape or household glue?
Ordinary duct tape may work as a short-term emergency measure, but it isn’t a reliable permanent repair for every outdoor cover. Sunlight, moisture, temperature changes, and repeated folding can cause the adhesive to lift or leave residue.
General-purpose glue can also harden, discolor fabric, or interfere with a protective coating. Avoid applying solvents, strong adhesives, or heat until you have confirmed compatibility.
As of 2026, the safest general rule remains straightforward: match the repair system to the material instead of assuming a product marketed for tents, tarps, or upholstery will work on every car cover.
Section takeaway: Use compatible repair supplies, clean the surface carefully, and avoid products that could stiffen the cover or scratch your vehicle.
3. How Do You Repair a Car Cover Tear or Hole?
You can often repair a localized tear by cleaning the material, aligning the edges, and applying a compatible patch with adequate overlap. The cover should be removed from the vehicle before you begin.
Never try to patch a cover while it is stretched tightly across the car. Tension can distort the damaged area and prevent the patch from bonding evenly.
Step 1: Remove and position the cover
Unfasten the straps and lift the cover away from the vehicle without dragging it across the ground. Dirt trapped beneath the fabric can scratch paint, and sharp debris can create additional holes.
Spread the damaged section flat on a clean surface. Keep the fabric relaxed rather than stretching it to make the tear look smaller.
Step 2: Clean and dry the damaged area
Remove loose dirt around the tear using the cleaning method recommended by the cover manufacturer. Wipe away residue without soaking the material unnecessarily.
Allow both sides to dry completely. Moisture and contamination can interfere with adhesive bonding, even when the surface looks clean.
Step 3: Align the torn edges
Bring the edges together gently if the tear is clean and the material has enough intact fabric. Don’t overlap or stretch the edges in a way that changes the cover’s original shape.
Trim only loose fibers that prevent the patch from sitting flat. Avoid cutting into sound material, as that can enlarge the repair area.
Step 4: Apply a compatible patch
For many small tears, an adhesive-backed fabric patch or purpose-made repair tape is the simplest approach. Confirm that the product suits the material and any water-resistant coating.
- Cut or select a patch large enough to extend beyond the tear onto sound fabric.
- Round the corners if the repair product allows it, reducing exposed corners that can catch during folding.
- Position the patch without wrinkles or trapped debris.
- Press it down evenly using the method specified by the manufacturer.
- Apply an additional layer on the opposite side only if the repair system recommends it.
- Leave the repair undisturbed for the full stated bonding or curing period.
An underside patch can help reinforce the damaged area while keeping the exterior smoother. Some repair products are designed for one-sided application, however, so follow their directions rather than automatically patching both sides.
Step 5: Repair a larger tear carefully
A longer tear needs more attention because wind and repeated stretching can pull against the repair. A larger compatible patch may work when the fabric around the opening remains strong.
For a tear several inches long, inspect the entire area before committing to a repair. A split that reaches a seam, crosses a heavily stressed corner, or reveals widespread fabric weakness may require professional repair or replacement.
Don’t treat any particular tear length as a guaranteed cutoff. A short tear in brittle fabric can be harder to repair reliably than a longer split in healthy material.
Can you sew a torn car cover?
Sewing may work for some woven fabric covers, especially when a seam has come apart but the surrounding material remains sound. Use suitable thread and stitching methods for that material.
However, needle holes can compromise water resistance, and sewing may be unsuitable for coated or nonwoven multilayer covers. If the original construction relies on bonded or taped seams, use a manufacturer-approved repair method instead.
If stitching is necessary on an outdoor cover, check whether the needle holes require a compatible sealing treatment. Don’t assume that adding more stitches automatically restores the original weather protection.
Section takeaway: Clean, dry, align, and reinforce the damaged area using compatible materials. The repair is only as dependable as the fabric supporting it.
4. How Do You Repair Seams, Hems, and Waterproofing Problems?
Seam damage, loose hems, and water seepage need different solutions from a simple hole. First determine whether the problem comes from separated stitching, worn fabric, damaged attachments, or a loss of water resistance.
Applying a patch or waterproofing spray without diagnosing the problem can waste time and make later repairs harder.
How to repair a separated seam
Inspect the seam along its full length and check whether the thread has broken or the fabric itself has torn. A short opening between intact panels may be repairable if the cover material is still strong.
For suitable woven material, careful restitching may restore the seam’s structure. Keep in mind that sewing can create new openings through a waterproof layer.
For coated, bonded, or taped seams, check with the manufacturer before sewing. A compatible seam tape or sealant may be appropriate, but it must be designed for the specific material and applied according to its instructions.
What if the elastic hem or straps are damaged?
A cover that slips off or leaves large gaps may have a fastening problem rather than a fabric tear. Check the elastic hem, tie-down straps, buckles, and any reinforced attachment points.
- Loose elastic: Check whether the elastic has stretched out or detached from its channel.
- Broken strap: Inspect the stitching and attachment area for further damage.
- Cracked buckle: Replace it with a compatible part if the design permits replacement.
- Torn attachment point: Reinforce it only if the surrounding fabric remains strong enough to carry the load.
Do not simply tighten a damaged strap harder. Extra tension can enlarge the tear or pull the attachment point away from the cover.
If a repair requires specialized sewing or reinforcement at a heavily loaded attachment, consider a professional repair service or the manufacturer’s support team.
How to address a car cover that leaks
A leaking cover doesn’t always have a hole. Water can enter through damaged seams, worn coatings, poor fit, or openings around the vehicle’s shape.
Start by identifying the likely entry point rather than treating the entire cover with waterproofing chemicals.
- Water entering through a tear: Repair the opening using a compatible patch system.
- Water following a seam: Inspect the stitching and use an approved seam repair if suitable.
- Water entering around the hem: Reposition the cover and check its fit and fastening system.
- Widespread seepage: Investigate coating deterioration or whether the cover was designed to resist prolonged rain.
- Moisture beneath the cover without rain: Consider condensation or trapped water on the vehicle before assuming the cover leaks.
Water-resistant and waterproof are not identical terms. Some breathable covers allow moisture vapor to pass through, while others use coatings or layered construction to resist liquid water.
After repairing a tear, don’t assume the original waterproof performance has returned. The repair may close the opening without restoring the surrounding coating or seam system.
Should you apply waterproofing spray after a repair?
Only use a water-repellent treatment if the cover manufacturer approves it for that material. An incompatible product may affect the coating, breathability, texture, or adhesive holding the patch in place.
Repair the physical damage first, then assess whether any approved surface treatment is necessary. Follow the product’s application and drying instructions, and test a small inconspicuous area when directed.
For more guidance, see this related guide on how to restore water resistance to a car cover.
Section takeaway: Fix the actual failure point. A patch won’t repair a loose strap, and waterproofing spray won’t restore fabric that has become brittle or begun to separate.
5. Which Car Cover Repair Method Should You Choose?
The best repair method depends on the cover material, the location of the damage, and whether the surrounding fabric remains sound. Use the comparison below as a starting point, then check the manufacturer’s instructions before applying a repair product.
| Damage or material | Possible repair | Main precaution |
|---|---|---|
| Small puncture in healthy fabric | Compatible adhesive-backed patch | Clean and dry the surface before application. |
| Long tear in woven polyester or nylon | Fabric patch; suitable stitching where permitted | Avoid stretching the tear or weakening the surrounding fabric. |
| Vinyl or vinyl-coated cover | Compatible vinyl repair patch or adhesive | Check chemical compatibility and curing requirements. |
| Nonwoven multilayer cover | Manufacturer-approved repair tape or patch | Sewing and heat may damage the layers. |
| Separated seam | Suitable restitching or seam repair product | Needle holes and incompatible sealants can affect water resistance. |
| Loose strap or damaged buckle | Compatible replacement part or professional reinforcement | Inspect the attachment area before applying tension. |
| Brittle fabric or widespread coating failure | Replacement is often more practical | A local patch cannot restore material that is failing throughout. |
The table outlines possible approaches, not guaranteed fixes. Two covers made from similar-looking fabric can use different coatings or seam construction, so confirm compatibility before starting.
When is a DIY repair worth trying?
A repair is usually worth attempting when the damage is isolated and the surrounding material is flexible, clean, and structurally sound. A small hole or short tear often requires less effort than replacing an otherwise useful cover.
Repairing a cover also makes sense when the damage has a clear cause, such as accidental contact with a sharp branch. Once that cause is removed, a compatible patch may provide useful continued service.
When should you replace the car cover?
Replacement becomes more reasonable when damage is widespread or the material has lost its strength. A patch cannot reverse age-related deterioration or restore a coating that is peeling across a large area.
Look for these warning signs:
- Several tears appearing in different areas.
- Fabric that cracks, flakes, or splits during gentle handling.
- Long sections of failed seams or attachment points.
- Persistent water seepage caused by widespread coating failure.
- A poor fit that leaves the cover loose despite correct installation.
- Repeated patch failure because the surrounding material no longer holds adhesive.
Before replacing a cover that’s still under warranty, contact the manufacturer. Unauthorized sewing, adhesive, or heat treatment could affect warranty coverage, depending on the terms.
If you’re comparing the cost and effort of repair with a replacement, inspect the whole cover rather than judging it by the size of one tear. You can also review the signs that a car cover needs replacing.
Section takeaway: Patch localized damage when the fabric is healthy. Consider replacement when multiple areas are failing or the cover can no longer provide the protection you need.
6. How Do You Test Your Repair and Prevent Further Damage?
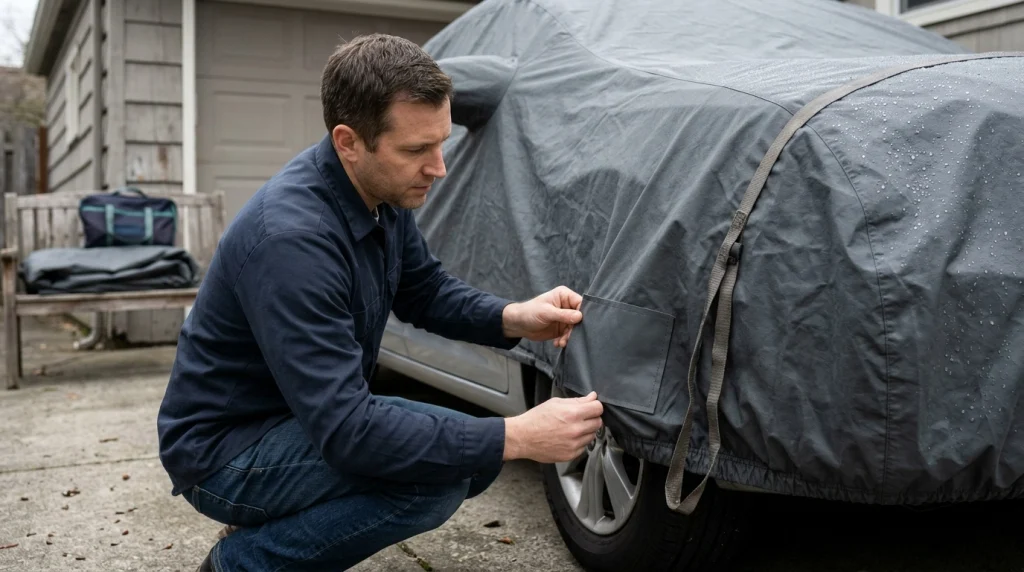
Once the repair has cured, inspect it before reinstalling the cover. A neat-looking patch isn’t enough if its edges lift, the fabric remains under tension, or the repair creates a rough surface against the paint.
Take a few minutes to check the repair and correct the conditions that caused the original damage.
Inspect the finished repair
Follow the repair product’s stated curing time before folding the cover or exposing it to weather. Some products need a longer period under certain temperature or humidity conditions.
Then check the following:
- Patch adhesion: Confirm that the edges remain flat and secure.
- Fabric condition: Look for new splits or stress around the repaired area.
- Surface smoothness: Make sure no rough edge, hardened adhesive, or protruding thread can rub against paint.
- Cover flexibility: Check that the repair doesn’t create an excessively stiff fold point.
- Fasteners: Confirm that straps, elastic, and buckles remain in good condition.
How to check for water seepage
If the cover is intended for outdoor weather protection, you can perform a cautious water check after the repair product has fully cured. Follow any manufacturer restrictions before exposing the cover to water.
Use a gentle flow over a small repaired area rather than a pressure washer or a forceful stream. Inspect the opposite side for seepage, but remember that this test doesn’t certify the cover’s original waterproof rating.
Dry the cover completely using the approved method before folding or storing it. If water still passes through, recheck the repair and surrounding material rather than repeatedly adding unapproved coatings.
Prevent future tears and seam damage
Many cover repairs become necessary because of repeated friction, sharp contact points, poor fit, or careless handling. Reducing those stresses can help protect both the repair and the remaining fabric.
- Remove sharp hazards: Check for rough edges, branches, and protruding objects near the parked vehicle.
- Use the correct fit: Choose a cover designed for the vehicle’s size and shape, and position it according to the instructions.
- Secure the cover correctly: Fasten approved straps without pulling excessively on the fabric.
- Keep the cover clean: Remove grit and debris that could abrade the vehicle or the cover’s inner surface.
- Handle it gently: Lift the cover rather than dragging it across rough ground or sharp bodywork.
- Store it dry: Follow the manufacturer’s cleaning and storage guidance to reduce moisture-related problems.
- Inspect it regularly: Catch small holes, loose seams, and damaged straps before they worsen.
Be especially careful when covering a freshly washed vehicle. Trapped water can create moisture beneath the cover, so dry the vehicle and check hidden areas before installing it.
For more preventative advice, read how to make a car cover last longer.
Section takeaway: Test the repair only after it has cured, and check for rough edges before putting the cover back on your vehicle. Proper fit, careful handling, and regular inspection help prevent repeat damage.
7. Frequently Asked Questions About Car Cover Repair
Can you repair a torn car cover at home?
Yes, many small tears and punctures can be repaired at home using a compatible patch or repair tape. Remove the cover, clean and dry the damaged area, and follow the repair product’s instructions. Widespread fabric deterioration or major seam failure may require professional repair or replacement.
What is the best tape for repairing a car cover?
The best tape is one specifically approved for the cover’s material and intended conditions. Fabric repair tape may suit some woven covers, while vinyl or coated covers can require a different adhesive system. Check the manufacturer’s guidance before applying tape to a waterproof or multilayer cover.
Should you patch a car cover from the inside or outside?
An inside patch can provide reinforcement while keeping the exterior smoother, but the correct placement depends on the repair product. Some products are designed for one-sided application, and certain materials need a particular orientation. Follow the repair instructions and make sure no rough edges contact the paint.
Can you sew a waterproof car cover?
Sometimes, but sewing can introduce needle holes that compromise water resistance. It may be suitable for some woven materials and unsuitable for bonded, coated, or nonwoven covers. Check the manufacturer’s instructions and use an approved seam-sealing method when required.
How do you fix a car cover that leaks after rain?
Inspect the cover for punctures, damaged seams, worn coatings, and gaps caused by poor fit. Repair localized damage with compatible materials and check the fasteners. If the fabric has widespread deterioration, a small patch or waterproofing spray won’t restore the entire cover’s original performance.
Can waterproofing spray repair a hole in a car cover?
No. Waterproofing spray is not a substitute for patching a physical hole or repairing a separated seam. Repair the damage first, then use a water-repellent treatment only if the cover manufacturer approves it. A coating treatment also cannot restore fabric that has become brittle or started to peel.
Is it better to repair or replace a damaged car cover?
Repair is often sensible for isolated damage in otherwise healthy fabric. Replacement becomes more practical when multiple tears, brittle material, widespread coating failure, or recurring seam problems affect the cover. Check the warranty and the cost of a compatible repair before deciding.
Final Takeaway: Repair the Damage Before It Spreads
Learning how to repair a car cover can save a useful accessory when the damage is limited to a small tear, puncture, or repairable seam. The key is to identify the material, prepare the surface correctly, and use a compatible repair product.
Don’t rush the process with ordinary glue, excessive heat, or an unapproved waterproofing spray. A careful repair should protect the damaged area without creating a new problem for the cover or your vehicle’s paint.
If the fabric is brittle, several seams have failed, or the coating is deteriorating across large sections, replacement is often the more sensible choice. Inspect the whole cover, follow its care instructions, and deal with minor damage before wind and weather make it worse.
Research note: Repair methods vary by cover material and construction. Always prioritize the cover manufacturer’s instructions and the repair product’s compatibility, safety, and curing guidance.